
Create a Temperature-Based Automation With Home and Shortcuts
You would think that creating an automation based on a given temperature would be an easy thing in Apple’s own Home app, but up until iOS13, and the update for both this app and the Shortcuts app, it was simply not possible. If you previously wanted to create such an automation, you’d need to use a 3rd party app, like the Eve for HomeKit app for example, but it’d be great to be able to do something seemingly simple all in one place. So with Shortcuts integration into the Home app we can now achieve this simple task.
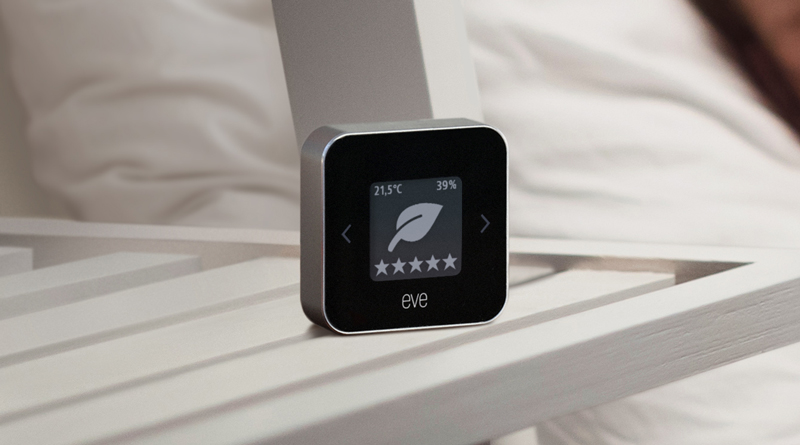
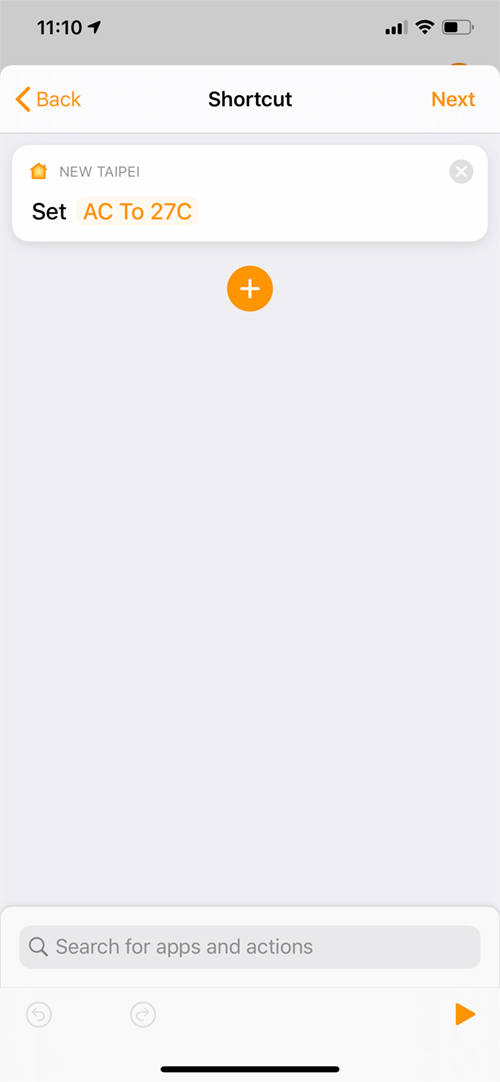
There are probably more than a few ways to achieve the same goal here, but this the way I’ve settled upon. For this ‘How to…’, I’m going to create an automation that turns on my AC unit, sets it to 27ºC/81ºF, but only after 7.30am, and only if the temperature is below 23ºC/73ºF. For this automation, the AC will be controlled by my Tado Smart AC Control V3+ (you can read our review HERE) and the temperature reading will be taken from the Eve Room combined Air Quality, Temperature and Humidity sensor. You could just as easily change this to turn on a fan (connected to a smart plug) if the temperature is too high of course.
CREATE A SCENE
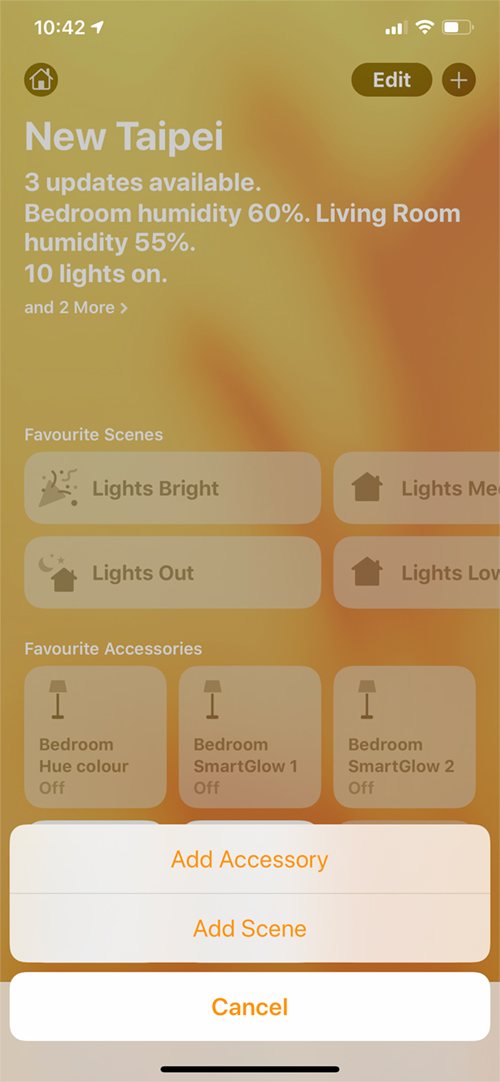
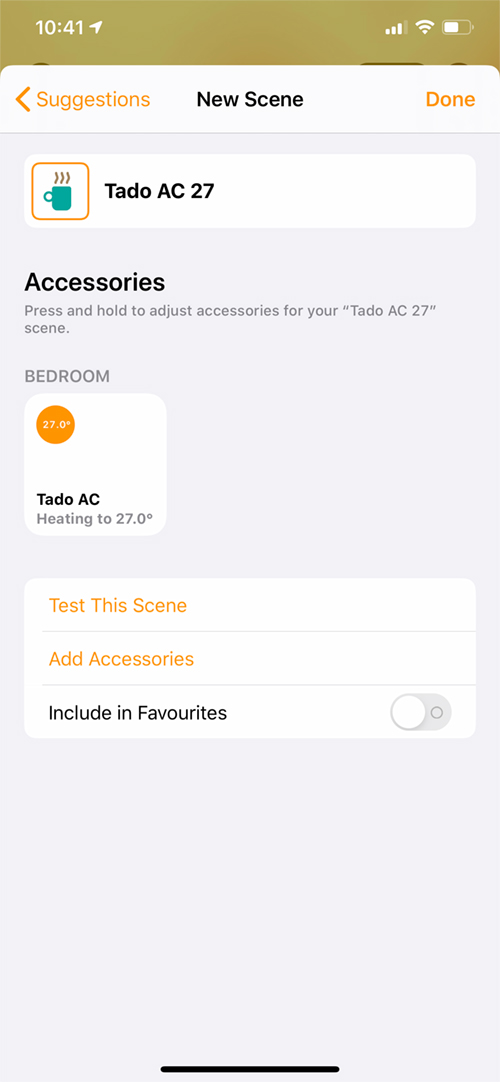
Although it’s not necessary, I’d first suggest you create a scene for your AC unit, so in the Home app;
- Create a new scene by clicking on the + icon in the top left of the screen
- Add your AC unit
- Set to the appropriate temperature and mode.
Once you’ve created your scene, we can create the automation.
THE AUTOMATION
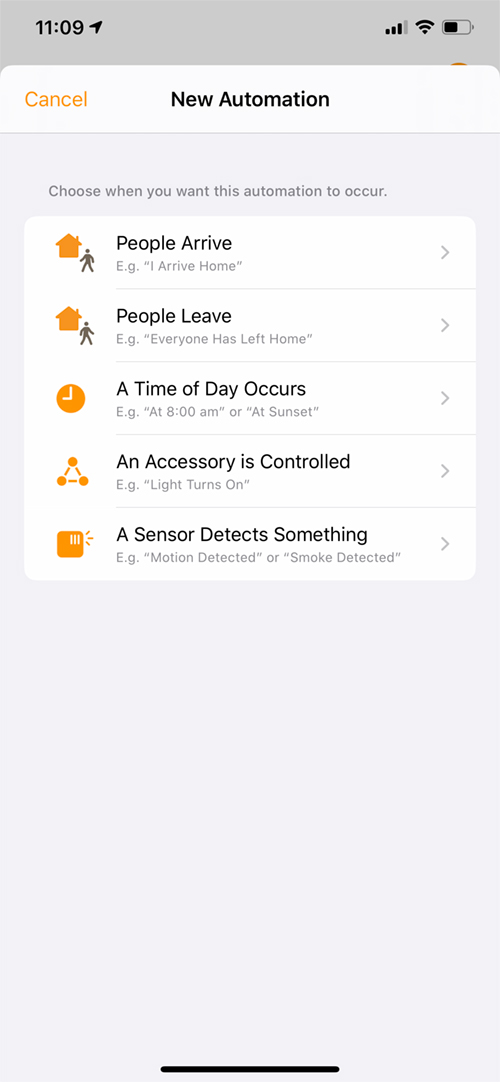
Create your automation in the normal way, by clicking on the Automation tab at the bottom of the screen.
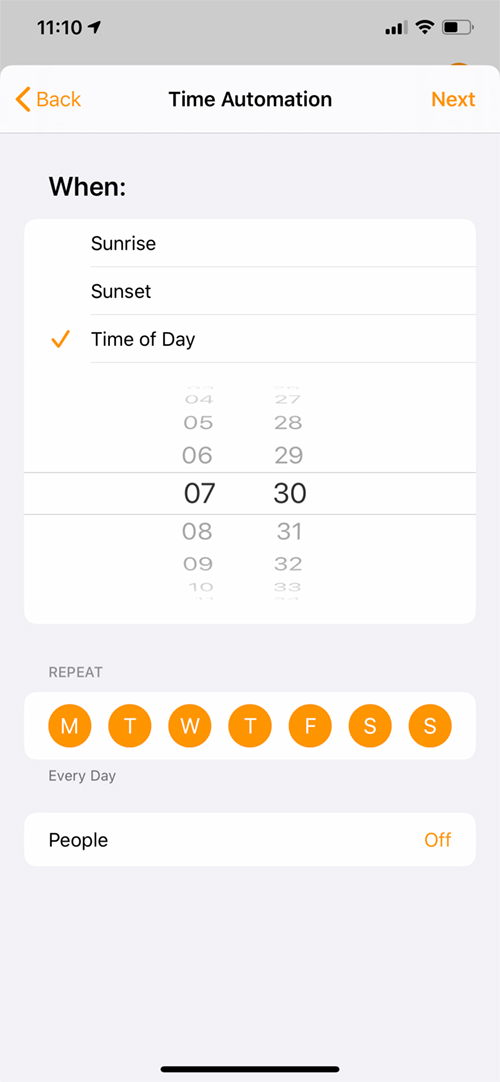
- Select ‘A Time of Day Occurs’
- Set your time – 0730 in this case
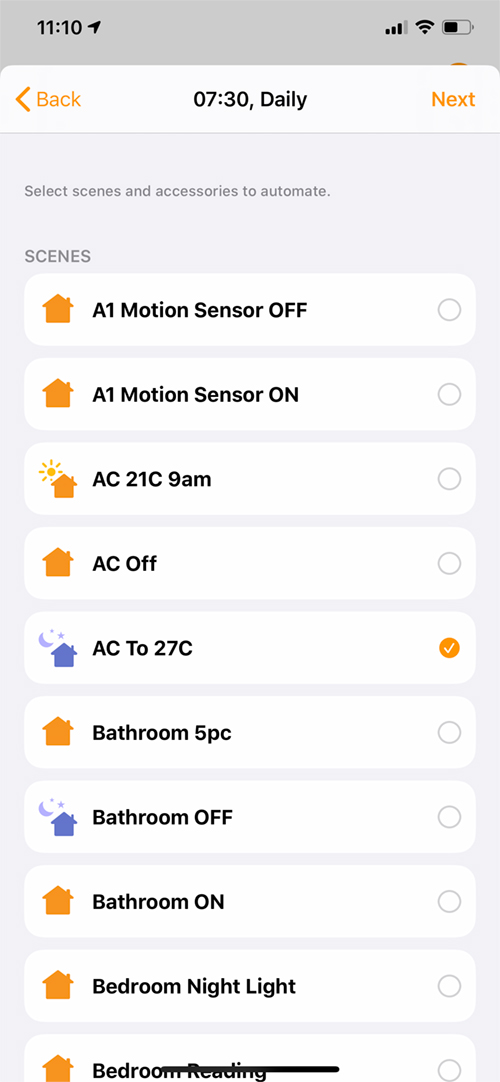
- Select the Scene we created previously
Now normally, we’d click Next, but in this case, we need to do something slightly different in order to utilise the power of Shortcuts.
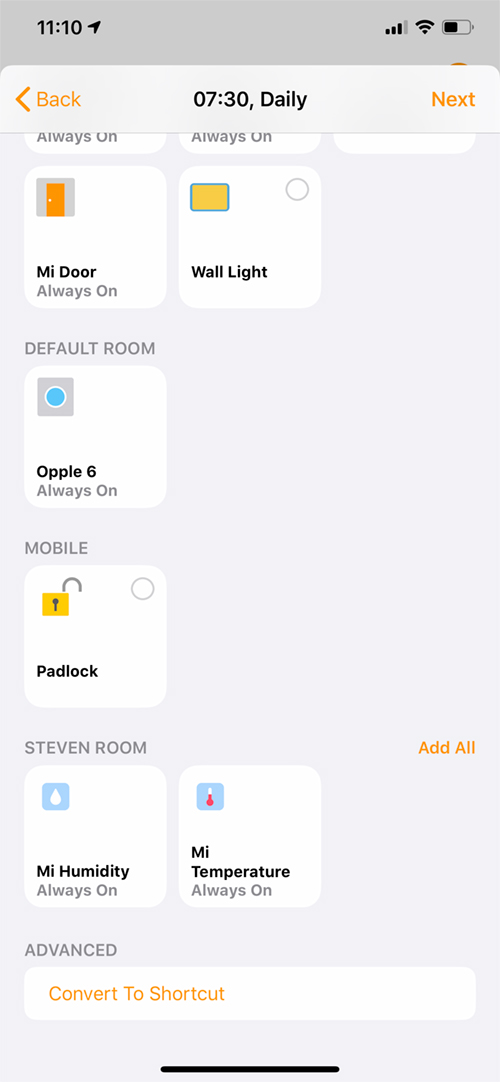
- Scroll down to the bottom of the screen and select ‘Convert to Shortcut’
- The next screen should show the automation, with a + icon below. Click the + icon

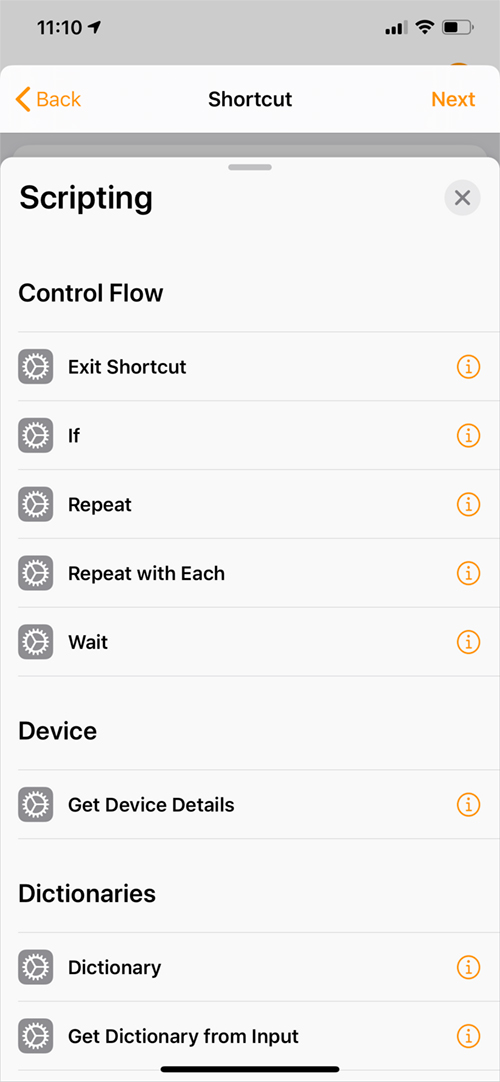
- Select ‘Scripting’
- From the list, select ‘If’
- Once that’s selected, you’ll return to the Shortcut itself
At present, the automation isn’t in the right order, so all you need to do is press on the relevant ‘panel’ and drag it into the right place.
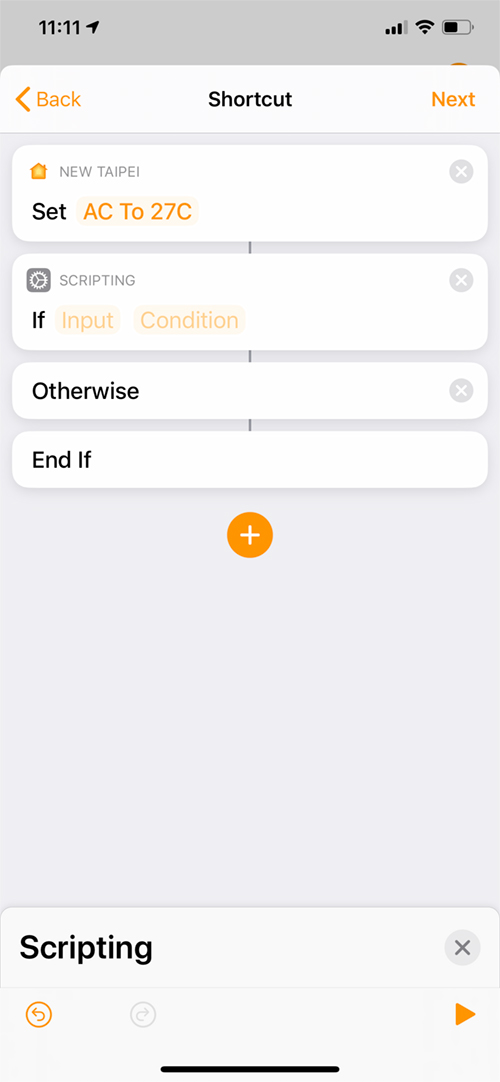
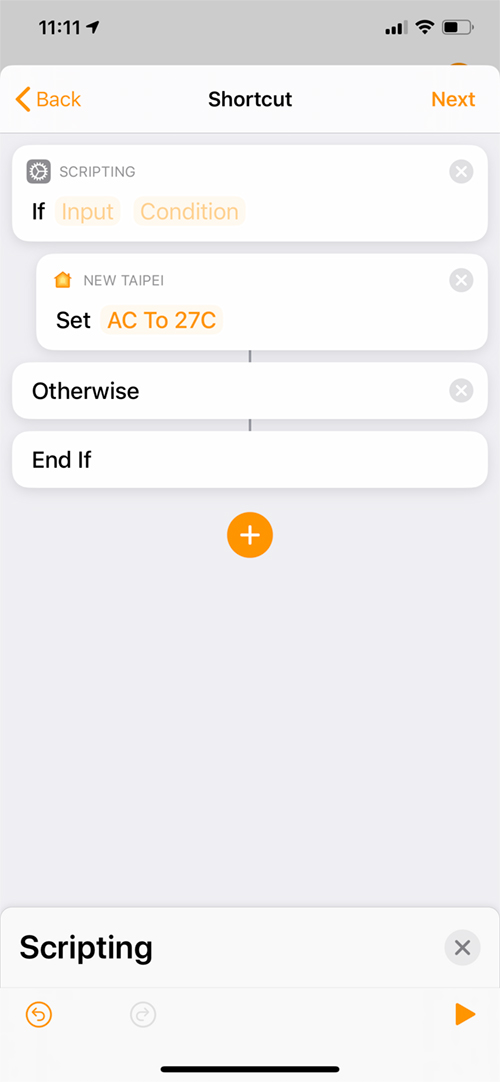
- The if panel needs to be first, so simply press on it, and drag up so that it’s placed above the automation.
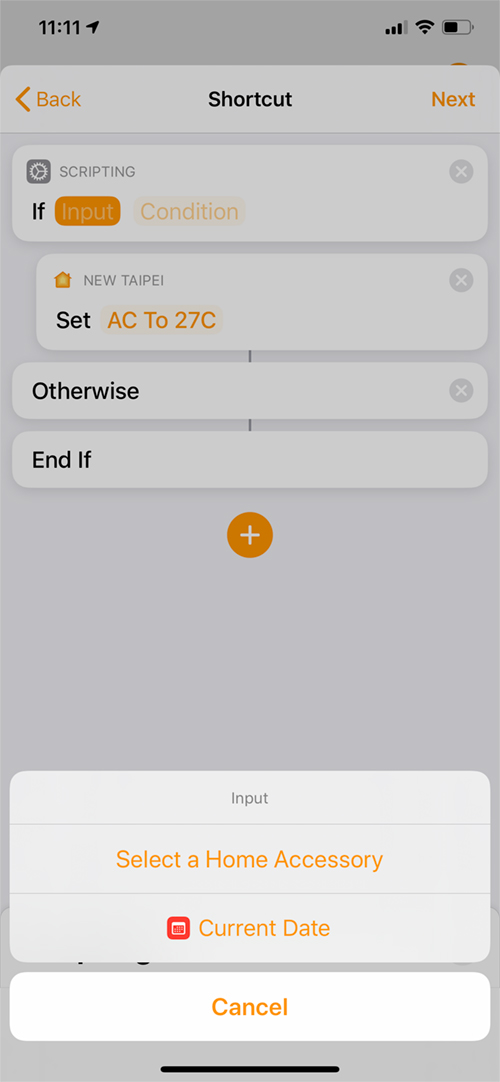
We’ve already got the device turning the AC on, but we now need the device to read the temperature that determines whether or not the automation will run.
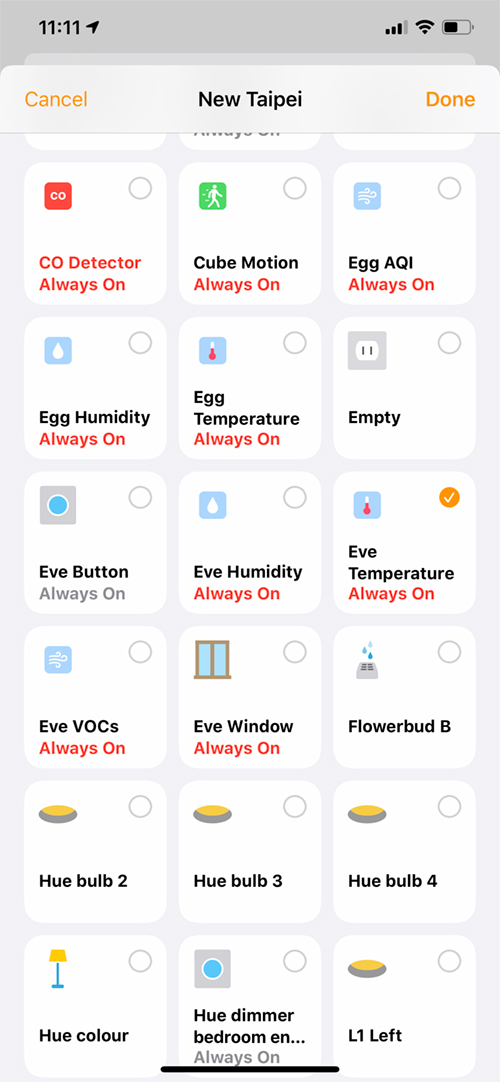
- In the Scripting panel, click on Input, then ‘Select a Home Accessory’
- Select your temperature device, in this case, the Eve Temperature, which is one of the three sensors in the Eve Home device
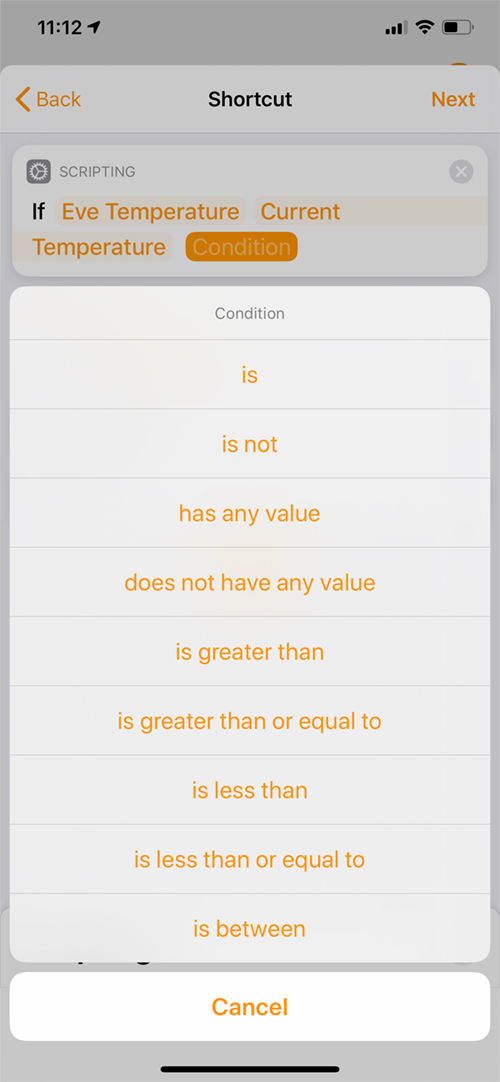
- You then return to the Shortcut, so next select Condition and select is less than or equal to


We now just need to set the temperature as well as centigrade or Fahrenheit.
- Add the temperature threshold for when the automation will start – in this case less or equal to 23ºC
- To set to ºF or ºC just click on the option next to the temperature option
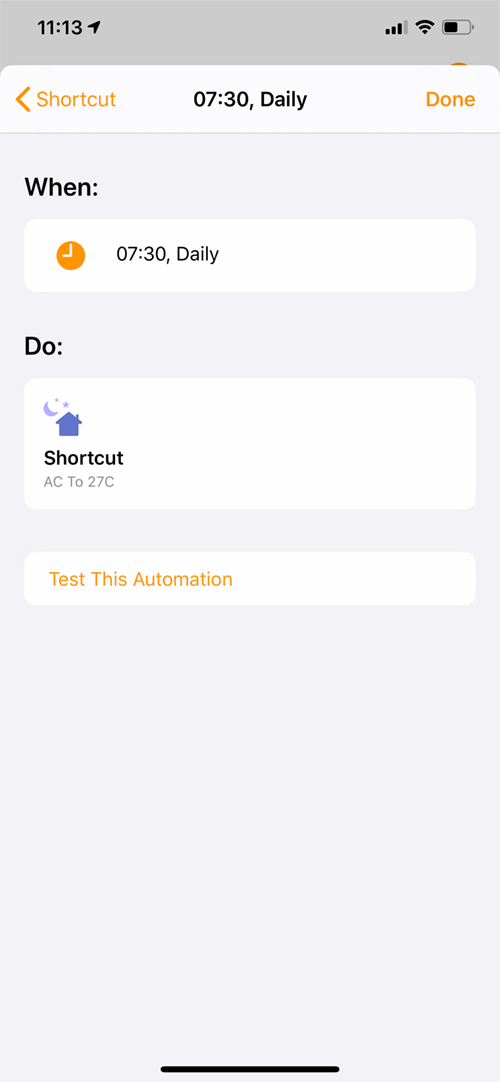
- Finally, click on Next to see the complete automation, and then click ‘Done’ to save it.
That’s all there is to it, and it’s all within the Home app, albeit with a little help from Shortcuts.
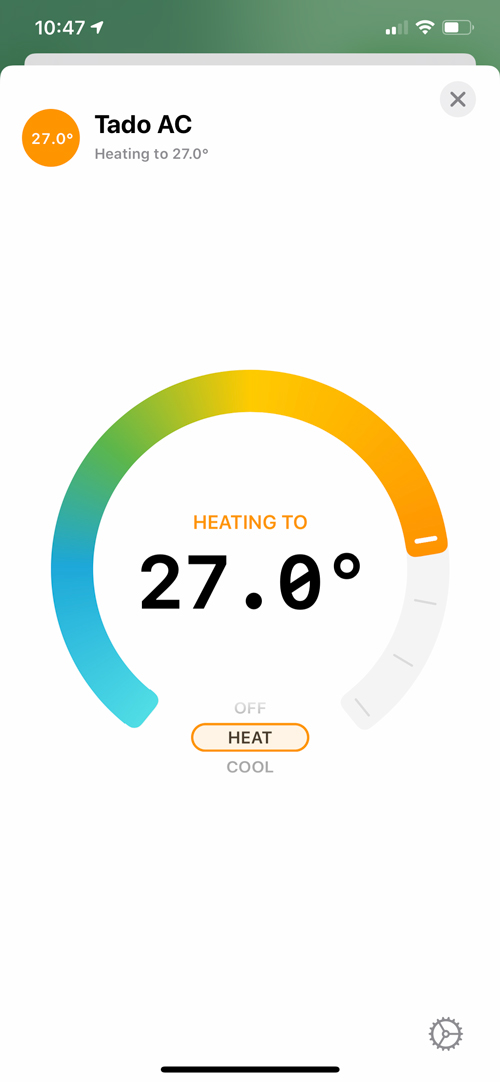
I don’t why I always thought that Tado exposed a temperature sensor to Homekit also.
It only shows the target temperature unfortunately, which is the temperature you want your AC to reach. You can see the humidity levels within the settings for the Tado device, and if you use a 3rd party app, you can also use the humidity levels as part of an automation.