

Advanced Smart Button Light Switch
If you remember, a few months ago I shared a post about how to use a smart button as a light switch (Post can be read here). Well now I have an update for that where I will show you a more advanced solution to this so we can change what happens based on the time of day. In addition to that, we’ll be using Shortcuts instead of the Home+ app.
Flowchart
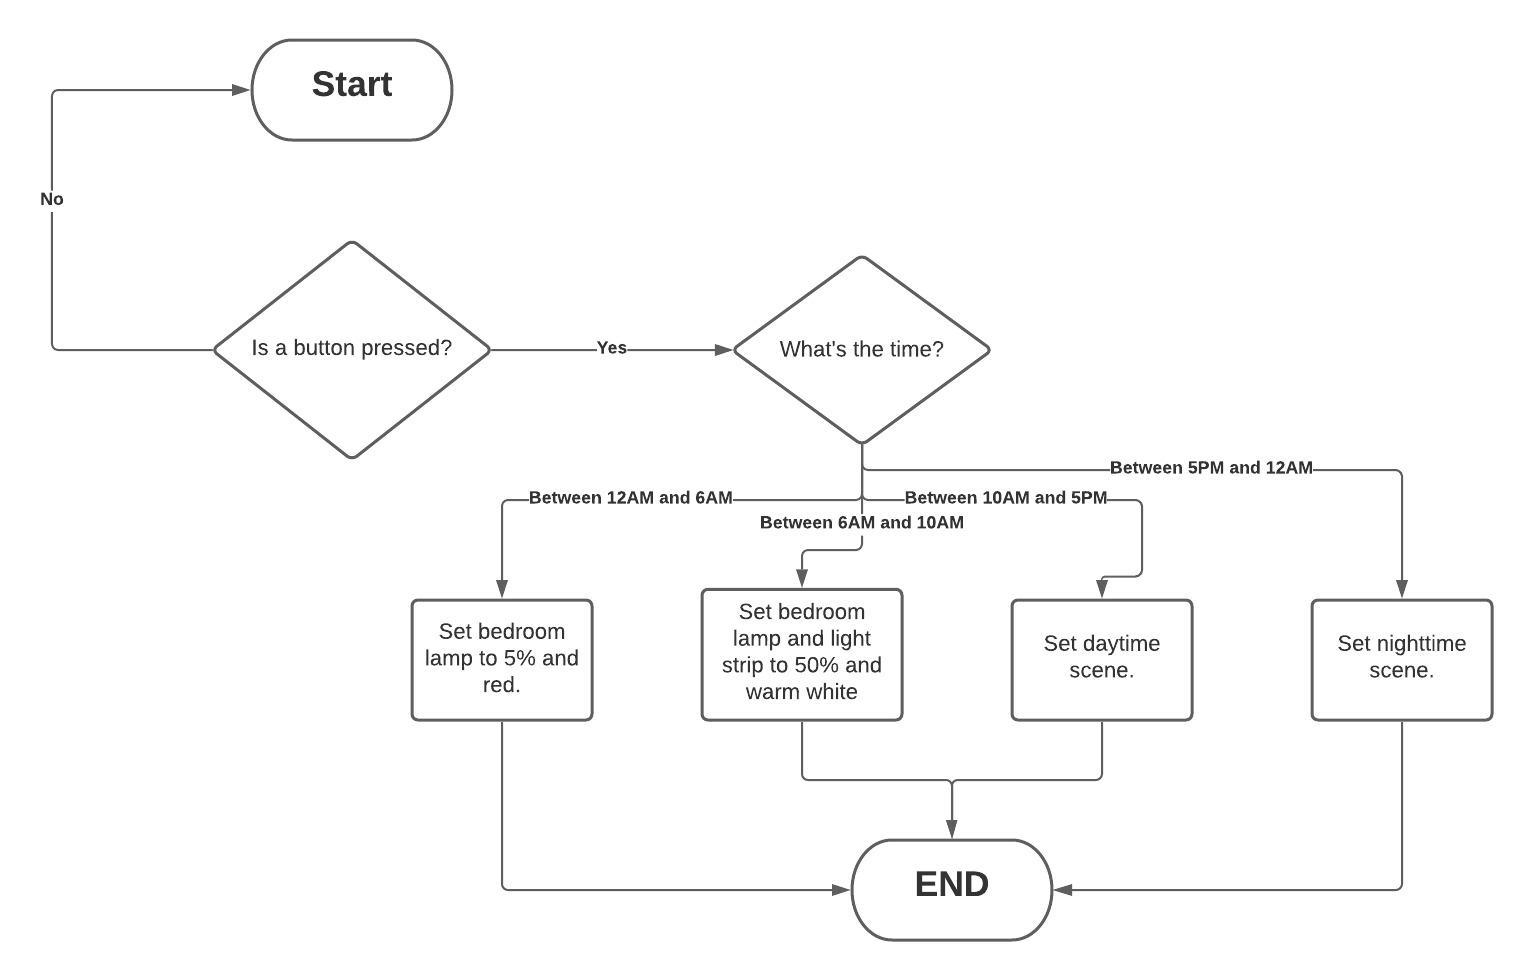
To get started, take a look at this flowchart below which outlines how the automation actually works. This should make it a little easier to understand what’s going to happen and what I’m explaining.
The Automation
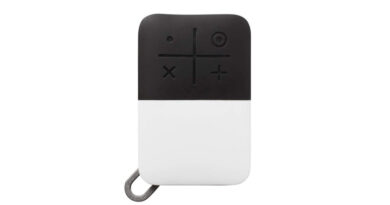
To get started, open the Home app and Long/3D press on the smart button icon. Choose one of the actions and select “add scenes and accessories”. In that menu, scroll all the way to the bottom of the list and choose “Convert to Shortcut”.
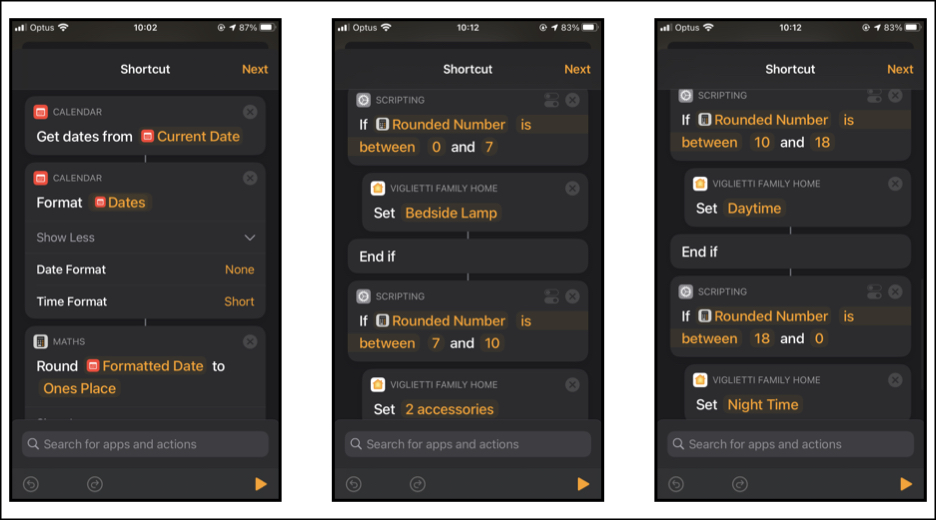
Open the actions list, and choose “Get Date” and then set the variable as “current date”. So the automation should read “Get dates from Current Date”.
For the next action we want to format the date into short form. So choose the action “Format Date” and the variable should automatically assign itself to the date from the previous action. In that same action, choose “show more” and change Date Format to none and Time Format to short.
For the third action, we want to round the short format time to a single number. So choose the “Round Number” action and assign the variable to “Formatted Date” and have it rounded to “ones place”. And that’s all that is needed for the first half of this automation. So if the time is 11:30 PM at night, than the rounded number will be “23” (this automations works in 24 hour time).
For the next half of this automation, grab an If Statement and make the condition “If [Smart Light/Device] is off” and within that, use multiple if statements to determine the time and thus the action. For example, in my automation I have “If Rounded Number is between 7 and 10″ turn on the daytime scene”. Continue this until you have all the actions that you want and delete the otherwise tags for all of those inner If Statements. For the outer if statement, within the otherwise tag set the lights to turn off.
Thus, when the automation runs it’ll trigger when you press the button. It checks the time and then checks if the light is on or off. If it is off, then it will compare the rounded down time to the if statements and complete whatever action you set. If the lights are on, it’ll turn them off. And that’s all there is to it. As for the second and third actions of the button, you can do whatever you want. You can use it to control other lights or have it set scenes in its dedicated room. Automation runs as far as your imagination can.
For a visual look at this automation, check out the photo below so you can see what it should look like for you.
Very nice flowchart.
I have some buttons coming, and I would do some thing close to that, but I have a doubt.
To convert the action of a button into a shortcut is it necessary to have a hub?
Glad the flowchart helped. Yes, it is necessary to have a hub as it’s needed for automations and without one it won’t let you convert to a shortcut. A home hub can be an iPad or Apple TV running the latest OS or a HomePod or HomePod Mini.
Let me know if I can help in any other way.
What’s the advantage doing this with shortcuts as opposed to Homekit? I believe this particular flow chart can be accomplished by both.