
Aqara Presence Sensor FP2 (review)
I think it’s fair to say that to a large extent, sensors – in all their formats – are central to what makes a smart home; they detect the state of a door or window, warn us of a leak – be that gas or water – and they can detect movement. These are designed to warn us or trigger another device (and sometimes both). For detecting movement, if you’ve ever used a motion sensor, you’ll know that whilst they can be great in most situations where movement is easily detected, they’re lacking when it comes to detecting someone’s ‘presence’ – whether they happen to have fallen asleep on the couch, or are quietly reading a book. In cases like this, you’re invisible to a standard PIR motion sensor. That might not always matter, but if you’ve ever had an automation where the lack of motion is designed to turn off lights, you’ll no doubt have been in a situation where you’re left in the dark because you weren’t ‘in motion’. Well, that could be a thing of the past if the technology known as millimetre wave or mmWave has anything to do with it and one that Aqara has already made progress on. Today’s product – The Presence Sensor FP2 – is actually a successor to the company’s Presence Sensor FP1. When I say ‘successor’, I mean that in the most all-inclusive way, due to the large strides made in improving what was already available with the first model. Read on to find out what they did to take things several levels ahead.
PACKAGING | CONTENTS
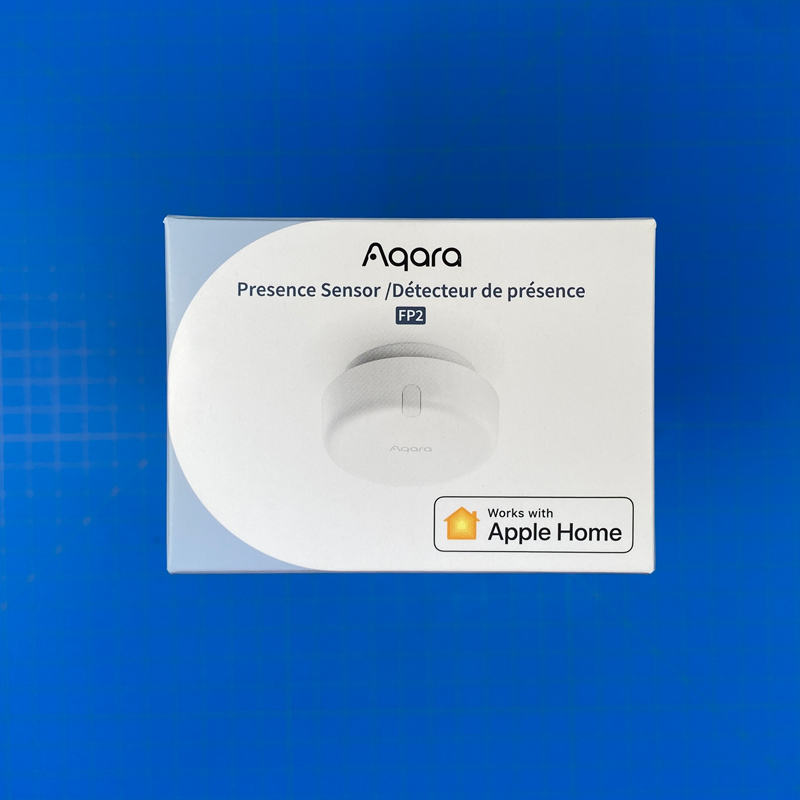

The FP2 has launched with a new packaging design and colour scheme, with the sensor pictured on the front. This is also where the ‘Works with Apple Home’ badge is placed, but the FP2 does also work with Amazon, Google, and IFTTT. No word on SmartThings at present, although once the FP2 gets an alleged update for Matter, it should work with SmartThings hubs capable of being Matter controllers, like the SmartThings Station.
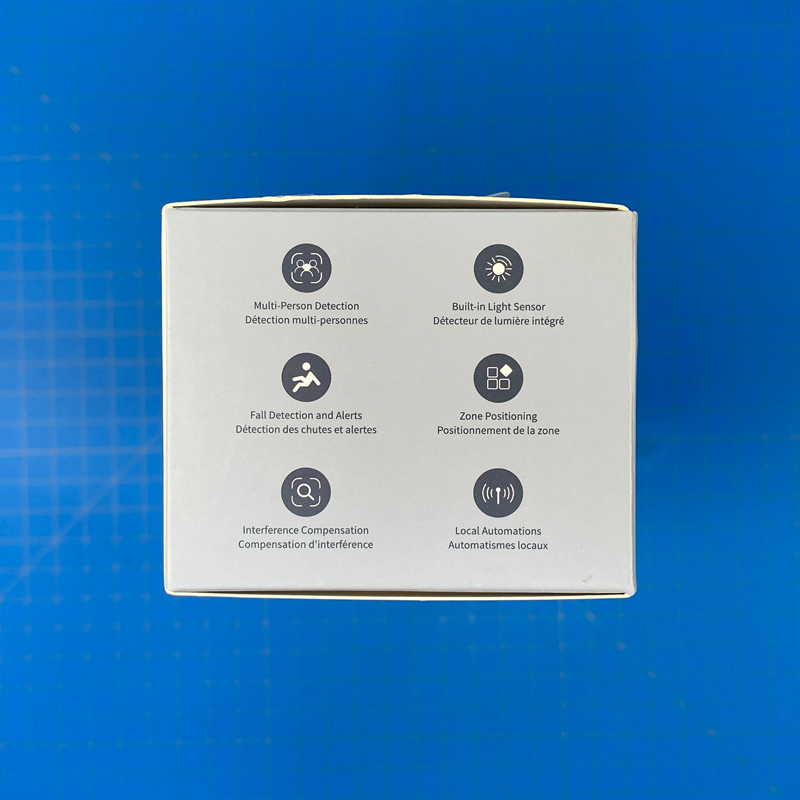
One side lays out the feature set of the FP2; multi-person detection, Built-in light sensor, fall detection, zone positioning, interference compensation, and local automations.
The other side of the box is largely just legal text, but you’ll also notice a Bluetooth logo. I suspect that a Bluetooth chip has been put in place for future Matter support, as Matter (and Thread) devices usually utilise Bluetooth for initial setup (commissioning).
I’ll quickly run through the features mentioned on the box;
- Multi-Person Tracking: The FP2 is designed to be able to detect and track up to five people simultaneously, although it’s also stated that three people is the optimum number for smooth operation. Unlike the FP1, which was only able to track one ‘signal’ the FP2 can individually track people as they move around inside the detection area. More on why that’s useful in a bit.
- Built-in Light Sensor: Light sensors are already found in most of Aqara’s motion sensors, but this is the first sensor with an included light sensor (that isn’t already a light sensor) that’s exposed to HomeKit. Like multi-person detection, the light sensor can be used in a multitude of ways, that involve detection in a specific zone, but only trigger an automation if the light levels are above a certain number, for example.
- Fall Detection: this speaks for itself, and could be of use for monitoring the elderly or infirm without having to watch them on a smart camera, for example. It should be noted that this feature only really works if the FP2 is ceiling mounted. This option actually limits the range of detection, and you lose the ability to use zones and track multiple people, so it’s really a case of which feature is most important to you.
- Zone Positioning: The Aqara app breaks the FP2’s detection range into a grid of 320 separate squares. You can select and group these squares to create zones. These zones can in turn be used to trigger automations. Each zone is also exposed to HomeKit as a separate presence sensor.
- Interference Compensation: This feature allows you to designate certain areas of the detection range as ‘interference sources’, so if you have a standing fan in one part of the room, that when active, triggers the FP2, you can create one of these interference zones where the fan is, so the FP2 can ignore it.
- Local Automations: On this last point, I have to mention that in my tests, automations involving the FP2 and some devices in the Aqara app are cloud-based, not local, although after bringing this up with Aqara, they assured me this was a bug they’re working on fixing, so it could already be a non-issue by the time you read this. Automations in the Home app/HomeKit are local anyway of course.
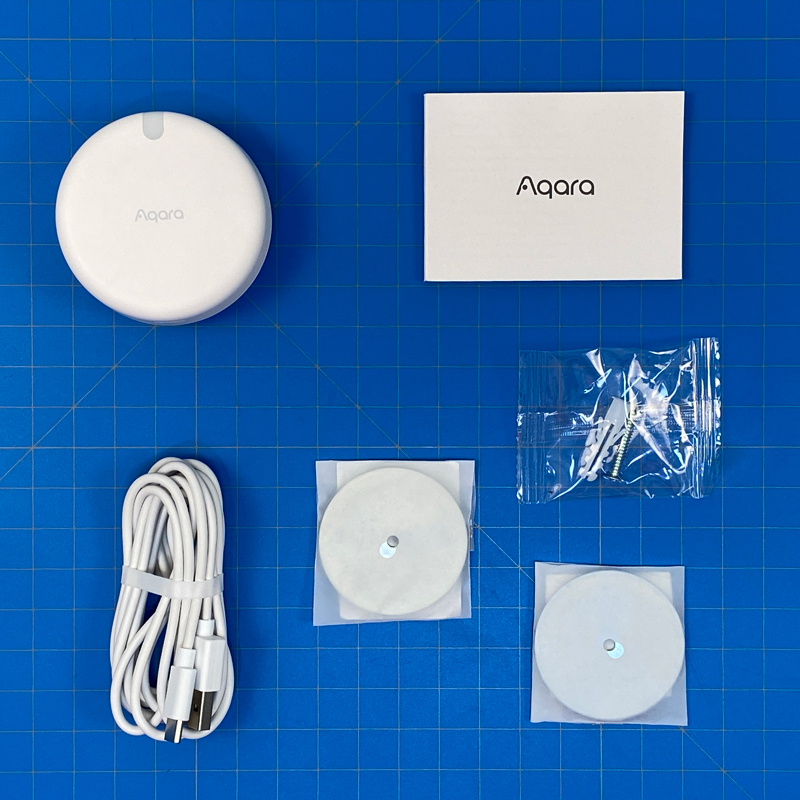
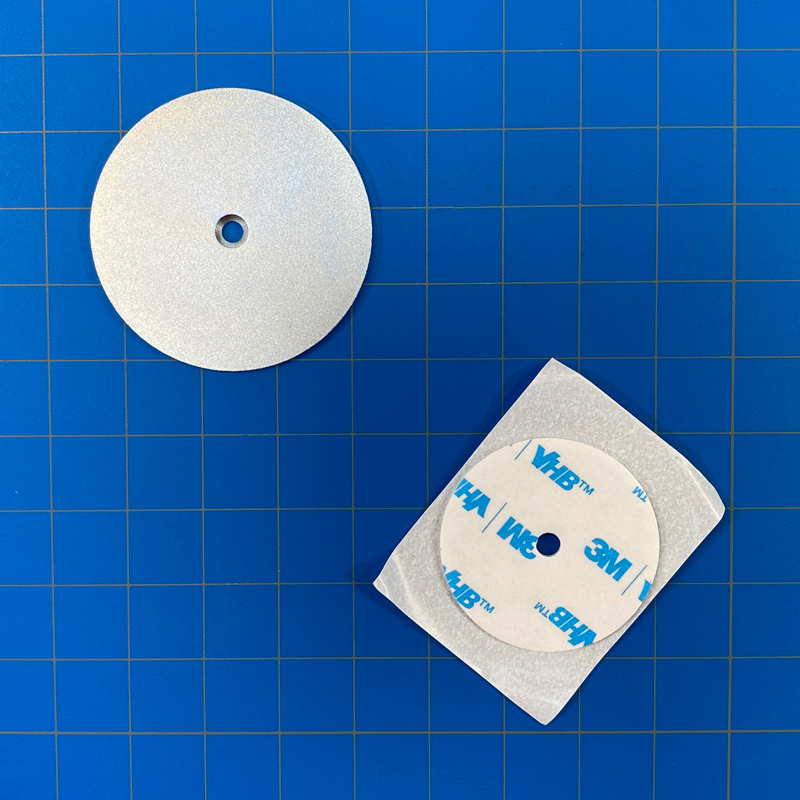
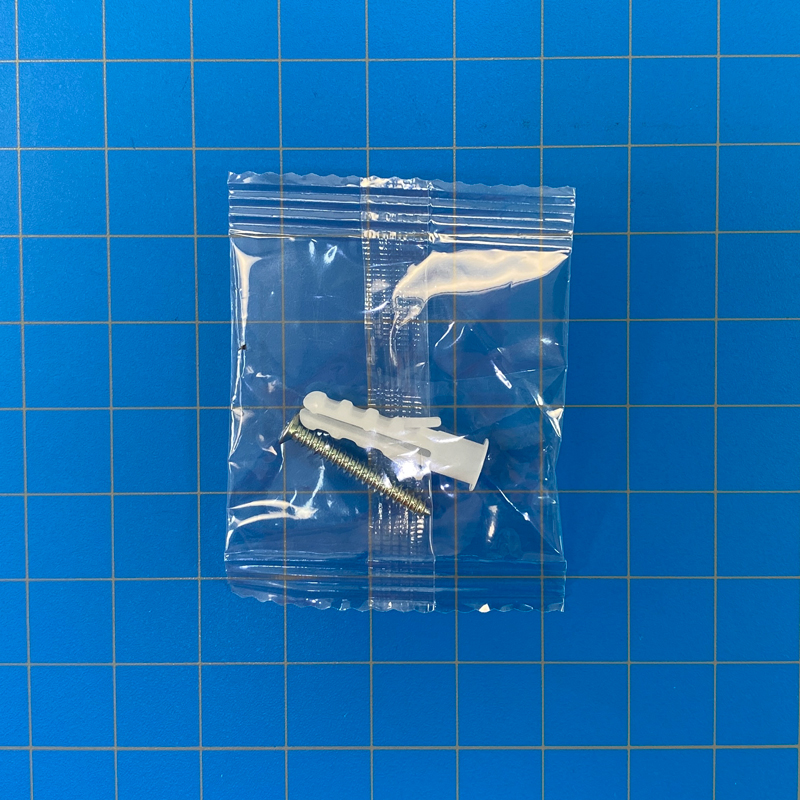

Aside from the FP2, you get two circular magnetic plates and corresponding double-sided stickers, a single screw and rawl plug for more long-term mounting, a 2-metre long USB-A to USB-C cable, and a manual in a whopping fourteen different languages.
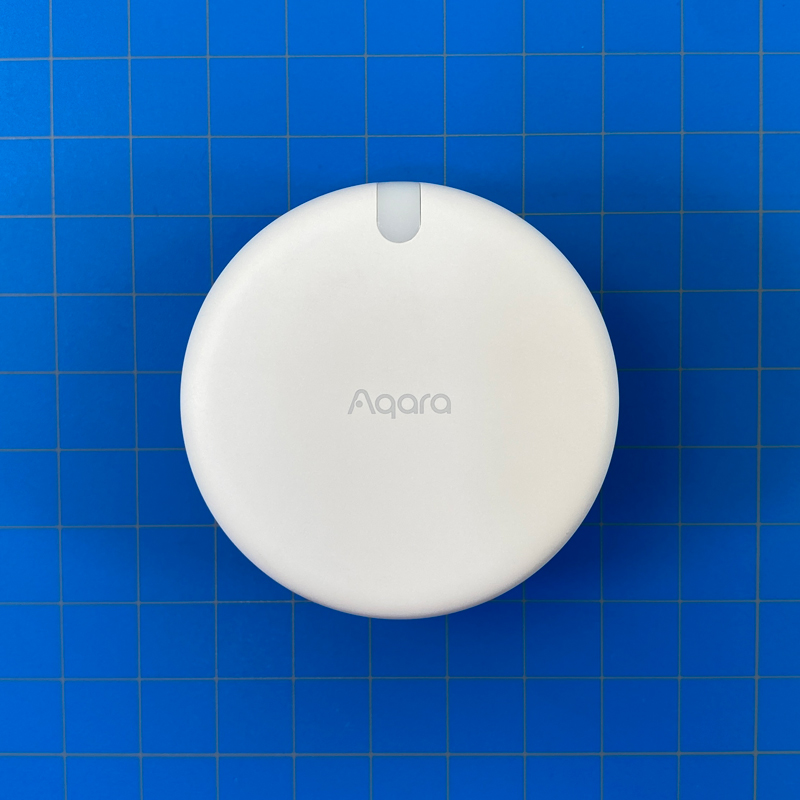
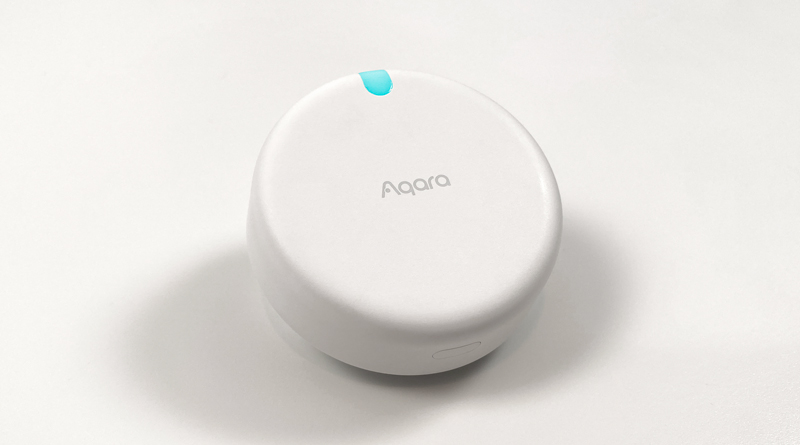
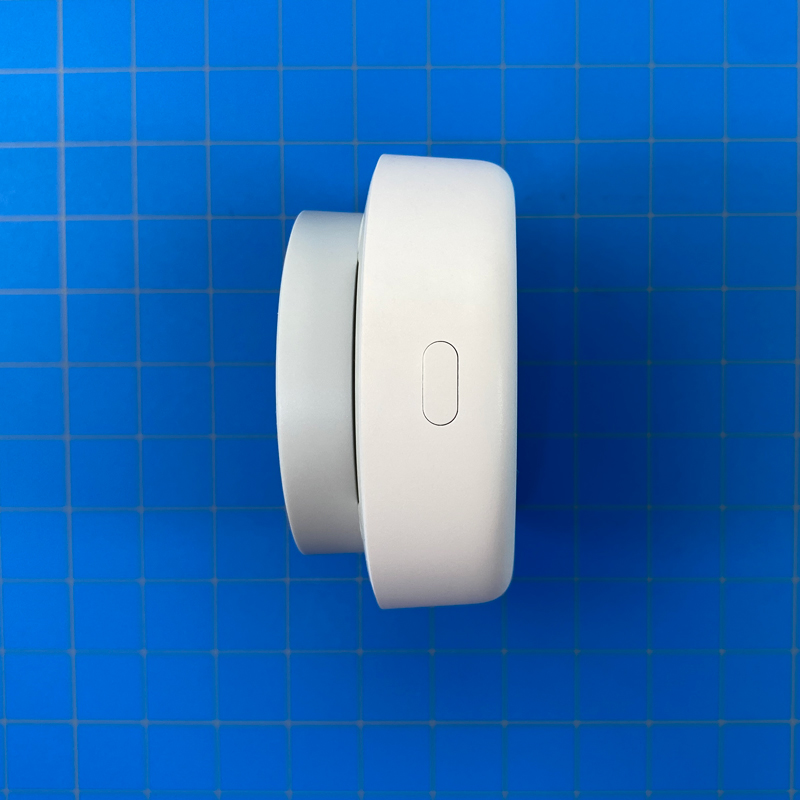
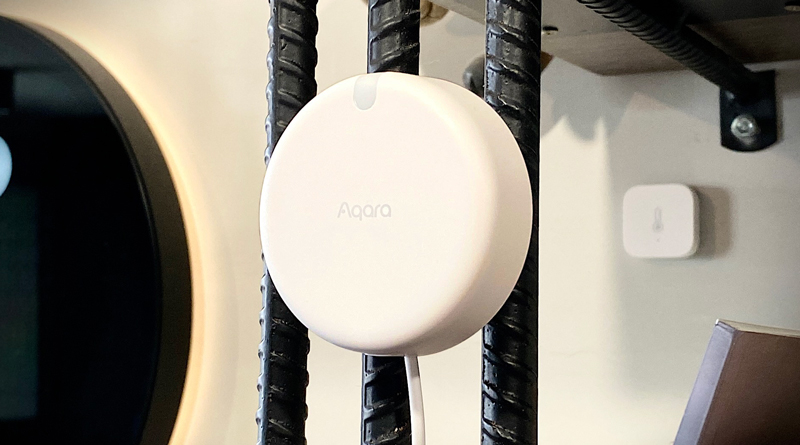
The FP2 is a circular, puck-shaped sensor with a cutout at the top that’s home to a large status LED, which I understand also houses the ambient light sensor, at least it appears that way in the manual. The base is magnetic, and is smaller in diameter than the main section out of necessity, as the USB cable that powers it needs to pass in between regardless of whether the stand – which is part of the base – is extended or not.
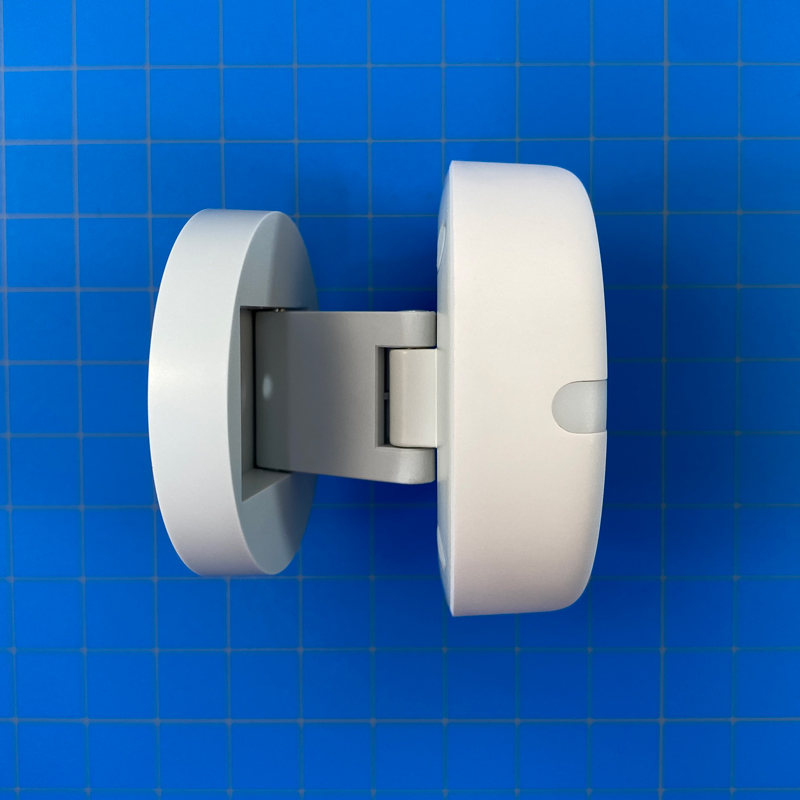
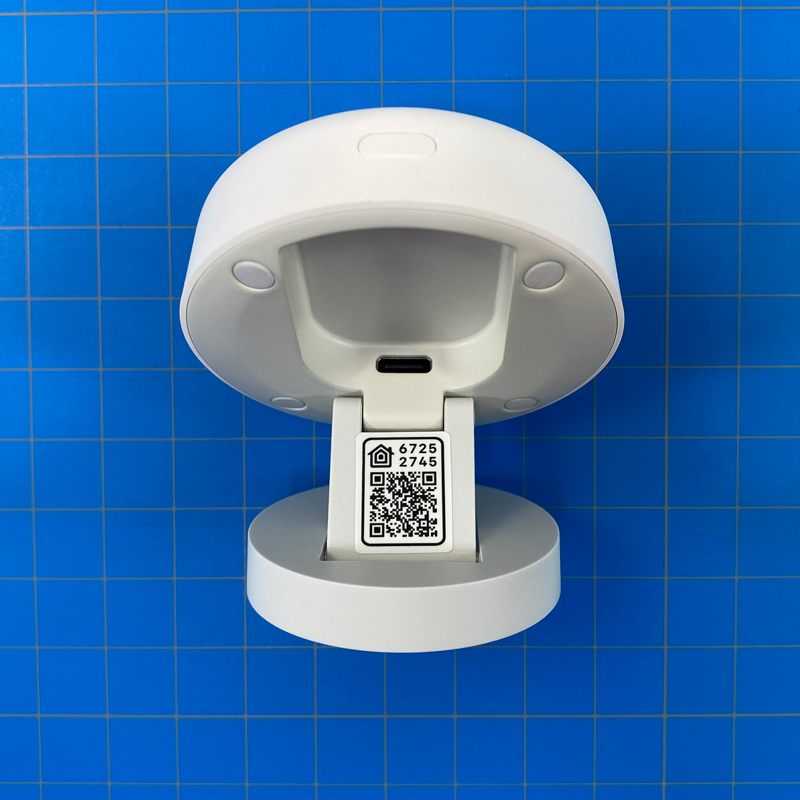
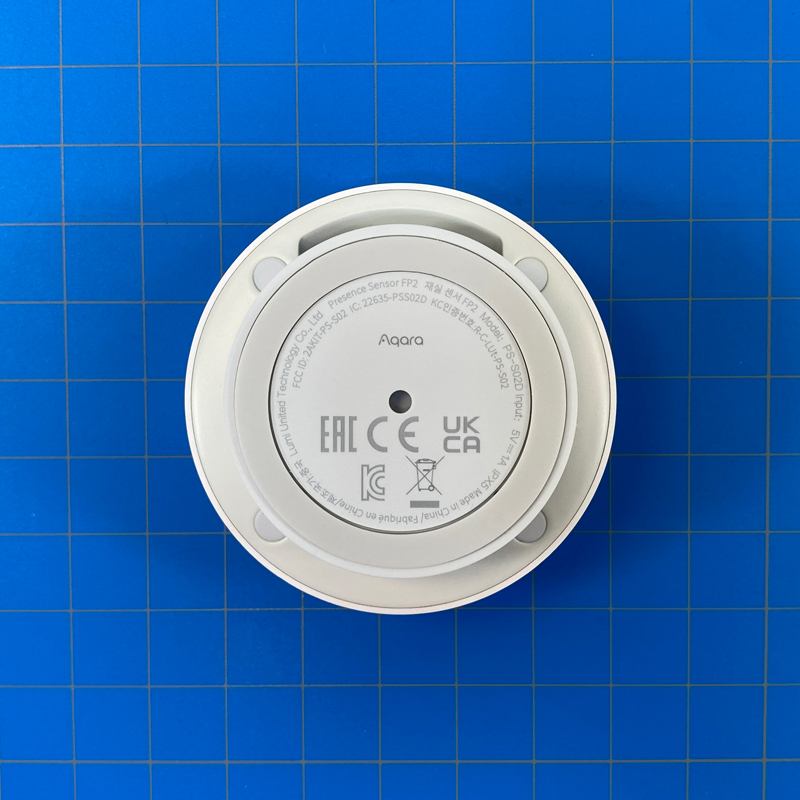
Although the stand looks similar to the ones you might have seen on the Aqara G2, G2H, and G2H Pro, as well as the FP1, this stand is slightly different as it doesn’t allow the main body of the FP2 to rotate. The base is home to the HomeKit QR code, so it can be added directly to HomeKit, although you really are better off adding it via the Aqara app, so you can add it to HomeKit, and then bind it to the Aqara app and server in one pass. Even though it can be added just to HomeKit, you’re not going to get much use from it without the Aqara app, as most of the features already mentioned need to be set up in Aqara Home.
FP2 IN THE AQARA APP
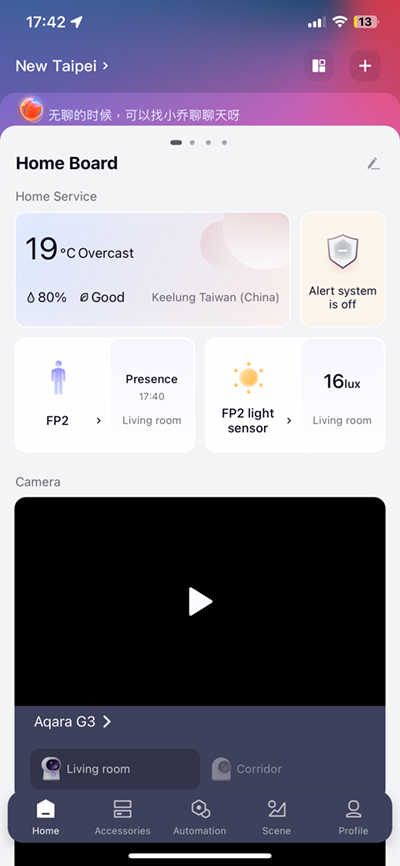

As already stated, the Aqara app is pretty essential, at least for initial setup, so starting with the FP2 there, I’ve set up two tiles – one for the FP2 showing its status, with a separate tile for the light sensor, showing the current Lux value. Tapping on the FP2 tile opens up the main UI for the sensor;
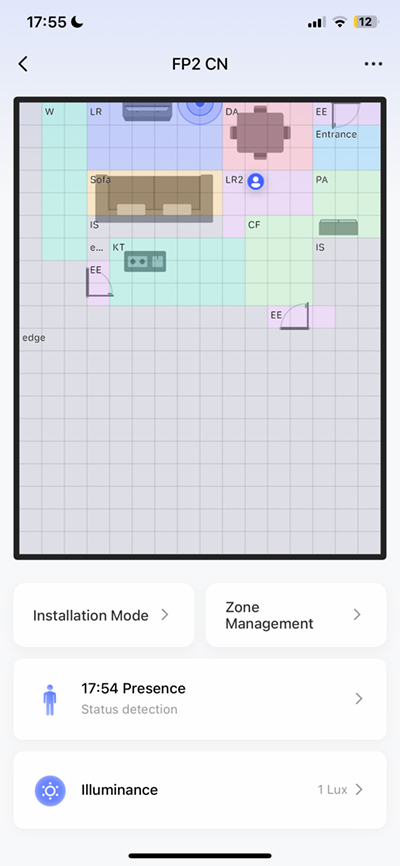
- At the top is a floor plan broken down into a grid of 16 x 20 tiles. In my case, you can see I’ve already set up my detection area, with furniture icons, zones, doors/exits etc. along with the edge of the detection range, as defined by the user (that’ll be me then…).
- Below there are half-width buttons labelled ‘Installation Mode’ and ‘Zone Management’, and two full-width buttons, one for detection status, and the other for illuminance, or brightness levels as reported by the light sensor.
As you can see from the last two screenshots, one shows absence, whilst the other shows presence, with a small icon on the floor plan to indicate a person.
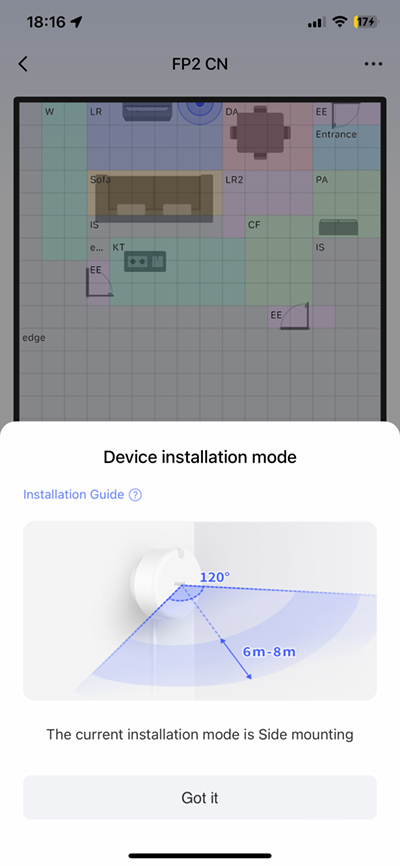
The Installation Mode button will simply show you the current type of installation option you selected when originally setting it up, along with what you can expect in terms of coverage. As previously mentioned, you can have this positioned so it’s facing forward, either stuck to a wall or on a shelf, or ceiling mounted. You could also have it placed in a corner, although that would essentially just be a variation of the wall-mounted option. That said, having it in a corner does mean that any blind spots caught behind the 120º detection area won’t matter, as they’ll be just walls (assuming the corners of your room are at 90º to each other).
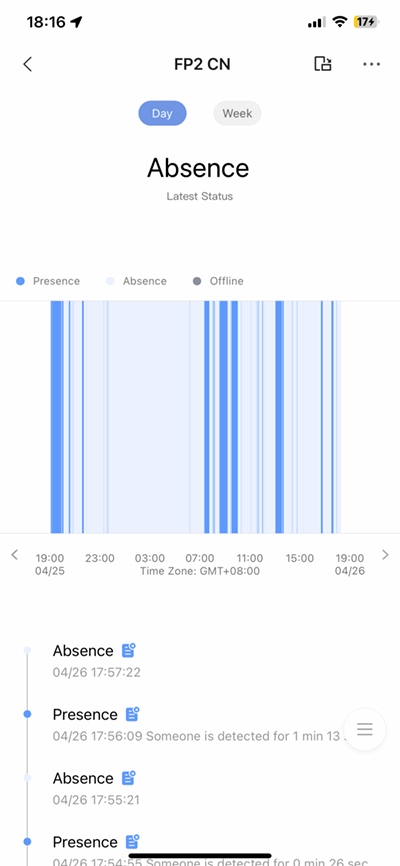
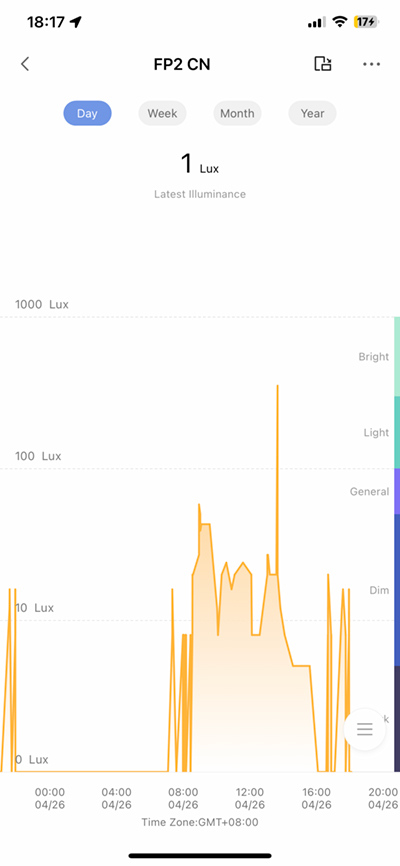
The presence/absence status button opens up a log of detection periods covering a day or a week, along with any potential offline times. Similarly, the Illuminance button shows a log of ambient light readings in Lux, covering days, weeks, months, and years.
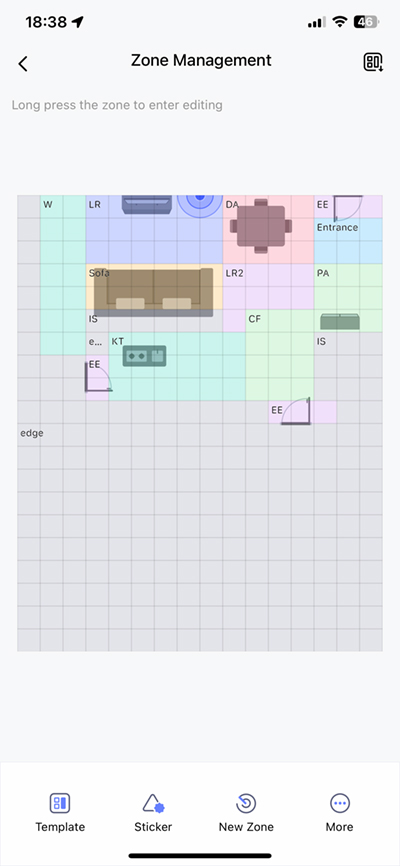
Tapping on Zone Management is where it starts to get fun, although it’s really important to set up the ‘edge’ of the detection zone, or you may well have an issue later on with detection and more. The ‘edge’ tells the sensor to ignore any presence beyond its boundary. This could be useful for areas that you don’t want detected, but can still pick up presence, like through a ground floor window, for example, as the FP2 can detect presence through things like glass. With the edges set up, you can proceed.
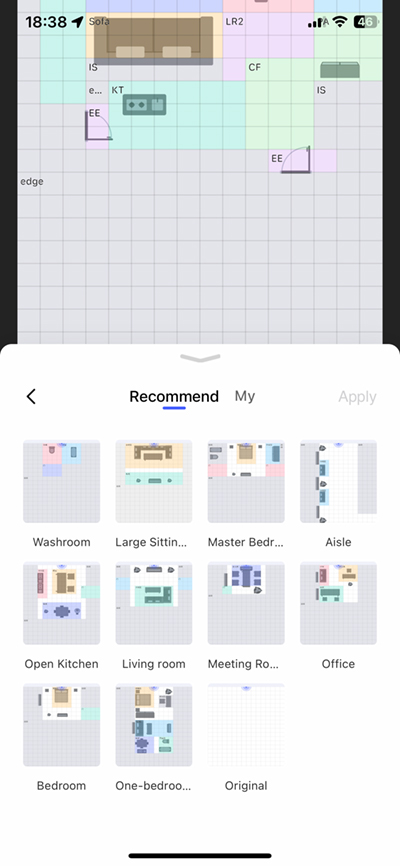
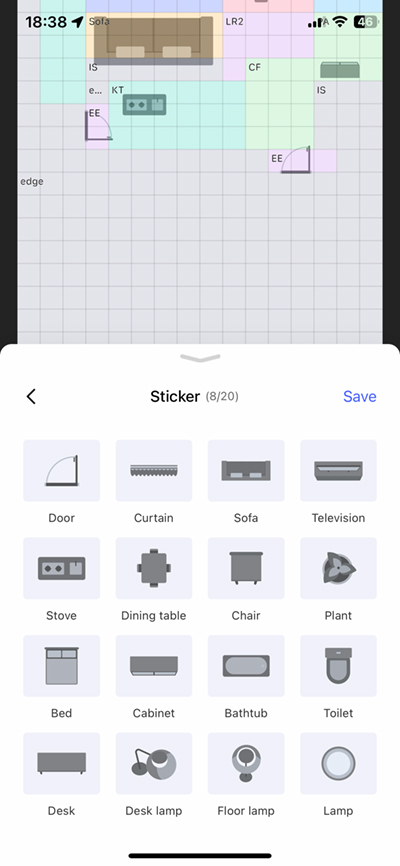
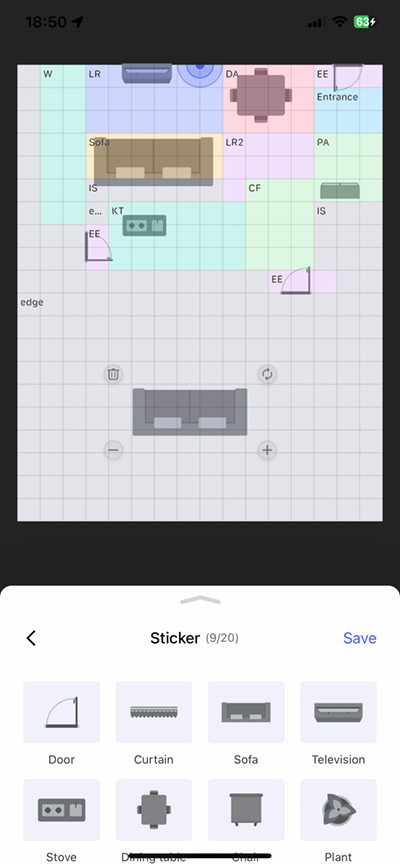
Here you can adjust various aspects of the floor plan, so with the Template icon on the bottom, Aqara give you preset layouts that you can use as starting points, complete with icons for the relevant furniture (beds, desks, stoves, sofas etc). the Sticker icon allows you to add up to 20 graphics to your floor plan, including the aforementioned items in addition to plants, TVs, lamps, toilets, and even doors etc. I feel there could have been a few more icons, but these probably cover the basics.
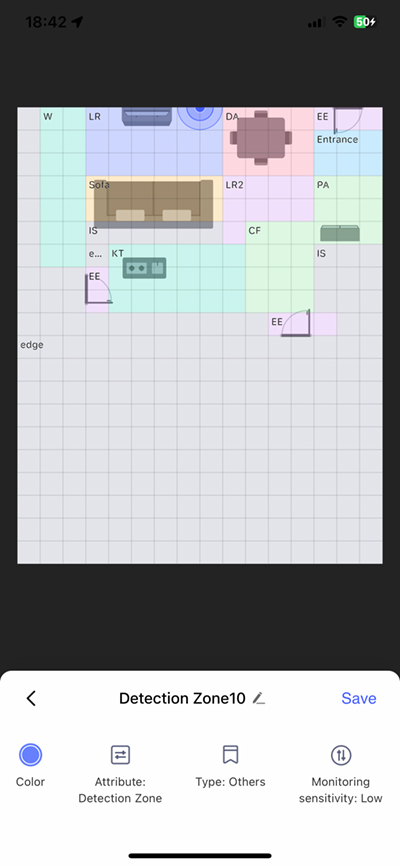
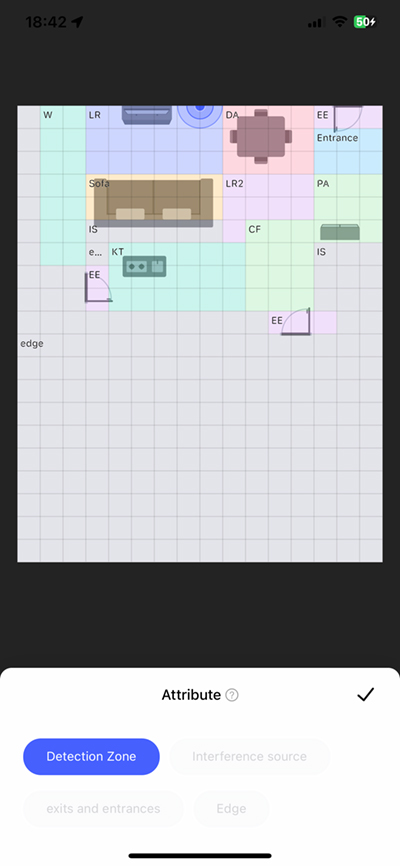

When it comes to creating zones, these are managed by selecting the relevant squares on the grid, and choosing a colour so you can differentiate between zones. You can attach an attribute to the zones – Detection Zone, Interference Source, Exits and Entrances, and Edge, as previously mentioned.
Interference source is useful if you have a standing fan, or anything that might fool the sensor into thinking there’s presence when there isn’t. Simply create the zone and assign it as an interference source so it can be disregarded.
Exits and Entrances are also useful, as these help the sensor realise why a person being detected/tracked might suddenly disappear, which should help the FP2’s algorithm.
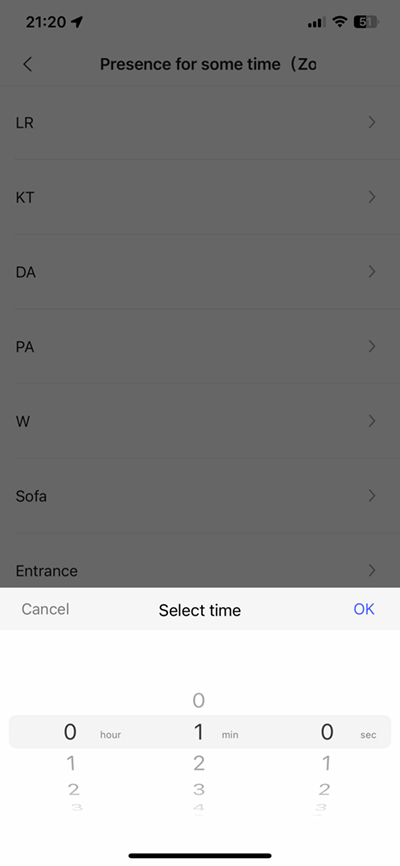
The Types option gives you the option to assign preset descriptions to zones already created, although you can name them yourself. As you can see in my example, I’ve kept things uncluttered by using simple two-letter codes (KT = kitchen, LR = living room, etc).
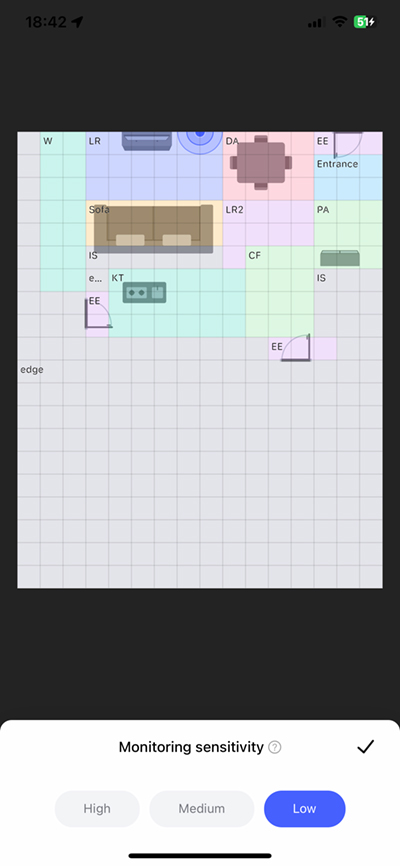
If the fact that the FP2 can track your location within the detection range, whilst also allowing you to create individual zones (for the purposes of advanced automations) wasn’t enough, each zone can be set to one of three levels of monitoring sensitivity – High, Medium, Low. Amazing really.
Going back briefly to ‘stickers’, and in the example above, you can see I’ve added a sofa. When you add a sticker, you have four options – you can rotate the position of the graphic, which allows it to turn at 45º with each tap. You can also increase or decrease the size of the graphic with the plus and minus buttons. Finally, if the graphic is no longer needed, you can tap the trash can to delete it.
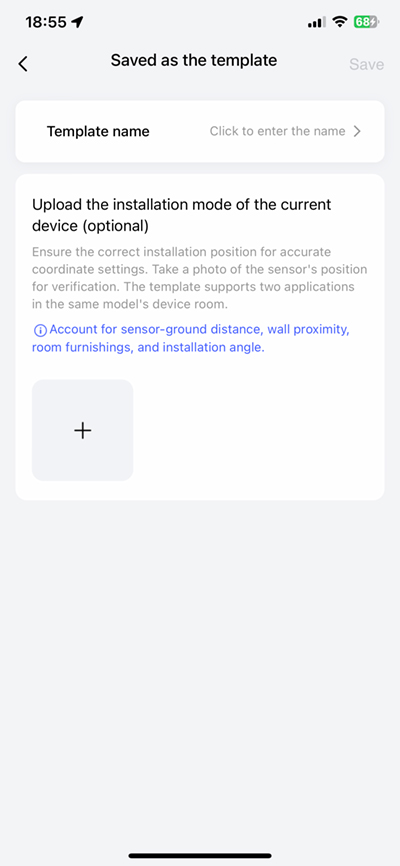
When you’ve got your room set up to your liking, you can save it for later recall, if for any reason you either messed up somehow or inadvertently delete it. You can also take a photo of the sensor’s location for future reference.
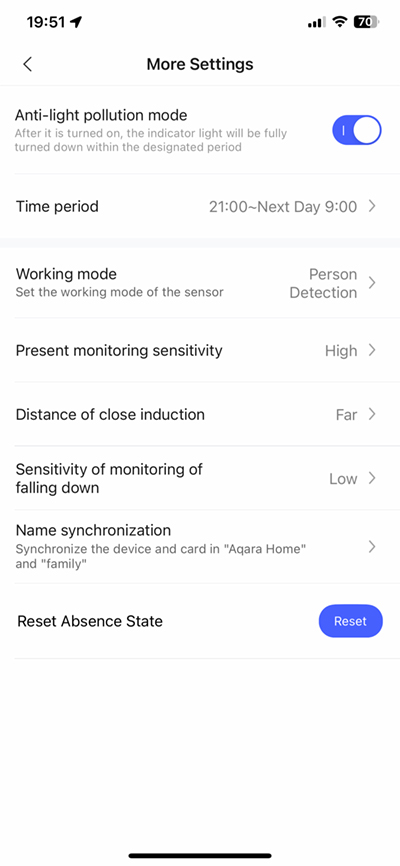
If you’ve used any Aqara products before, you’ll be familiar with the structure of devices in the app, and so in ‘More Settings’ you get access to pretty much all the options you’ll need for the FP2. You can turn off the LED light between hours set by yourself, which would be useful in a bedroom at night. There are options for overall sensitivity and fall detection monitoring.
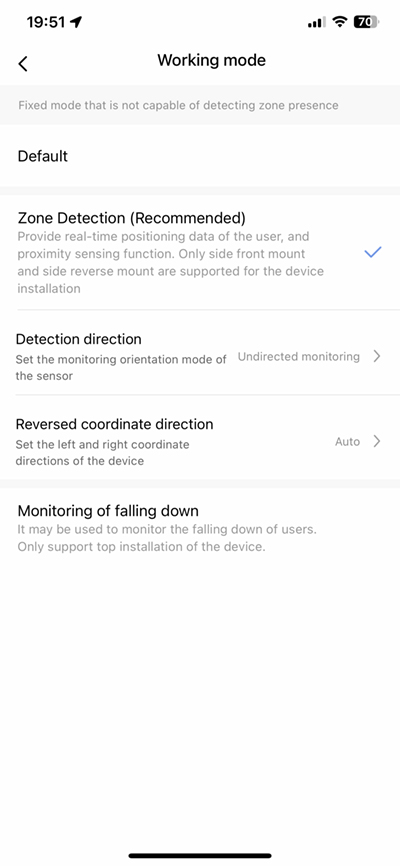
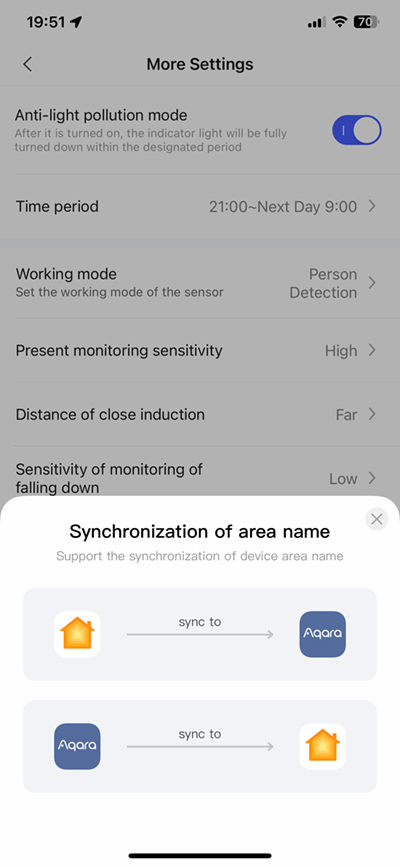
The working mode can be changed here, with zone detection being the recommended default. You can also set the FP2 to detect direction, which is something the FP1 was also capable of. There’s also a ‘Reset Absence State’ button, which can be used if for some reason the sensor is detecting presence when there is none, which in my case has been rare, although less rare for some it seems. When it comes to the zones and what you’ve named them, there’s an option to have the names synced between Aqara Home and HomeKit, with options to sync in either direction.
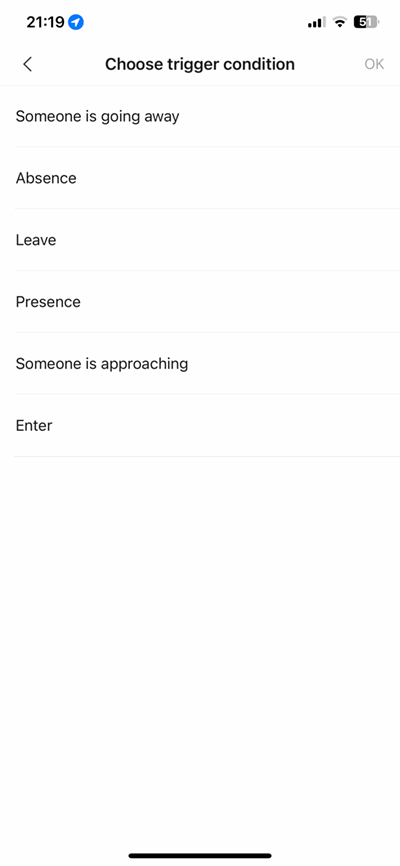
AUTOMATION OPTIONS IN AQARA HOME
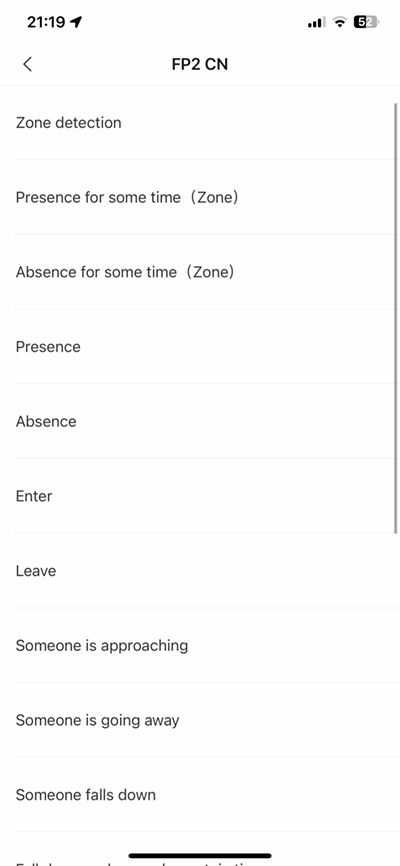
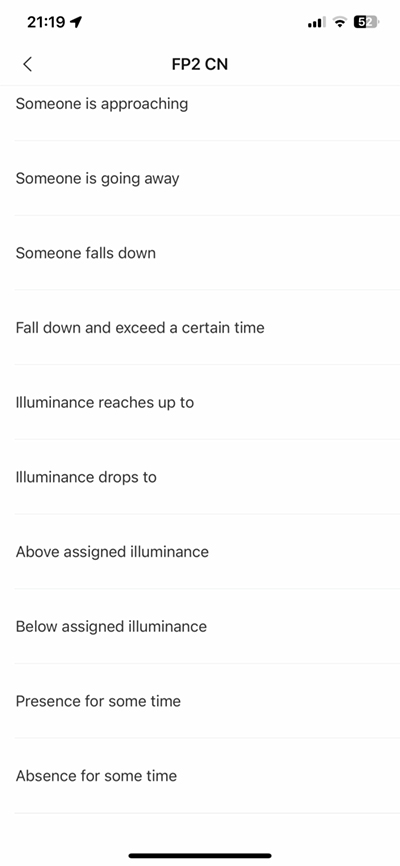

One thing I’ve always liked about the Aqara app is the expansive amount of choices offered, and given what you can achieve with the FP2, you may well be overwhelmed by the choices combined with zones and the sensor. So not only do you have options for basics like Presence and Absence detection, as well as zone-based detection, but even more specific things like Enter, Leave, Someone is Approaching, Someone is Going Away, Someone Falls Down, as well as options involving the light sensor. On top of that, when it comes to zone detection, you can get granular by selecting specific zones for your automation.
Within these specific zone automations, you then get the granular options found in the previous menu. It’s quite mind-boggling what you can do, although you do need to bear in mind this is all for the benefit of other devices in the Aqara app – which are only going to be Aqara devices in the main, so you can forget about using these with non-Aqara devices outside of this ecosystem.
When it comes to the options for detecting ‘presence (or absence) for some time’, you can set the amount for that ‘time’, with the ability to go as low as one second, or as high as just under four hours (3h 59m 59s).
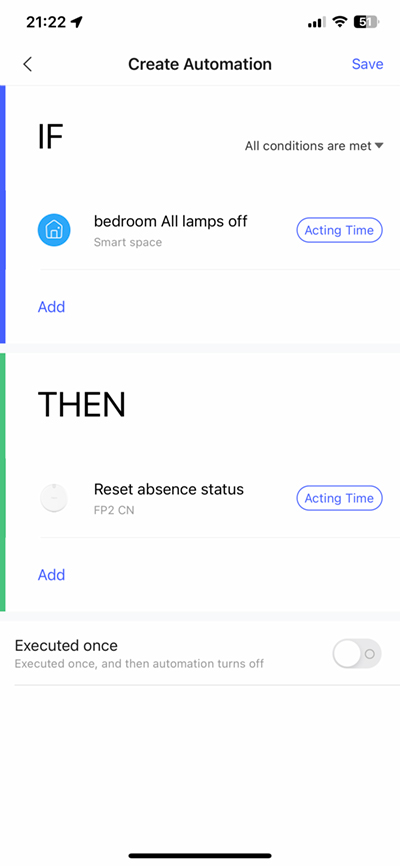
All of these options are available as triggers in an Aqara automation (the IF section), but you also get one option to use the FP2 in the ‘THEN’ section. In this case, you can choose to have the FP2’s absence status to be reset. There can’t be too many reasons why this would be necessary, but I guess if you’re leaving home, and for some reason, there’s an errant presence detected that you know is wrong, you could just have it reset when you turn off some lights or lock a door on your way to work perhaps.
THE FP2 IN APPLE HOME/HOMEKIT
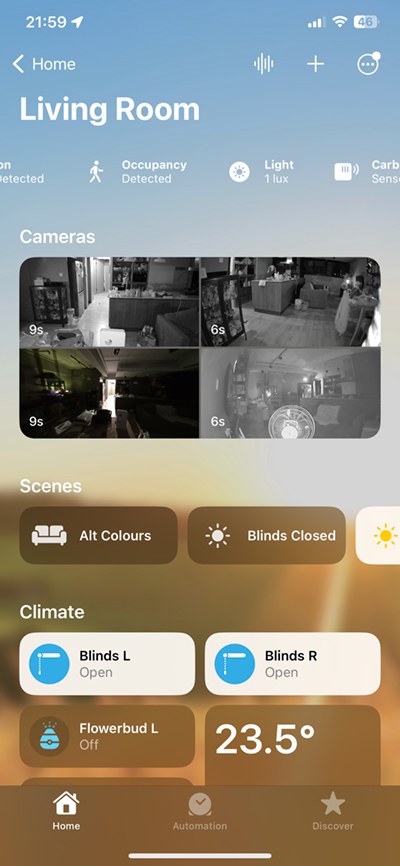
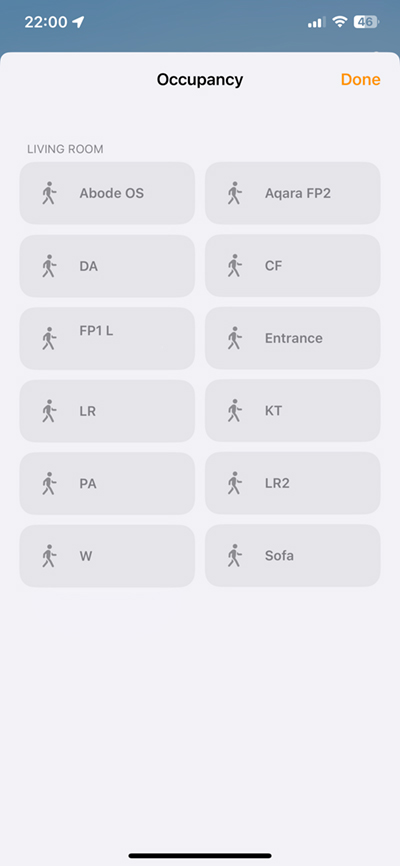

As you might expect, when it comes to HomeKit, automation options are a lot more stripped back. That doesn’t mean you can’t have fun with the FP2, as each zone created with the FP2 in the Aqara app is exposed to HomeKit as a separate presence sensor. So you don’t have to scroll back through this article, I’ll tell you I created a total of nine zones;
- Living room (LR and LR2)
- Kitchen (KT)
- Dining Area (DA)
- Corridor (CF)
- Entrance
- Prayer Area (PA)
- Windows (W)
- Sofa
Each of those, as you can see, is showing up as sensors in the Home app. You’ll also notice that I’ve got additional sensors listed on this screen. Abode OS is simply an Abode motion sensor, but for some reason, it’s exposed as an occupancy sensor. I also have the FP1 listed (FP1 L). Additionally, the FP2 shows up as a separate sensor, that I assume covers the whole area, not just zones.
You can also see that the light sensor shows up in HomeKit, with the Lux readings listed in the details section.

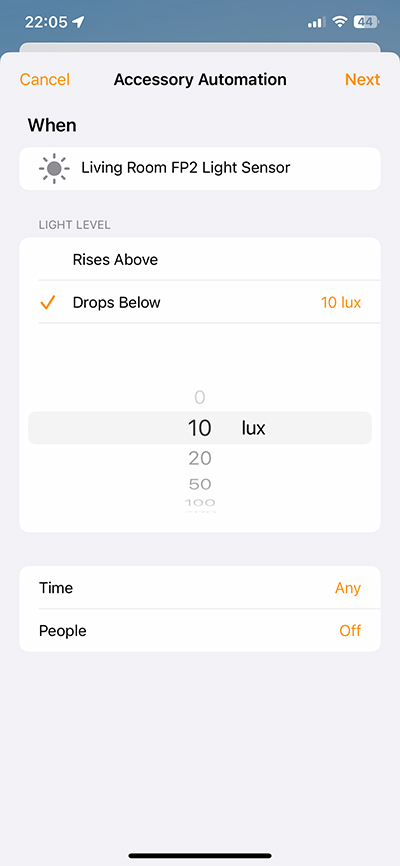

The light sensor can be used in automations, with options for when the Lux readings rise above or drop below specific levels. These levels are fixed in the Home app, but I’m not sure having them to be so specific is necessary. When it comes to the presence sensors, you simply get the same kind of options as you would with a motion sensor – detects or stops detecting occupancy.
Even though the options for HomeKit-only automations are more limited, you can still make use of the option to ‘convert to Shortcut’ within the Home app, which does give you a lot more choices.
THE FP2 IN USE
When I first started to use the FP2, like many other people it took a while to get it how I wanted it, with a lot of moving around so as to make sure everything on the floor plan matched real life. What was told to me before I even set it up was how important it is to get the edges set up. Without doing this, you can leave yourself wide open to all sorts of false detections, ghosts occupancy events and more. That’s not to say the FP2 has been perfect even with this, and there have been occasions where the sensor – or rather the app, it seems – gets stuck, only to catch up with all motion events, and display ‘figures’ on the floor plan darting at high speed from one end of the room to the other. Using the ‘Reset Absence State’ button may not seem ideal, but it would seem that over time, the algorithm learns from this, and begins to report less and less false information. This is something I feel has happened in my case, and as a result, things have improved to the point where I largely don’t have any issues with the FP2. It would seem a recent app update has made things a lot more reliable.
One issue I’ve seen reported by some users was the initial setup not going well, with some people simply not being able to add the device to either HomeKit or Aqara. It’s hard to know what might have gone wrong in most cases, as there are so many variables at play, not least among them human error. I, fortunately, had no issues with this. I do have another one to set up though, so maybe it’ll be my turn to suffer, but I tend to have relatively few issues with this kind of thing for whatever reason.
I think the one thing that could be a possible bone of contention is the price, but of course, any company is free to set the price they see fit, and we as consumers are not obliged to buy them if we don’t like the price, so I can’t really see an argument in this instance. Before anyone says “Well, you got yours free!” I’d like to remind you that a “free” product comes with a lot of testing, video editing, and writing, so I’m not sure it could truly be considered free – all that aside, I still paid for my Chinese model with my own money. There are other options for occupancy sensors, like the FP1, or the LifeSmart Presence sensor (video HERE, review HERE), although both of these options require a hub, as they utilise Zigbee.
All in all, this sensor fixes a few issues that simply aren’t as easily achievable with standard PIR sensors, and the fact that you can split this into up to 30 zones, thereby giving you the equivalent number of presence sensors in HomeKit, really shows you that you’re getting a lot for your money.
I’m not so sure it would be of much use in a small bathroom, for example, and I’d probably recommend the FP1 for simpler tasks, but for large rooms, especially open-plan areas like the one we have here, it’s a bit of a godsend.
Aqara Presence Sensor FP2

Pros
- More accurate than a PIR sensors
- Up to 30 zones, exposed to HomeKit
- Light sensor exposed to HomeKit
- Tons of options for Aqara uses
- Detachable USB-C Cable
Cons
- Relatively high price tag
- A few bugs to fix
Great review – thanks. Do insects cause false triggers?
I don’t think so, and haven’t seen any triggers in the logs when there was no one in the vicinity, but then we tend to only have mosquitos, which are pretty small. Walking insects like cockroaches would be too low on the ground to detect.
I built an automation that in the process I converted into a shortcut to turn off my office light when I’m away for 10 minutes, but if I leave for a while and come back again the automation doesn’t postpone! What is missing here?
Could you provide a screenshot of the automation so I can work out why there’s something not working? You can upload it somewhere or email it to us.
I sent an email, thanks a lot!