

Nanoleaf 4D Screen Mirror and Lightstrip Kit (review)
For a few years now I’ve had a light strip set up behind my TV for what is referred to as ‘bias lighting’. In all this time, however, I’ve only used a dumb light strip and kept it at one colour. I have found it to be effective in terms of helping with more extended viewing periods, which tallies with the Wikipedia entry on the subject;
“The purpose of bias lighting is to reduce the perceived brightness of the display as a result of the contrast with the slightly illuminated area around it. This reduces the eye strain and fatigue that occurs when viewing a bright display against a very dark background for an extended time, and increases the perceived blackness, perceived highlights and overall contrast of the display.”
Whilst a smart light strip might be of even more use, I felt that along with my recent purchase of my very first 4K TV, it was time to go a step further than that and try out something that could provide not only a smart strip experience but also utilise ‘screen mirroring’. This function is designed to extend the viewing experience beyond your screen with lighting that matches what you see on (the edges of) the screen in terms of colour and brightness, changing and adjusting in real time. There are a few products out there that support this kind of function, although not many are also HomeKit compatible, or if they are, they tend to be quite expensive – the Hue Sync Box, for example, is currently selling for US$177 for the box alone, before you’ve even paid for compatible lighting products.
This is where Nanoleaf has stepped into the arena, with its own take on this feature, called the 4D Screen Mirror and Light Strip Kit. I’ll be taking a look at this product and offer you my thoughts on how easy (or not) it is to set up, any pitfalls that I encountered that you might too, and whether bias lighting is actually enough without the screen mirroring functionality.
PACKAGING
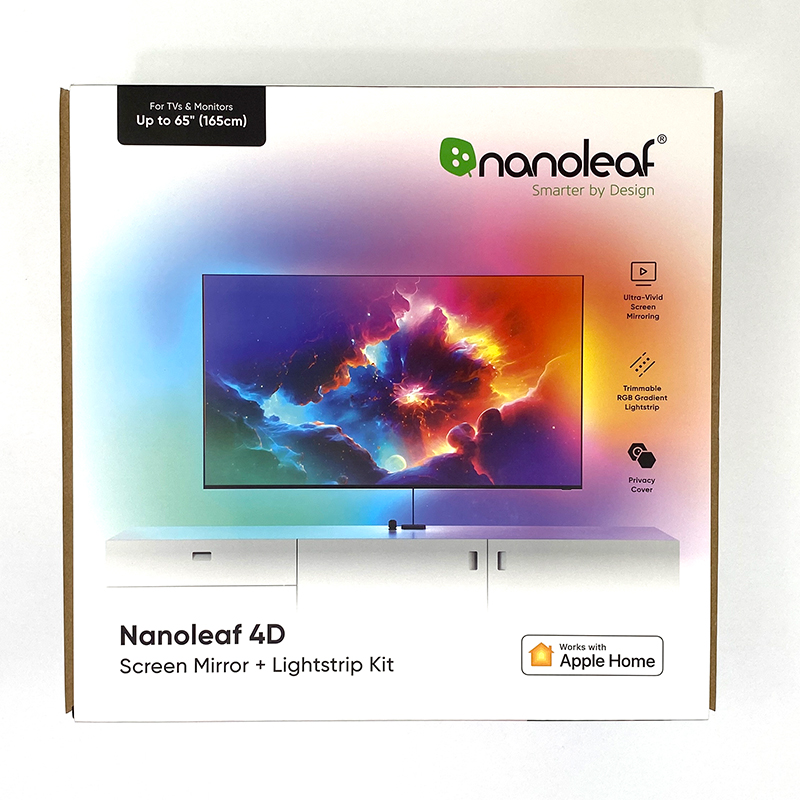

I’ll give it to Nanoleaf – they do make decent packaging when it comes to both presentation and getting everything in place and well-protected. The front demonstrates exactly what the ‘kit’ is designed for, along with the version purchased, as there are three separate options available;
- Screen mirror + Light strip Kit for TVs up to 65″
- Screen mirror + Light strip Kit for TVs up to 85″
- Screen mirror kit, with no light strip, only the controller and camera
The back features a lot more detail on what the kit is capable of, and one end of the sleeve shows a closeup of the camera and mount, which helps the kit determine what’s on screen and how to interpret that to the strip and/or lights. This also shows that the kit is not only compatible with Apple Home but also Google Home, Amazon Alexa, Samsung SmartThings, and IFTTT.
WHAT’S IN THE BOX?
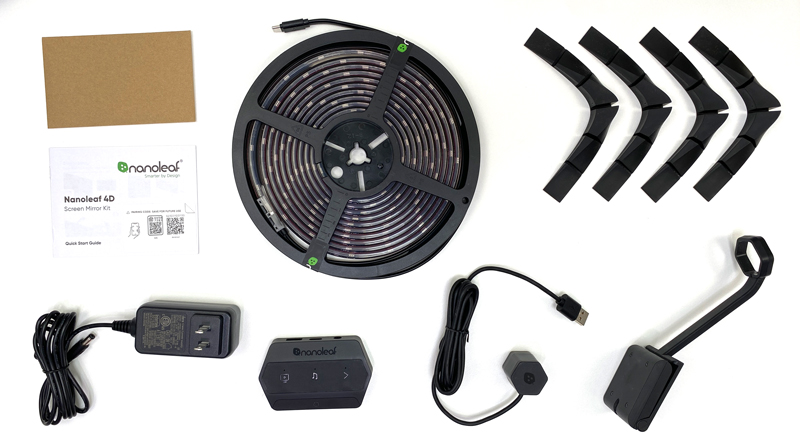
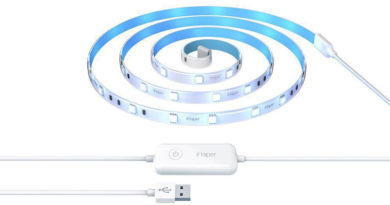
The box contains a ton of stuff, all of which is going to be of use to some degree. Aside from a manual that also includes QR codes for Apple Home and Android, there’s a small envelope containing double-sided stickers. The strip is included if you went for two of the three available options (I have the 65″ option), a power supply, a controller box that does much of the processing for the screen mirroring, a camera to monitor your TV screen, which plugs into the controller, a bracket designed to sit on top of the edge of your TV, and four corner brackets for the strip.
A CLOSER LOOK
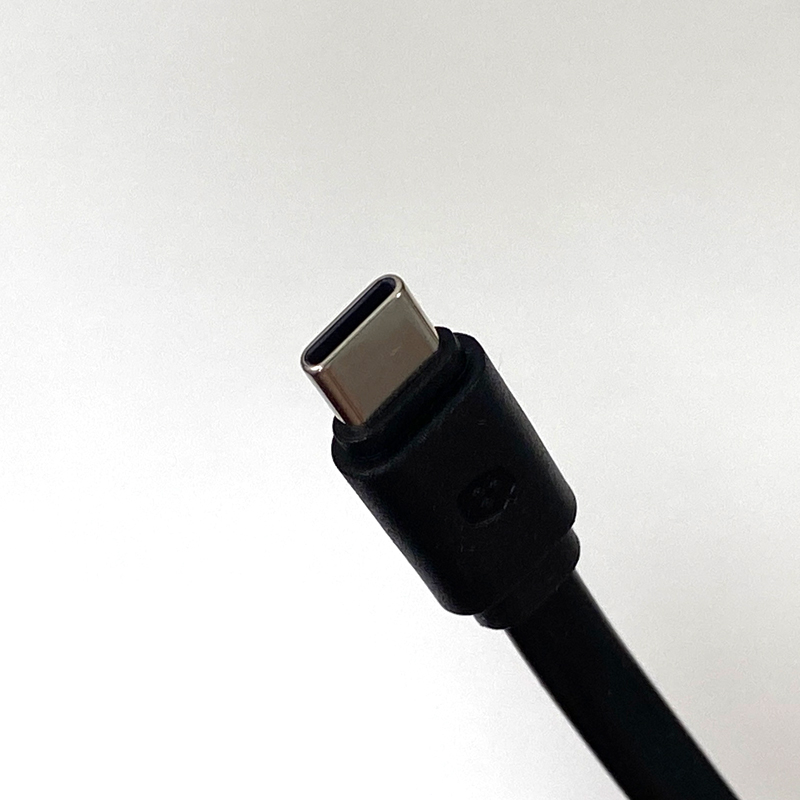
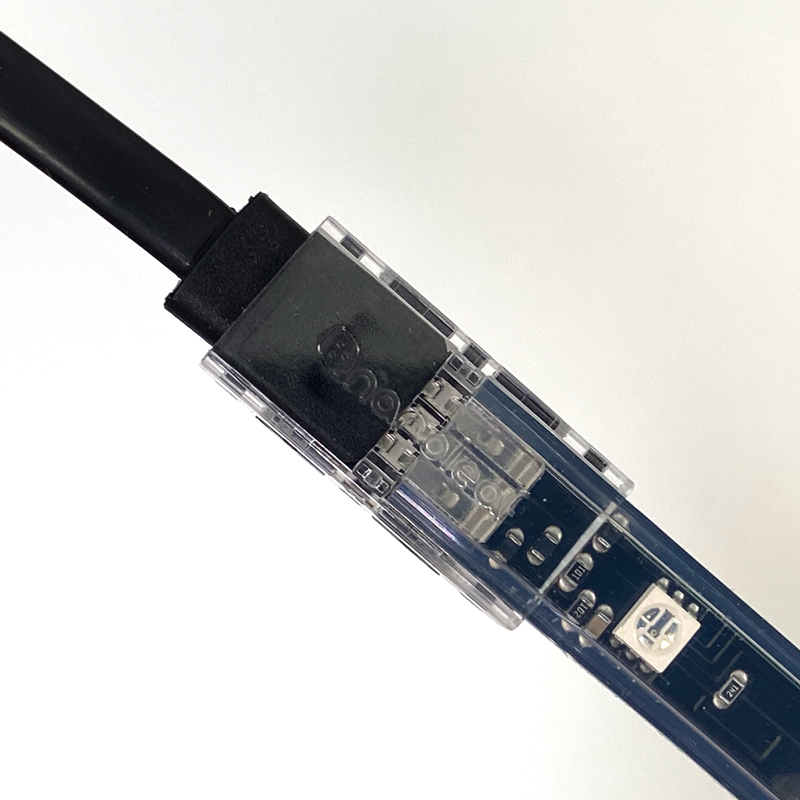
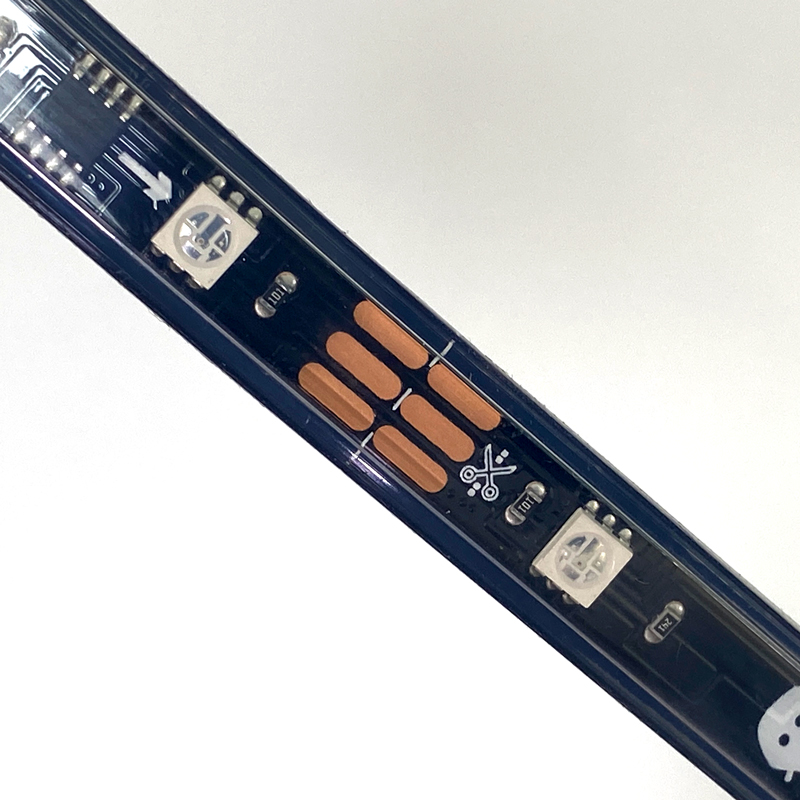
The strip itself feels a fair bit chunkier than other strips I’ve had, which I also found to be the case with their Essentials strips. What’s more of note here from other strips is that although it connects to the controller, it does so with a USB-C cable, which is then connected to the strip. Usually, you’d see some sort of proprietary connection or at least a coaxial connector. The strip has plenty of cut marks that allow you to cut the strip to the desired length more finely than most other light strips. This is due in part to the fact that this is designed to go behind TVs, where you need to cover a more accurate area, generally speaking.
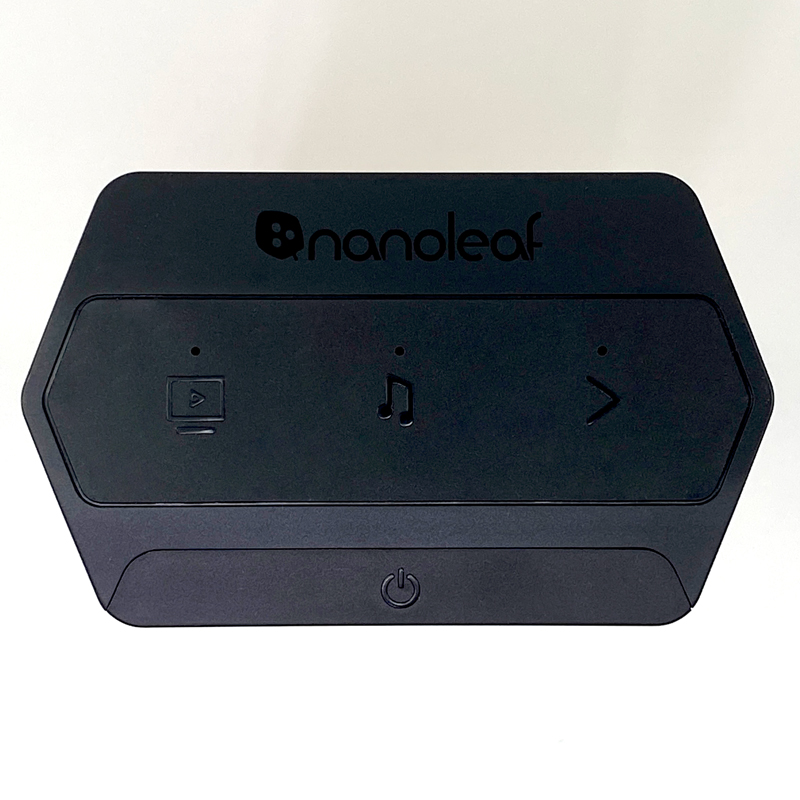

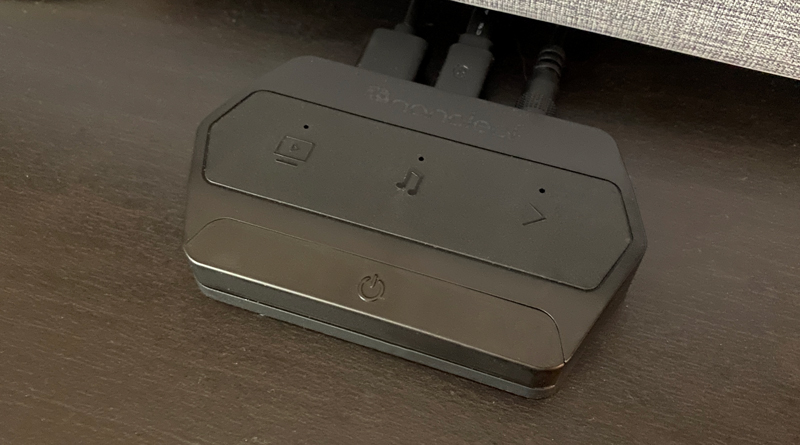
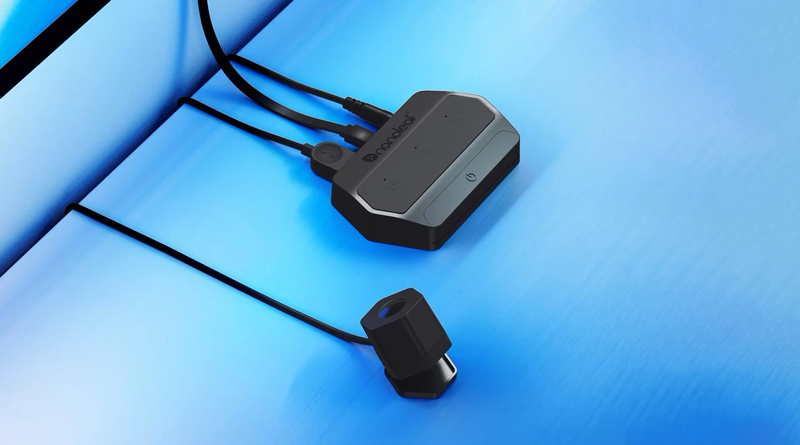
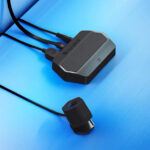
Most consumer light strips come with a controller that has, at a minimum, on/off controls and lighting modes. In the case of the 4D, this is replaced with a controller that looks more like a set-top box. The top of this box has one main button for power, along with three buttons grouped in the centre to control the different screen mirroring modes (off, 1D, 2D, 3D, and 4D), Rhythm mode (music sync), and scene modes. You can’t tell from the image above, but the panel with the 3 buttons is rubberised, so when pressing these buttons there’s a little ‘give’. The power button is a standard ‘click’ type button.
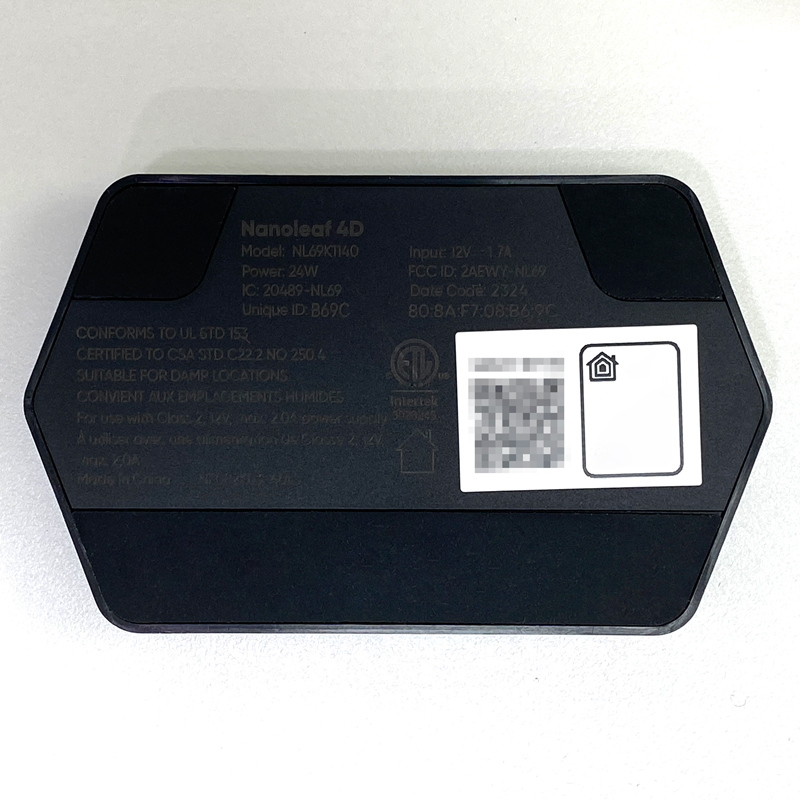
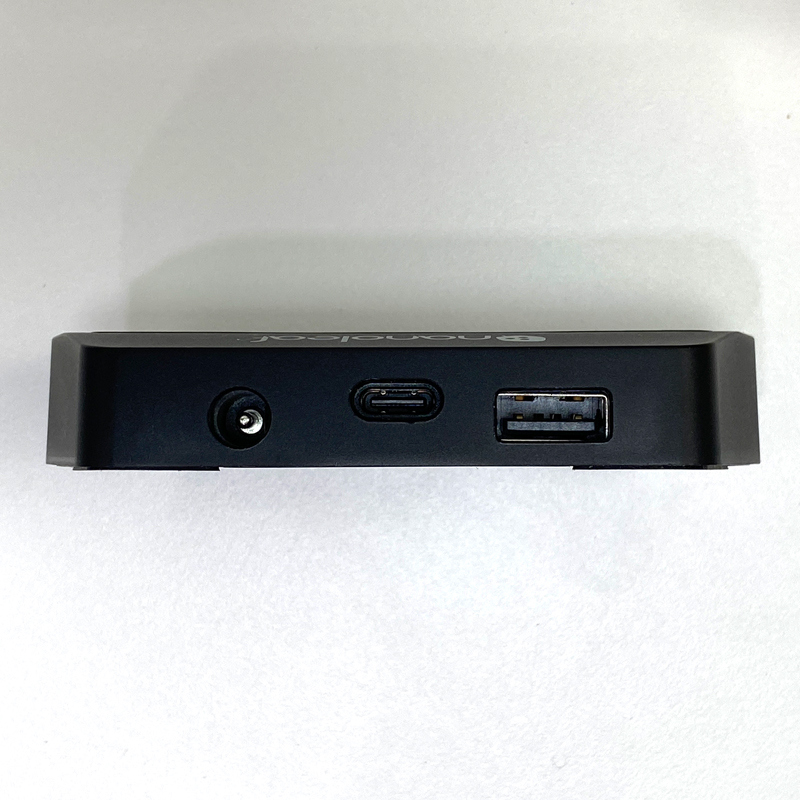
The underside has rubberised pads so it won’t slide around, along with two QR codes; one for Android users, and a HomeKit code. The front of the unit has nothing of note, but the back has three ports; a coaxial port for the power supply, a USB-C port for the light strip, and a USB-A port for the camera to plug into, which we’ll look at next.
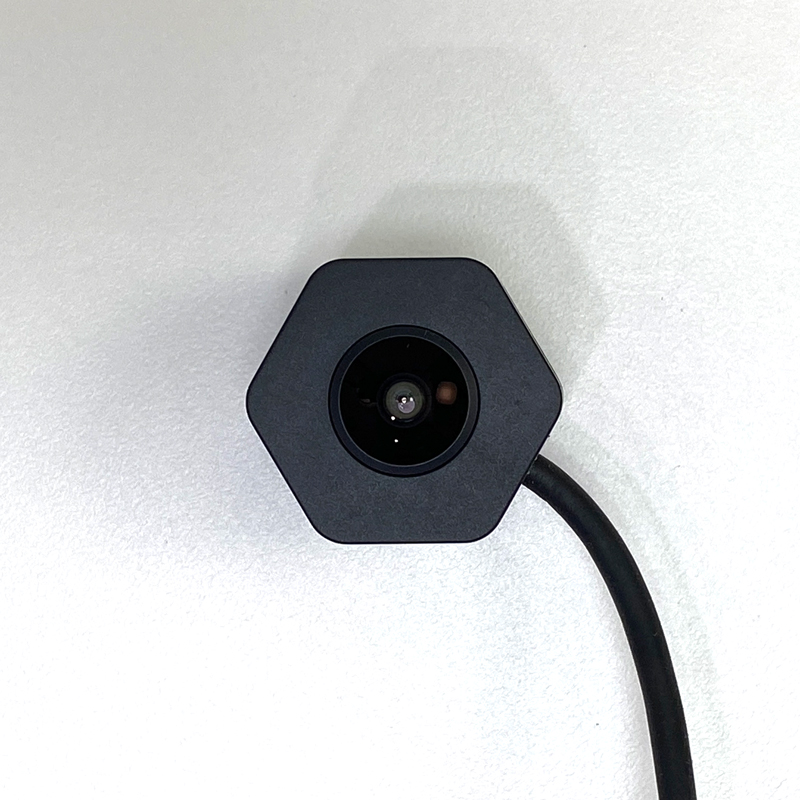
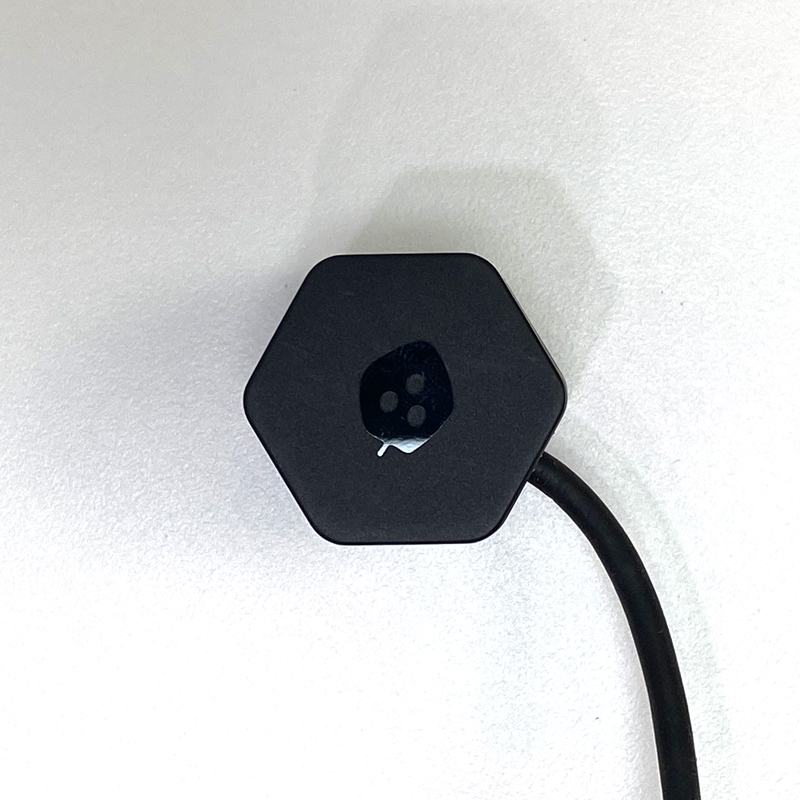

Along with the controller, the camera is probably the second most important part of the ensemble, given that it’s this that analyses the image on your screen. The camera lens is purely for this function and can’t be accessed as a regular camera, at least by the user. As it’s going to be pointing at the TV, I’m not really concerned about privacy, although I guess it depends on what you’re watching! If you are concerned about protecting your privacy, the camera does come with a magnetic lens cover that just snaps into place. The camera also has a built-in stand that allows the camera to be angled to point up towards your TV screen, although this is not of use if you plan to mount it from the top of your TV.
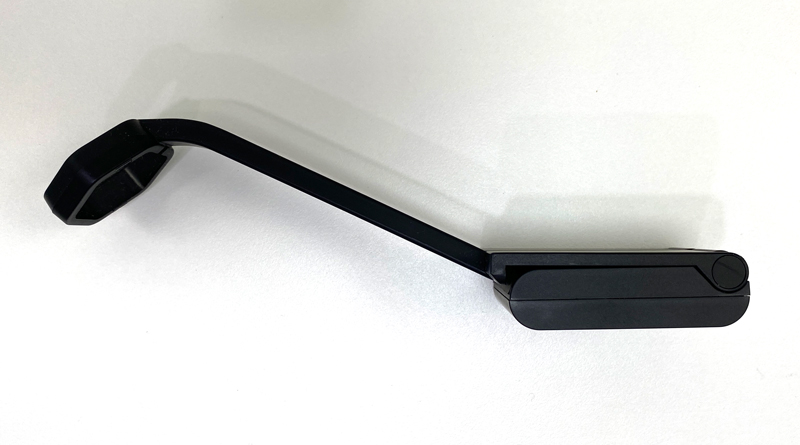
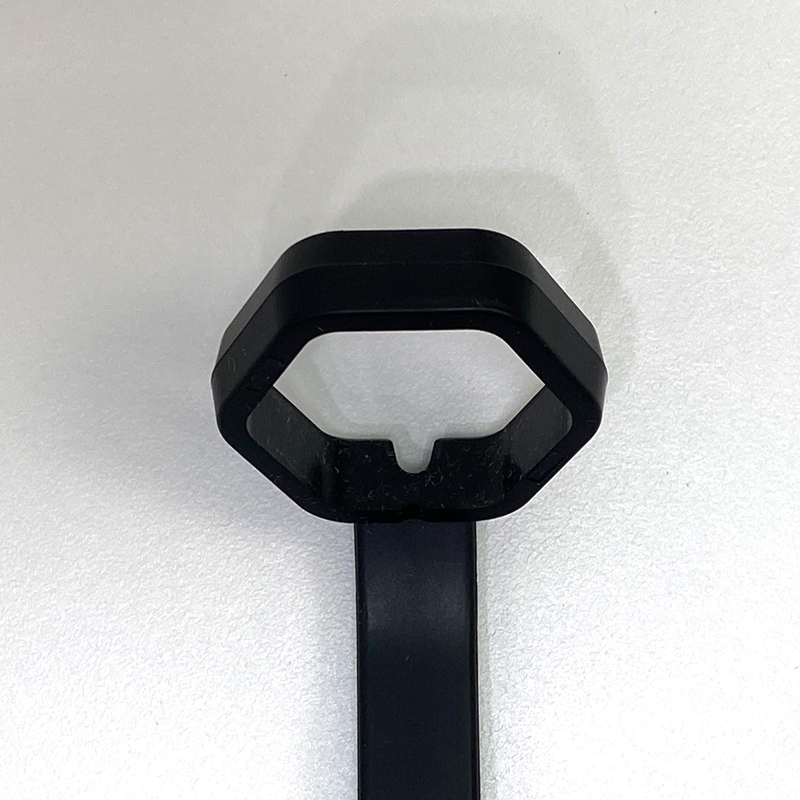
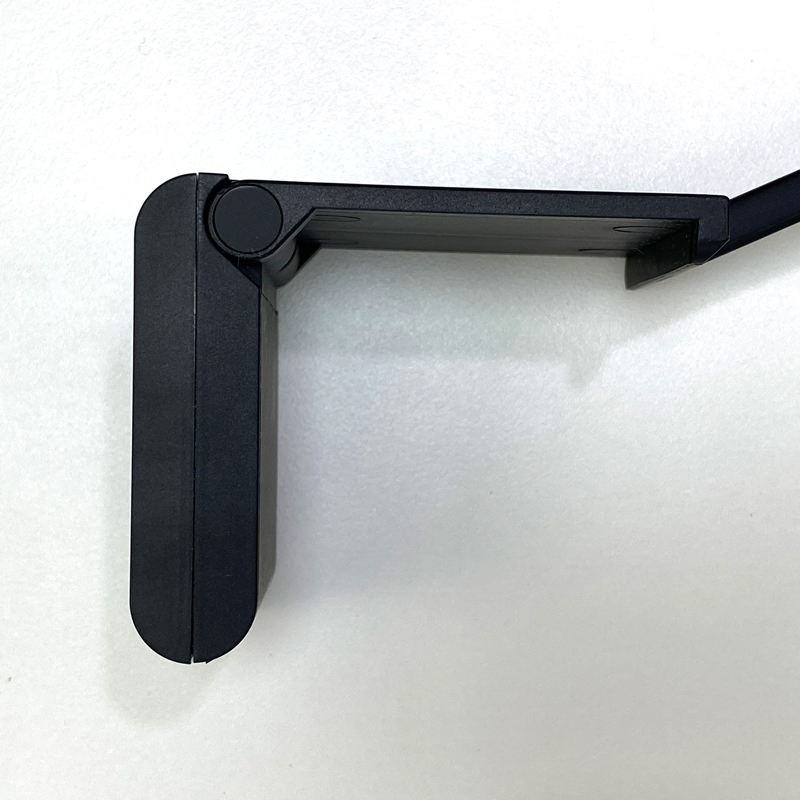
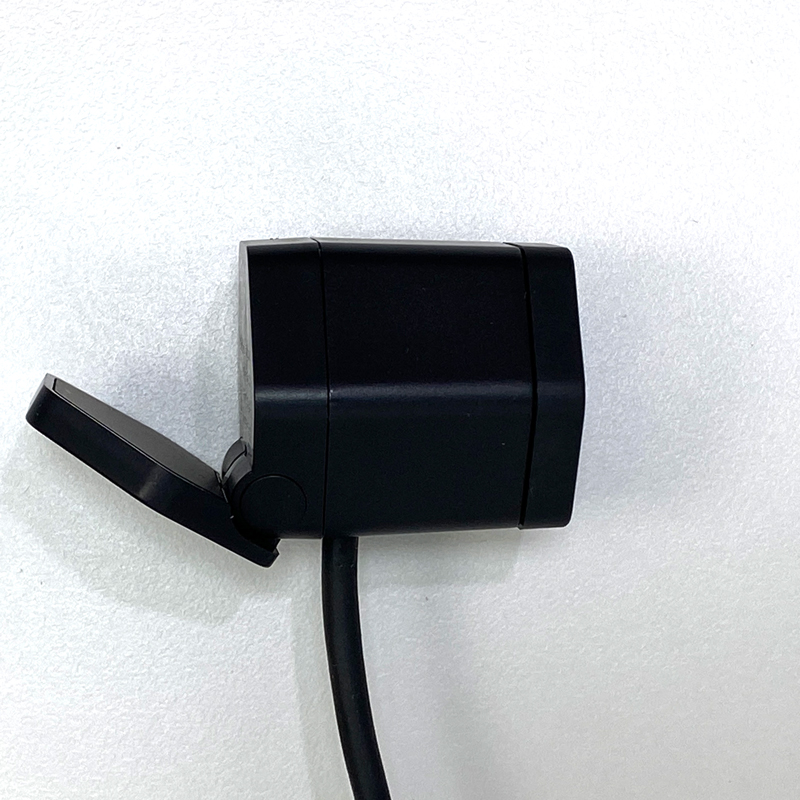
Mounting it from the top of the TV isn’t as cumbersome as you might think, and in my case, it was very straightforward to set up, although I’d still prefer to use it sat facing up, as it’s a lot more discrete in my opinion. The counterweight at the back ensures it won’t topple without some help, and does a good job of holding it in place. The camera simply sits in the holder, with the USB cable fed through a small gutter in the stand to keep it tucked away.
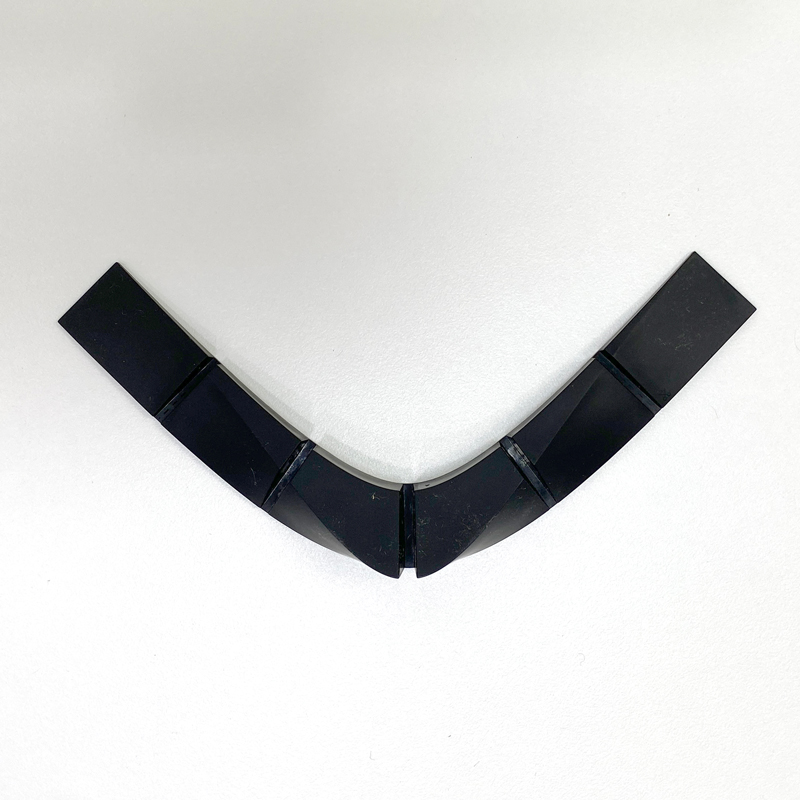
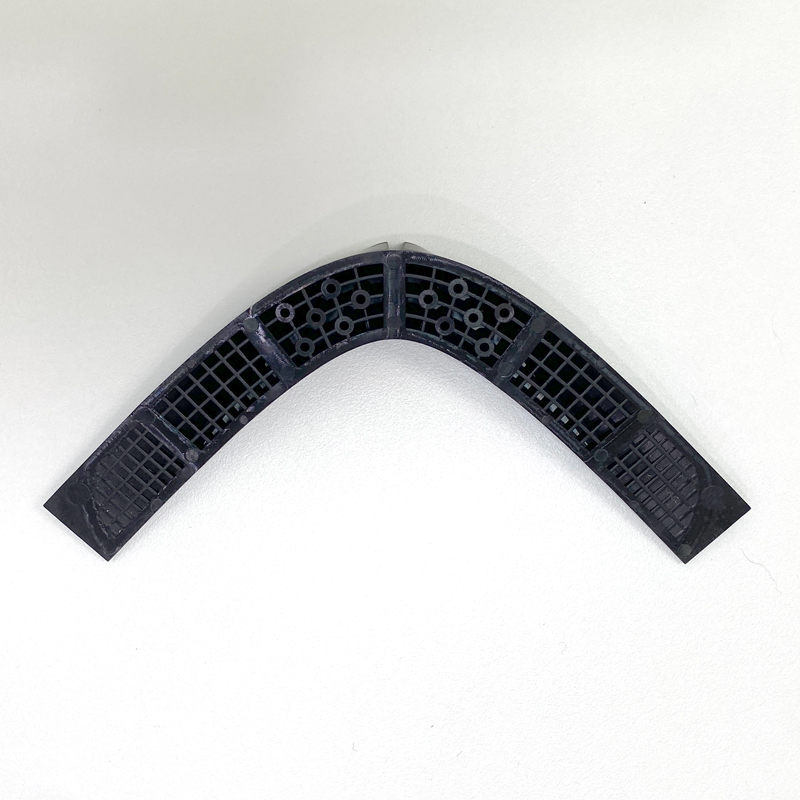
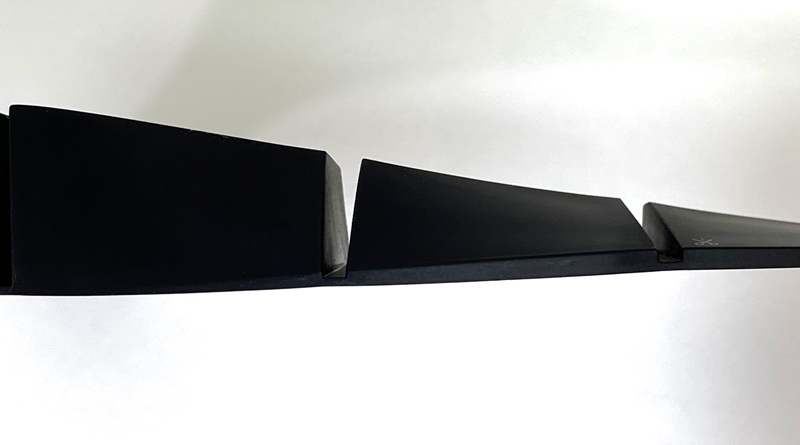
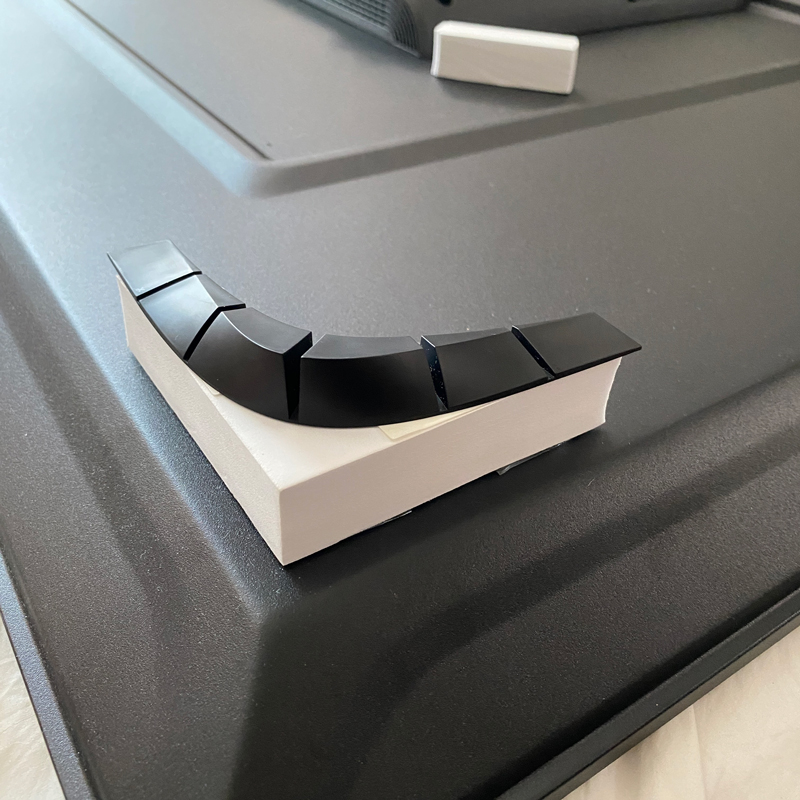
The final pieces are four corner brackets to aid in getting the strip around the corners of the back of the TV. If you’ve ever tried to get a strip fixed to the back of your TV, you’ll know that getting the strip to pass at a 90º angle isn’t as easy as some would think, and as a strip like this is even more inflexible than standard strips, these corner brackets should help. They work by forcing the strip to angle itself by 45º in the horizontal plane, so it essentially helps the strip navigate the corners in a more natural way. These brackets are made up of segments that make the brackets flexible at sticking to surfaces with a bit of a curve too.
PHYSICAL INSTALLATION
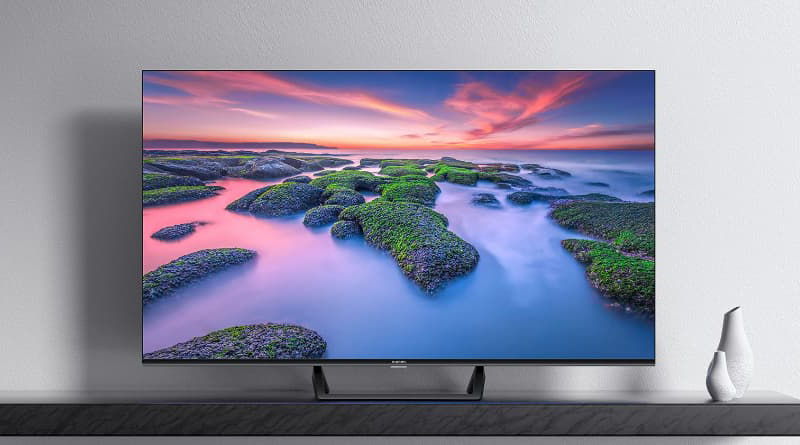
It might come as a bit of a surprise to many that until a few weeks ago, I was using a 1080p Samsung TV from 2013 – shocking, I know…! Because I wanted to give the strip the best chance of delivering on its promised functionality, as well as preempting the inevitable demise of my old TV, I opted for something well within my budget. Xiaomi in Taiwan is offering their 55″ 4K A2 TV for just NT$12,000 (approx. US$375), down from NT$20,000 (US$625), so at 40% off, it was too good to pass up and perfectly timed. Needless to say, coming from a 42″ screen to 55″ screen is a bigger change than you’d expect, but the size was right in the sweet spot for the Nanoleaf 65″ kit.
Before the strip or the TV arrived, I knew there would be issues with fitting the strip, which in this case was due the bottom section for the back of the TV. This section sticks out from the back, presenting you with what I’ll call a ‘chin’ for want of a better word. This means that if I were to fit the strip as is, with the corner brackets, the position of the strip on the bottom half of the TV would be closer to the wall than the top part of the strip. In hindsight that probably wouldn’t have been as noticeable as I’d imagined, but for now, in order to keep the strip evenly distributed, I opted to use some spare pieces of high-density packing foam I had lying around. This allowed me to balance the position of the top and bottom parts sections of the strip.
The issue I did encounter was one that I’ve found before when it comes to LED strips and the backs of TVs, in that the strip’s adhesive is usually just not strong enough, especially when it comes to the corner brackets, which the strips had a hard time keeping stuck to. It’ll do for now, but I may revisit this setup again at some point.
The only other thing to do once I had the strip in place was to power up the controller, connect the camera and strip, and I was ready to go. I initially set up the camera looking up at the TV from below but changed that to using the stand afterwards.
HARDWARE/SOFTWARE INSTALLATION
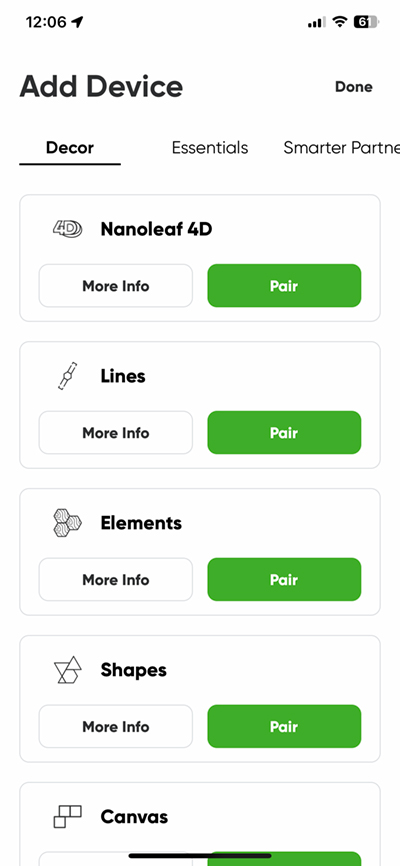
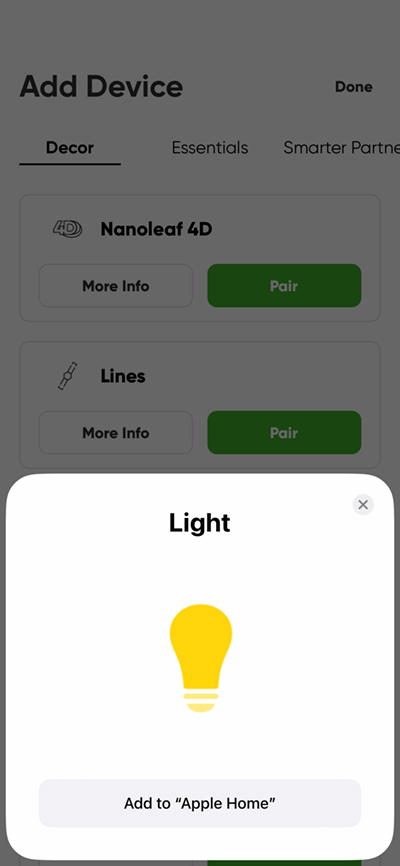
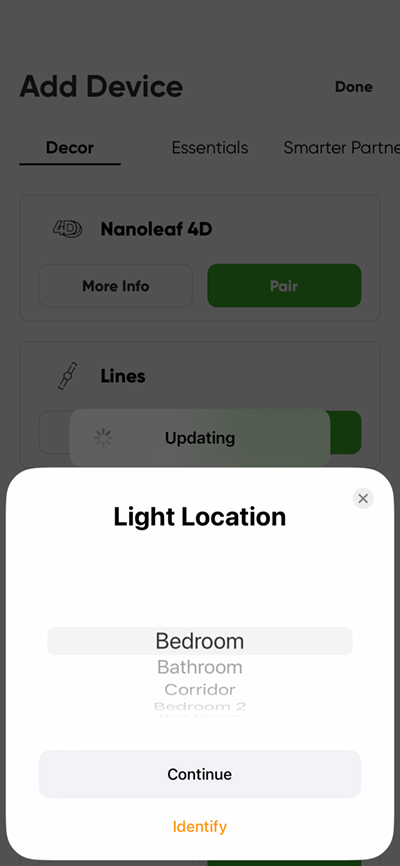
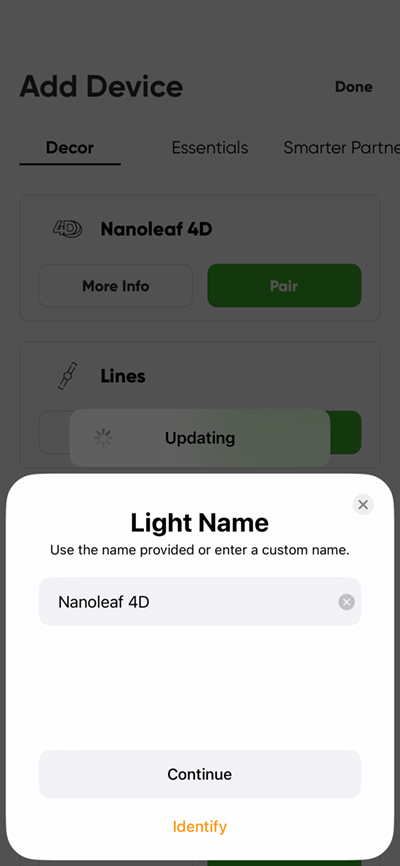
I started off the process of adding the device via the Nanoleaf app, as I was sure there’d be a firmware update waiting for me. As I’m using HomeKit, I used the QR code that appears on the manual and the controller. Adding was easy enough, with a connection to my WiFi network using the 2.4GHz band. I’m not entirely sure why Thread isn’t used in this instance, but it could be possible the controller is destined to act as a Thread Border Router, like the company’s Shapes and Lines products. I then placed it in a room within the Home app, and named it, as is standard for a HomeKit device.
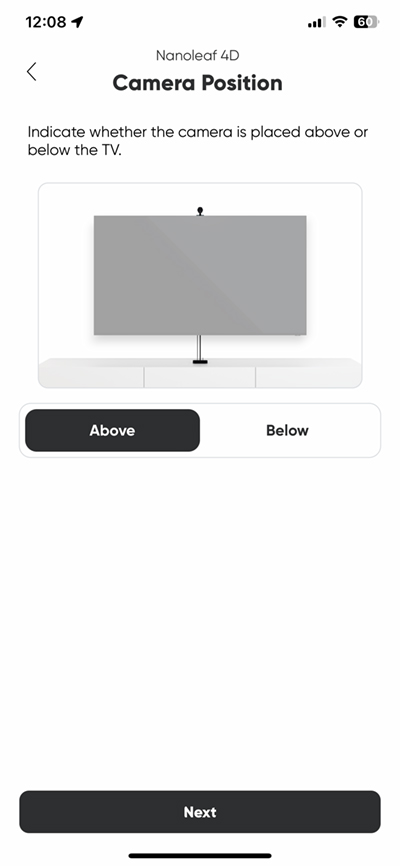
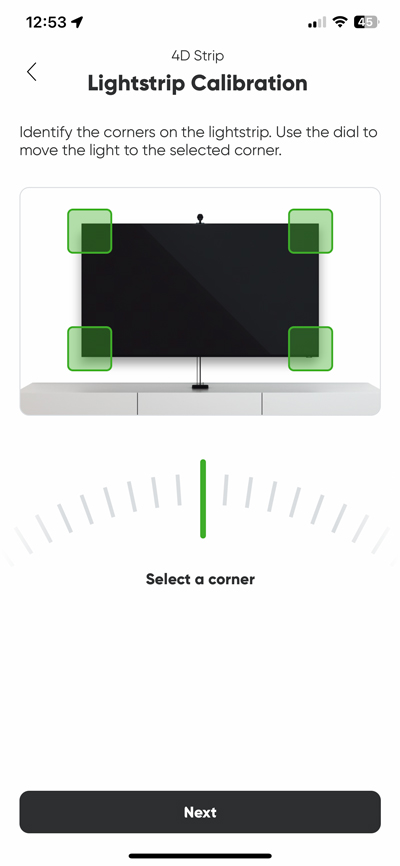
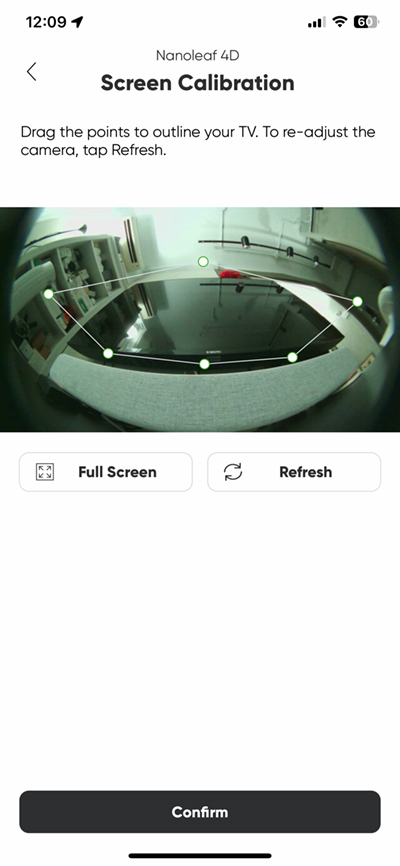
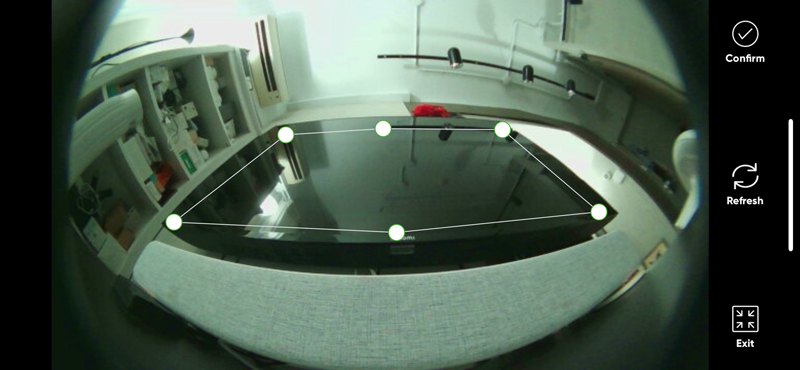
Once installed, you’re taken to the setup, which involves a few simple steps. First off, you need to select which position the camera is set to – from the bottom looking up (below), or from the stand looking down (above). The next step involves calibrating the strip by identifying the corners, so the strip knows its overall position around the TV. This is where things initially “went south” with the setup, as this second step didn’t appear during the process, even though I’d seen it in various other videos. I soldiered on anyway, which took me to the camera feed, which isn’t live but merely a snapshot. This section allows you to move six dots around the screen to outline your TV’s own screen. You can also go full-screen if required. The missing calibration option did eventually show up after I’d gone through a reset.
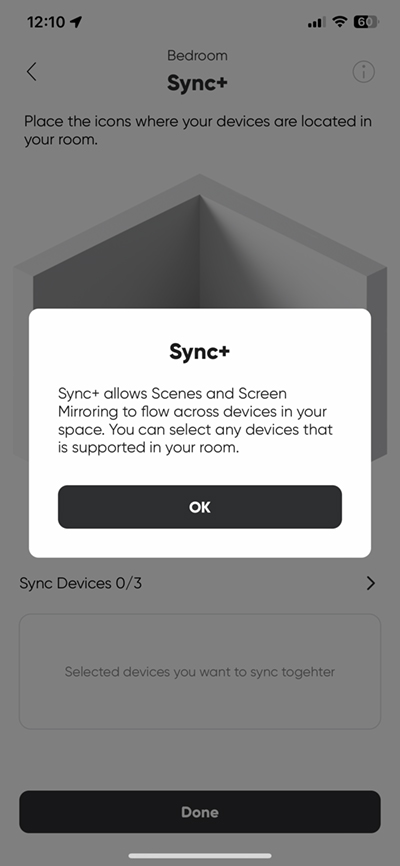
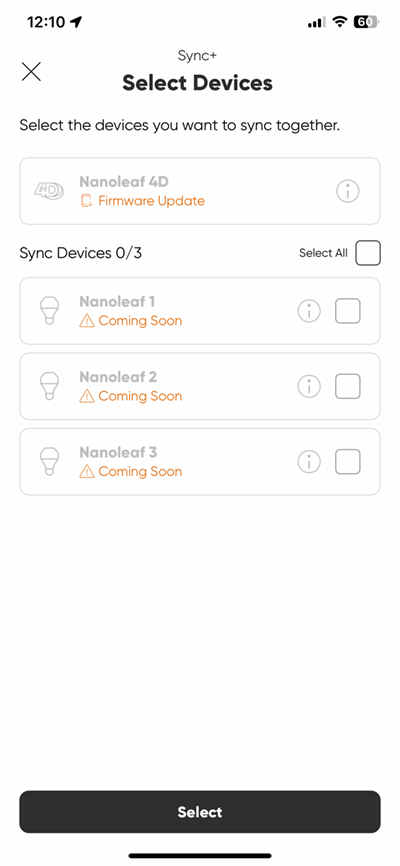
Despite the process not quite being complete, thanks to the missing calibration page, I was then presented with the option to include other Nanoleaf devices to work alongside the 4D strip, although as you can see above, none of the bulbs in the same room are currently compatible. There should be an update to include those too, but I’m doubtful it’ll be necessary. We shall see.
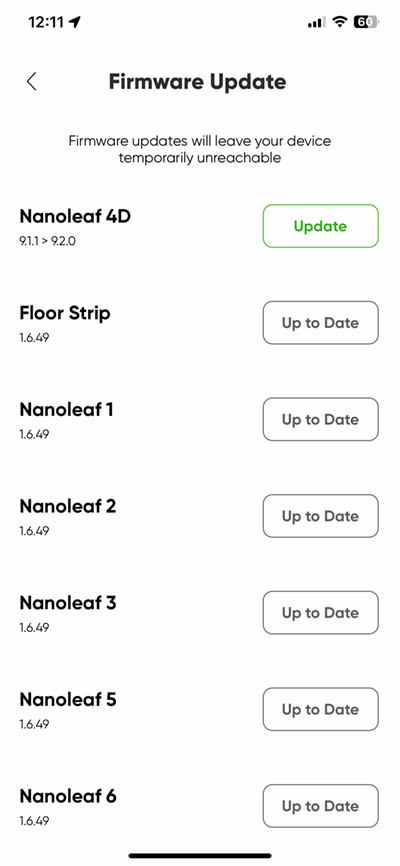
Further issues ensued when I attempted to perform the required update to the 4D. After pressing the ‘update’ button in the app, and waiting for what seemed like an eternity, I gave up and force-quit the app. Upon relaunching, it still showed there was an update, but when looking at the updates page, it showed no ‘update’ button, with the firmware number still listing the older version. A couple more force-quits and it finally showed that it had indeed updated the firmware. I don’t use the Nanoleaf app for anything more than updates usually, and if I didn’t need it for that, I’d be more than happy, as their app is pretty buggy and unstable. I’ve had similar issues with updating bulbs, strips, Shapes etc., and it never seems to get fixed. Unfortunately, the app is required to some extent for the 4D to be controlled unless you leave it on one setting at all times. Luckily, the strip will stay on whatever last setting was deployed when you turn it on via HomeKit.
4D OPTIONS IN THE NANOLEAF APP
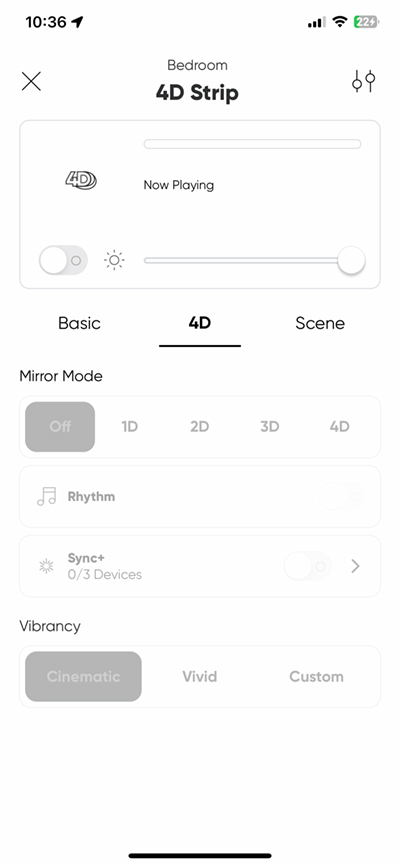
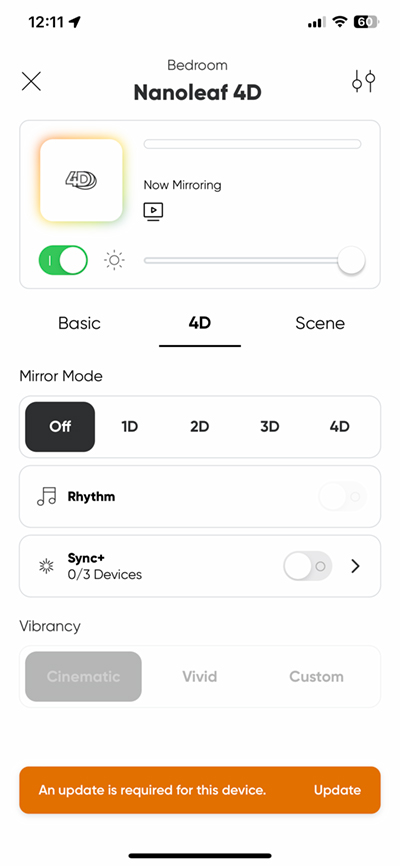
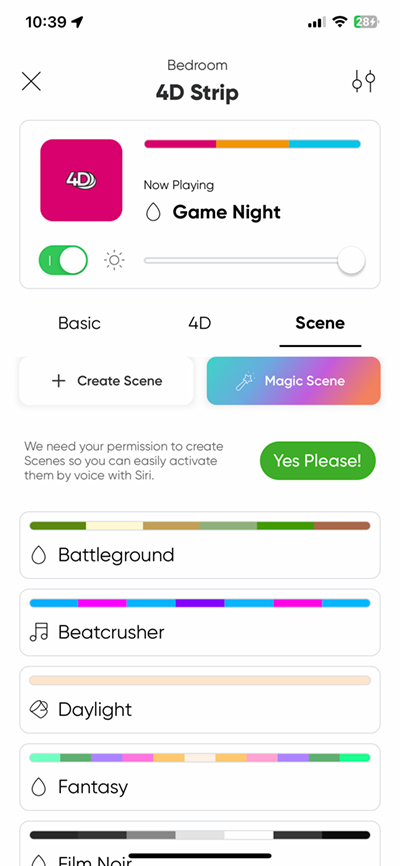
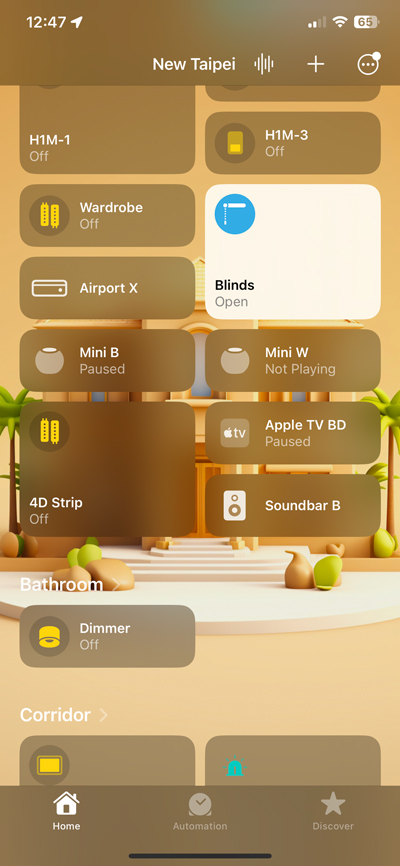
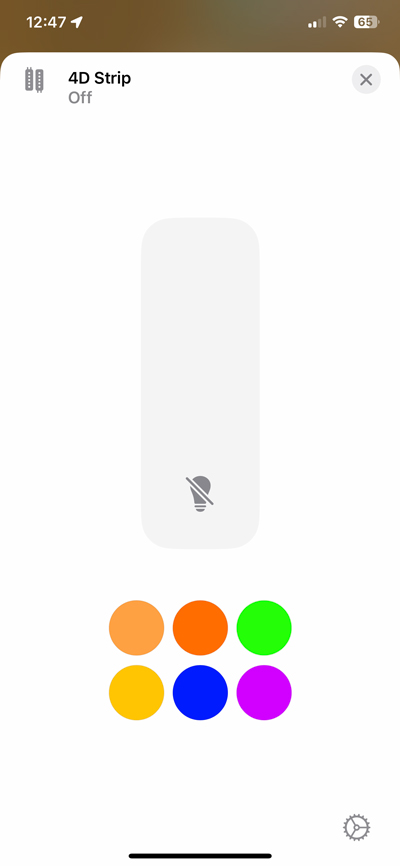
The 4D will show in the Nanoleaf app as a single selectable tile, which once pressed anywhere other than the 4D icon will open up to the main opinions page. On this main page, you can turn the strip on or off as well as adjust the overall brightness levels of the strip. Below that you can choose from three different options;- ‘Basic’, ‘4D’, and ‘Scene’.
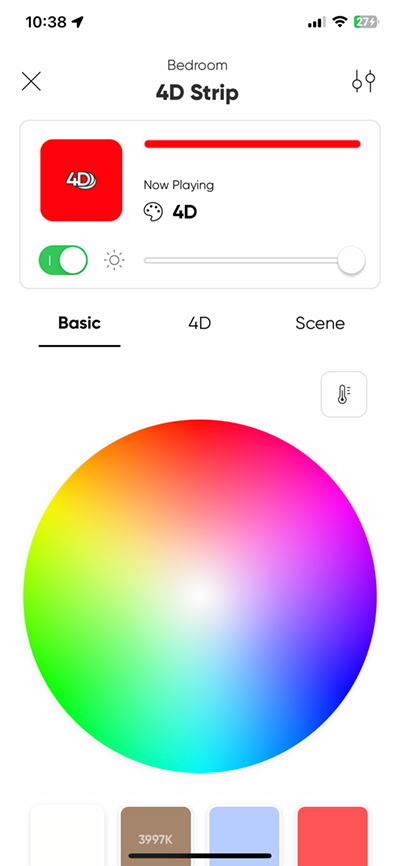
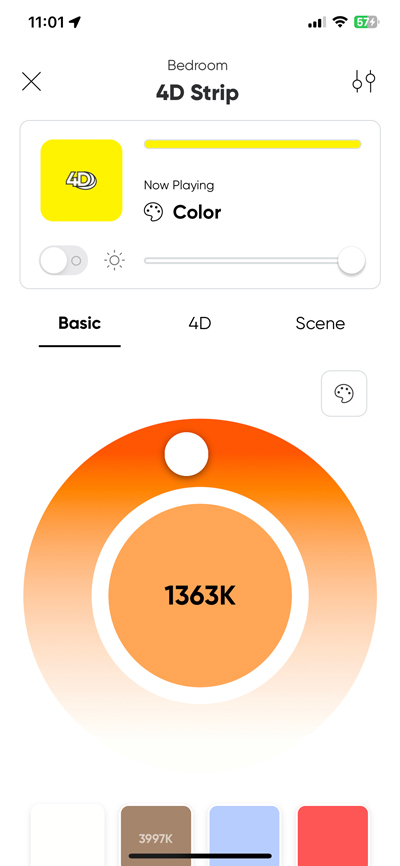
- Basic – This option allows you to use a single solid colour along the length of the strip, which is also the same as you’ll find in the Apple Home app.
- Scene – This third option allows you to select from a series of preset multicolour animated effects.
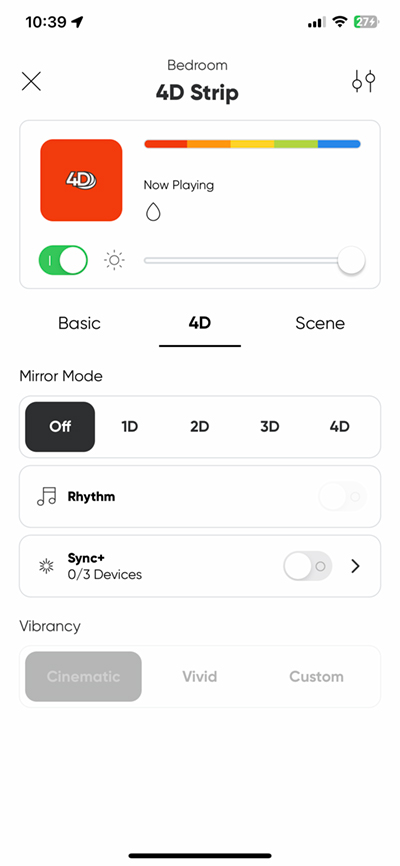
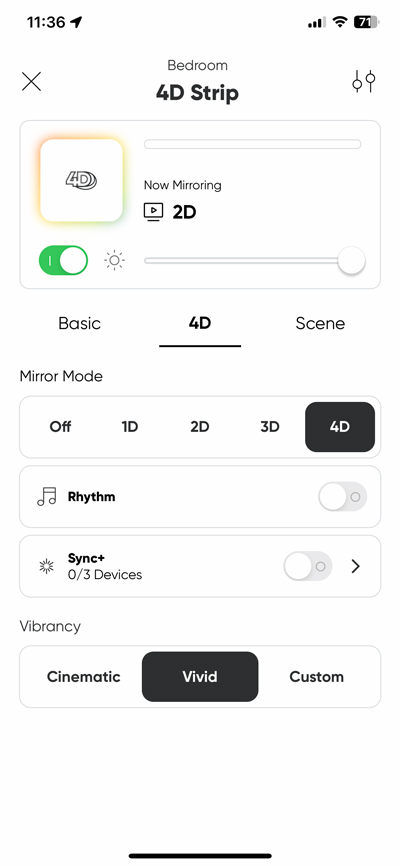
- 4D – This is the main option for screen mirroring functionality, which is broken up into further sub-options
- 1D – This option simply provides simple ambient back lighting in white, which will adjust its brightness in relation to what’s on the screen
- 2D – This second option is like 1D, except it uses colour instead of white, and will adjust its colour and brightness based on the dominant colour on the screen
- 3D – This option isn’t as clear as to how it differs from 4D, but in my experience, it seems to replicate the colours around the edges of the screen, like 4D does, but in a more ambient way, so in essence less accurate.
- 4D – This is the one you’d be using if you want to extend the colours beyond the edge of the TV screen. With this (and the 3D) option, you get a further three options to choose from;
- Cinematic – This gives you what 4D is designed to do, but with less vibrancy, so whilst it follows the colours, it’s slightly more muted. This is probably of use if you’re in a darkened room, but don’t want the effect to be overbearing, which can be the case with some action-based Sci-Fi movies, for example.
- Vivid – This is the same as Cinematic but with brighter and more saturated colours. This might be of more use if you want the 4D effect, but the room isn’t as dark, maybe due to you watching a film in the daytime.
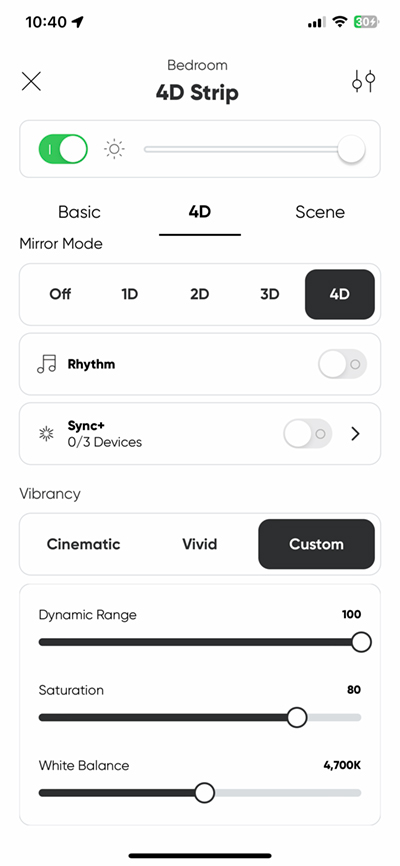
- Custom – This option sort of speaks for itself, allowing you to adjust the dynamic colour range, saturation, and overall white balance of the strip.
You can also activate the ‘Rhythm’ option alongside all the 4D options, which will then adjust the brightness and colour based on both the sound and image from your TV, as well as any external sounds. I’m not sure about having Rhythm activated alongside the 4D effects, as it could end up with a bit of sensory overload, but it’s your call.
NANOLEAF 4D RESULTS
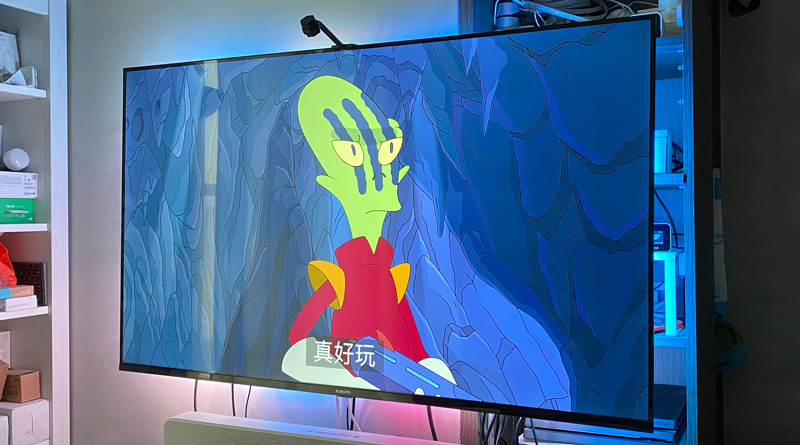
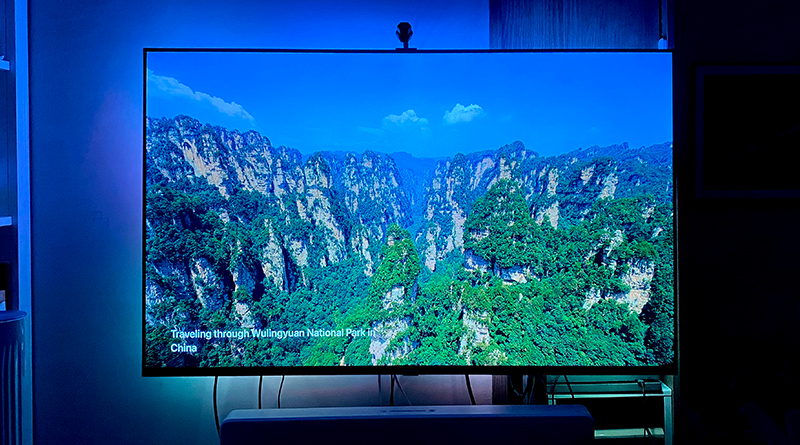
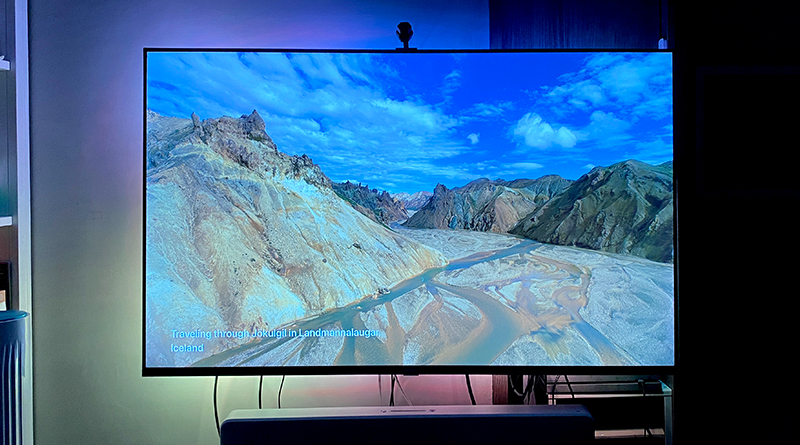
I should preface this section by explaining that where we have our TV placed (in the bedroom), there’s not enough wall behind the TV to perfectly demonstrate the entire strip. As you might be able to make out from the image above, there are shelves built into the wall. That said, the colours are still pretty visible even if they don’t hit a light, blank background in this area. This is less evident in the following photos and video unfortunately, but where the colours do hit the wall, it’s fairly clear that the screen mirroring works – to a greater or lesser degree – depending on various contributing factors.
First of all, here’s a video demonstrating the on-screen colour-tracking. It works better than I expected, although it can vary, especially with darker images;
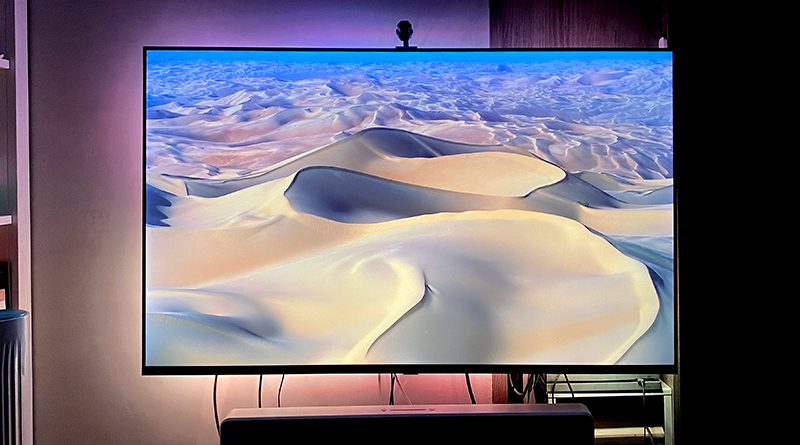
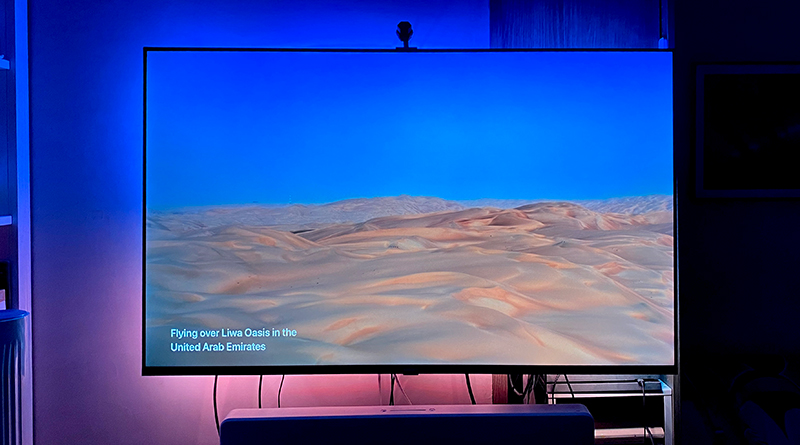
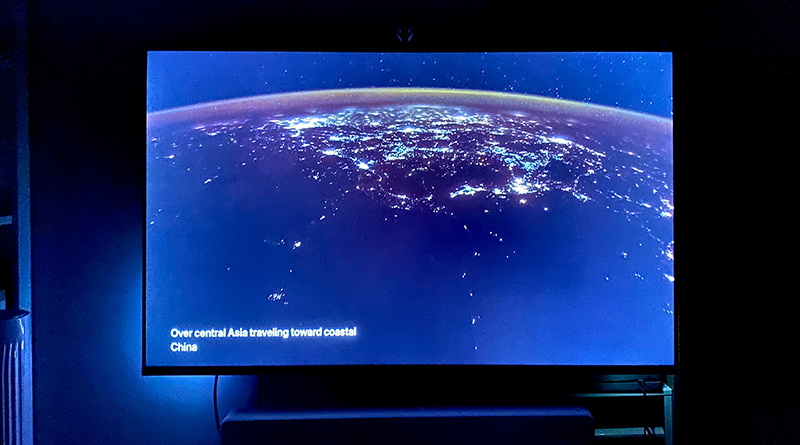
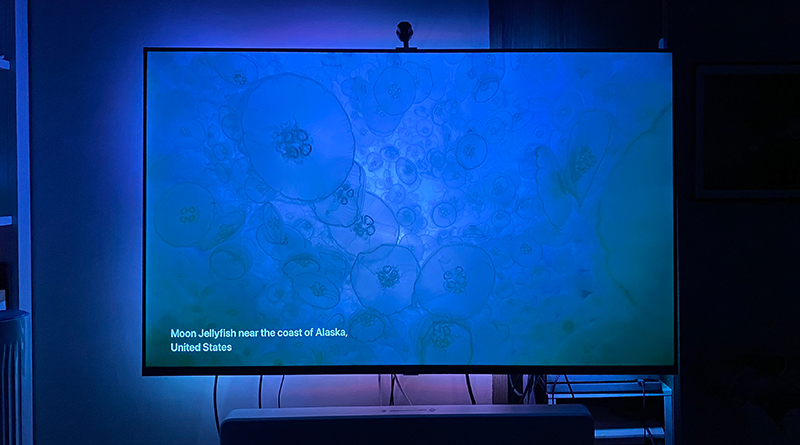
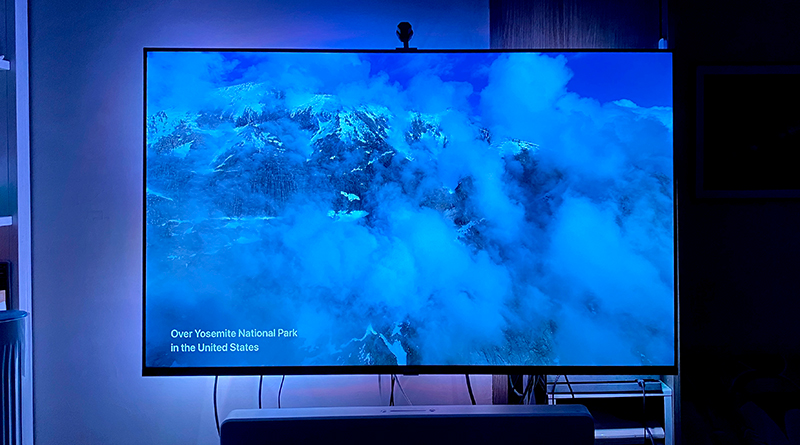
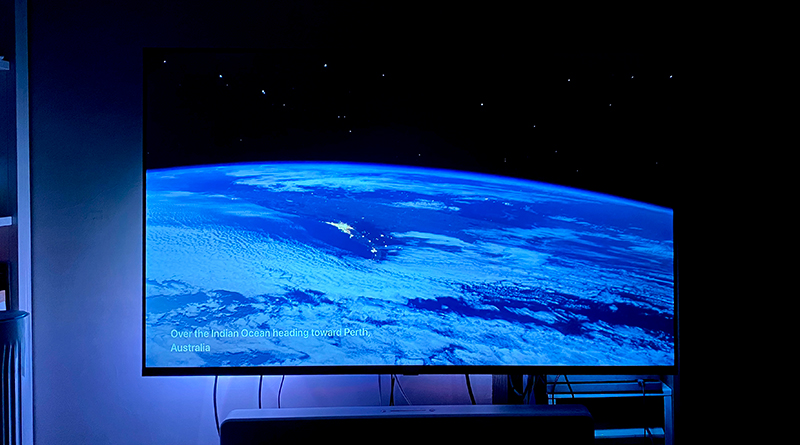
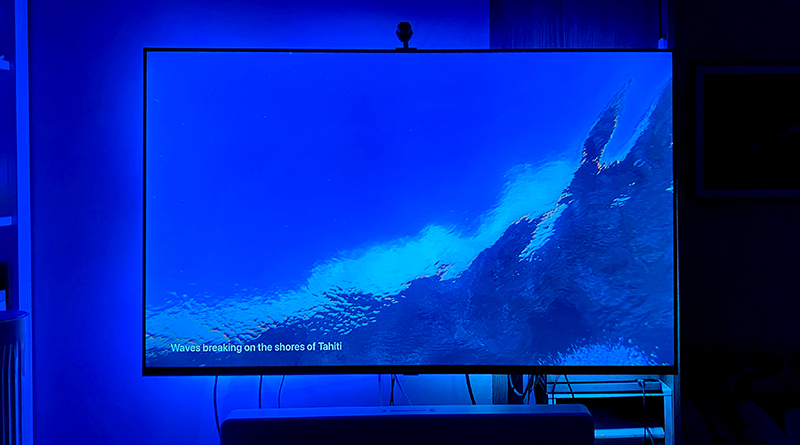
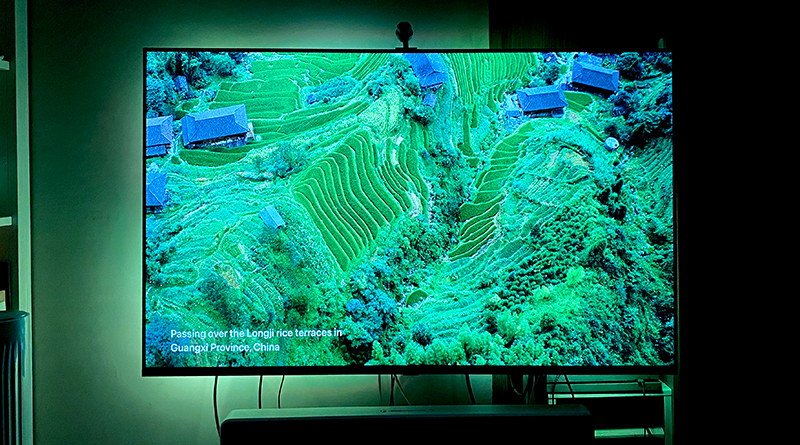
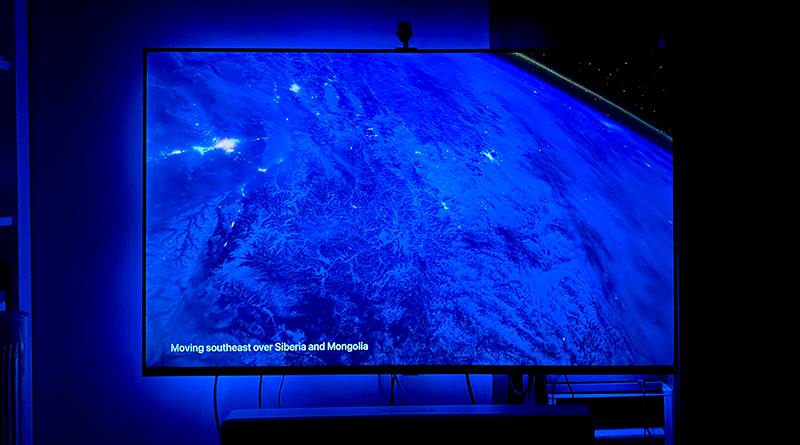
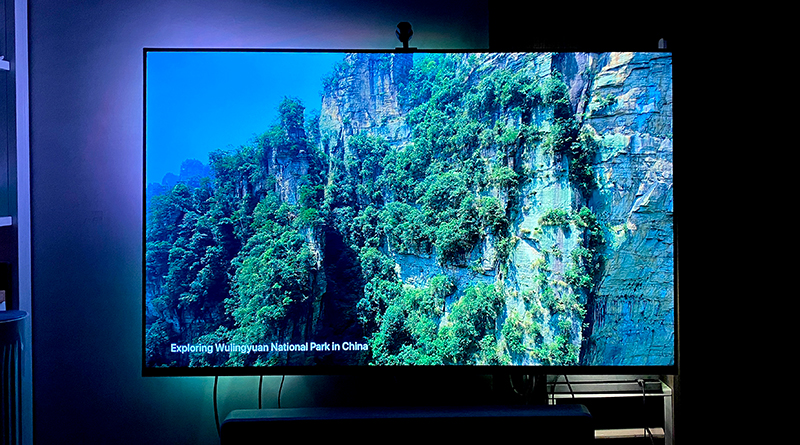
As previously explained, the camera didn’t quite pick out the colour that emanated on the left side of the TV, although you can see it on the bottom and top left corners. What these images do demonstrate are the relatively accurate colours, bearing in mind the colours are representative of the screen colour along the edges, not the inner parts of the image. They also show that when there’s little to no colour – like can be seen in the images of Earth from space – that light doesn’t show at all, for obvious reasons.
What I did notice on occasion, when either there were dark areas, or when the screen went momentarily dark via a scene cut in a film or TV show, some or all of the LEDs wouldn’t turn off (to match the blackness of the screen), but instead show a random colour in parts (often times red) or freeze on the last selection of colours until the screen was lit up again. It didn’t happen all the time, but it’s clearly a bug of some sort that I hope will be addressed down the line.
Speaking of bugs, I also noticed that quite often in the Nanoleaf app, there was a delay in turning the strip on, before settling into the correct mode in the app. So once the strip was on, the setting for the strip was supposed to be on a particular mode, but after maybe 5-10 seconds, the modes would rapidly change, as though it was catching up with multiple presses you’d initiated, even when you hadn’t touched anything.
There is one issue that I’m sure affects all other light strips that have the screen mirroring functionality, and that is to do with aspect ratios. Many TV shows and some older movies will be filmed in the 16:9 aspect ratio, thereby filling the screen, and thus allowing the screen mirroring to work as intended. However, many films are filmed with an aspect ratio that essentially has black bars at the top and bottom of the screen, which means the LEDs at the top and bottom of won’t be showing any colours, because they’re seeing black. Heck, even some older movies with a 4:3 ratio will produce black bars on the side of the screen, so I’m not sure what can be done in cases where the screen isn’t completely filled with imagery.
IN APPLE HOME
As you can guess, there’s no specific way to control the multicolour or screen mirroring effects in Apple Home, which is the case with all strips. You get the one tile that can turn the strip on or off, along with a slider to control the brightness and a single solid colour of your choice. The good news here is that if you have the 4D set to Screen Mirroring already in the Nanoleaf app, once turned on via HomeKit, that mode should be active by default. When it comes to multicolour animated preset ‘scenes’ in the Nanoleaf app, these can be exported to HomeKit, although I’ve never bothered with it so far, as you could end up running out of space for your own custom scenes in Apple Home.
You’ll also note that there’s no option for Adaptive Lighting, which is something you get with the HomeKit over Thread versions of the company’s Essentials lineup – the A19 bulbs and the light strip. I personally don’t think it’s necessary to have adaptive lighting for a strip that’s essentially going to replicate what’s on a display, as the chances you’re going to be in a ‘productive’ or ‘winding down’ state whilst being entertained by what’s on the TV are probably close to zero. If the option was available, then it would negate the whole purpose of screen mirroring to begin with – n’est-ce pas?
SUMMING UP
For the price, I think with HomeKit compatibility, the Nanoleaf 4D kit is actually at a decent price point. This is made more favourable when you consider that if you don’t want the strip, you can just purchase the camera and controller to use with Nanoleaf Shapes or Lines that you may already have.
I’ve found, after a fair bit of tweaking and taking into account some of the product’s limitations, that it works at least as well as I’d expected. This is especially true when you consider that a seemingly fairly low-resolution/budget camera and controller are doing quite well at translating what’s on screen. I personally don’t like the camera mount idea, in much the same way as I don’t really dig retrofit (Heath Robinson) type options these days (switchbot bot is one such device, sorry), but I imagine if the bottom placement option doesn’t work as well, then I’ll probably get used to the camera mount eventually.
The one area of real frustration is the app itself. I, and many others, find it frustrating to use for only a short amount of time, so I think an overhaul is long overdue, but get the bugs fixed too please Nanoleaf!
Nanoleaf 4D
Pros
- Decent price compared to the competition
- Works well once set up
- Extra options beyond screen mirroring
- Overall decent build quality
- Useful corner brackets provided
Cons
- Buggy app makes usage a chore
- Strip adhesive not very strong
- Strip/App slow to respond from off state
What dynamic contrast, saturation, etc settings have you settled on for the Custom 4D config?
Hi, at present I’ve found the following settings work best when the image is full screen (no top/bottom black borders) – 4D Mirror mode, Cinematic, Brightness 60%. If the image has the black borders, 3D seems better overall.
The letterbox issue is actually quite easy. What I’ve found is to show a bright letterbox movie so you can see the edges, and actually select that as the screen area you are watching. It doesn’t seem to adversely affect full screen movies either.
There also a great video (You can find the Link in my article on my blog) that Nanoleaf put out about tips and tricks. It really helps. It particularly helped me with placing the camera.
Other than that, great article as usual. I need to write more in my blog, but haven’t tried enough yet.
Thank for the suggestion, I did eventually adjust it so that you could see the edges in a similar way to how you mentioned, but I’ve since chosen to select either the 3D or 2D option in Mirror mode when there’s a film with the black borders. All I need to do is work out how to create a scene for the different modes so I can switch between them quickly without going into the Nanoleaf app. I’ll put a link to your article in my review too.