
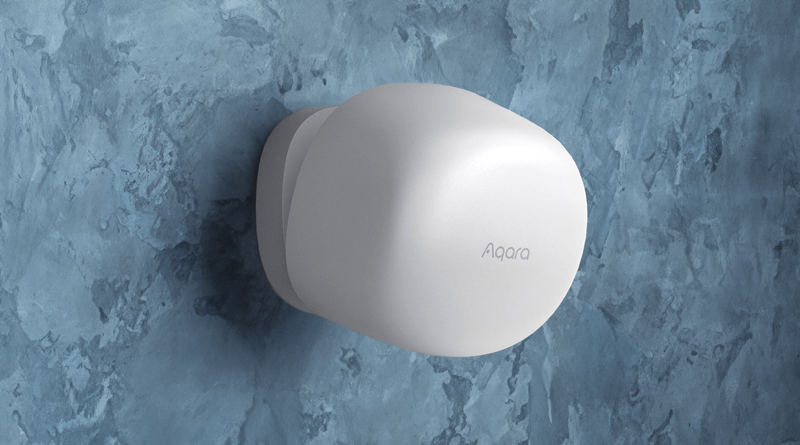
Aqara Presence Sensor FP1E (review)
Motion sensors have been a mainstay of the smart home for a long time, and for good reason; they trigger other devices – usually smart lighting – when they detect motion, as well as inform the user if motion has been detected. This makes it probably one of the most versatile category types in many ways, although they aren’t without their drawbacks. If you’ve ever used a PIR (Passive InfraRed) motion sensor, and have wanted it to not only turn on some lights upon motion, but also wanted it to turn lights off when no motion is detected, you’ll know what I mean. Because PIR motion sensors rely on infrared light radiating from objects in its field of view, when you stop moving, if for example you’re reading a book, watching a movie, or simply taking a nap, the sensor doesn’t think you’re there. This inevitably activates the ‘lights off’ scene you created. If you want to avoid such a scenario, this is where Presence Sensors (sometimes also referred to as Occupancy Sensors) using mmWave technology make more sense. Wikipedia explains it best;
(mmWave) sensing is a non-contact system of using mmWave radar sensors to measure movement, acceleration, and angles as small as a fraction of a millimeter. This system requires a mmWave radar sensor to transmit and receive pulses of millimetre electromagnetic wave energy, detecting targets and motion from the reflections it receives back.
So as you can see, simply shallow breathing will be enough to let a Presence Sensor know you’re still there, and not leave you in the dark – literally. today’s product review is for the Aqara FP1E, which can both be considered the successor to the FP1, which was only released in China, and a scaled back version of the Aqara FP2 (review HERE, video HERE).
If you’re keen to know how it performs, and how it differs from the other two Presence Sensors just mentioned, read on…
PACKAGING | CONTENTS
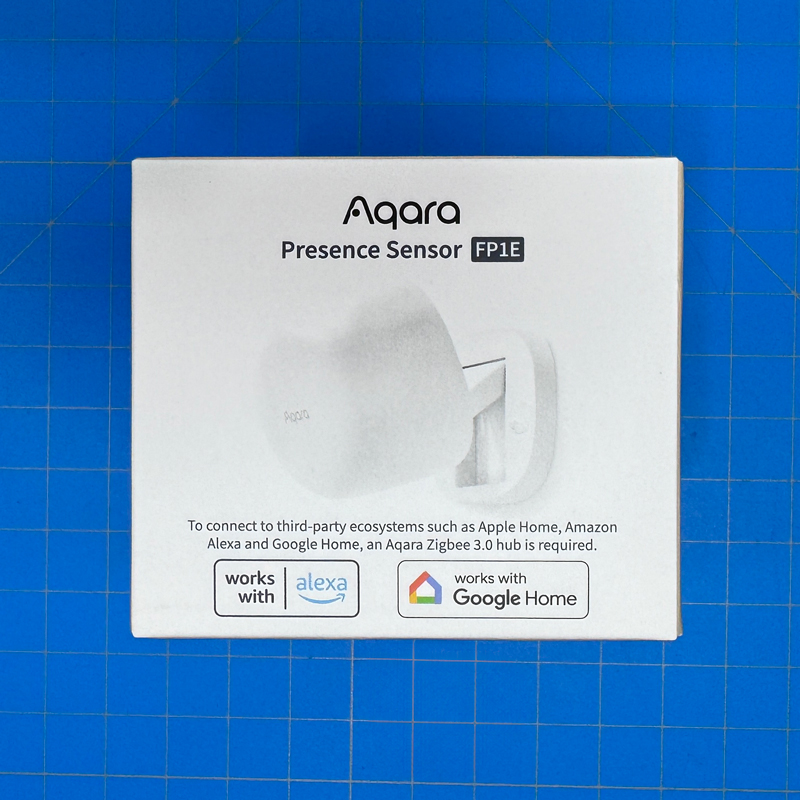
Aqara’s packaging is fairly standardised now, with the product front and centre, a sort of ‘disclaimer’ below, and logos for compatible ecosystems. this is where some Apple Home users might be confused, as the ‘Works With Apple Home’ logo is not present alongside the Alexa and Google logos. That’s due to the FP1E using Zigbee 3.0, which in turn means it would require an Aqara hub, which is point of entry to Apple Home. I have to assume that Alexa or Google are a bit more easy going about their logos being on the box than Apple, as the disclaimer text does state “To connect to third-party ecosystems such as Apple Home, Amazon Alexa and Google Home, an Aqara Zigbee 3.0 hub is required”. So don’t panic, it definitely works with Apple Home – as long as you have one of their Zigbee 3.0 hubs.
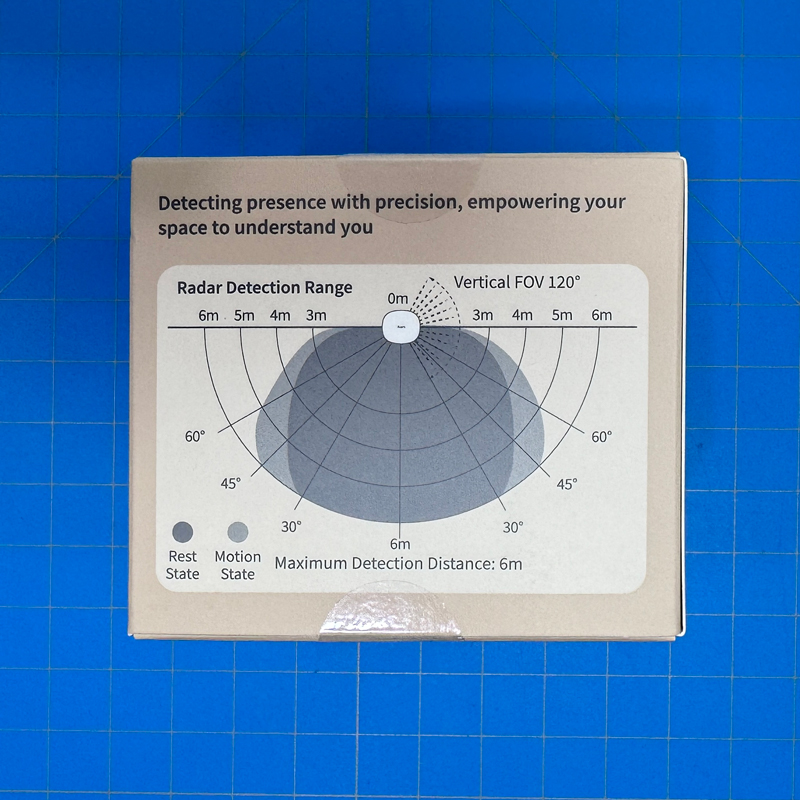
The rear of the box is a little more technical, showing the sensor’s radar detection range, whilst the sides offer up features and specs;
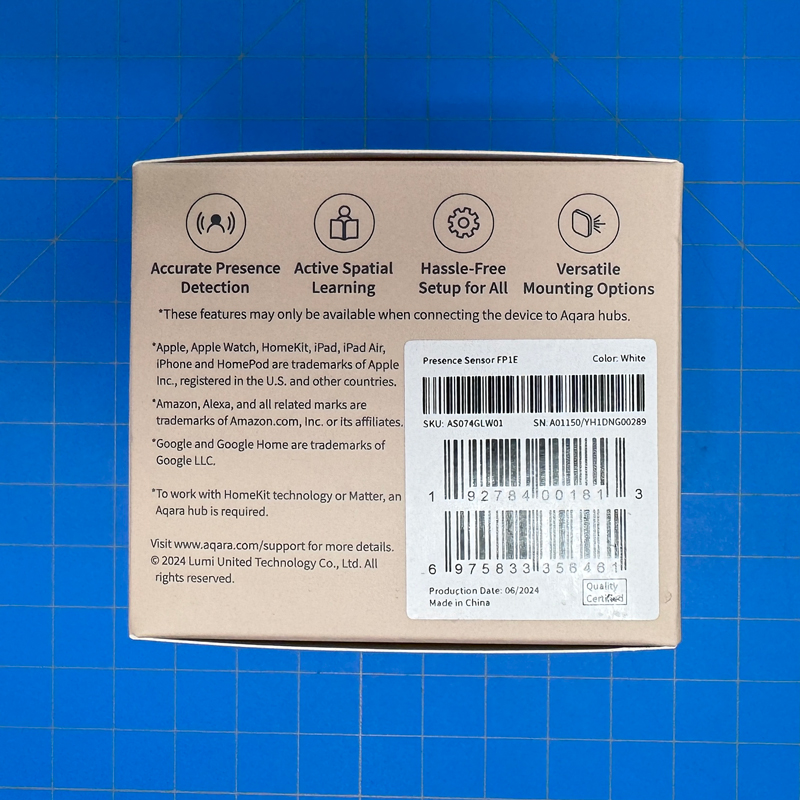
Features
- Accurate presence detection
- Active spatial learning
- Hassle-free setup for all
- Versatile mounting options
Specs
- Model: PS-S03E
- Ports: USB-A
- Input power: 5V 1A
- Wireless protocol: Zigbee (3.0)
- Dimensions: 57 x 50 x 37mm
- Operating temperature: -10~40ºC | 14~104ºF
- Operating humidity: 0~95% RH, no condensation
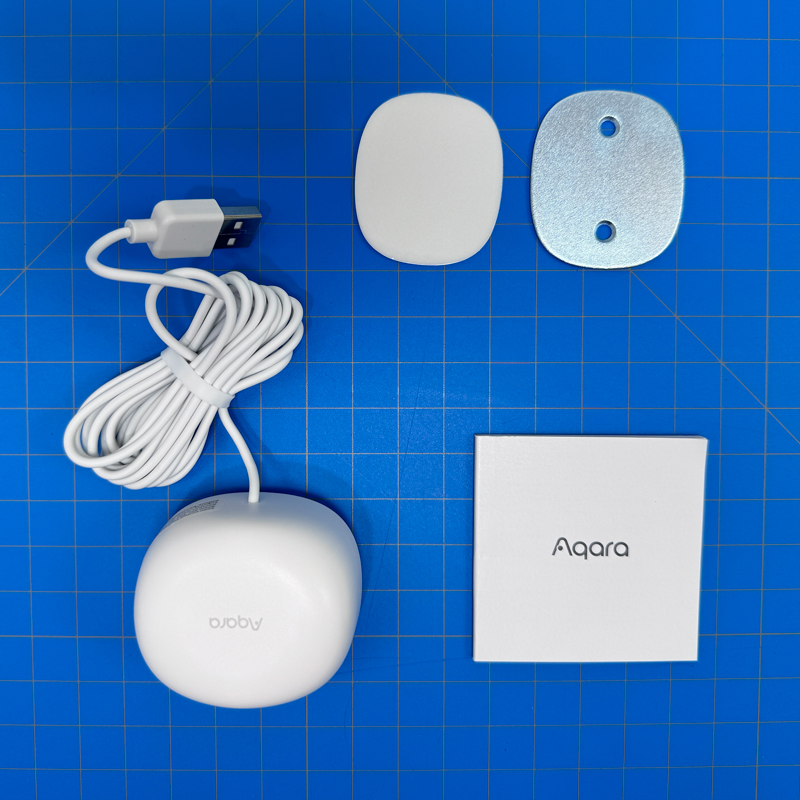
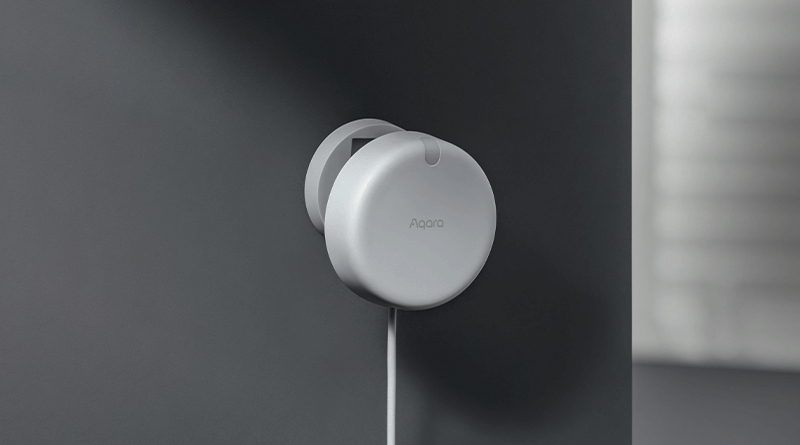
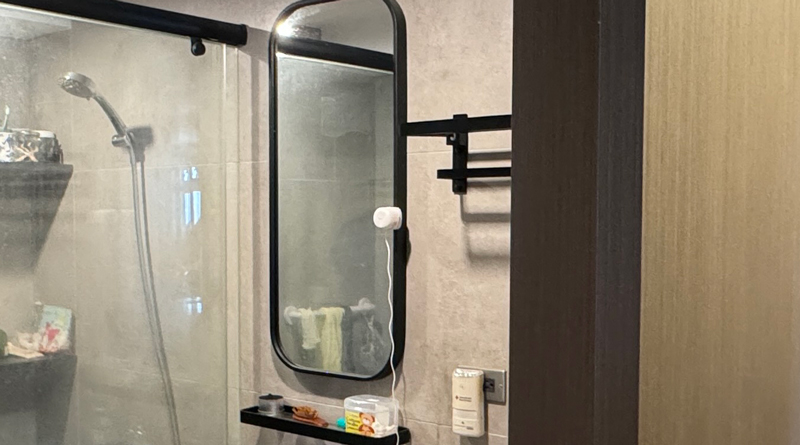
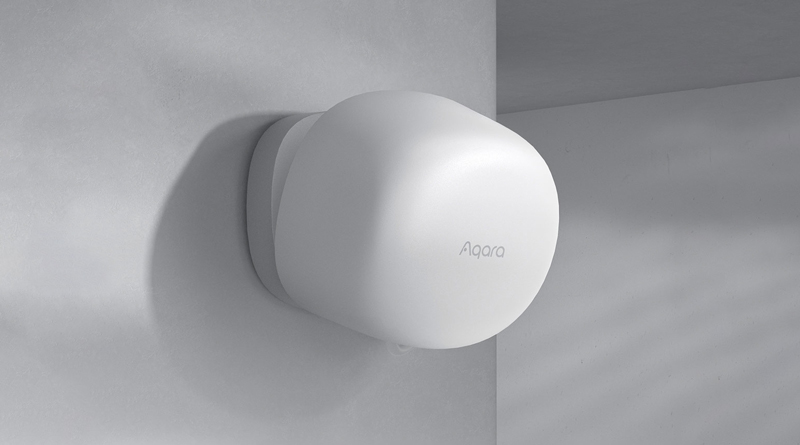
Inside the box you get the FP1E of course, a metal plate with two holes for fixing it to a wall using screws, a matching double sided adhesive patch, and the manual in multiple languages. Both the metal mounting plate and the base of the FP1E’s stand are magnetic, so once you’ve mounted the plate the FP1E will cling to it very well. If you’ve ever used the G2H or G2H Pro, you’ll be able to attest to the magnet’s strength at holding fast. THere’s no power brick, as you may have come to expect these days.
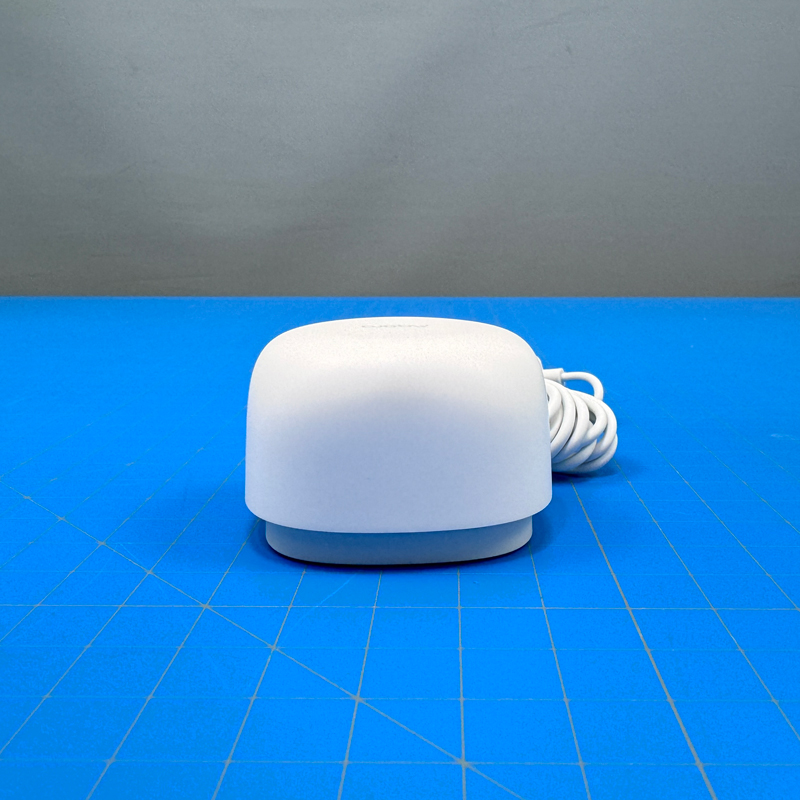
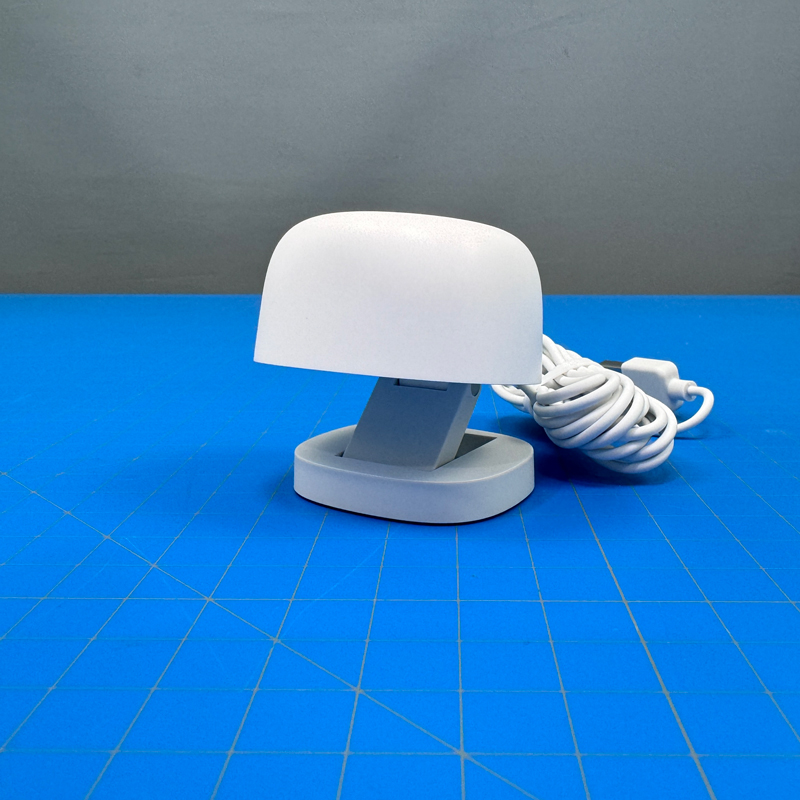

The FP1E uses the now tried and tested stand you find in products going way back to the days when early Xiaomi cameras came out – you know, the ones that were released years before Wyze used the same camera design and repackaged it…
This stand is still in use with the Aqara camera Hub G2H Pro, and the cameras that preceded it – the G2, and the G2H – so it’s clearly a good design, and offers versatility for the placement of the FP1E at many different angles. Along with the option to angle it in the vertical plane, it can also be rotated, making it really exceptionally handy. The underside has a simple but easy to press reset button.
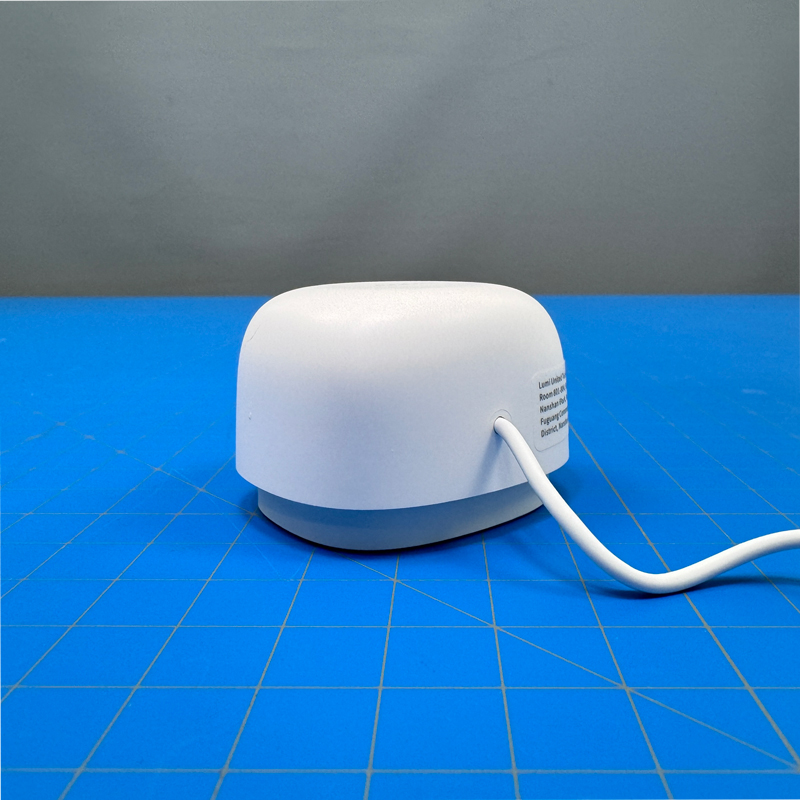
Unlike its big brother, the FP2, the power cable is fixed to the device, and as such can’t be replaced for another cable. The cable it comes with is probably more than long enough for most use cases, coming in at a bit under 2 metres.
If you’re an owner of the FP1 (I have three here myself), then you’ll immediately know the design has not changed at all with the introduction of the FP1E. It differs from the FP2 visually, but also in terms of functionally too though, which I’ll get to shortly. It has improvements over the original FP1 too, although perhaps less perceptible.
IN AQARA HOME
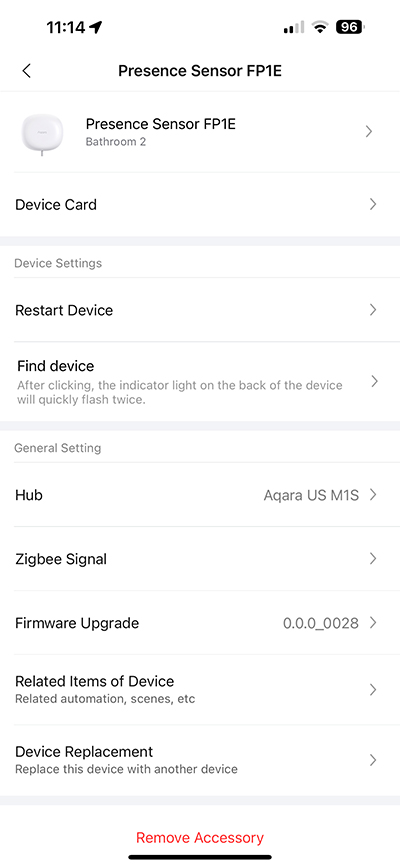
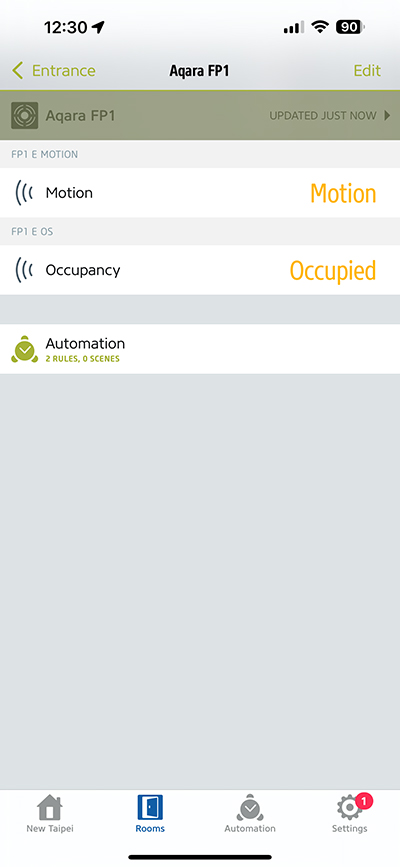
Compared to both the FP1 and the FP2, the FP1E is a lot more streamlined, both in terms of the options within the app, and in terms of functionality. Whilst the FP2 offered an array of functionality, including creating a detailed map of your room or living area, along with icons for furniture etc, the FP1E has none of that, and in some ways is better for it. Also unlike the FP2, which offered up to 30 separate zones – all exposed to Apple Home, I might add – the FP1E simply covers one area, which can be adjusted.
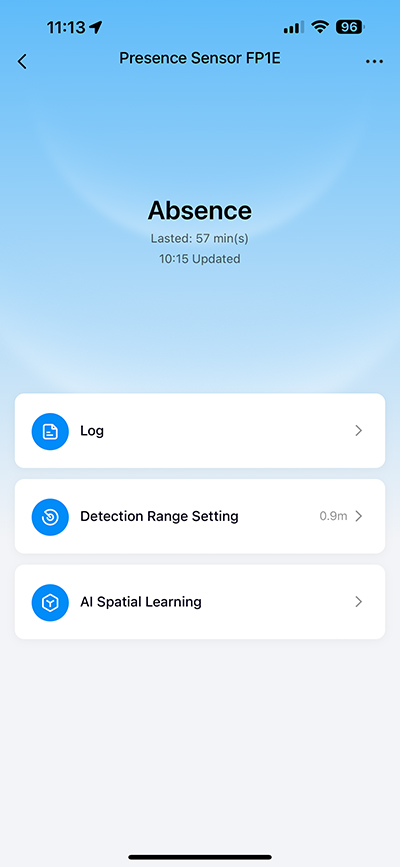
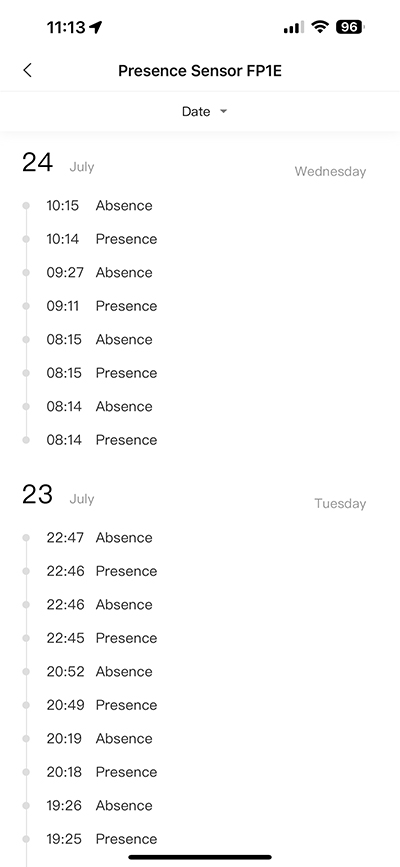
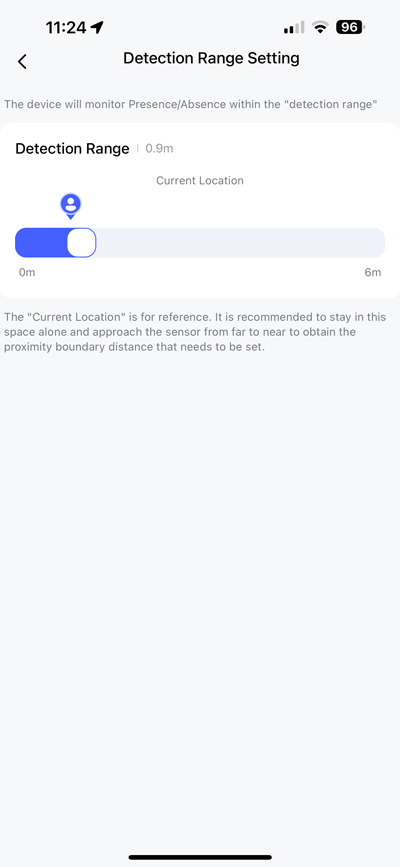
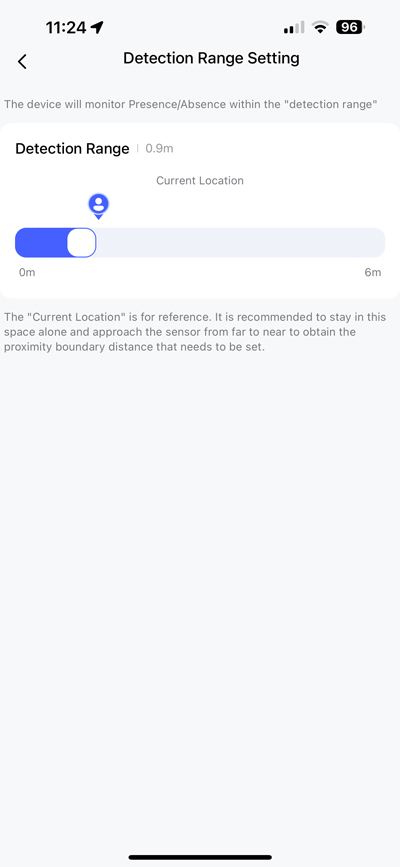
The main page for the device is quite simple, with three main accessible options shown. The first of these is a log of presence and absence events. It’s very simply laid out, and as such is easy to understand. The Detection radius setting is really simple to use, and a lot more intuitive than was offered by the FP1, which had a screen that represented your room/area, like the FP2. However, the UI for the FP1 was really difficult to get a grasp on, as through trial and error you had to work out the edges of its detection range. This for me involved standing in four corners of the living room, to check whether I was within range or out of range of the sensor, then adjust the map boundaries accordingly. It was pretty tedious, if I’m honest.
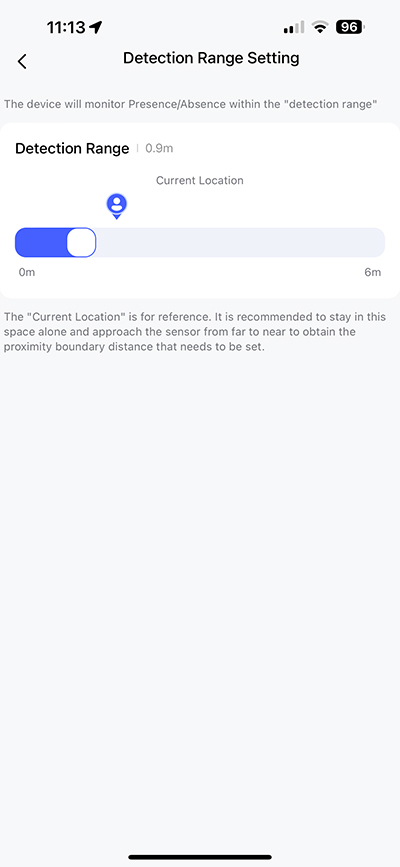
The FP1E does away with that, and just has slider that represents the complete detection range, from zero to six metres. When you’re in the sensor’s range, a little icon would appear above the slider to show where you are in relation to the sensor, and therefore allow you to adjust the sensors detection range. This means if you wanted it to only detect presence within two metres of the sensor, even if the room was four metres deep, then this allows for that. Of course, it’s not as detailed as the FP2 with its 30 zones, but for some people and some use cases, this simple setup is exactly what’s needed, and no more.
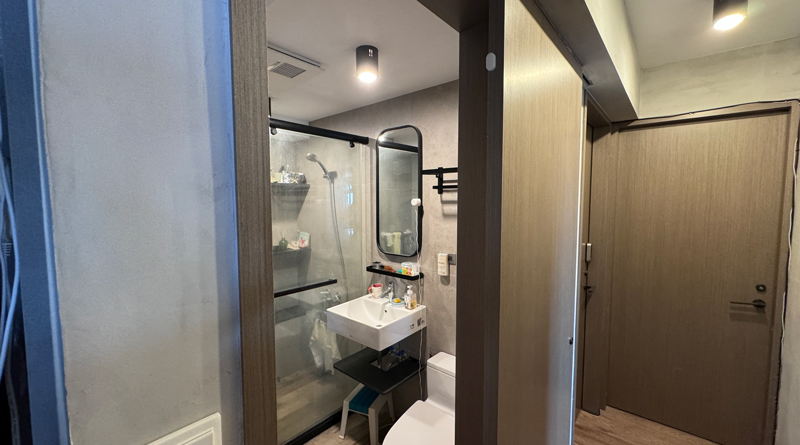
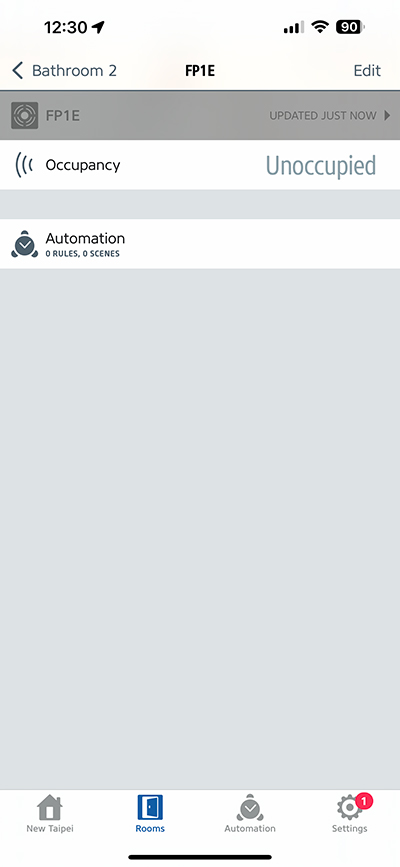
For the last few weeks, I’ve been testing it in a few locations, but primarily in the bathroom. The reason for testing it here is that the bathroom offers the perfect circumstances for testing how well it adheres to the limits set for its detection range. when going from the living room to the other bedrooms, we would pass by the open sliding door of this bathroom, and so for a standard motion sensor, there’s going to be the strong chance that it would pick up motion even when you’re not actually in the bathroom, merely passing by.
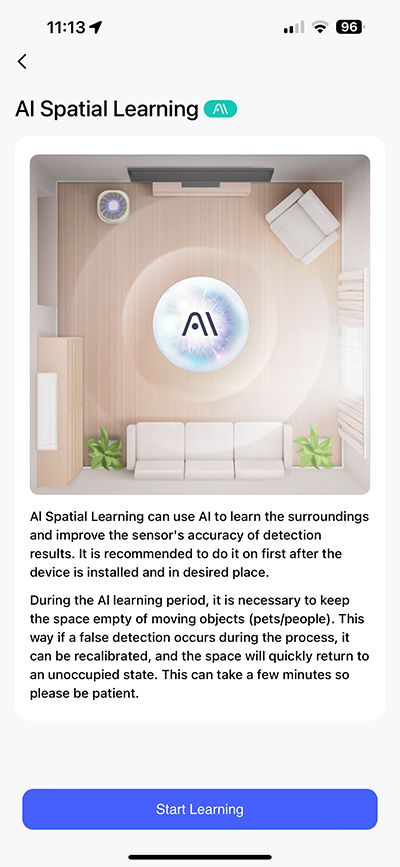
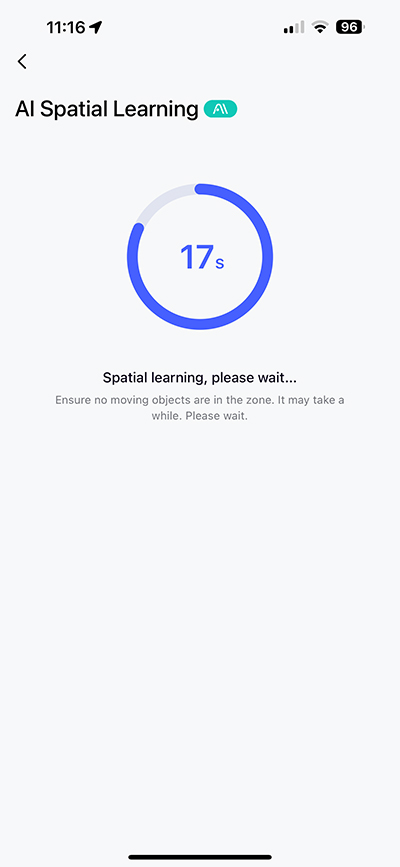
Not so with the FP1E! Before anything else, you should set the device up, then clear the area of any type of moving object, be that a person, a pet or a fan. Then with the help of AI, the FP1E will build up an image of the area in question as a starting point. It only take around 20 seconds to do this. after that’s done, you can go into the Detection Range Settings page, and set up the limits for the sensor.
As you can see from the last two screenshots above, I’ve set it so that anything outside of the bathroom is set so that it won’t trigger anything based on presence, even though it clearly can detect when I’m outside of the range I set it at. This has worked incredibly well, and I can stand right outside the door to the bathroom without triggering the automation I set up for it, which incidentally turns on the Aqara wall switch controlling the bathroom lights.
IN APPLE HOME

There’s not much to report on with the Apple Home side of things, so in essence, if you’re going to use the FP1E in Apple Home automations, it’ll act like any motion or presence sensor to trigger other devices, depending on the detection of presence or absence. It’ll still abide by the detection limits you set in the Aqara app, however.
One thing the FP1E lacks versus the FP1 is that the latter does offer both presence and motion detection. Motion detection is almost on a par with a standard Zigbee motion sensor in terms of speed, which is quicker than a presence sensor for initial motion detection. You can see the two separate sensors listed here in the Eve app, with the FP1E only showing presence as an option. The FP1E doesn’t have such an option, however, whilst presence detection still isn’t as fast to react compared to a PIR sensor, it’s a massive improvement over the speed of presence detection with the original FP1. In most cases I may end up using a standard PIR sensor in combination with the FP1E, unless response time isn’t a top priority.
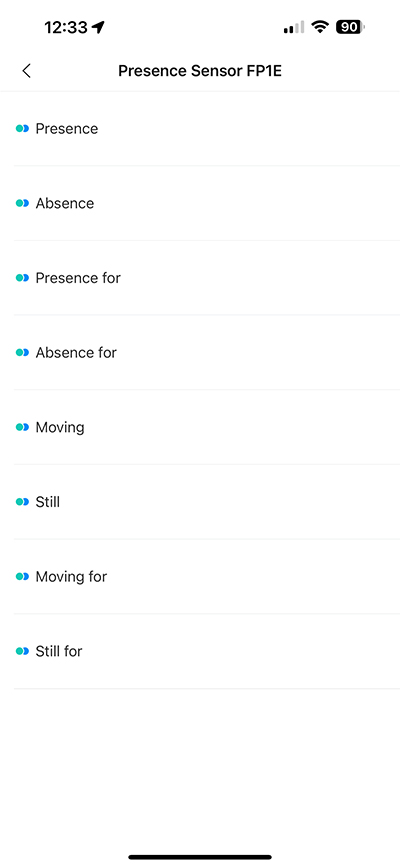
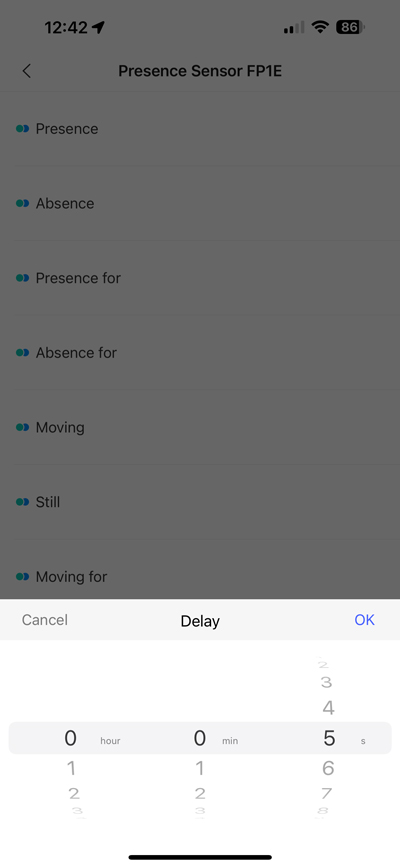
Ultimately, the options in Aqara Home are superior, as long as the automation is working with other Aqara devices of course. There are options for presence and absence, but also ‘presence for’, ‘Absence for’, ‘Moving’, ‘Still’, ‘Moving for’, and ‘Still for’. Additionally, you can even trigger a couple of options with the FP1E, which you don’t normally see. So, you can, for example, use an Aqara smart button to trigger the FP1E to relearn its Spatial Learning, thereby resetting the absence status, or you can even restart the device. That’s impressive.
THE FP1E IN USE
As previously mentioned, I have three FP1s, two of which are in use. Both are used in small spaces, like our en-suite bathroom (not the one used in the tests), and our entrance area. I never reviewed the FP1 for two reasons; I found the device hard to set up to my liking, and found it inaccurate some of the time, especially for larger areas. I also didn’t review it because it was only available in China, and didn’t want overseas readers buying one off the back of my review, despite it being a largely negative review if I’d written it. With the FP1E, things have changed considerably, and I’m glad that Aqara saw fit to release this internationally, as it does the job well. Yes, it’s not as comprehensive as the FP2, but for use in a bathroom or kitchen, where you may not require the zones feature offered by the FP2, this does a great job. It’s way more easy to set up than either the FP2 or the FP1, and on that basis it works as well as I could have hoped for. I’m also glad they stuck with Zigbee for this device as opposed to WiFi as is found in the FP2, or Matter over Thread for some of the company’s newer devices. Not that I don’t like Matter or Thread, but I know where I stand with Zigbee, and it rarely lets me down, which is of paramount importance to me, and I should imagine to other users too.
If I were to find any negatives, it would be the fact the power cable is permanently fixed into the sensor, but I guess Aqara decided to stick with the design they already had in the FP1 and just upgrade the internals, which definitely seems to be the case in my experience. Other than that, its highly recommended.
Aqara Presence Sensor FP1E
Pros
- Really simple setup procedure
- More accurate than the FP1
- Less complex than the FP2
- Uses Zigbee 3.0 reliability
- Very useful mount/stand
Cons
- Power cable not detachable
- No light sensor, unlike the FP2
- no separate motion sensor, unlike the FP1

I was excited for the zigbee connectivity of this but then read it comes with a non removable cable that’s only 6 ft long. That’s definitely too short and really precludes ceiling mounting imo. And it’s not even USB C 🙁
The fixed power cable is show stopper. How can you ceiling mount something with a 2 meter cable… 🙂
And it also says on the pictures max height is 2.8 m, which gives max coverage. Which is great, FP2 have max height only 1.8, which is nothing. But it’s hard draw a 2meter cable to something 2.8 meter up…
And as mention, they use USB-A to avoid the extra chip needed for USB-C. Which complicates things even more, it’s just ridiculous.
For this reason it’s simply not possible to buy it.
It’s not meant to be ceiling mounted. That would be the fp2. this is meant to be wall mounted.
Unfortunately the cable is a real deal breaker: who wants hanging cables on their walls?