Vocolinc PureFlow Smart Air Purifier (review)
Vocolinc isn’t specifically known for anything especially cutting edge, in the way that maybe Nanoleaf could be regarded, with their unique, touch-sensitive light panels, for example. However, they do have a ‘first’ with their highly popular Flowerbud Aroma Diffuser, which is still the only device of its type to be HomeKit compatible. Not content with this one product, alongside a reasonably large collection of smart bulbs, smart plugs and a smart lock, the company have bravely embarked on their most ambitious product yet, namely the PureFlow Smart Air Purifier. I say ambitious, as creating a device of this size and complexity is no mean feat, not least of all getting it certified for the job it is intended to do, but given that there are only two other air purifiers on the market that could be considered HomeKit compatible, then the Vocolinc Air Purifier is almost – like with the Flowerbud – alone in the field. The other two products I hint at, are the Brid Air purifier, which no longer seems to promote itself as HomeKit compatible (I’m not sure they ever were officially certified), with no mention at all in any support documentation that I was able to find, and the Coway ‘Clean Air Tower’ AP-1217L(H), which only seemed to have been released in Mainland China, but now no longer seems available. There is a third product, by Opro9 called the Smart Air Washer, which uses water and fans to clean the air, but whilst this product is available in China and Taiwan, the company appear to be marketing this more like a diffuser than an air purifier, with essential oils being offered to go with the product. It’s also really small and isn’t suitable as an air purifier for anything coming close to a large room. Odd.
So putting the PureFlow in a league of its own to a large degree, it seemingly doesn’t have a lot of competition right now, although the fact that Xiaomi makes a series of Air Purifiers that can be ‘shoehorned’ into HomeKit via HomeBridge, for those willing to experiment with uncertified devices, does make things interesting. Keep reading to see if the high price is worth it for official HomeKit compatibility.
PACKAGING
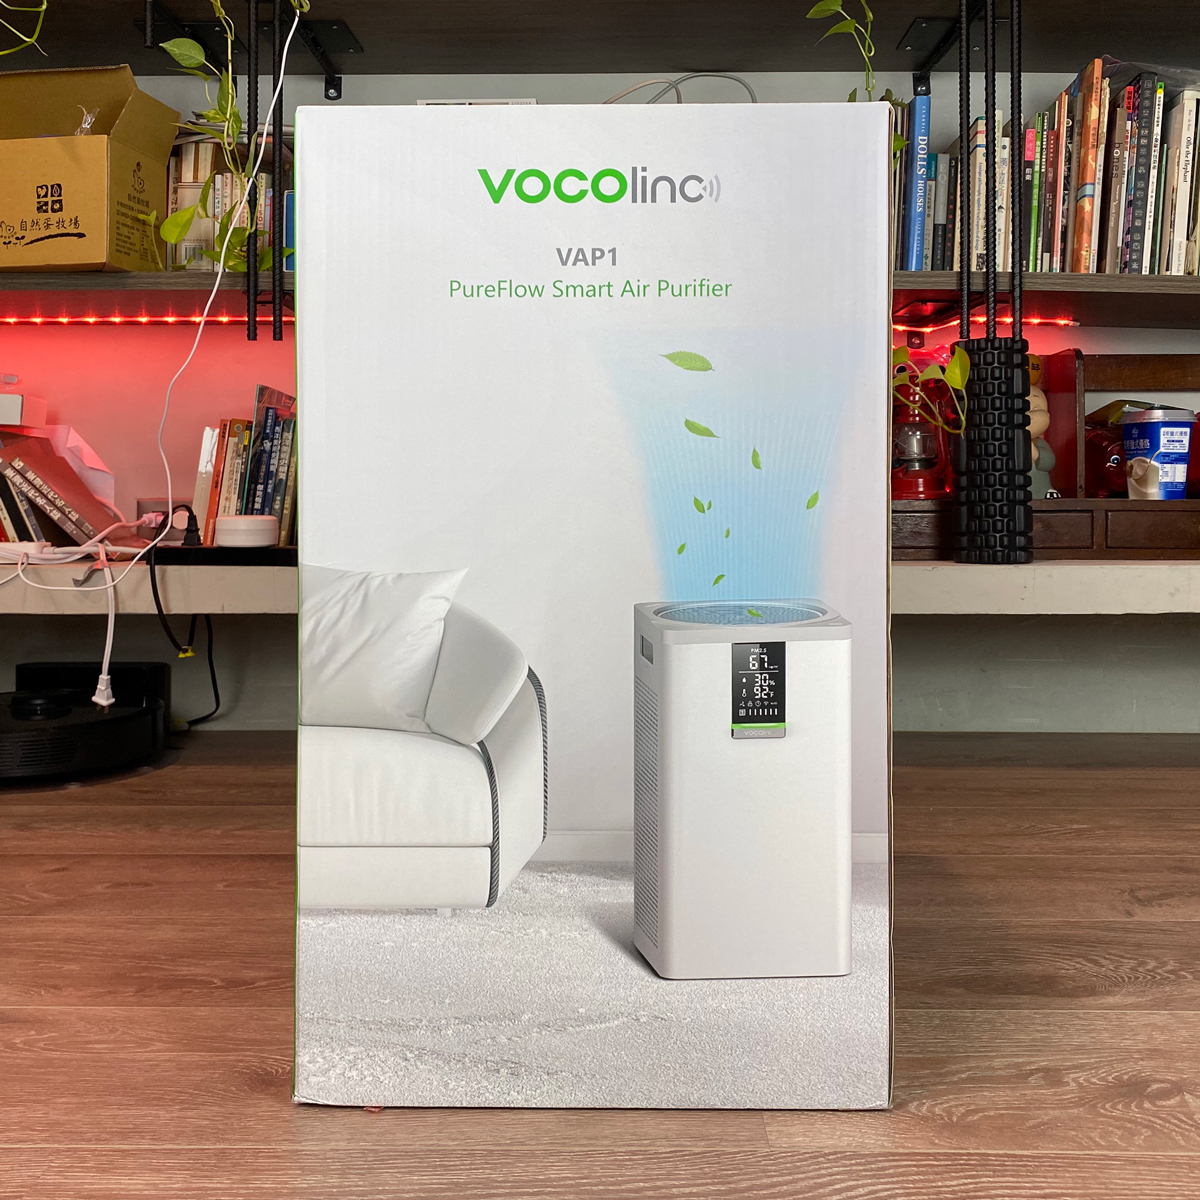
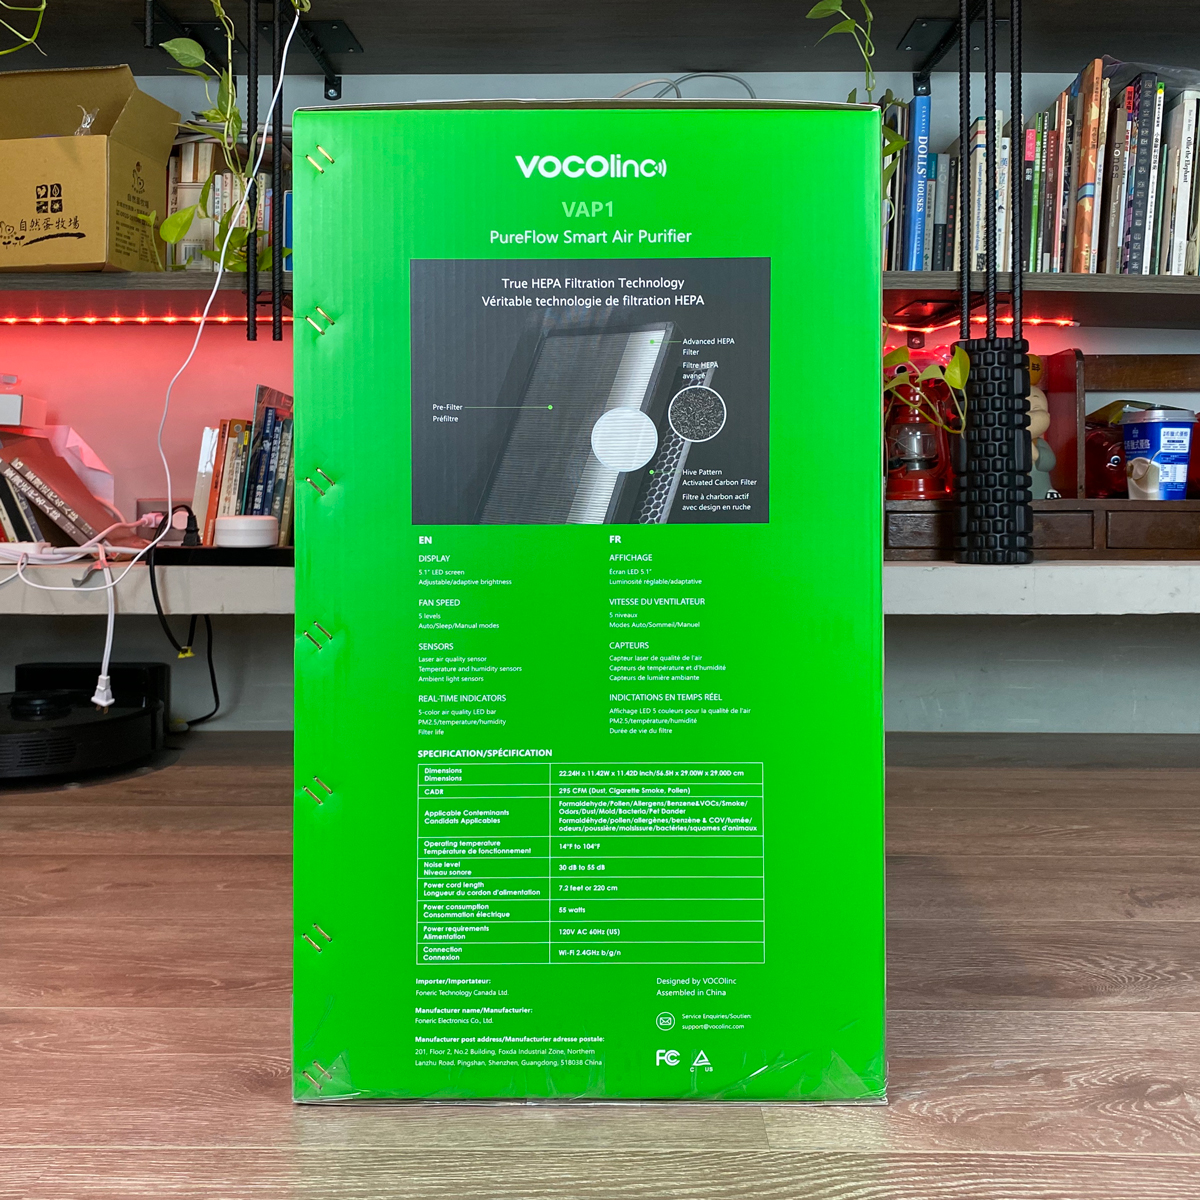

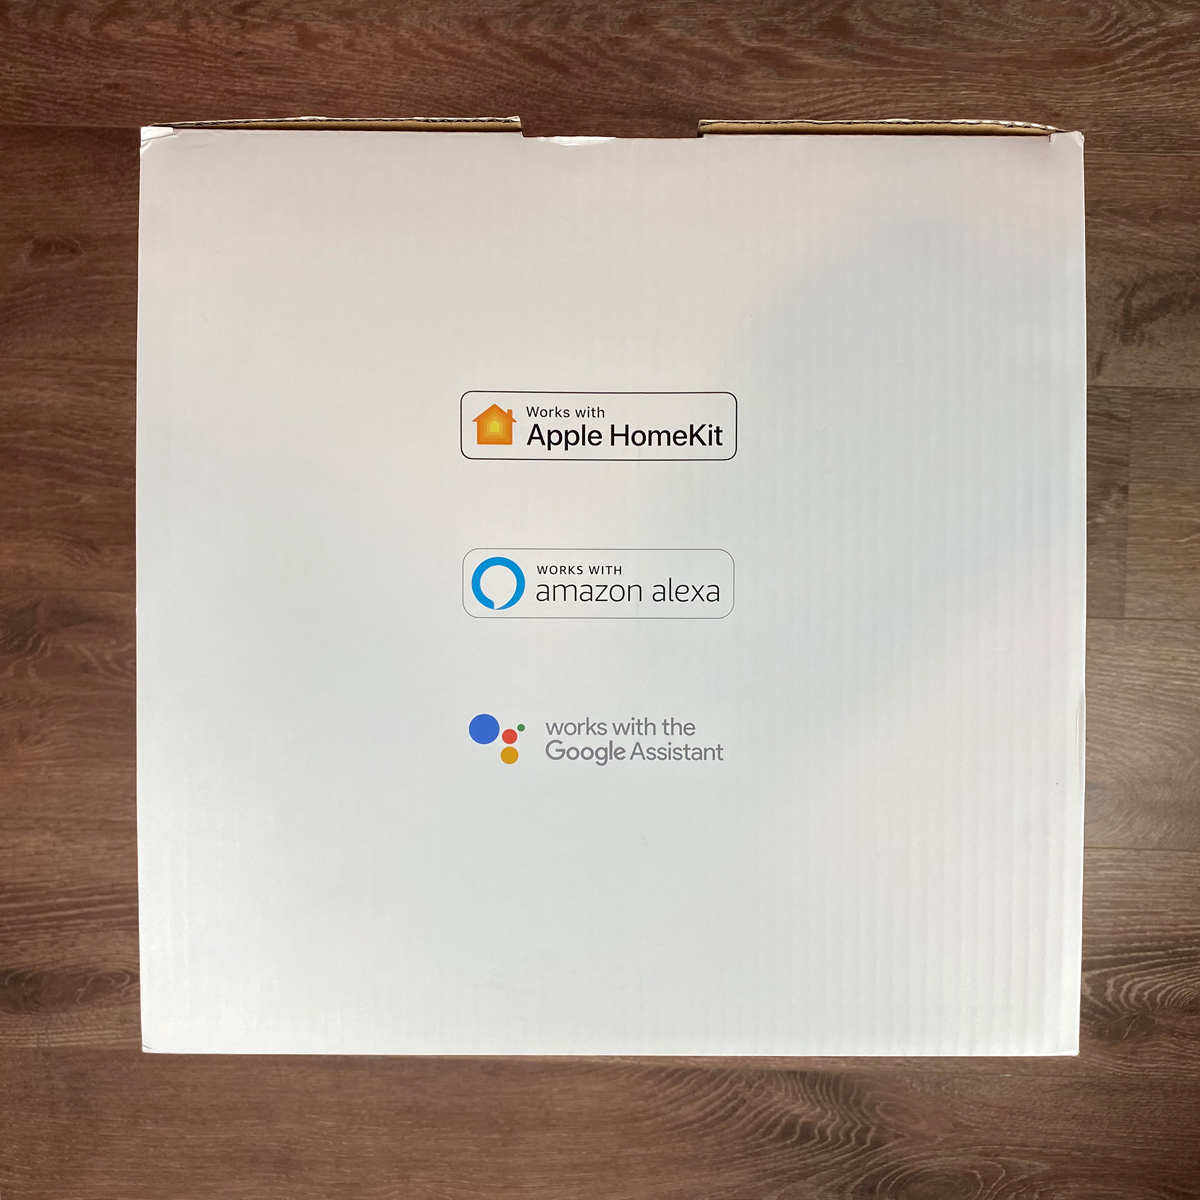
As you can imagine, a device of this type is going to come in a suitably large box, although true to the Vocolinc styling, the packaging follows the basic design rules with a large amount of green on the sides. The front features a lifestyle image of the product, whilst one side feature details and specs for the product, and the what the filters that come with it are capable of. The other side covers some of the basic functionality of the VAP1, which is how I’ll refer to the SmartFlow Air Purifier henceforth. The top of the box has the logos for the three smart home systems it’s capable of, including, of course, HomeKit.
THE PUREFLOW
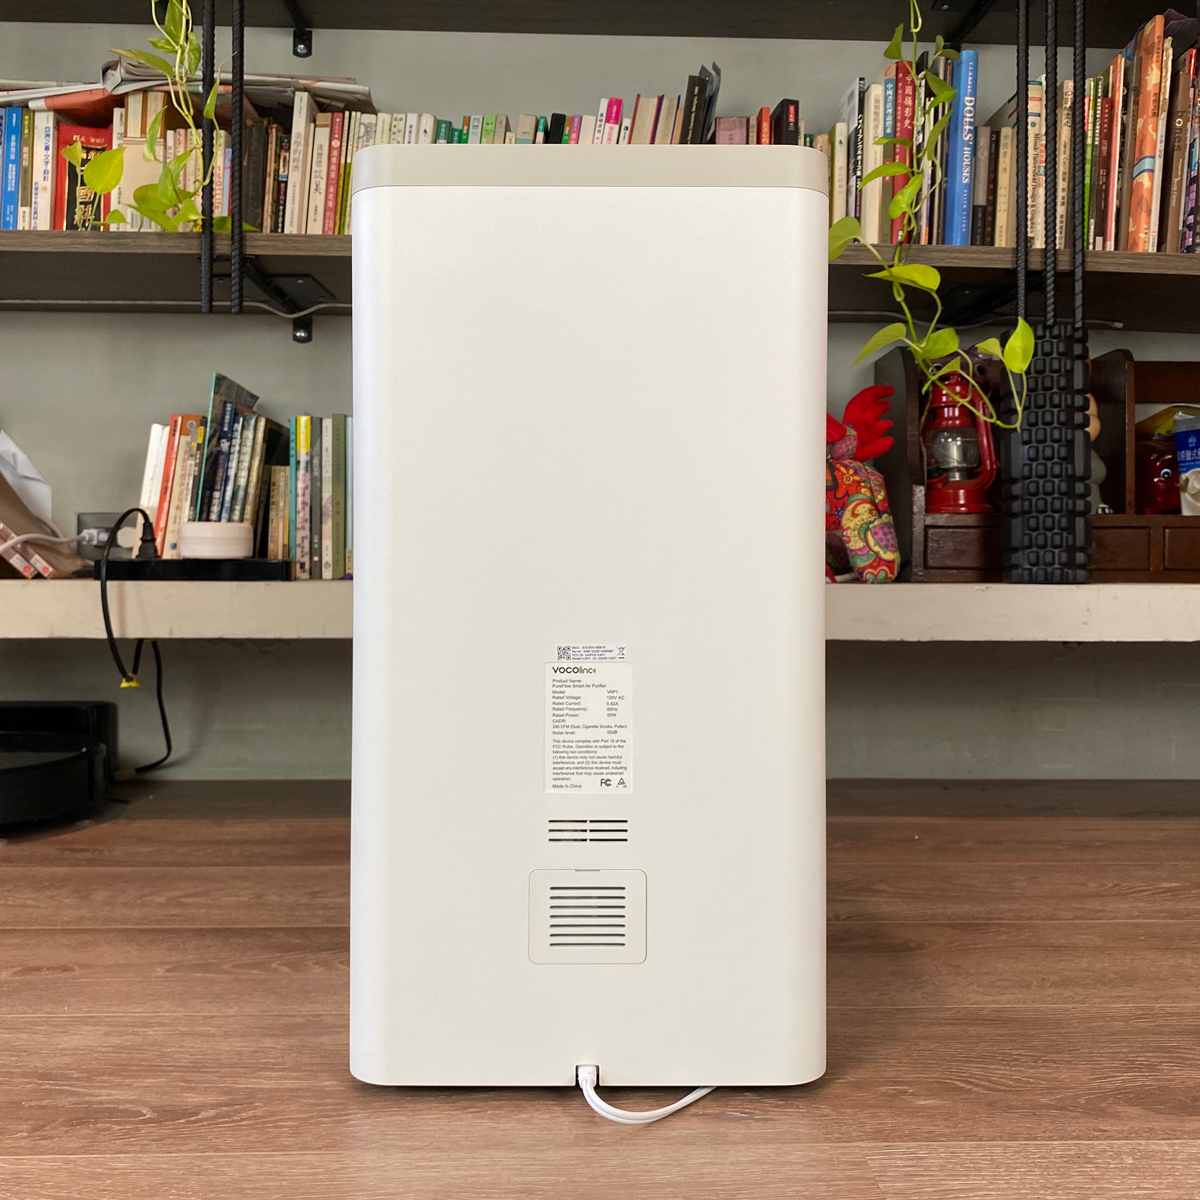

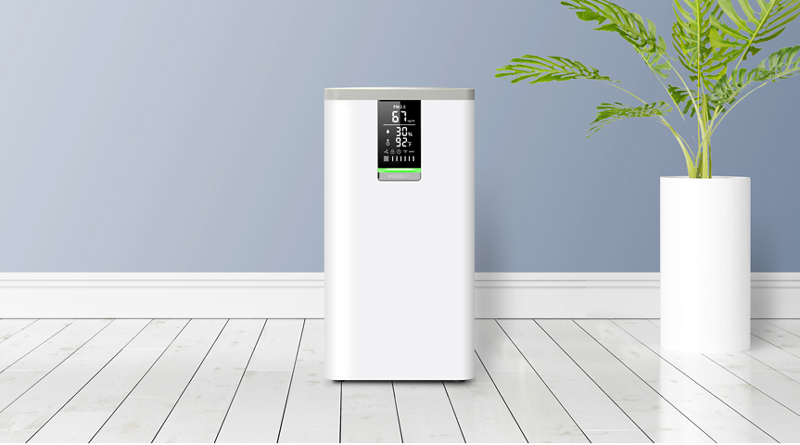
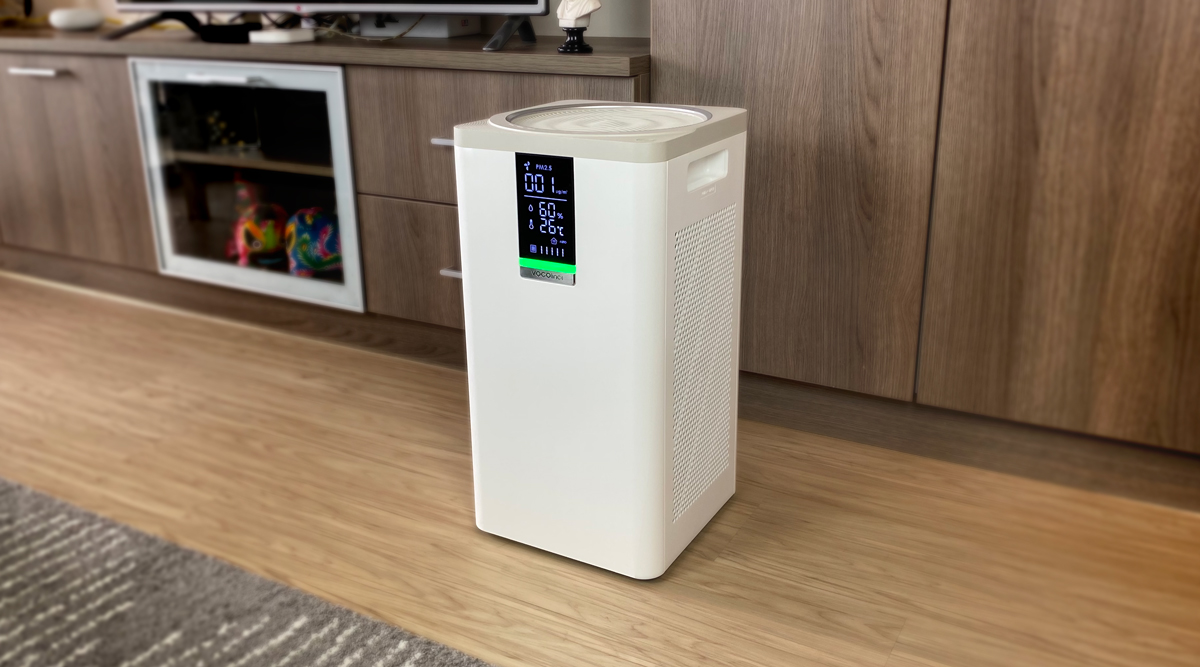
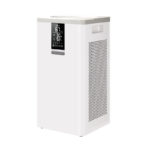
Swiftly moving along, we get to the VAP1 itself, and as with the Xiaomi range of air purifiers, it’s a largish monolithic affair, with a largely blank back, where the power cable lives, as well as a small removable panel to access the PM2.5 sensor for when you need to give it a clean. There are vents on both sides, that are also removable panels to access the filters, and a mostly plain front, with just a large LED panel to distinguish itself. Beneath the panel is a large LED bar that for the most part is lit green, or at least should be if unless your indoor air is not great. Right underneath the LED bar is a shiny chrome-like plate with the Vocolinc logo. This might be a bridge too far for some that aren’t too keen on logo placement, but I’m ok with it. The Vocolinc logo does make another appearance on the top of the device, however, so maybe a little overkill perhaps.
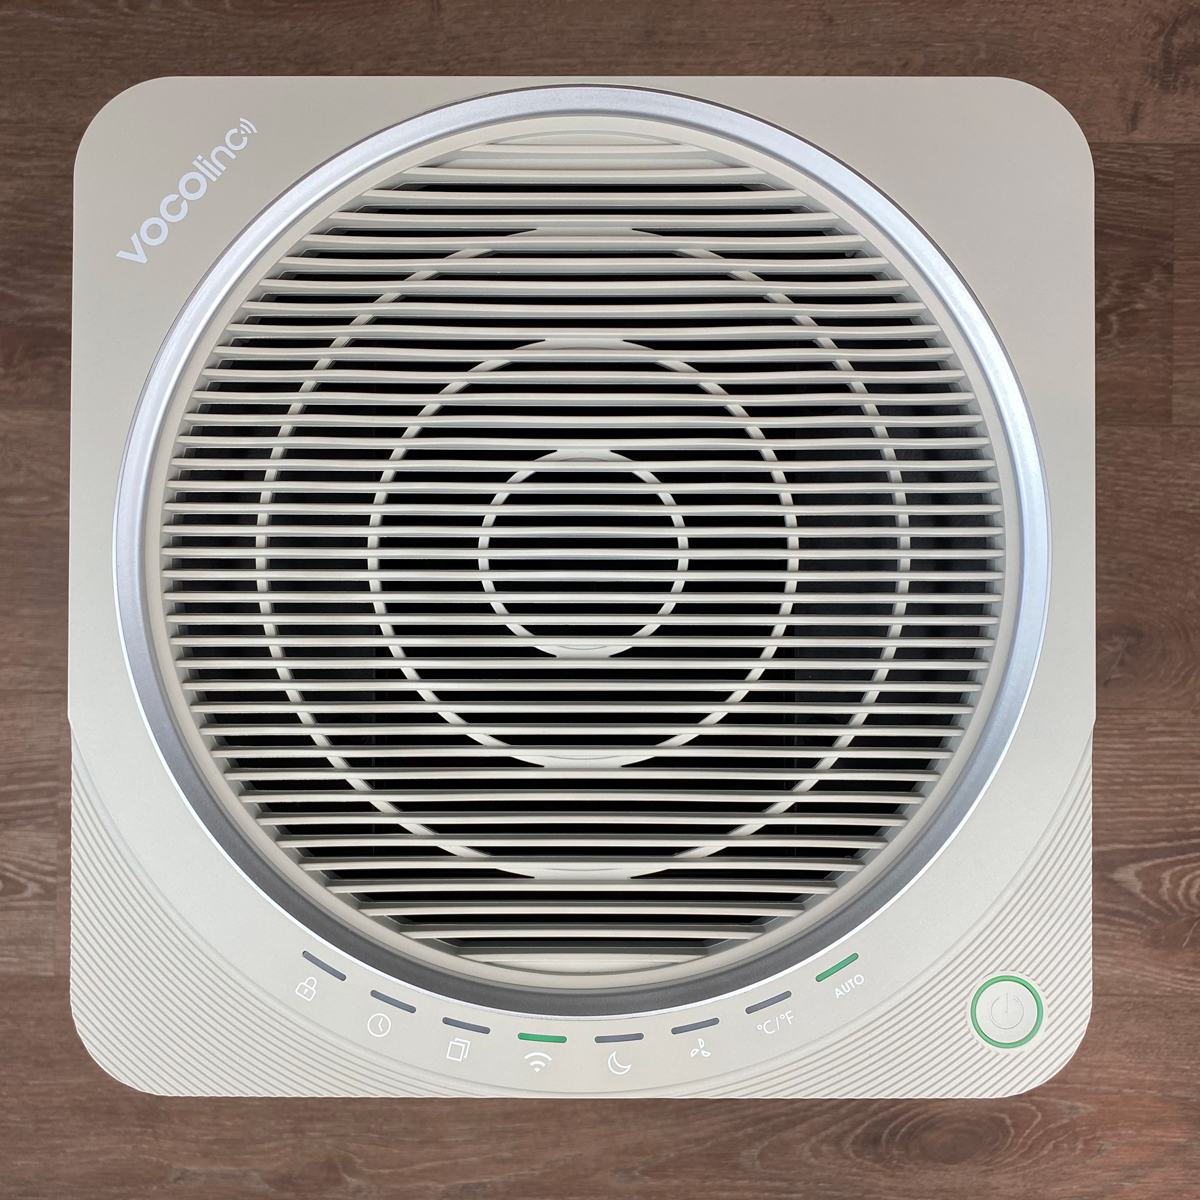
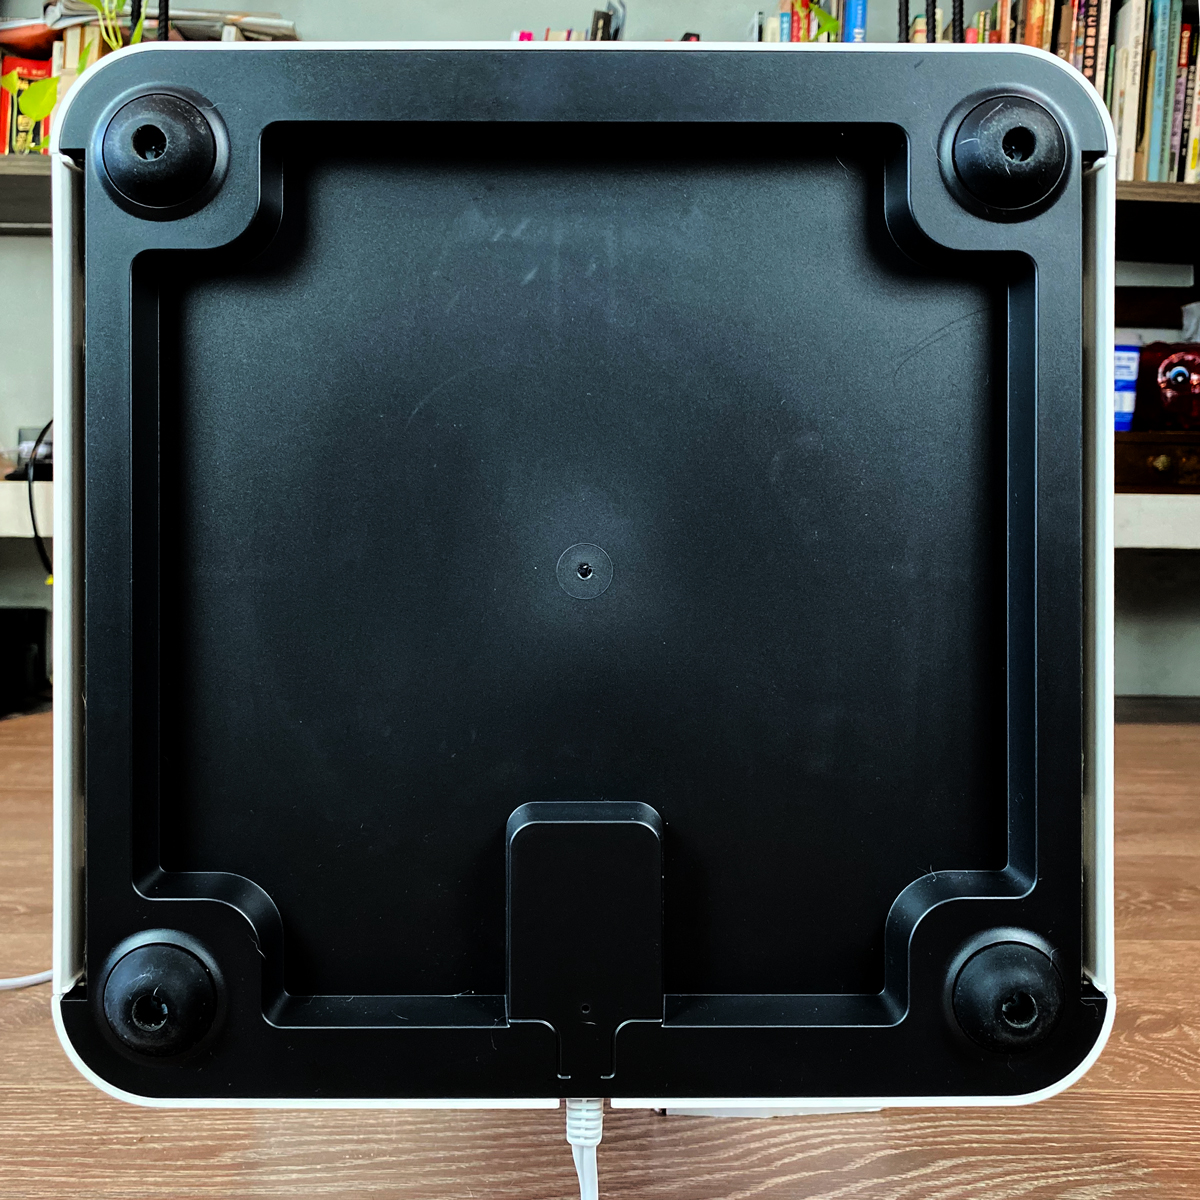
The top of the VAP1 sees the most interaction, with a series of buttons curved around the front of the circular vent. We’ll talk about these controls next. The base of the unit is merely home to four sturdy rubber feet.
CONTROLS
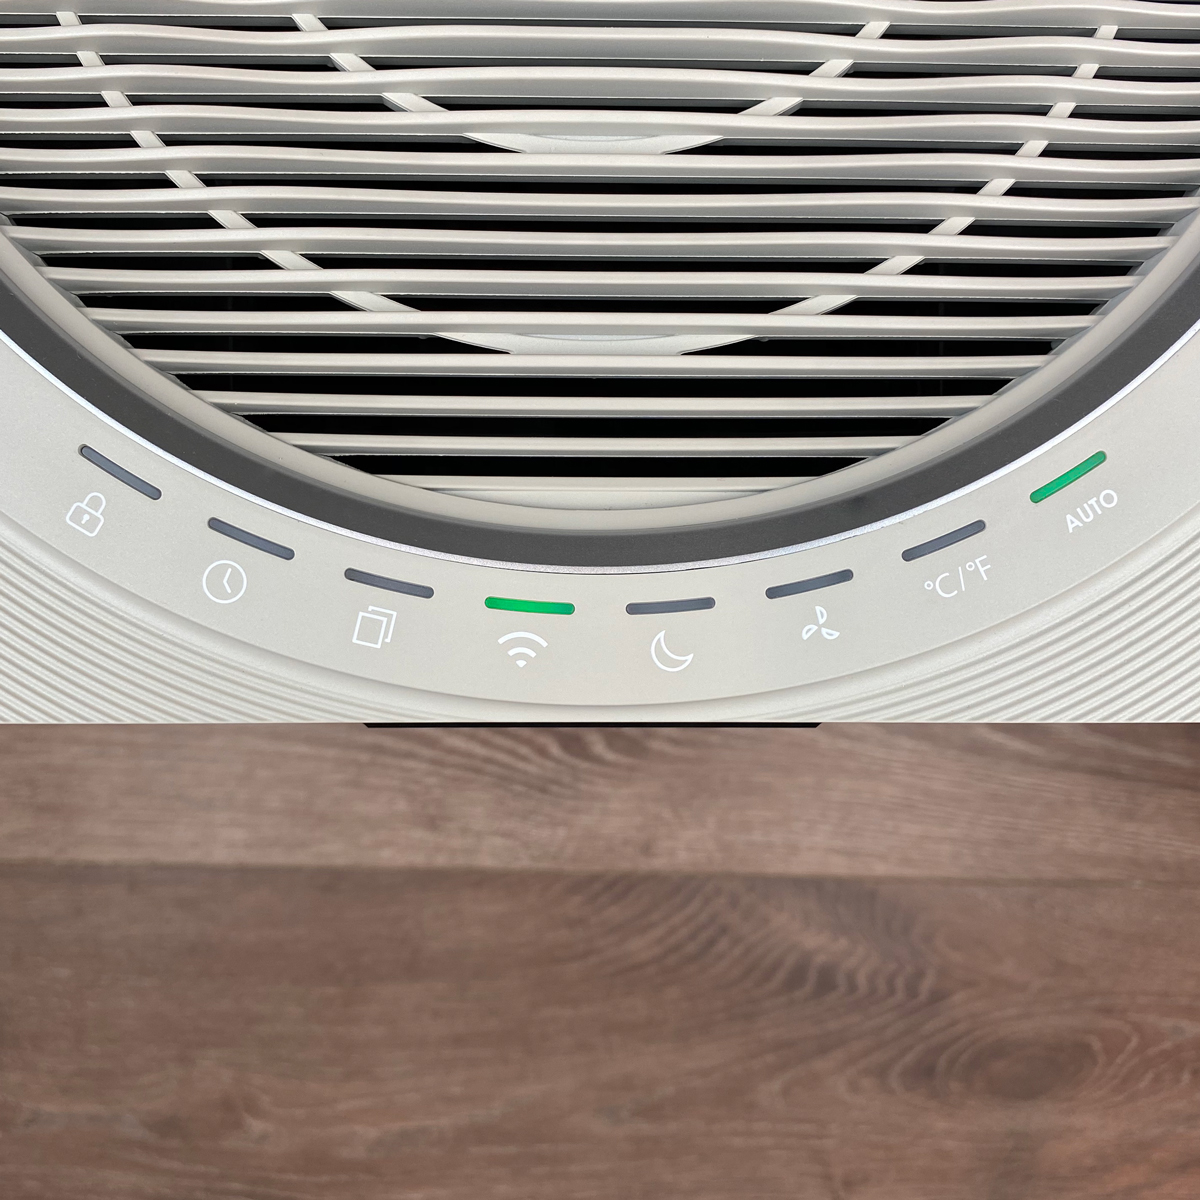

The VAP1 has a series of controls on the top, that gather around the front of of the edge of the air vent, with a total of eight distinct functions. In addition, there’s a separate power button located in the front left-hand corner. All of these buttons are touch-sensitive in that you simply tap on them to enable the relevant function, as there are no physical mechanisms that you can feel when tapping on them. This is also the case with the on/off button, even though it appears as though it would be pressed in like a typical push-button control. It’s not only quite nice to be able to control the VAP1 one with the lightest of touches, which is especially useful for those that might suffer some disability, like arthritis, for example. Of course, none of these controls is required if you prefer to use your smartphone, scenes or automations, but it’s great to have the quick access options.
As for the buttons themselves, and what they control, starting with the on/off button, it’s just that – it turns the VAP1 on or off, although the device and the sensors are still active. This essentially turns off the fan, and the display, along with any LEDs. Whilst in the Off mode, access to the sensors is still available via the Home or Vocolinc app, via your smartphone. When on, there’s a green LED light that encircles the button, so it’s visible in low light or darkness.
moving onto the line of eight buttons and they are as follows;
- Auto mode (on/off)
This speaks for itself really but in essence, when this mode is active, the fan will automatically increase or decrease in speed, depending on the air quality in the room. When off, you can control the fan speed yourself.
- Cº/Fº
This simply toggles between Centigrade and Fahrenheit for the temperature display. I’ll be honest and say I think this was a bit of a waste of a button, as something like this isn’t changed more than once unless you really want to regularly see the temperature in both. I think it would have been just left to a setting within the app, so as to use the button for another more regularly used function perhaps.
- Fan Speed
This is the fan speed button. Successive presses cycles through the fan speeds, from one to five, with 1 being the lowest speed, which is also the equivalent of the ‘night mode’ speed, right up to 5 being the highest speed.
- Night Mode
As you can guess, Night mode sets the fan to its lowest speed, whilst also turning off all LEDs as well as the LED screen. Upon activating this mode, the green LED above the icon will turn green, with the LED screen turning off, with the exception of a small LED icon in the same shape as the night mode icon. Both the green LED and the screen icon will turn off after a few seconds, so there are literally no lights at all.
- WiFi
This stays on in all modes except for off and night mode and will be solid unless it becomes disconnected from the network, or if you’re initially setting up the VAP1, in which case it will flash.
- Filter Replacement
This will light up when you get close to needing to replace your filters. Aside from this, it remains off.
- Timer mode
This will light up when you set a timer for the fan. You can set a timer for the fan to be running, from 1 to 24 hours. each press of this button cycles through an extra hour added to the timer. After pressing the button when a 24-hour timer is set, it will revert to zero hours, which is ‘timer off’.
- Kid Lock
Pressing and holding this button for 3 seconds activates or deactivates Kid/Child mode, which makes all buttons unresponsive until this mode is deactivated again.
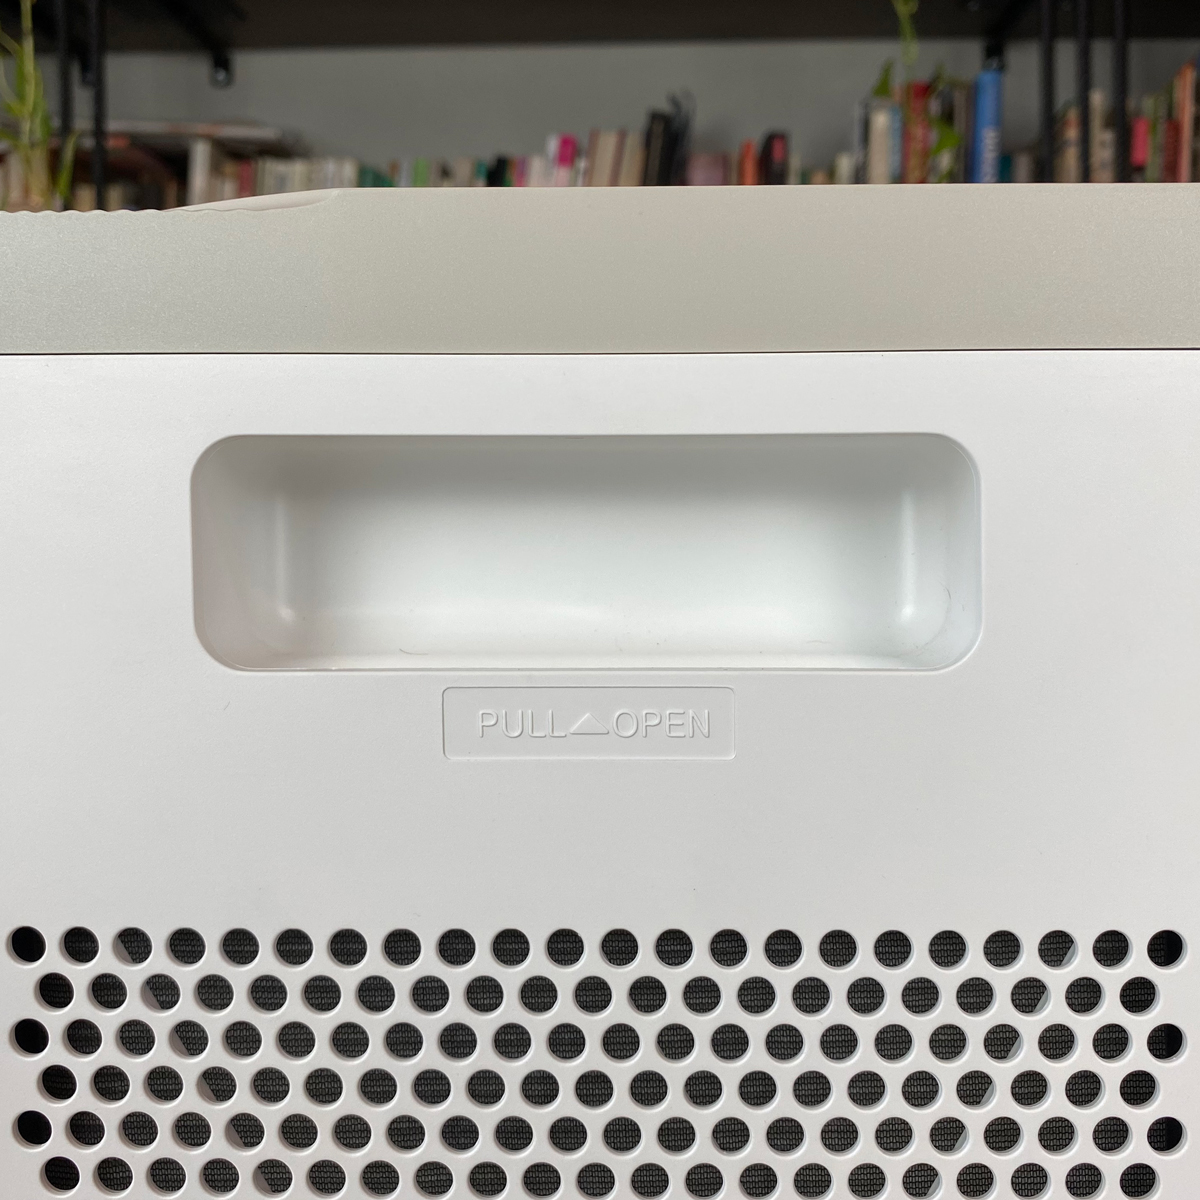
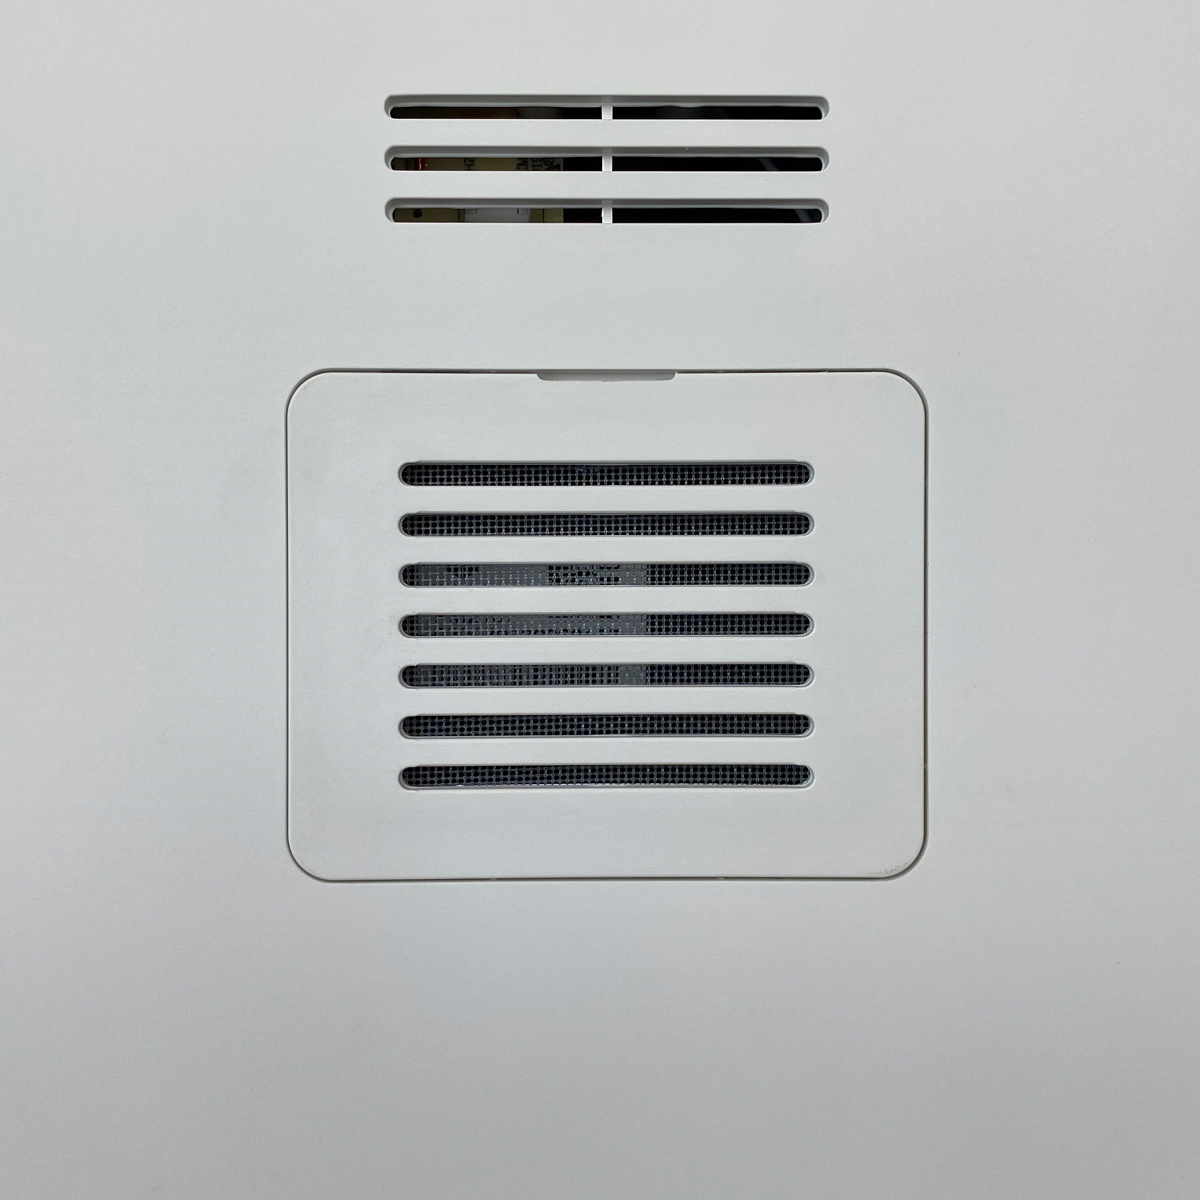

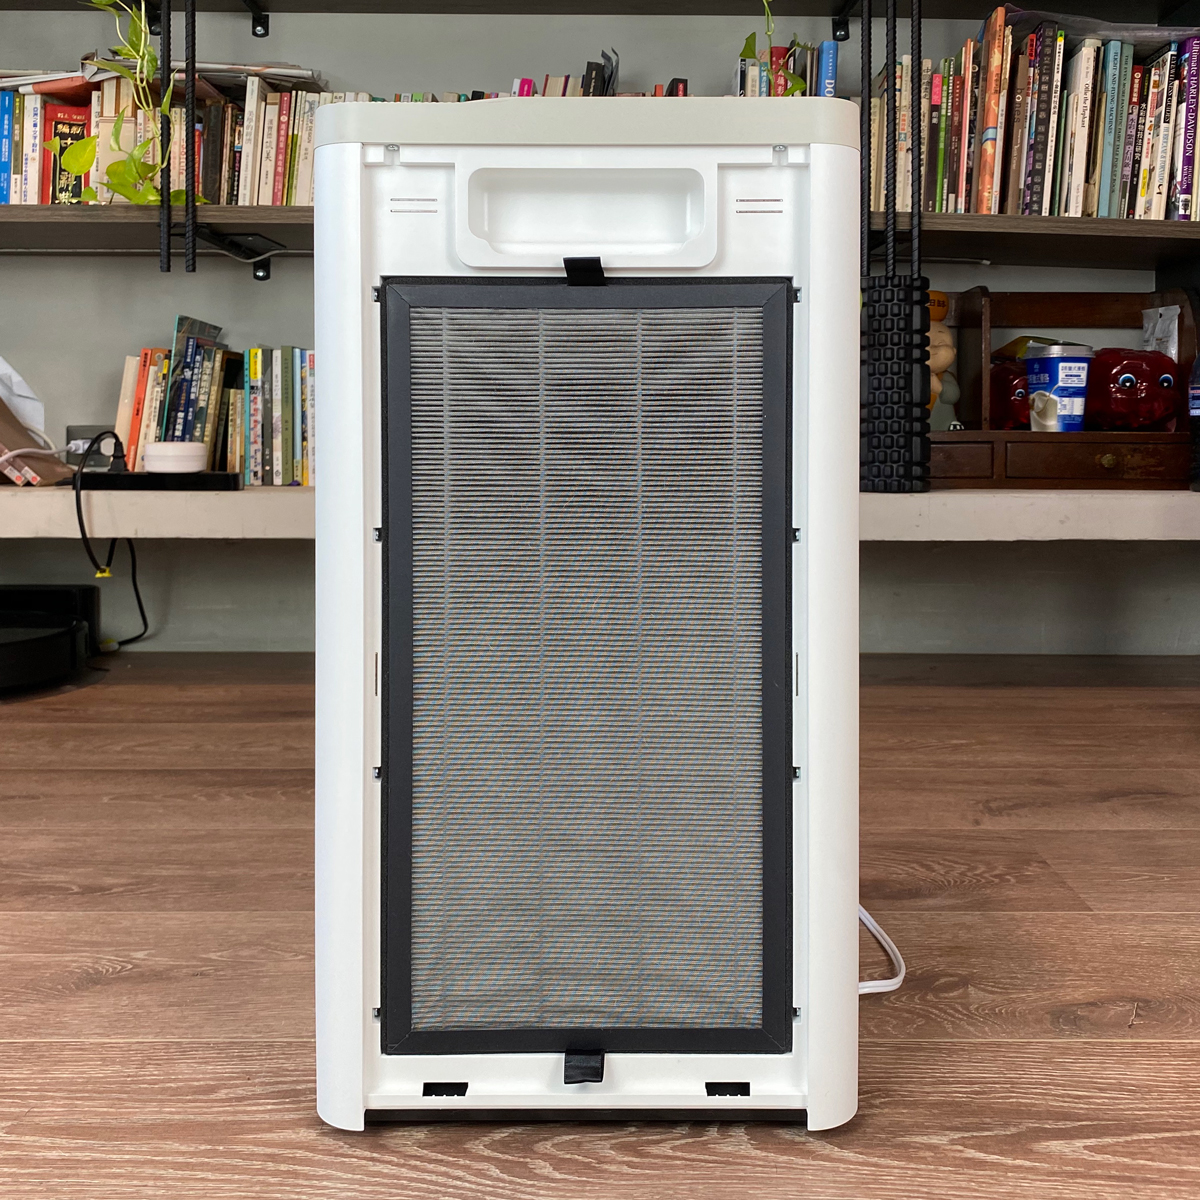
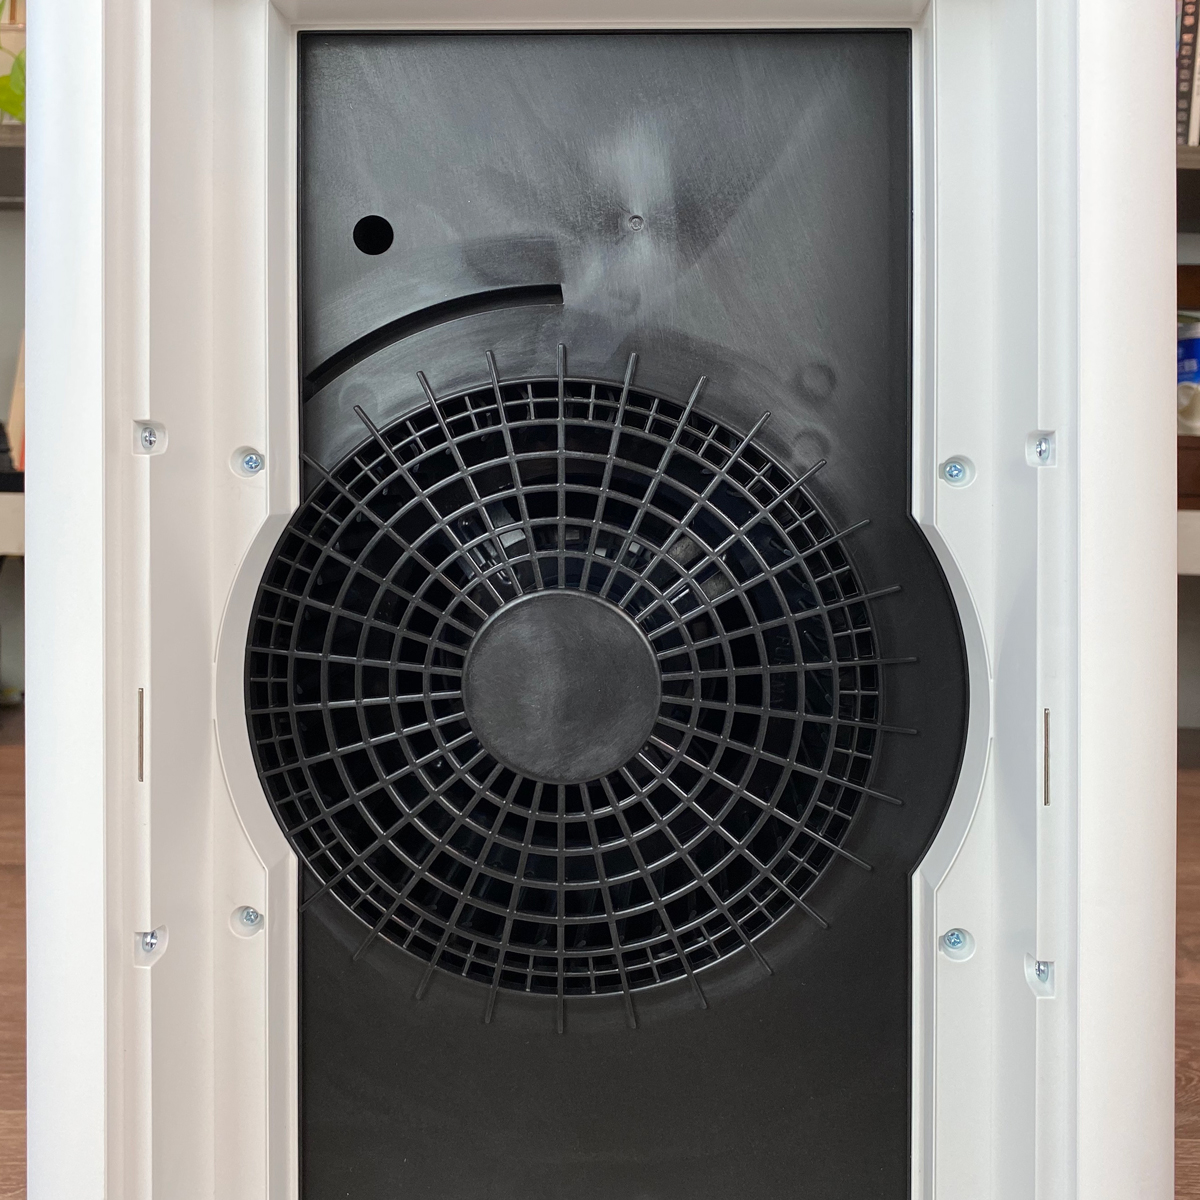
Both sides of the VAP1 have removable panels which allow you to access the filters, as well as the intake fans, should they need cleaning. As already mentioned, the main particulate sensor is housed at the rear of the VAP1, and is accessible for cleaning from behind a small removable panel. The side panels are held in place with some magnets along the inside of the recesses that host the panels, and they click in place with a reassuring ‘snap’ when placed back.
FILTERS

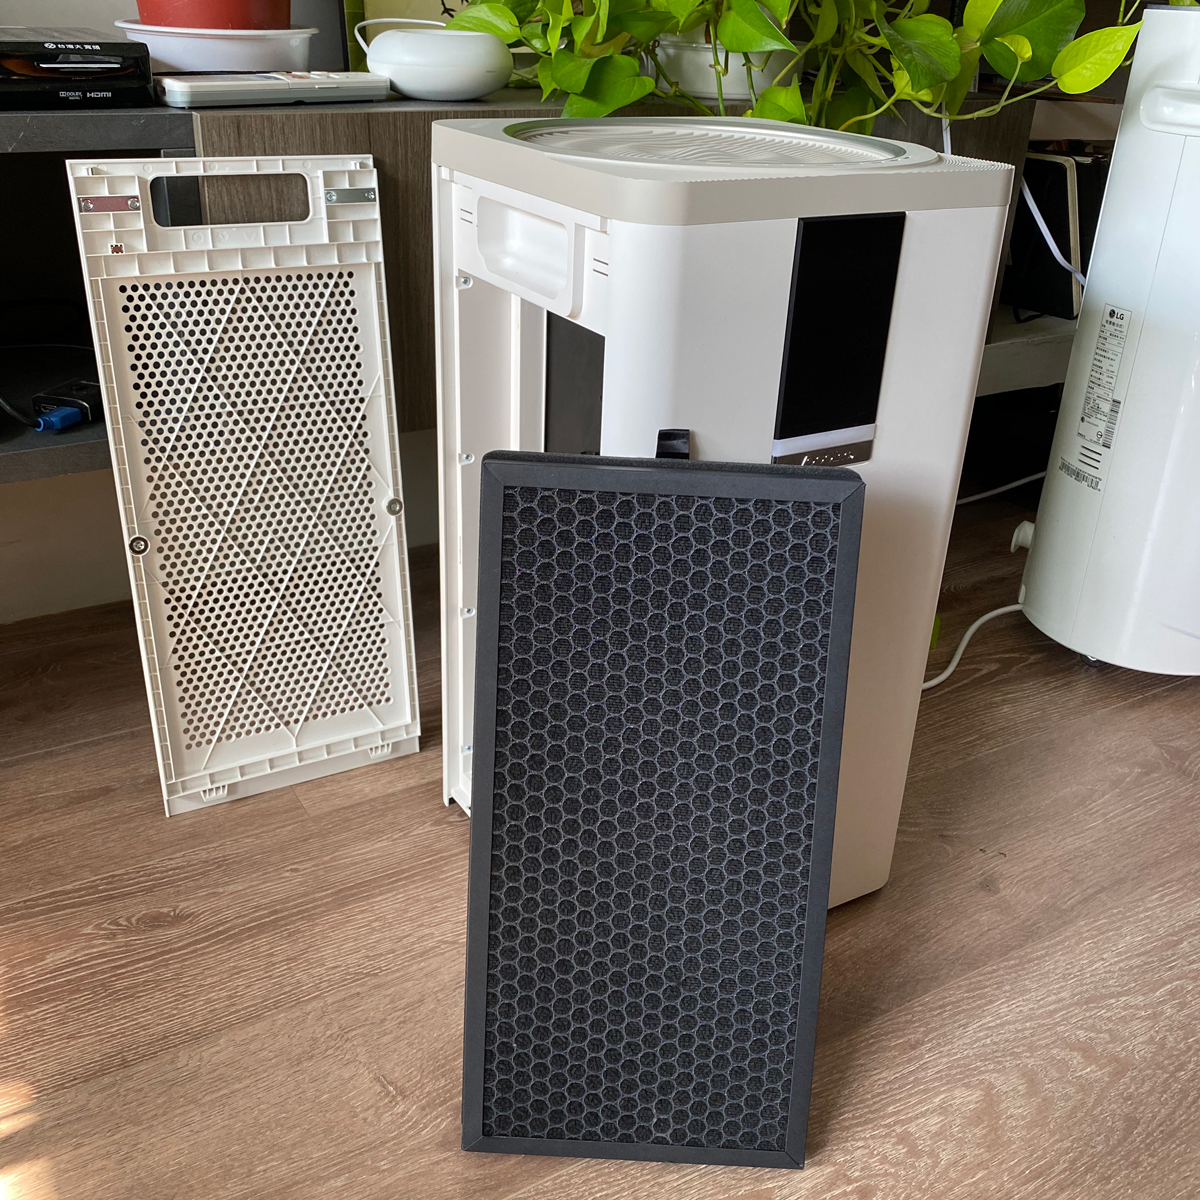
Because the VAP1 has intake fans on both sides, this means that it needs a pair of filters. The filters that come with the VAP1 are listed as ‘true, 3-stage HEPA filters’. As the description implies, this has three parts to its assembly; a Prefilter, that catches things like pet dander (dog and cat hair to you and me) and pollen etc. which is like a fine net. You then get to the second part of the filter, which you can see underneath the prefilter in the first of the two images, which is labelled the HEPA (High-efficiency particulate air) filter. This filter captures particles as low as 0.3 microns in size, which includes pm2.5 and bacteria. The third part is the active carbon section, which is good at capturing things like odours, and VOCs (Volatile Organic Compounds). It’s important to note that there are many air purifiers that will use a HEPA filter, which is great for picking up the pm2.5 particles but won’t do anything to stop VOCs, which can be just as hazardous in large or consistent quantities.
You can’t run the VAP1 on just one filter, as you’ll get an error message, which means the device won’t work, so as the VAP1 requires a pair of filters, it’s not going to very cheap. A Vocolinc representative informed me that they’ll be selling a pair of filters for US$79.99, so $40 apiece. Now that doesn’t sound massively cheap, but first of all, from my anecdotal searches so far, I haven’t found many filters of these types that are cheap, but also of the same dimensions. When I’ve found a product of a similar size and functionality (3-stage), then the prices are roughly the same, although you’re not required to buy two at a time. It’s worth noting that due to having filters on both sides, you should get more efficient and faster air cleaning, which in turn would suggest the filters are used less often, meaning they should last longer. I’ve been told you can expect 6-9 months of typical usage from a pair of filters, and possibly more. Compare that to the Xiaomi Air filters I have for my ageing Mi Air Purifier 2, and I’m getting through one of their filters every 3-4 months, which doesn’t even include the carbon layer, so taking all of this into account, the price seems to be of better value than you might think. All I can say on this is, like most people, I don’t like to spend money if I can help it, but living in Taiwan, where pollution is a perennial problem, it’s hard to put a price cap on me and my family’s health, so it’s a necessary cost. If you can find a filter that fits, does the same job, and is cheaper, then that’d be great! Let me know if you find one (or a pair…). These filters are super easy to replace incidentally, and you could replace the pair of them in less than a minute. I’ve provided links at the end of this review to explain more about PM2.5, VOCs and HEPA filters, as it can be a bit confusing at the best of times.
INITIAL SETUP
If you’ve added a device to HomeKit before, you’ll know it’s pretty easy in most instances, and with the VAP1 it’s just as easy. In the case of this installation, I decided to add it via the Vocolinc app, which still requires you to scan the HomeKit code, but also includes the option to add it to Google Assistant if you want too, so all round it’s the best way to add this device to your home.
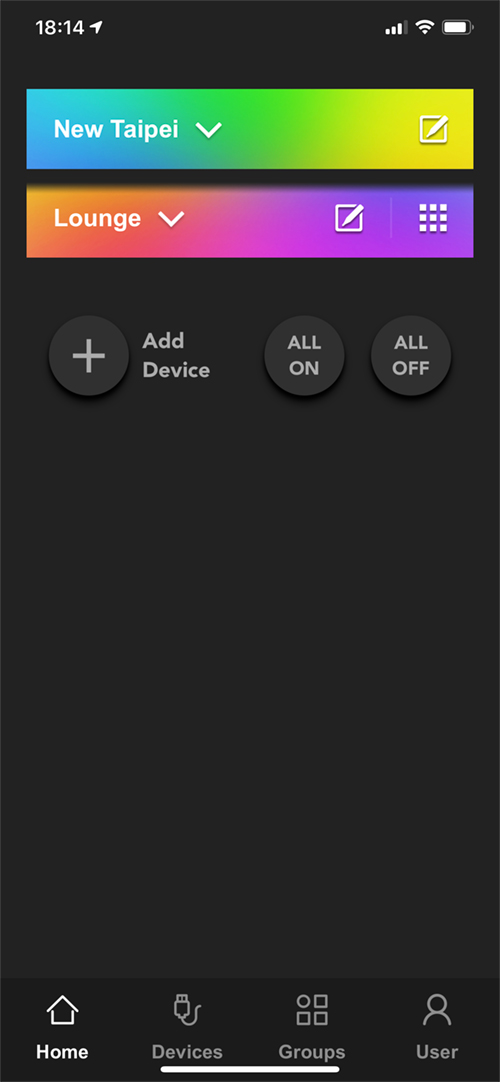
- Select the relevant room and click ‘Add Device’
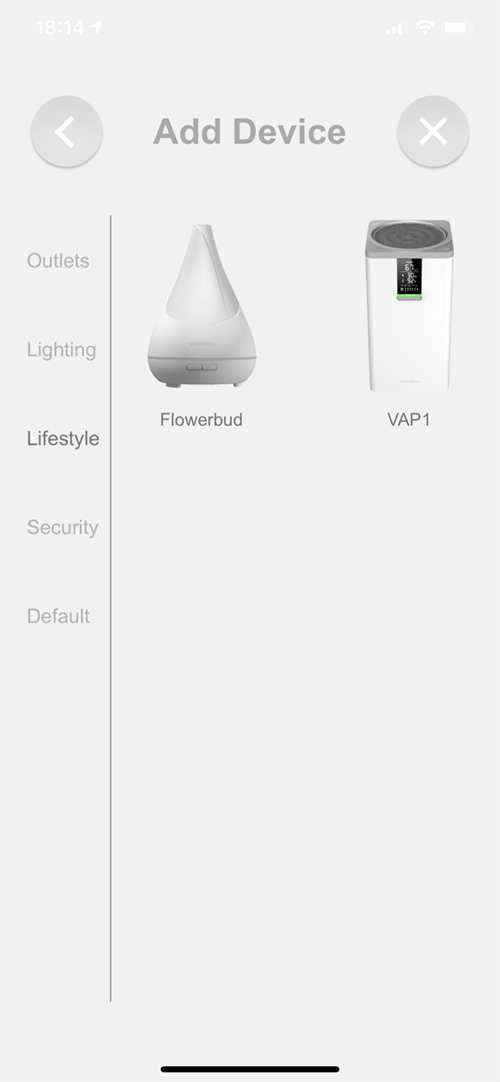
- Select the Lifestyle tab and then the VAP1
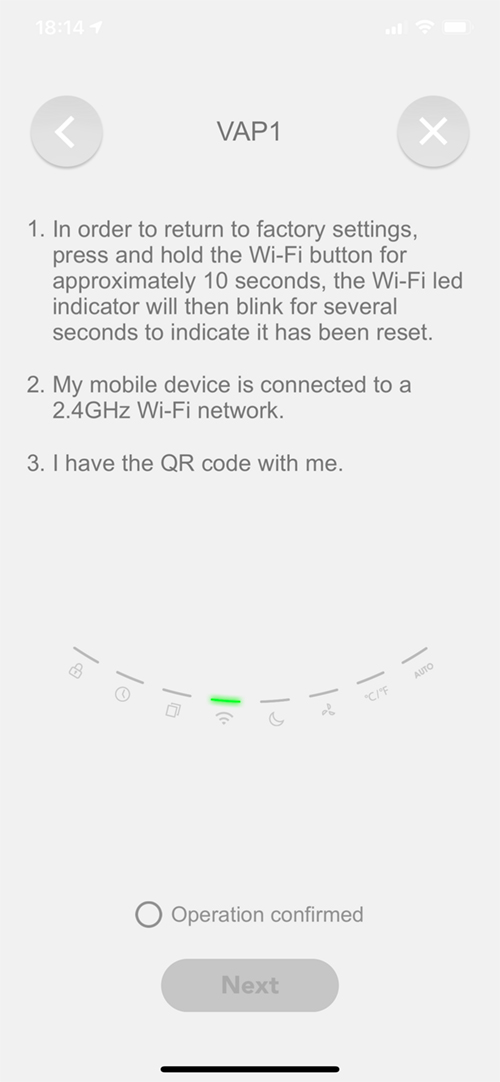
- Press and hold the WiFi button for roughly 10 seconds, until the WiFi indicator starts to flash
- Click on ‘operation confirmed’, click Next
You then proceed in the normal HomeKit manner by scanning the QR Code, choosing a room, and decide whether it’s a favourite. That’s basically it.
IN THE HOME APP


Once added, you can check in the Home app to make sure all is present and correct, which initially will show just the one tile, although in fact once separated out, you get a total of four ‘services’. Three of these services are sensors – temperature, humidity, and air quality, with the fourth device being the VAP1 as a sort of fan device, given that you’re controlling the speed of the fans that suck in dirty air.
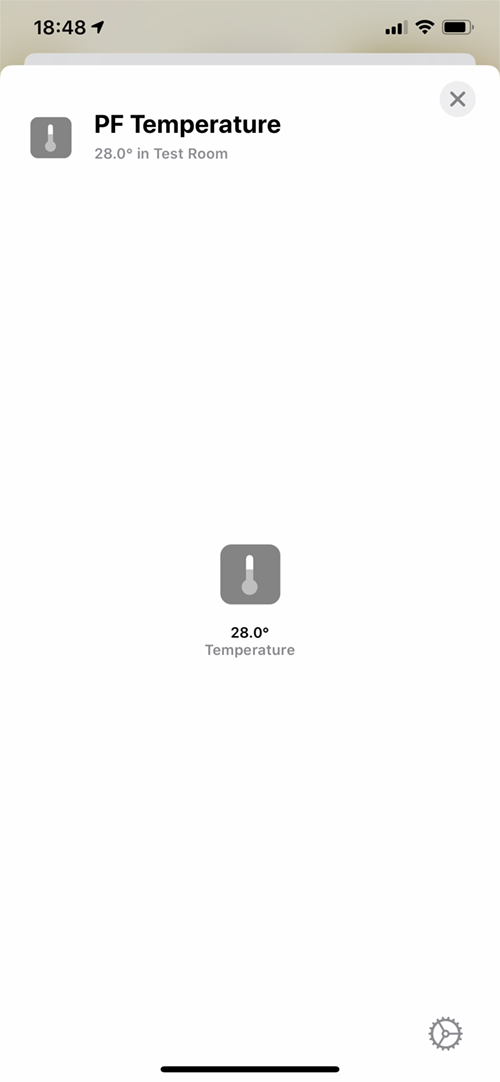
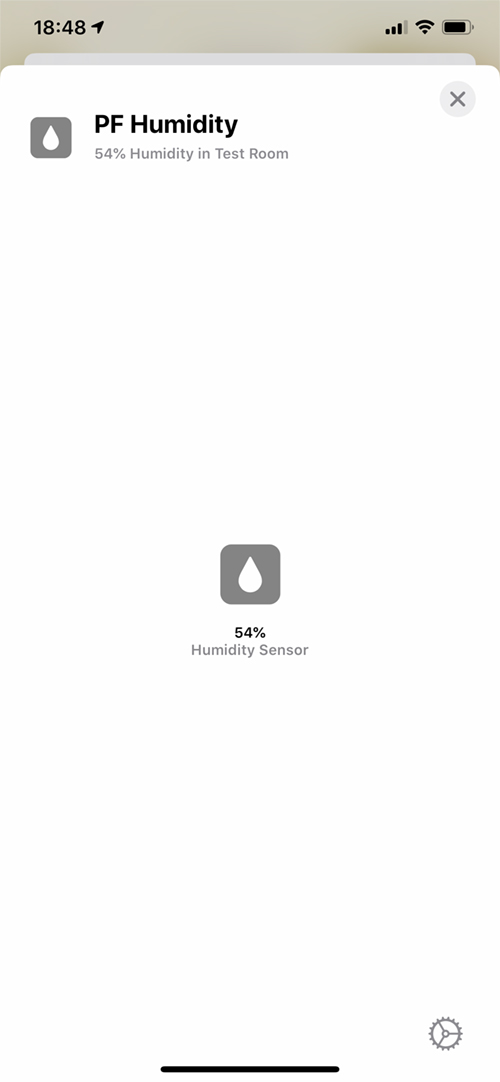
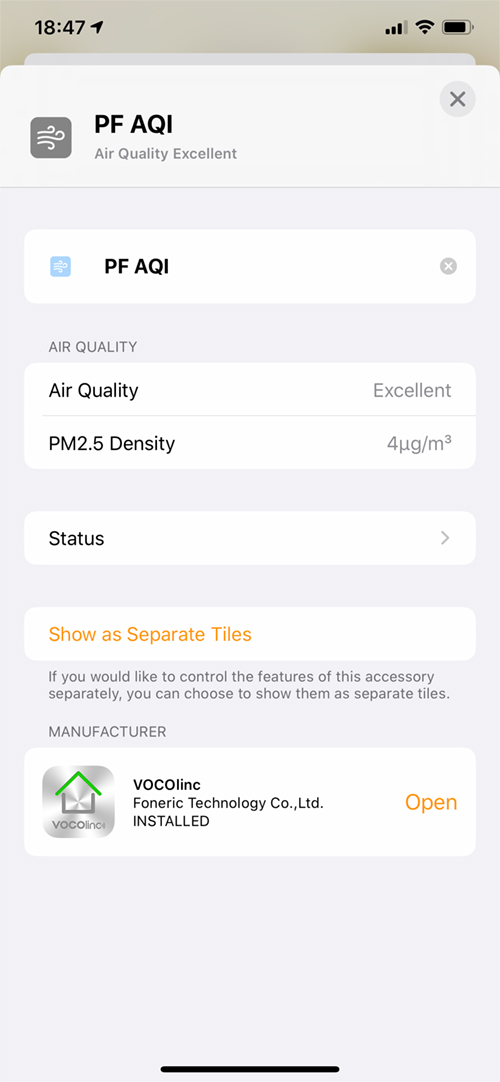
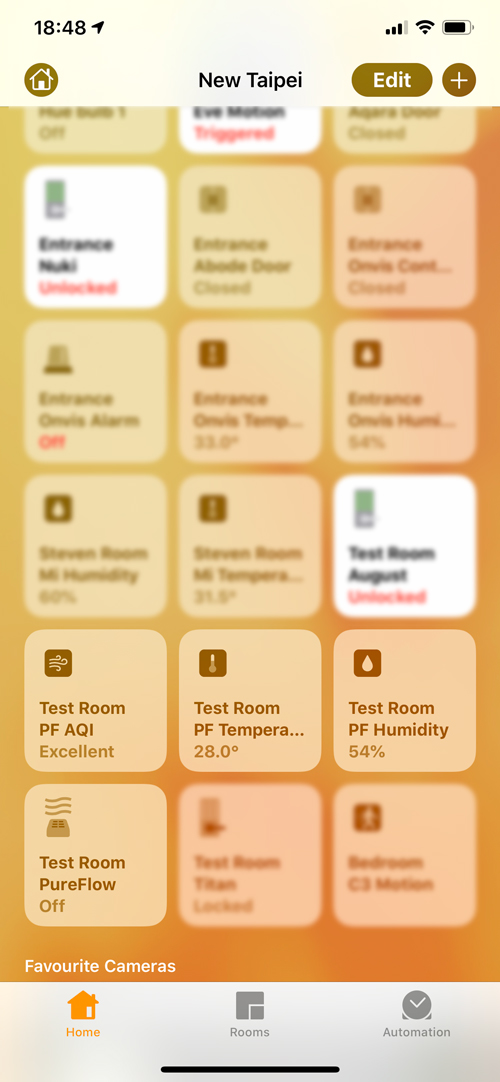
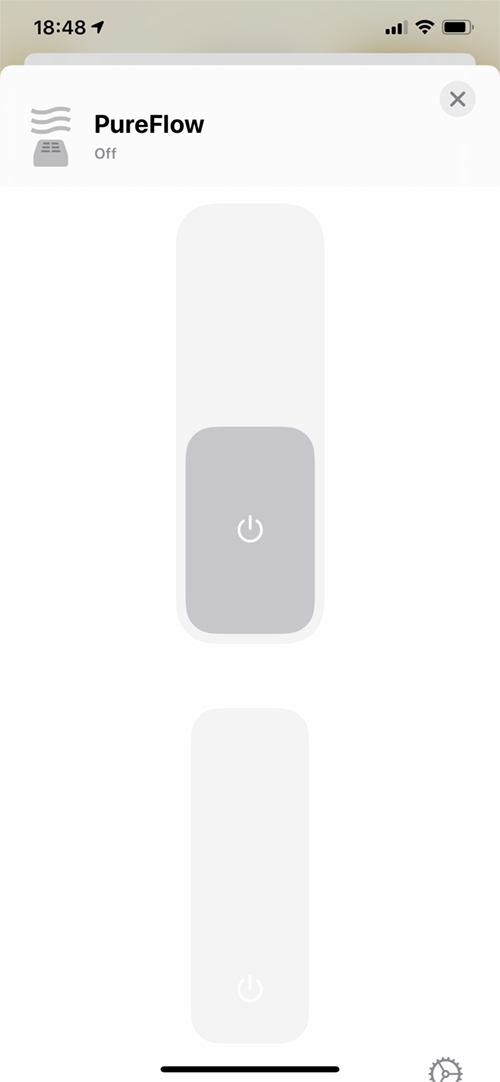
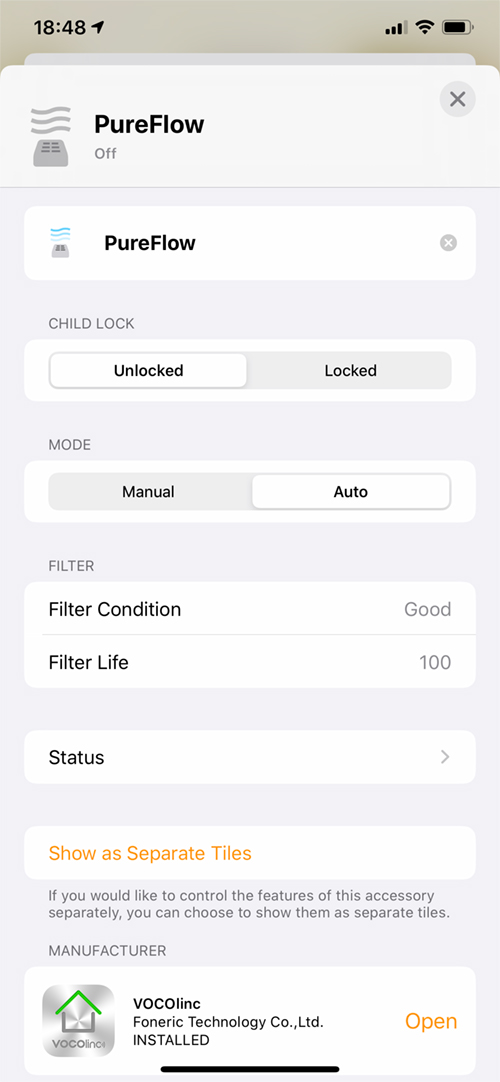
Once the services are split up, which is how I prefer things, you get the four tiles, along with settings pages for each service, the Air Quality page shows the AQI (Air Quality Index) level, which can be Excellent, Good, Fair, Inferior, or Poor. Along with this, you can see the PM2.5 density levels. The Humidity and Temperature pages just show the relevant numbers as standard, and the Air Purifier tile, which is controlling the state of the device, as well as controlling the fan speed. Further settings for the fans allow for locking and unlocking the VAP1 (the kid lock mentioned earlier), along with manual and auto mode. Finally, you get information on the filter condition (good) and filter life in, I assume, a percentage.
IN THE VOCOLINC APP

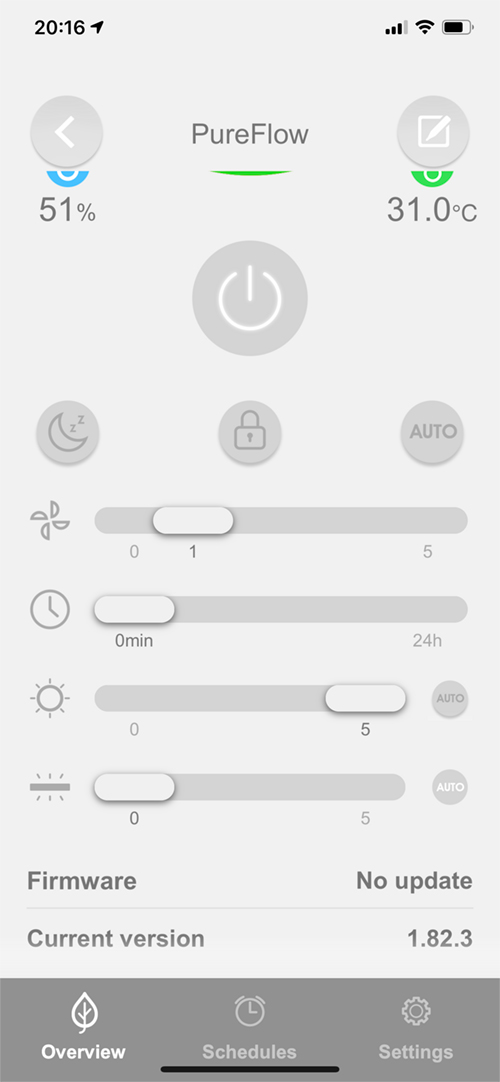
The Vocolinc app has a few more functions than the Home app, which is good and bad; It’s great that you have more control over certain parts of the device, which I’ll go into shortly, but it’s also a shame that these aren’t exposed to HomeKit if you want to run certain types of automations, or if you simply don’t want to hop between apps, which was the whole reason for the Home app being created, to begin with. Putting that to one side, for now, the ‘overview’ screen is broken into two halves, with the top half featuring a large colour circle that reflects the state of the air in your home, as well as tell you the PM2.5 count. On the top half of either side of this large circle, you get icons for filter life and WiFi strength. Below that are icons for humidity and temperature levels. below all this is the on/off button. These are the main visuals you might glance at when in the app, and they are reproduced via the LED display. Going a bit further down you then get controls for Night mode, Kid mode, and Auto Mode.
If you then scroll further down, you then come to controls, some of which are exclusive to the Vocolinc app. First off is the fan speed, which has a slider for moving from zero (off) to five (maximum). Below that is a timer slider. Unlike the physical button on the VAP1, where you cycle through the timer in increments of one hour, this slider seems to be a lot more finicky, so you can end up with a timer of 3hrs 46mins for example. whether this is ultimately rounded up to the nearest hour, I’ve yet to find out, but I’ll update the info once I find out for sure. Give that the slider is pretty small when it has to cover a 24hr period, I’d suggest it needs a bit a rework so that it snaps to the nearest hour.
The final two sliders are also exclusive to the Vocolinc app and relate to the display, and the colour LED strip below. Both of these sliders go from zero to five, which relate directly to the brightness of the display and LED strip respectively, with zero being off, and five being maximum brightness.
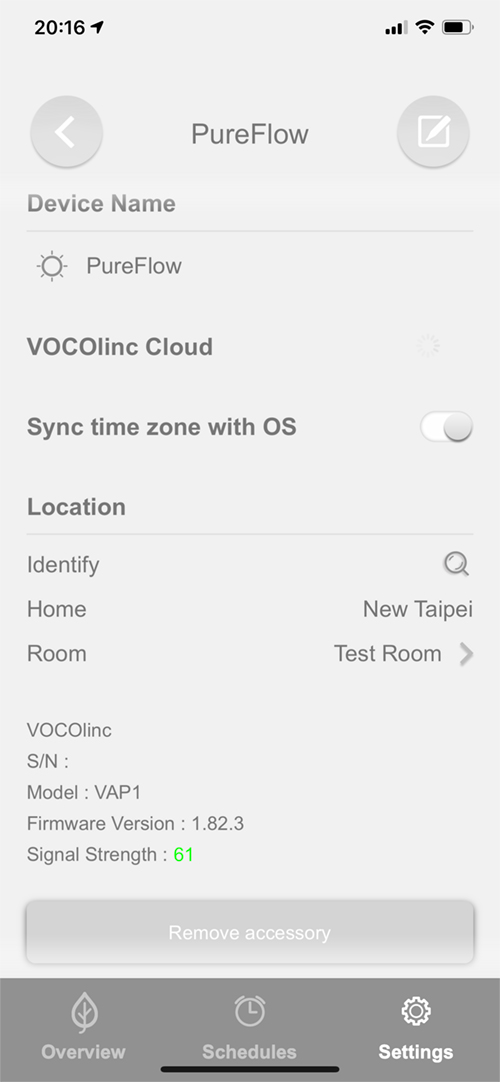
The settings page just gives you details on the device itself, including WiFi strength, the possibility to perform firmware updates, as well as sync the device to the Vocolinc Cloud, which is required for use with Amazon Alexa and Google Home.
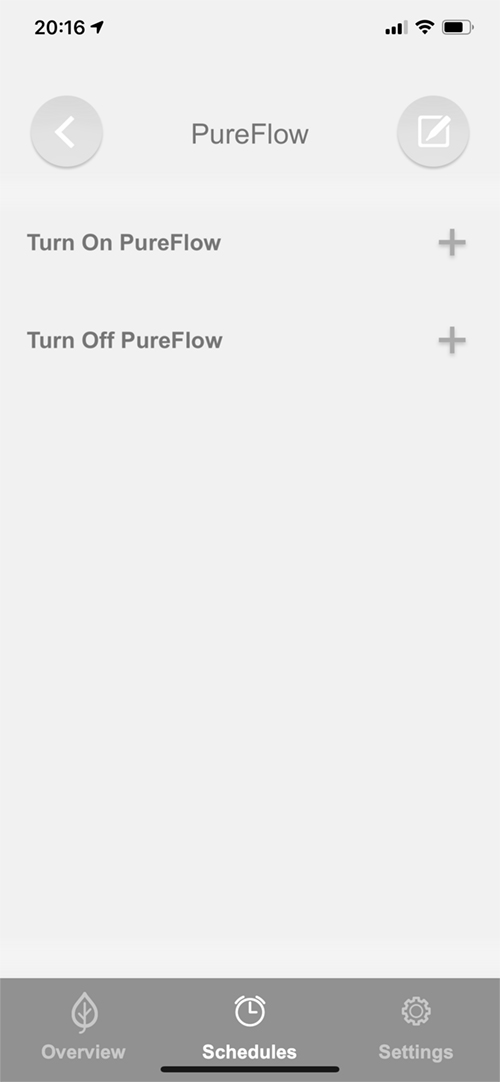

There’s another tab that is for simple schedules, and it really is simple, as these schedules only allow the device to turn on or off, so at present, you can’t schedule the device to go to a specific fan speed, or even set a schedule for it to go to Night mode. This is a glaring omission in my opinion, as in order for you to go into Night mode, you have to either get out of bed and set it as such via the buttons, or go into the app to set Night mode. Not the end of the world, sure, but if this device is supposed to be smart, a simple automated mode change should be second nature. I mentioned this to Vocolinc, and they’ve said they’ll work to get this functionality included in the next update, so hopefully, it won’t be too long before this oversight is fixed.
LED DISPLAY


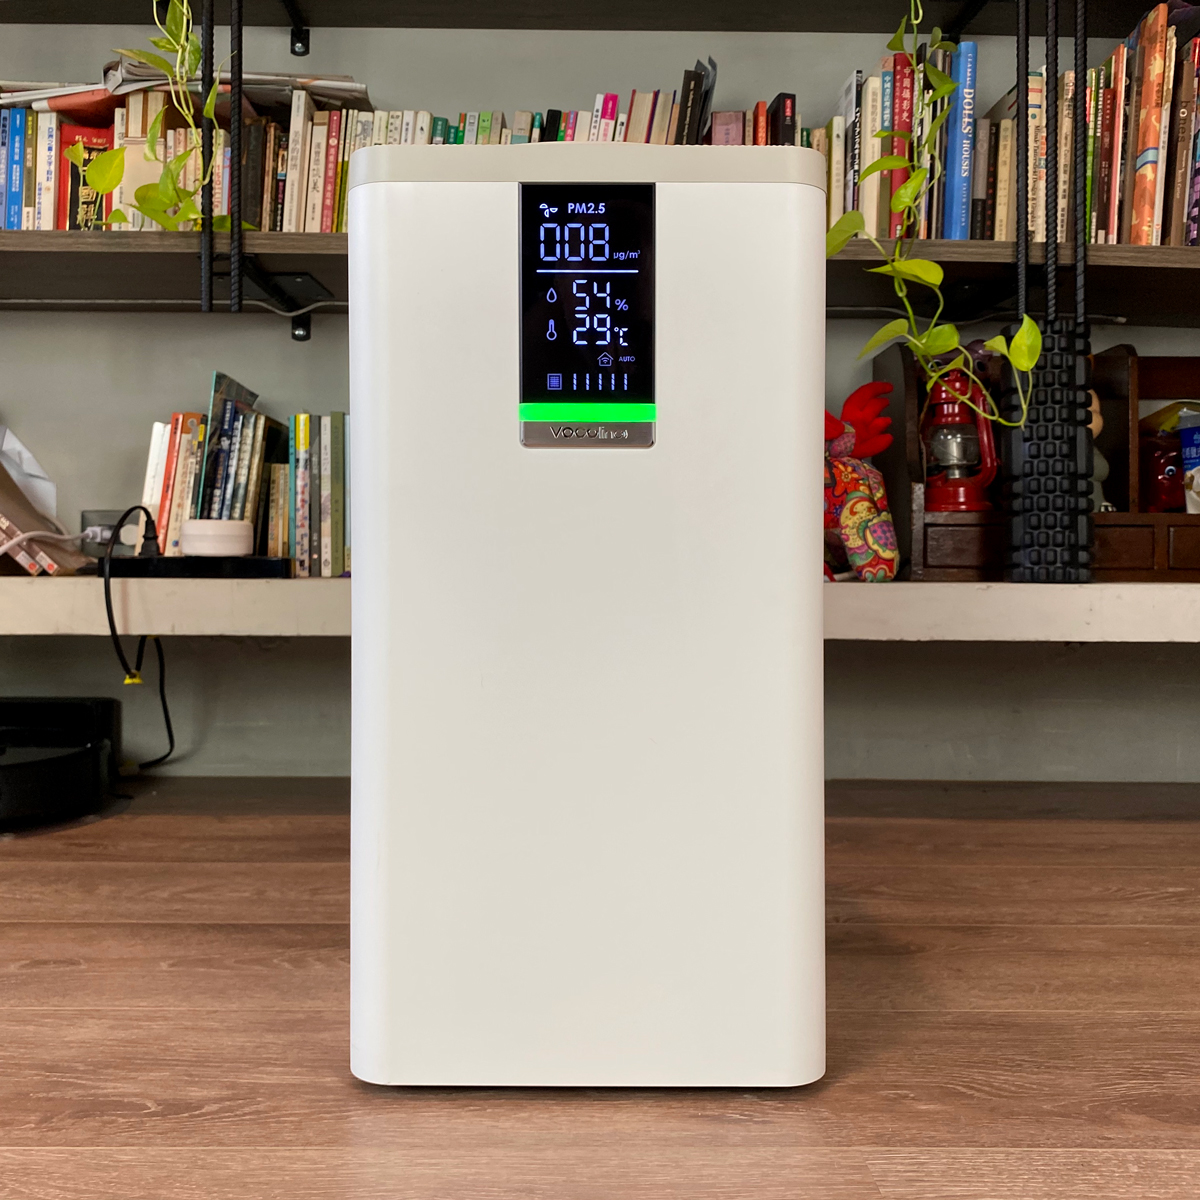
One thing I really do appreciate about the VAP1 is the large LED screen. I honestly thought it was a bit overbearing when I saw the initial renders that the company released last year, but it really is a lovely touch and one that can be seen from a reasonable distance, which you can really say about the Xiaomi models that have a similar display.
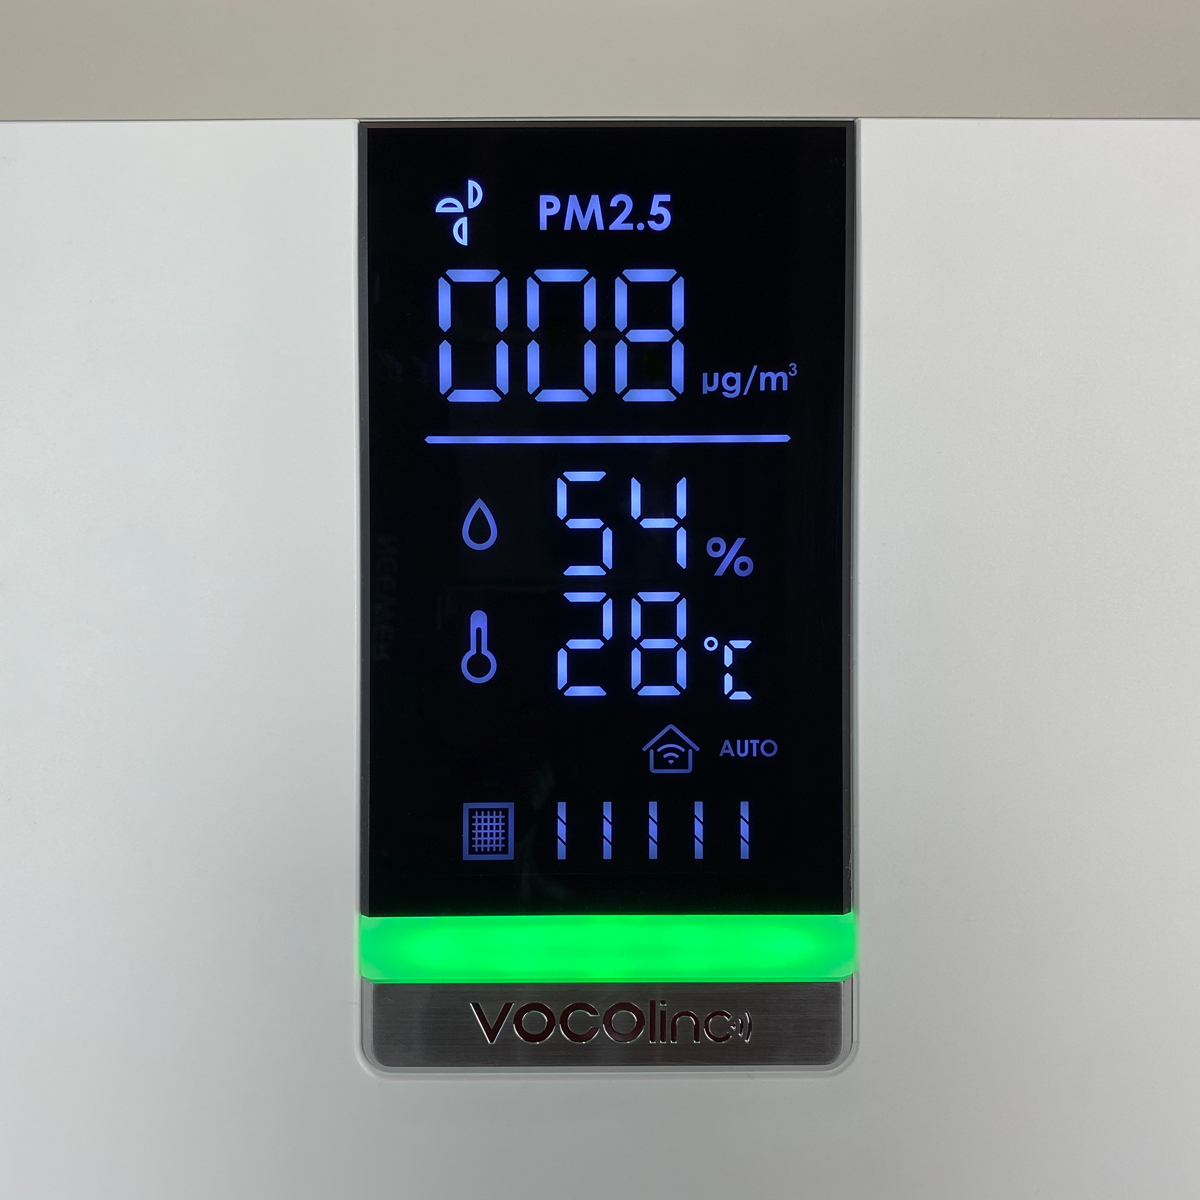
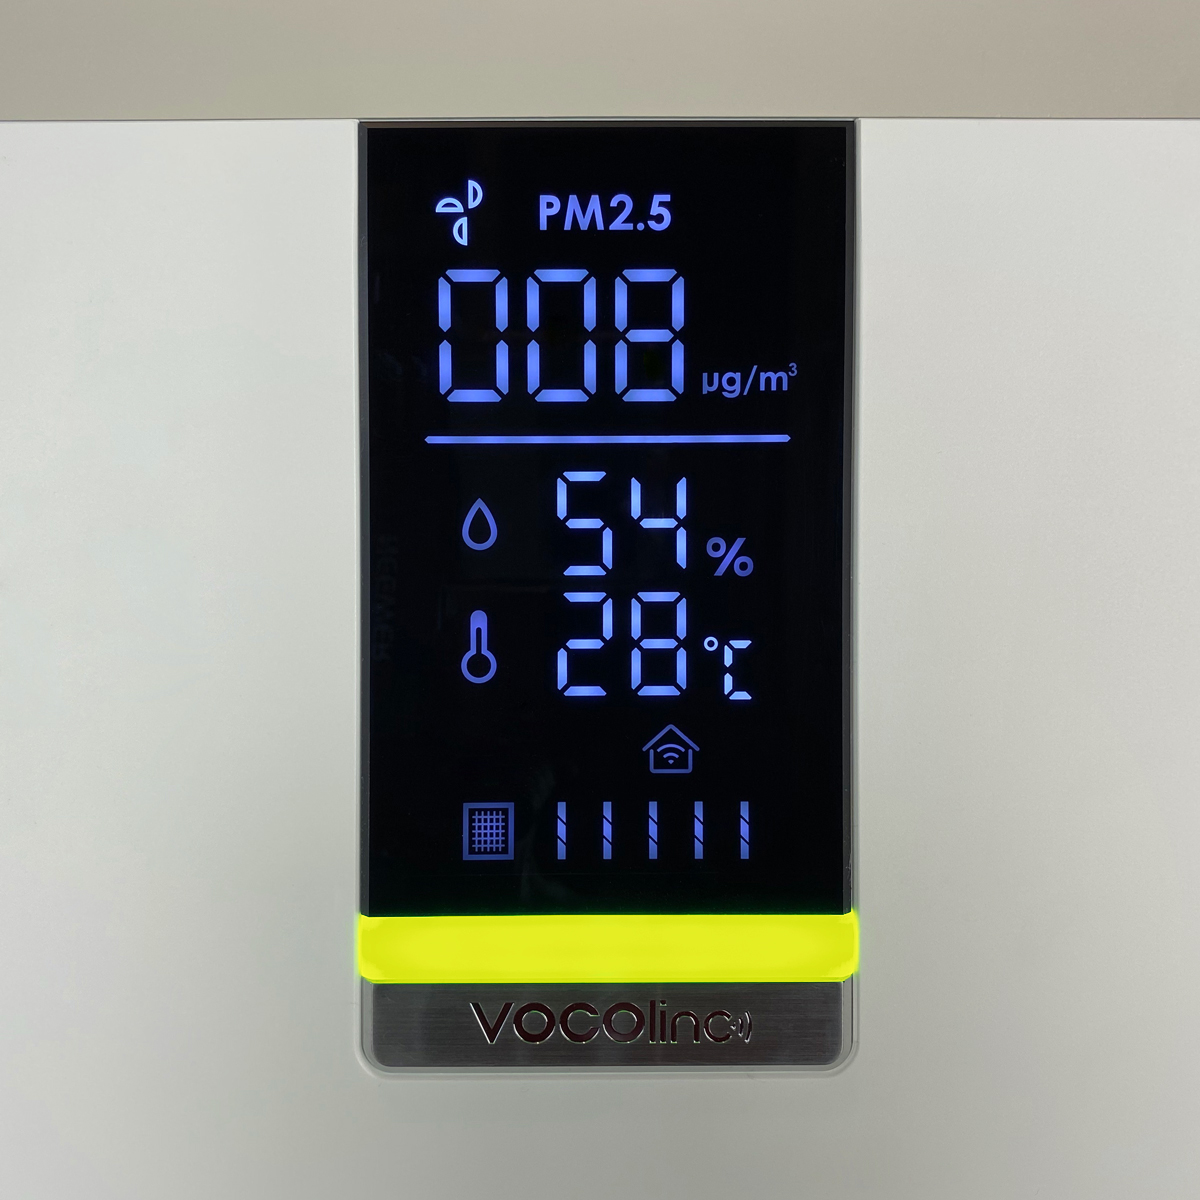
Pretty much everything that you see on the main screen for the VAP1 within the Vocolinc app is the same here, so if the any of the metrics change, you’ll see that change on the display and on your smartphone at the same time. When you change the fan speed via either the button or the app, the PM2.5 number changes to the fan speed number (1 to 5), before reverting back to PM2.5. the little fan icon also rotates and will turn faster or slower depending on the speed that is set. Along with the PM2.5 levels, you see the humidity and temperature levels, along with a wifi icon. This should remain solidly lit and only flash if you become disconnected from the network. The last section shows an icon for the filter, along with 5 vertical bars that reflect the amount of usage left for the two filters.
I mentioned previously that one button is dedicated to switching between Celcius and Fahrenheit, and the display dutifully displays this change accordingly. When in Auto mode, the Auto text will show up next to the WiFi icon.
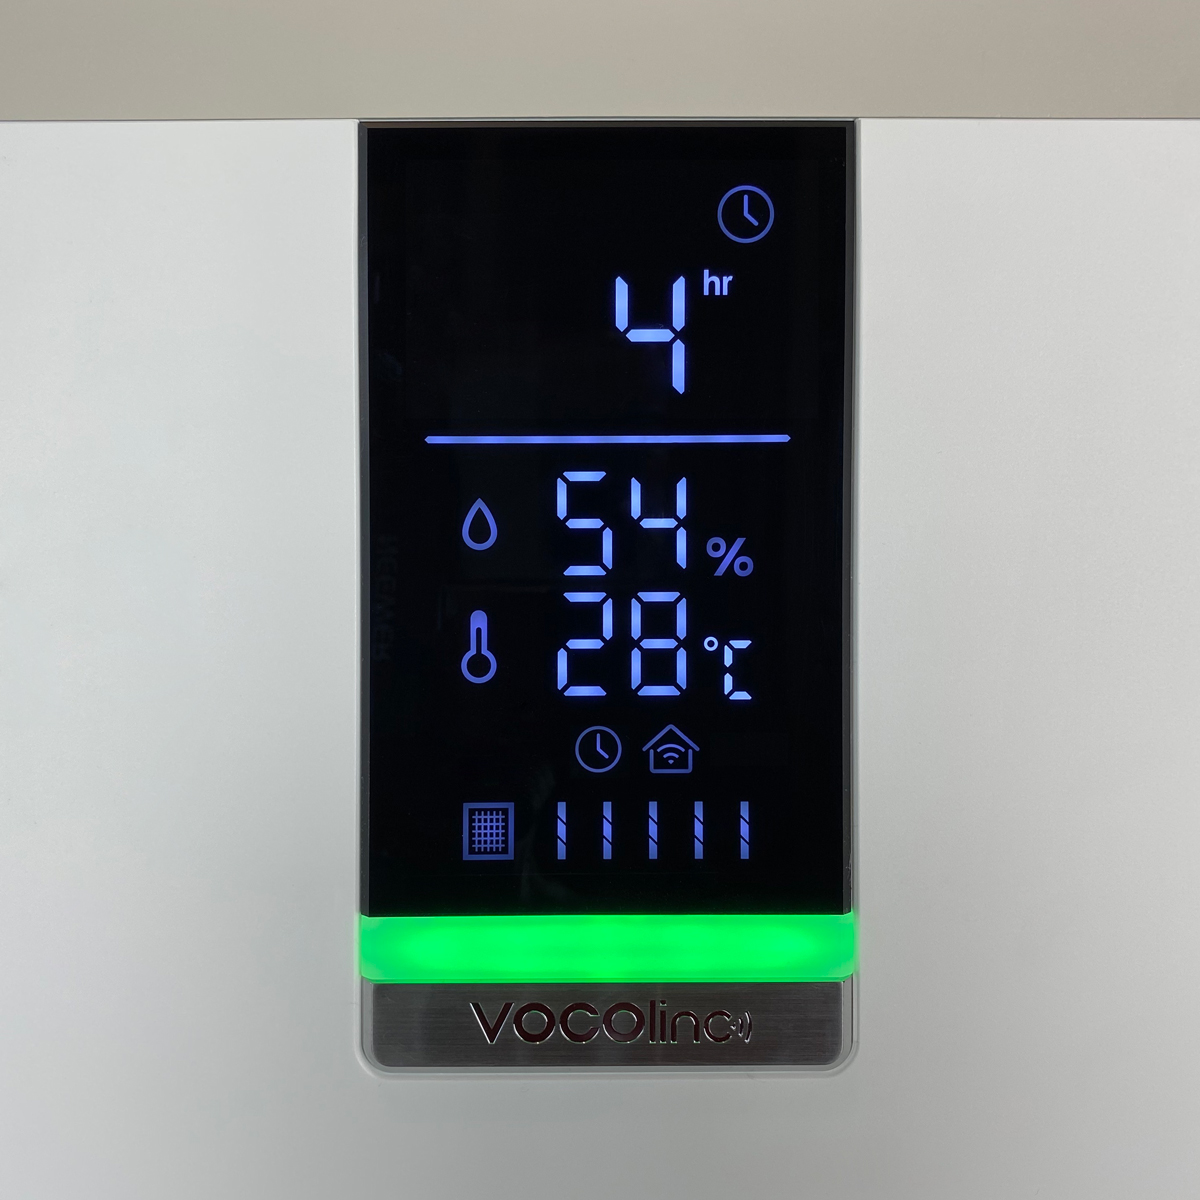

In the same way that the PM2.5 display changes to the fan speed number when changing the fan speed, setting a timer for the VAP1 will show the time in complete hours, before eventually returning to the PM2.5 display. If a timer has been set, you can tell with a clock icon next to the WiFi icon.
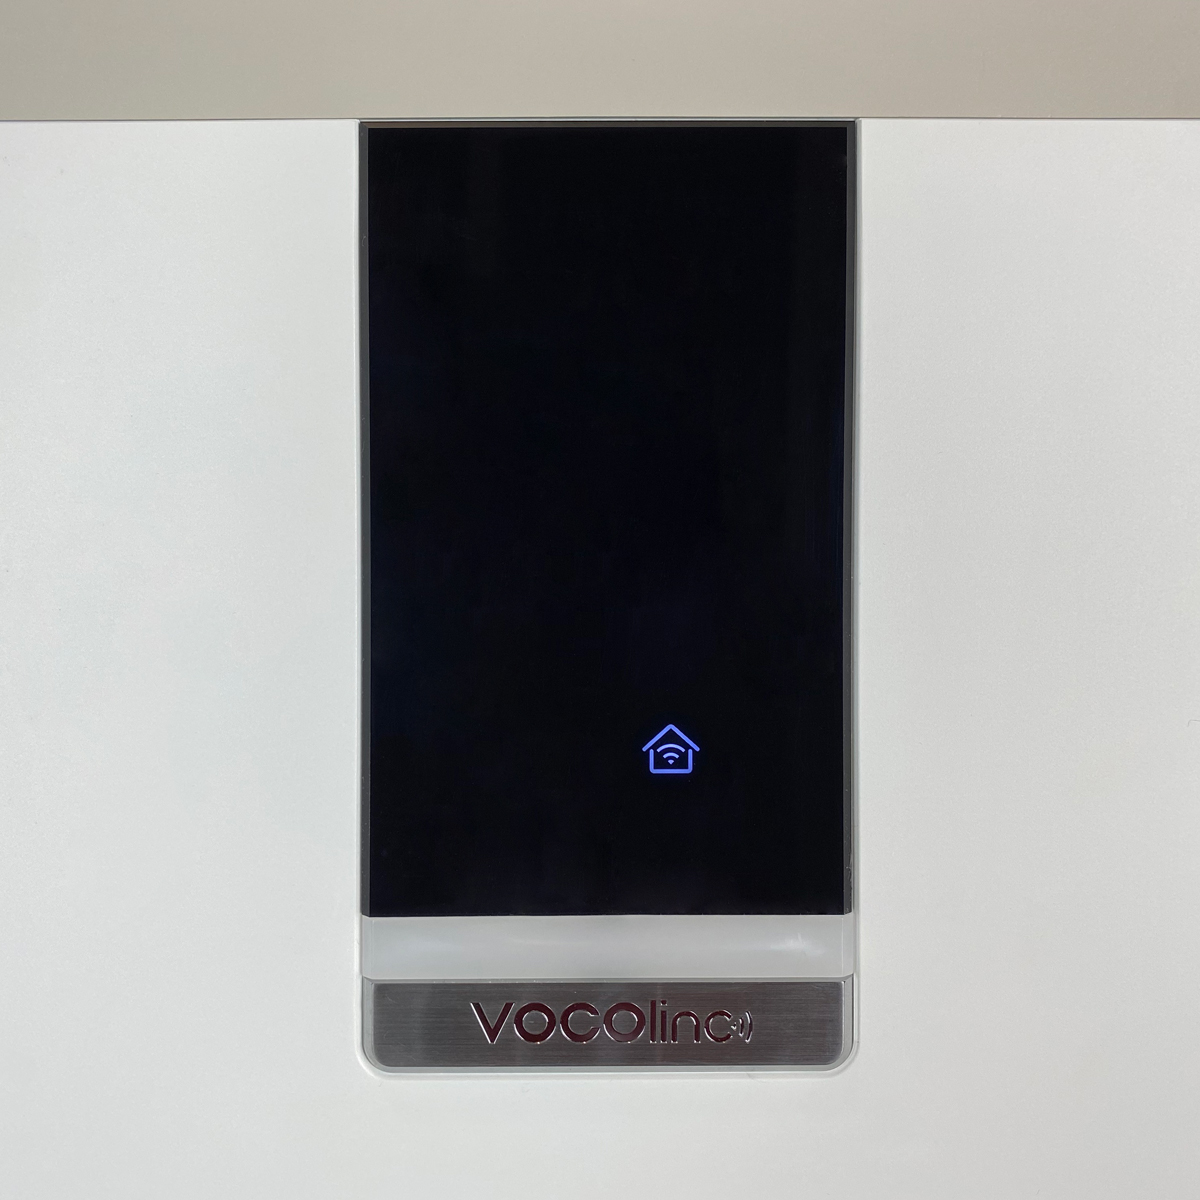
If you set the VAP1 to Night mode, the display will turn off, with only the Night mode icon show, with itself turning off after a few seconds, so the display is completely off, including any LEDs associated with the buttons. Having constantly ‘on’ LEDs is something of a bugbear for many, so Vocolinc has taken this issue seriously by adding this functionality. When the device is turned off, you essentially get the same result as night mode, with the exception that the fan is also off.
COLOUR STRIP


* Note: The colours have been simulated for the purposes of this review. The companion video review shows the colour bar change in real-time.
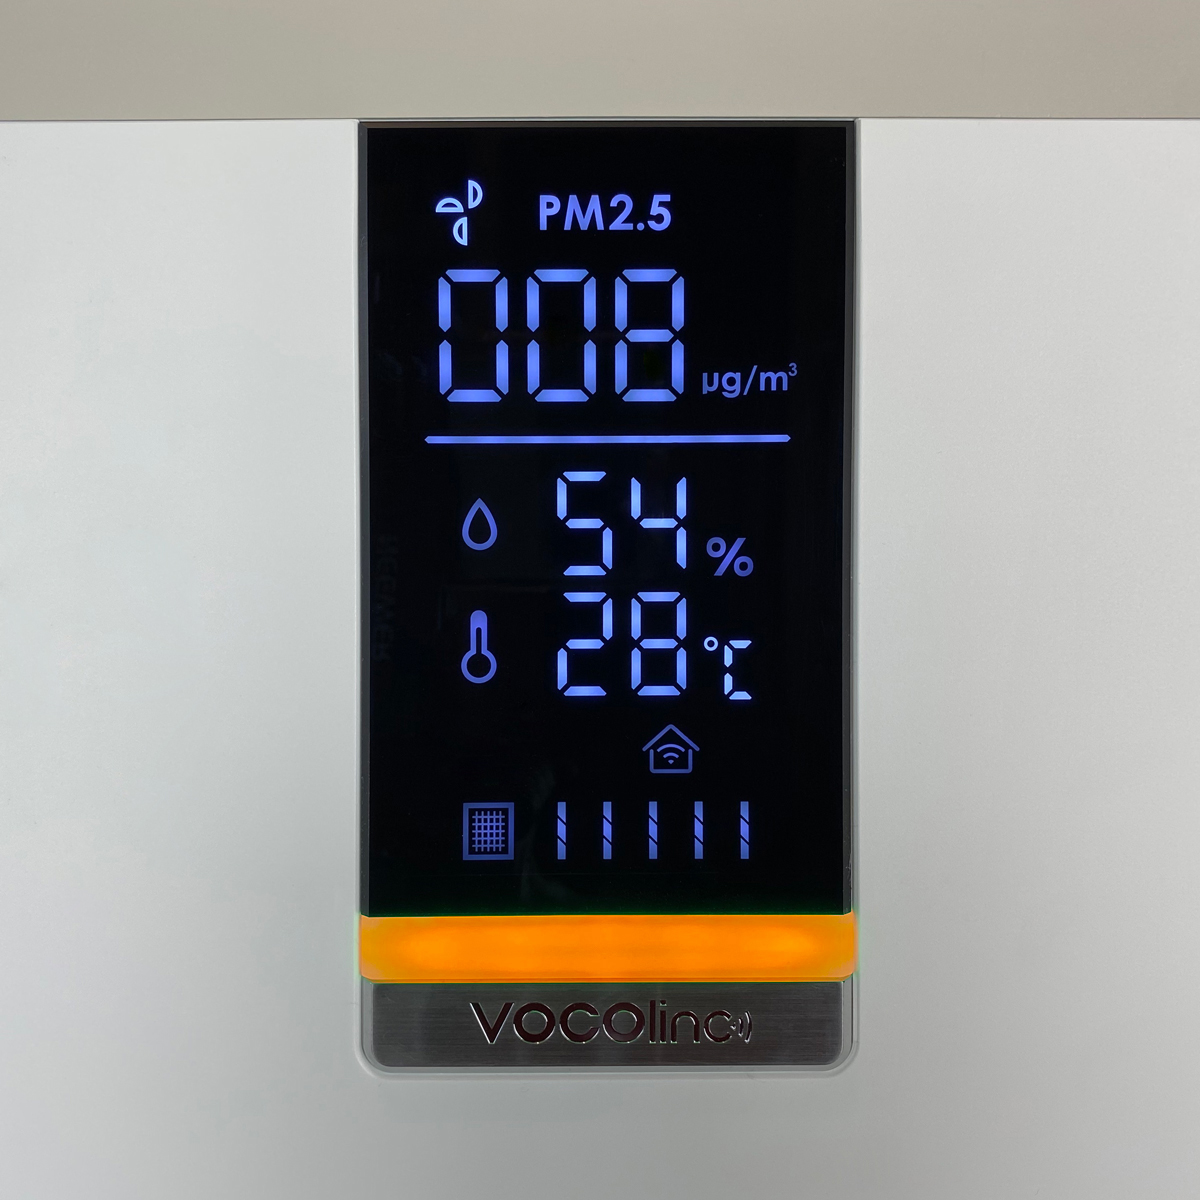
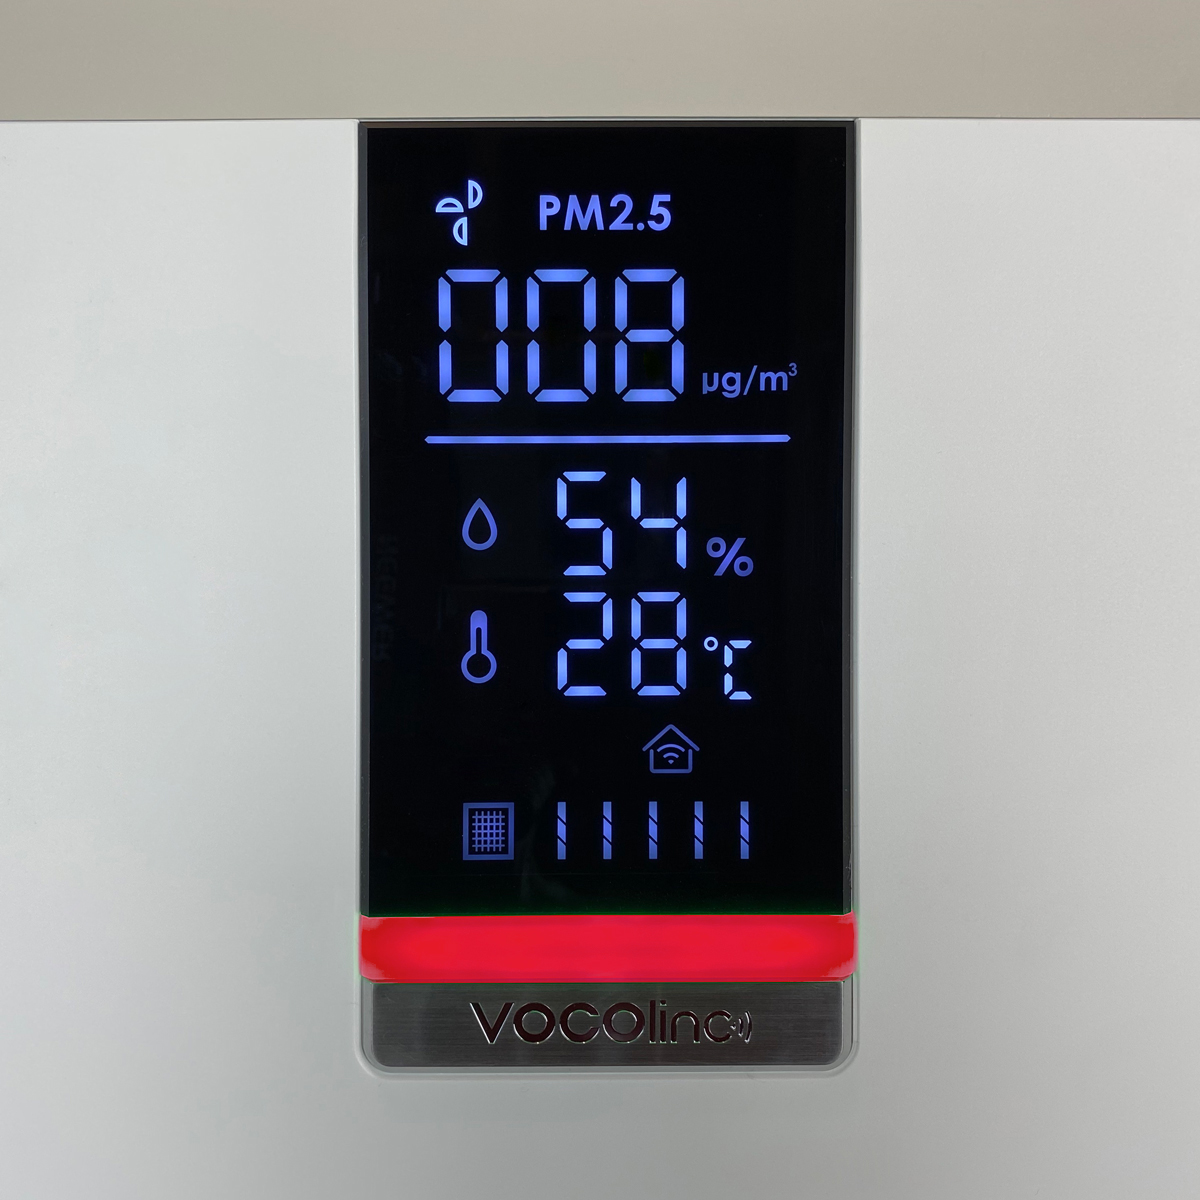
The colour bar below the LED display is there as a quick reference to the air quality detected by the PM2.5 sensor. in normal operation and with ‘good’ air quality, the LED bar will be green. If the air quality starts to get worse, the colour of the strip will change to Lime Green, Yellow, Orange or Red, depending on how severe the indoor pollution gets. If you have the VAP1 set to auto mode, in theory, the strip should always stay green, with the air purifier and fan speed changing to keep air quality at acceptable levels. As already mentioned in the details for the Vocolinc app, you can adjust the brightness of this strip, or turn it off altogether if you prefer to just rely on the PM2.5 reading on the screen.
IN USE
I’ve been using the VAP1 for a couple of weeks now. It hasn’t failed in any way so far, and while it may seem like a minor point, due to all the photography and video I’ve put it through, I’ve had to unplug it numerous times. Every time I’ve plugged it back in, it picks up the WiFi signal really quickly, which makes a difference to me. I also removed and added to HomeKit about 6-7 times, and each time I’ve readded it, I’ve had no issues at all. Things like this are reassuring if nothing else.
Does it do the job? Of course. I don’t think any company could charge $400 for something that was central to well-being and important in what it’s meant to tackle, and not deliver. I’ve tested smoke and a couple of VOC sources and it has been pretty damn good at tackling those (as can be seen in the video). I think alongside the price, people may well baulk at the price of the filters, but as I said towards the start, what price do you want to put on your health?
The other point to note, and I know this will come up, is that some will say “why not just get a dumb air purifier for a quarter of the price, and plug it into a smart plug?”. Well yes, why not, but can the smart plug change the speed of the fan? Nope! Add to this that many devices nowadays come with what I refer to as ‘soft buttons’ in that they aren’t physical buttons that can be pressed in or out and stay in that mode. With that, the device may be ‘on’ when it’s plugged in, but as soon as the smart plug is turned off, the device turns off and will stay that way even when the smart plug is turned back on, so unless your purifier has mechanical buttons, a smart plug is another ‘Nope’. The only other option I can think of is to get an air purifier that comes with an IR remote; That way, you could use the very inexpensive Xiaomi IR controller, and teach it to learn the controls for the air purifier’s remote. The IR controller works with Mi Home and can, therefore, be controlled via Siri Shortcuts. It’s not full HomeKit by any means, however, and so isn’t a patch on the VAP1 being fully HomeKit compatible.
So, all in all, I’m really happy with it. I do really hope that Vocolinc is able to implement an automation for the night mode but other than that it’s a great device, and within reason, regardless of where you live, air quality is of concern, so it does pay to spend a bit on good quality, and something with HomeKit smarts too. I’ve gotten to appreciate the reason for this device being the price that it is. Of course, who wants to pay more than the minimum they can get away with? I’m no exception to this, and it may ring a little hollow given that Vocolinc provided this product for free, so I do have to ask myself, would I pay the US$399 asking price for the VAP1. It’s hard to answer that fully, as I live in Taiwan, and so I would have to take into account hefty shipping fees. If I were to live in the US, however, would I? Possibly. I want as many things in my home to be officially and natively compatible with HomeKit as possible, and for that reason, I usually expect to pay a bit of a premium. If I had the spare cash, and needed a decent air purifier, then I would buy it without a question. Is it worth it to buy a cheaper Xiaomi air purifier, and send it through HomeBridge/HOOBS, like I already do? Once again, Possibly. I have an older Mi Air purifier 2, which works fairly well in HomeKit via HOOBS, but it’s far from perfect, and that aside, the model that I have is notoriously inaccurate for measuring PM2.5 levels. So, taking all things into consideration, I would say that this is one of those purchases that you should seriously ask whether it needs to be smart to the extent that the VAP1 is. If you aren’t bothered about automation, and are happy to press the buttons on your device, then just spend a bit less on a decent standard air purifier. Automation is a boost to many disabled users though, so it’s worth considering for those that may be incapacitated on a temporary or more permanent basis, so that’s another thing to consider if it’s relevant to you.
The Vocolinc PureFlow Smart Air Purifier is already available via BestBuy in Canada, with BestBuy US to follow, along with Amazon.com. For Europe, the PureFlow is available to preorder from a few different sites, with am estimated shipping date of mid-July.
References:
- HEPA – https://en.wikipedia.org/wiki/HEPA
- PM2.5 – https://en.wikipedia.org/wiki/Particulates#Size,_shape_and_solubility_matter
- VOCs – https://en.wikipedia.org/wiki/Volatile_organic_compound
Full disclosure: VOCOlinc provided HomeKit News with the PureFlow Smart Air Purifier for the purpose of this review. No other compensation was made or requested.
PureFlow Smart Air Purifier
Pros
- Large display for instant access to data
- 3-Stage filters provide a high level of protection
- touch sensitive buttons ideal for the frail or elderly
- Night mode turns off all LEDS
- Very quiet operation volume at fan speed 1
Cons
- Filters aren't cheap as you need to buy a pair
- Night mode and other extras not currently exposed to HomeKit