
AmbiClimate Mini Smart AC Controller (review)

Way back in the middle of 2019, we reviewed the Ambi Climate 2, a smart AC controller that was able to work with Google, Amazon, and IFTTT, but not HomeKit, at least not officially. Later on, the company – Ambi Labs – added Siri Shortcuts to their app, as a stopgap measure, so that you could at least set your AC using your voice via HomePod, iPad, iPhone etc. Moving onto 2021, and the Hong Kong-based company have released an update/addition to the Ambi Climate 2, in the form of the Ambi Climate Mini.
If you’re not sure what this device is, it replaces your standard AC remote, allowing you to control many aspects of your AC via your phone, voice, or using automation, depending on what route you take in using this device.
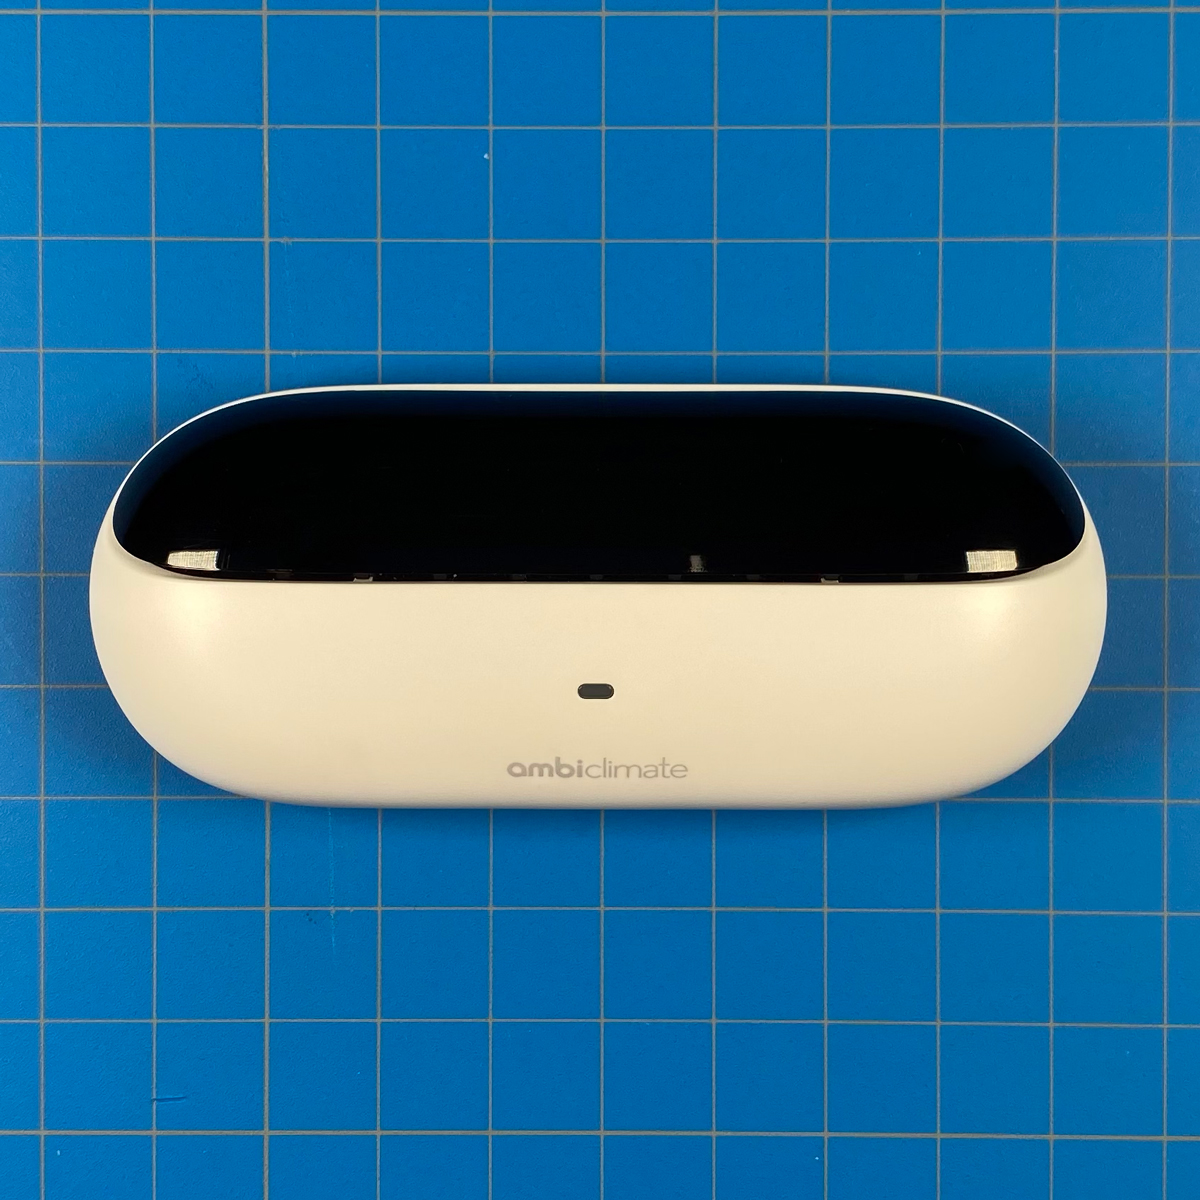
As you can probably guess, this new device is smaller than the previous model, but basically does much the same stuff. The main difference, aside from the much-reduced size, is that the company’s A.I. tech has gone from being free to a subscription service. Whilst that may give you pause for thought as to whether this device is worth a subscription, it’s also worth noting that the service you’re paying for is a lot more advanced than other AC controllers on the market. That said, as it’s still not officially HomeKit compatible, this could push you to look at alternatives. Today I’ll have a look at this newer model, and hopefully give you a better understanding of the product, as well as give you an idea as to whether the extras are worth paying for.
In case you find you’re interested in purchasing this product, Ambi Climate are offering an additional US$10 off the standard price if you purchase via their website, using the exclusive promo code HKN10. The code is valid until June 2021.
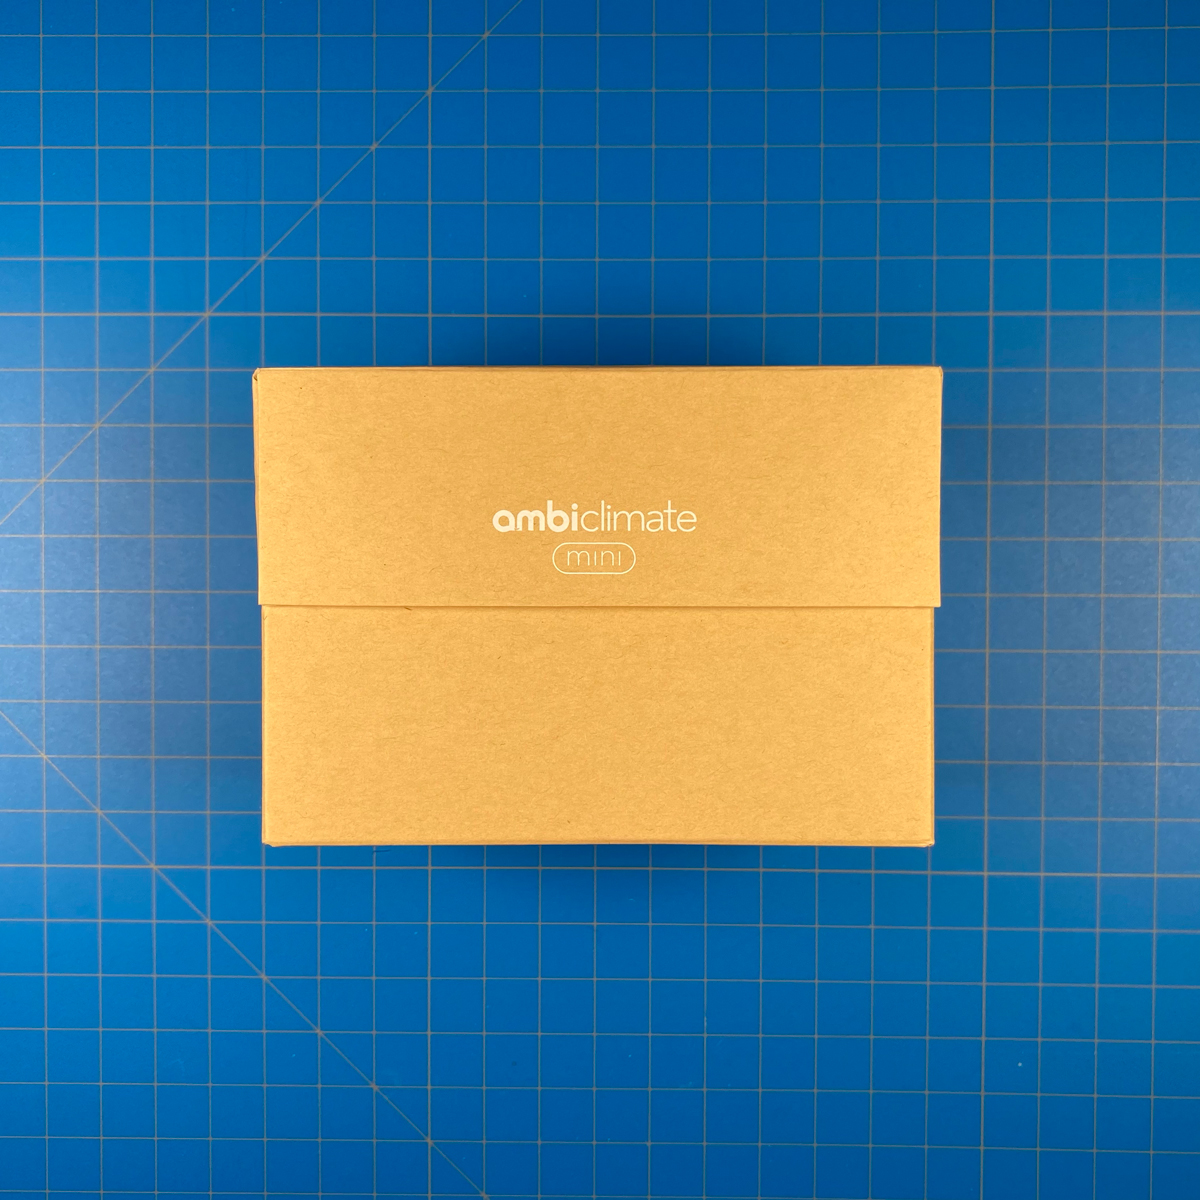
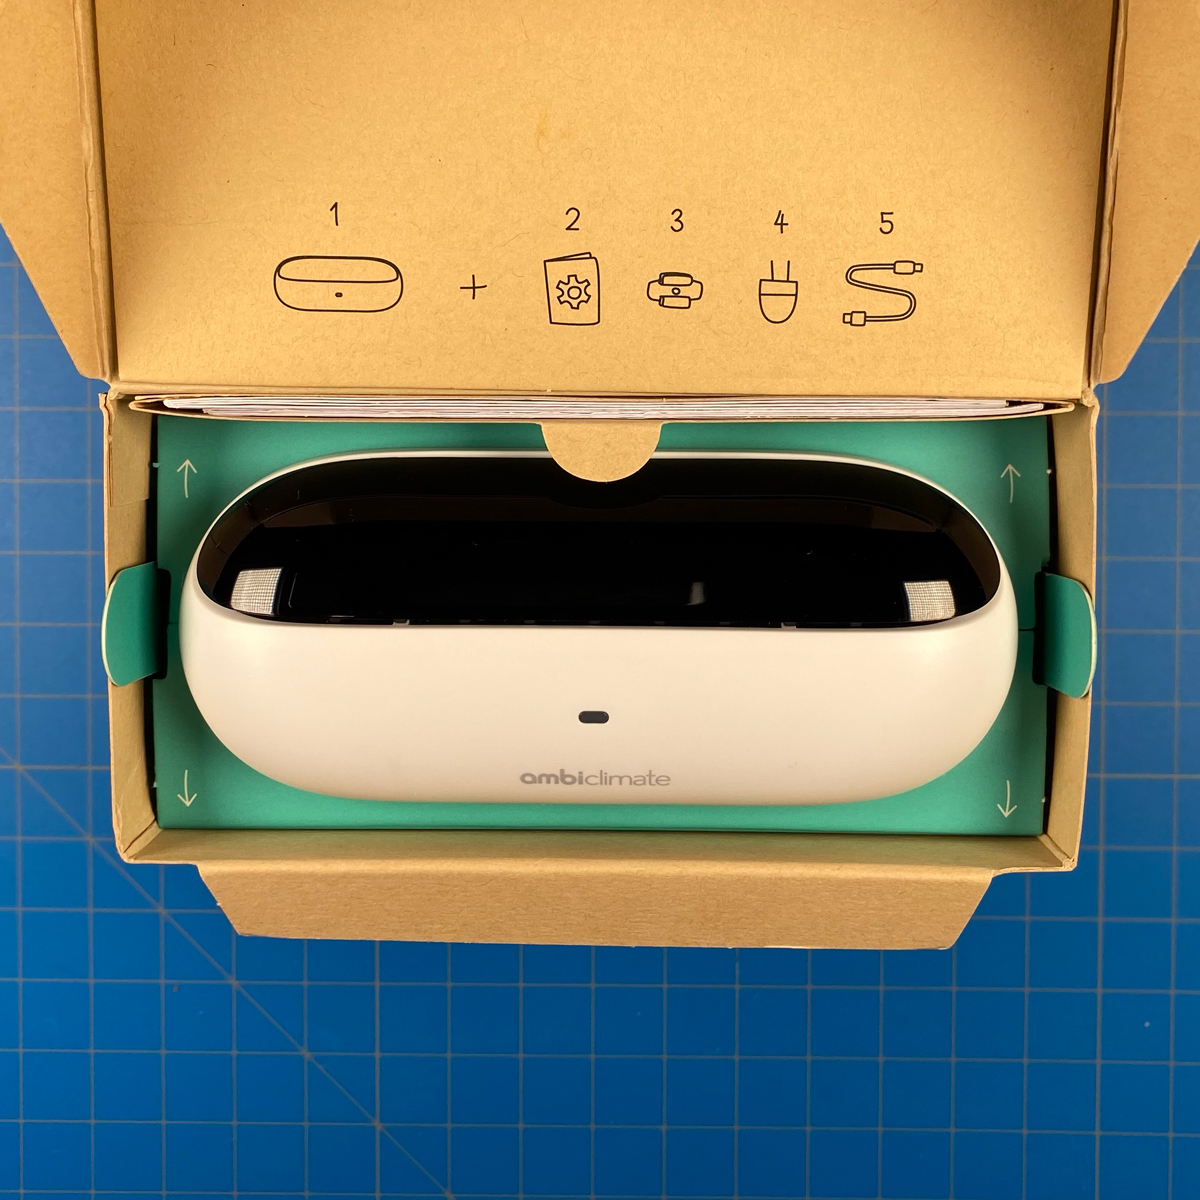
PACKAGING
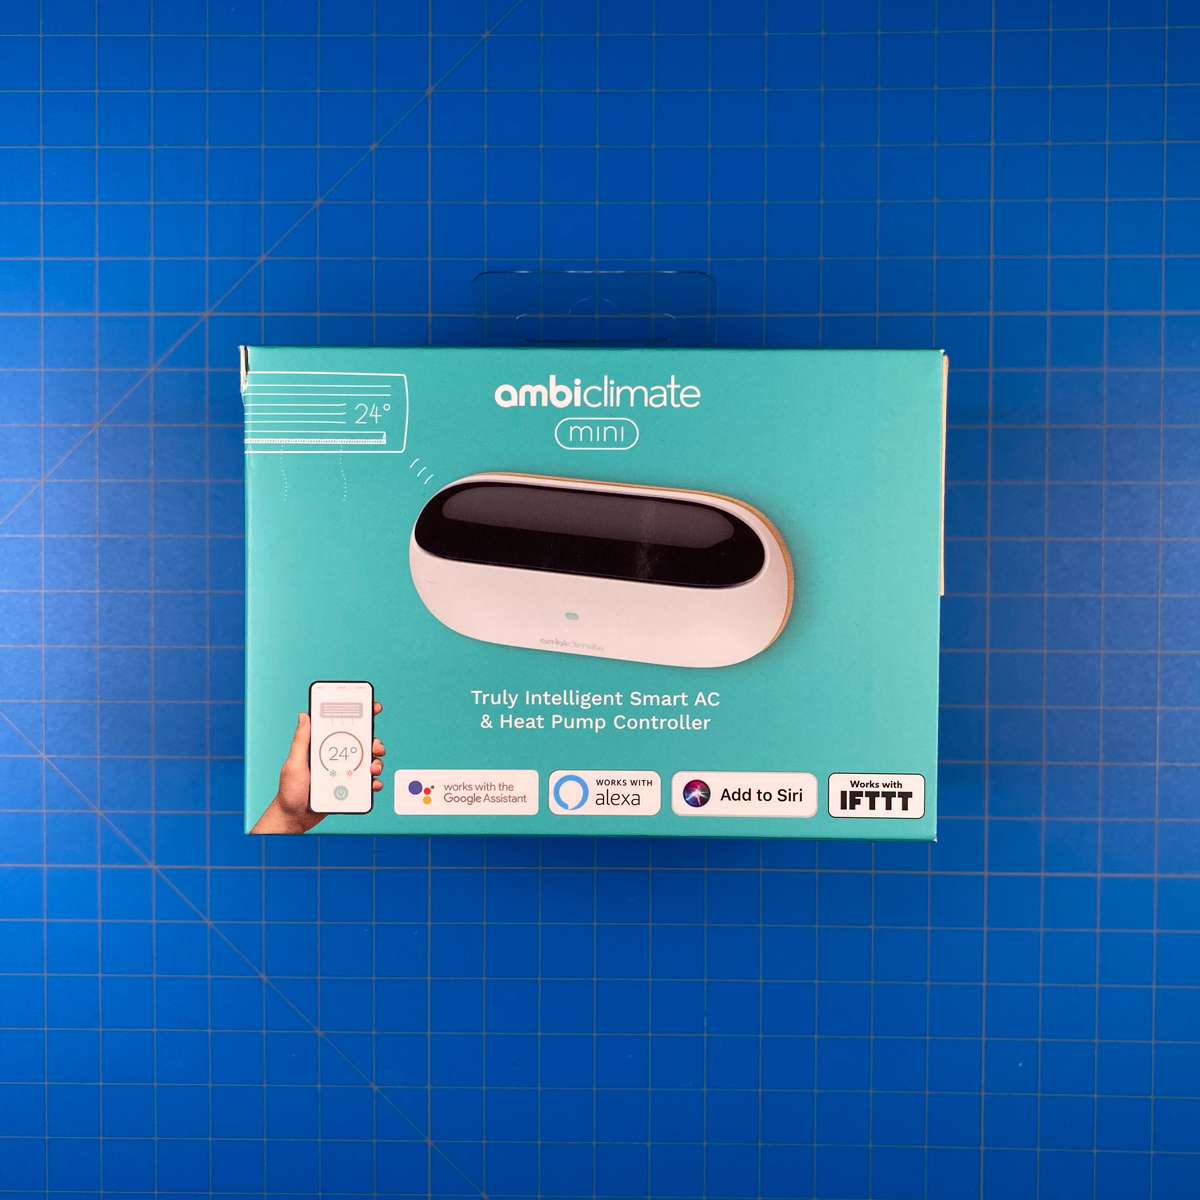
It is what it is, so if you’re aware of that, or use HomeBridge/HOOBs, then it matters less. It does work with Google Assistant, Amazon Alexa, and IFTTT though, and also includes the new ‘Add to Siri’ badge, meaning it works with Siri Shortcuts. I’ll go into that more, later.
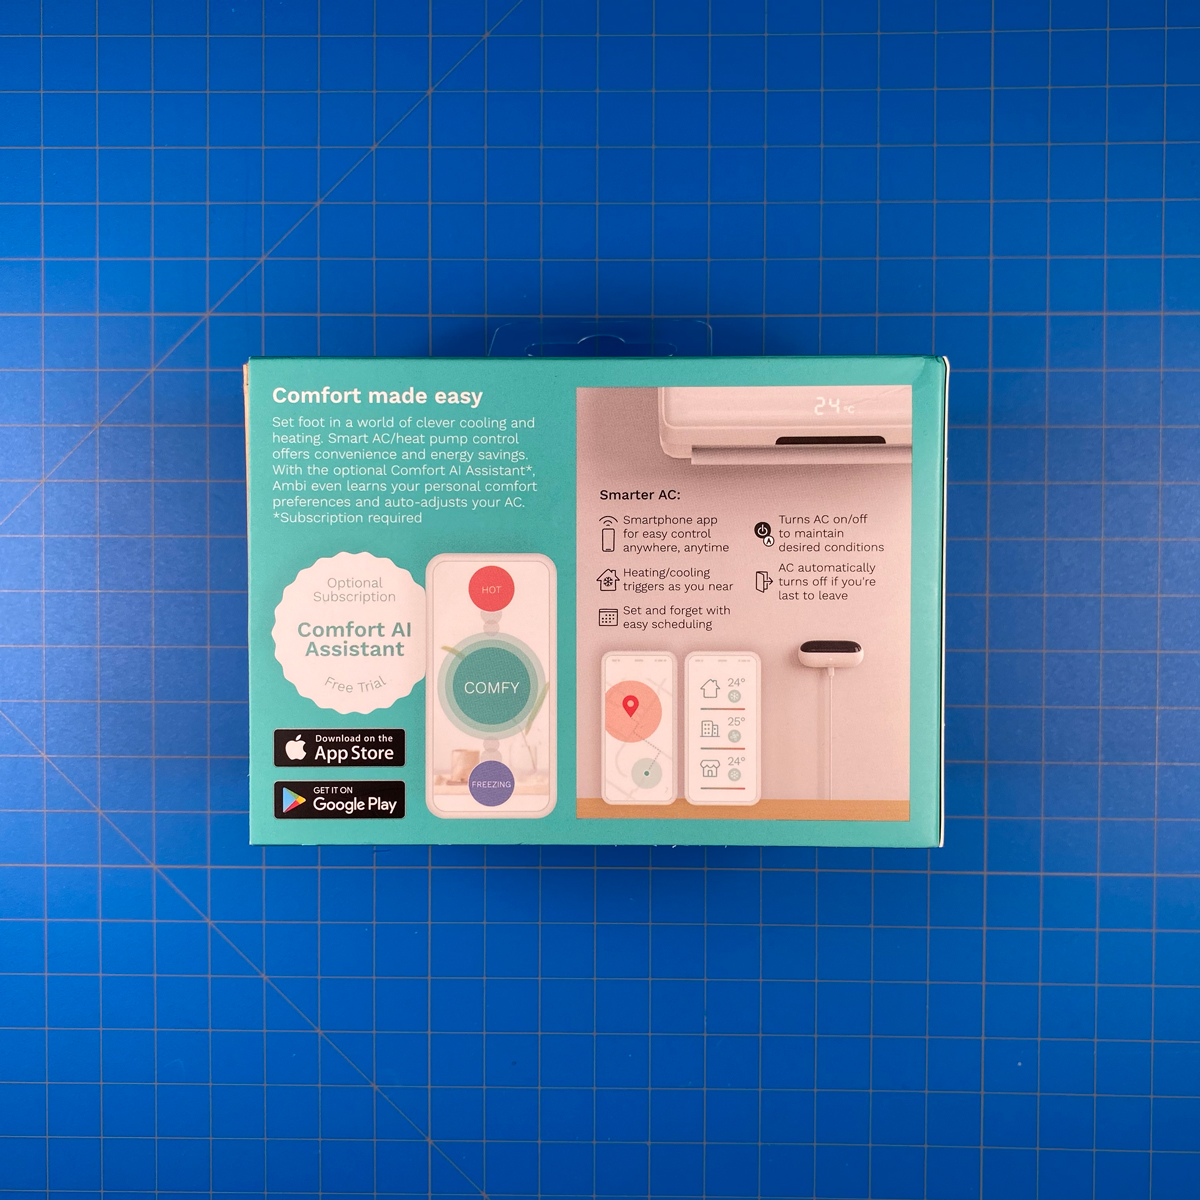
The rear goes to great lengths to let you know that this AC controller makes use of what is described as a ‘Comfort AI Assistant’ – this is the subscription option I mentioned in the previous paragraph. The good news is that whilst you get a free one-month trial, you don’t need to use this functionality in order to use the Mini and can control the AC along with all aspects of your particular AC anyway.
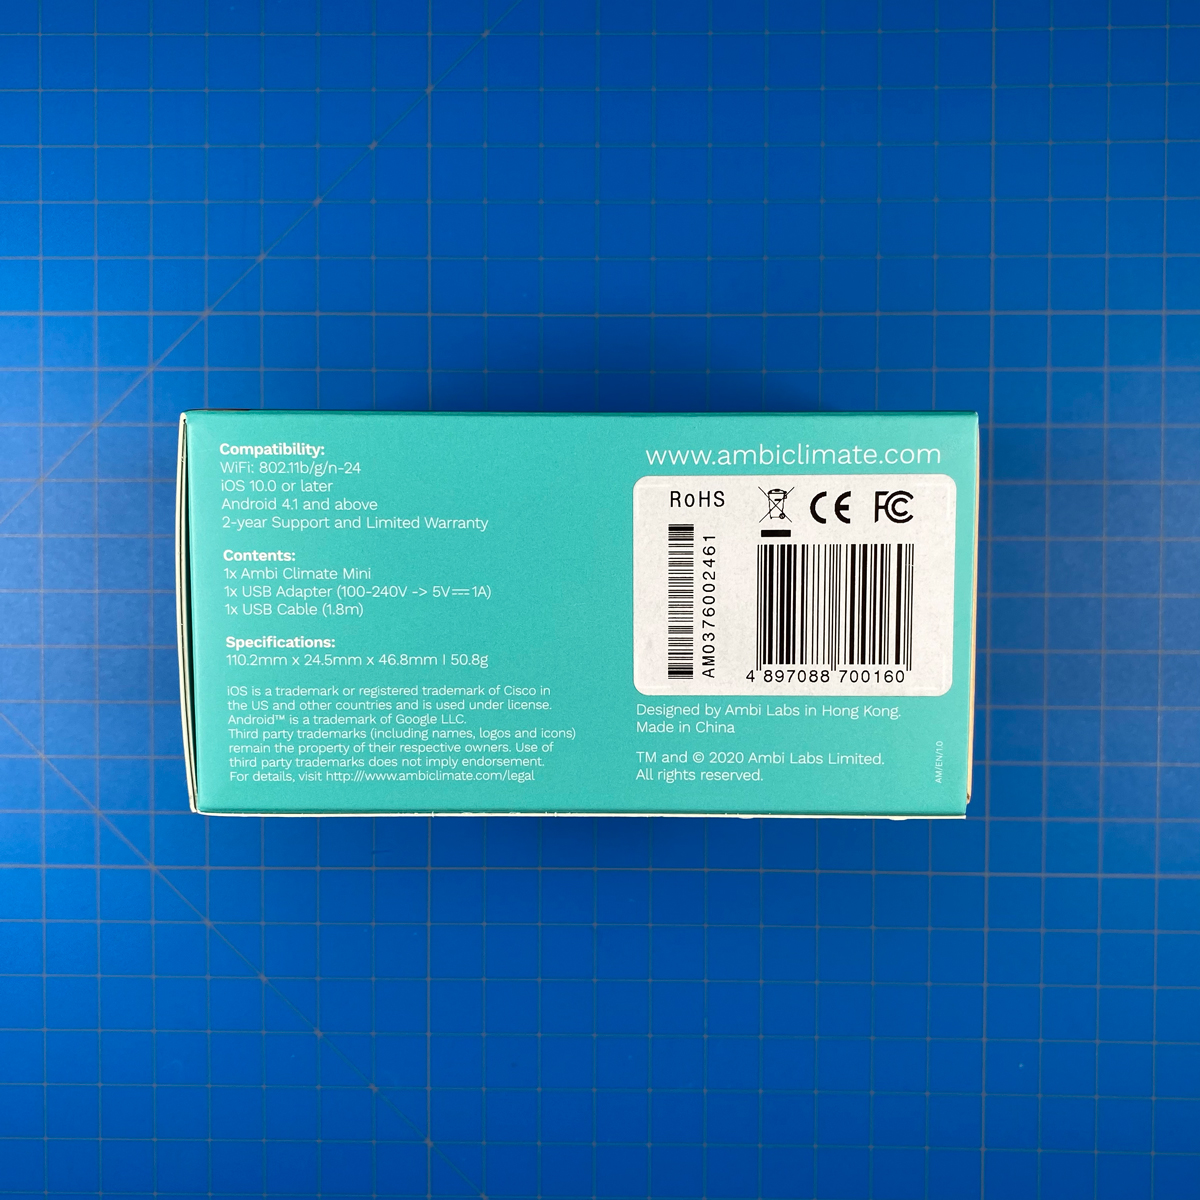
The base of the box lists a few details, including compatibility, the contents of the box, and basic specs;
Compatibility
- WiFi – 802.11 b/g/n 2.4GHz
- iOS 10 or later
- Android 4.1 and above
- 2-year support and limited warranty
Contents
- 1 x Ambi Climate Mini
- 1 x USB adaptor (100 ~ 240v, 5v/1A)
- 1 x USB cable (1.8m / 70.87in)
Specifications
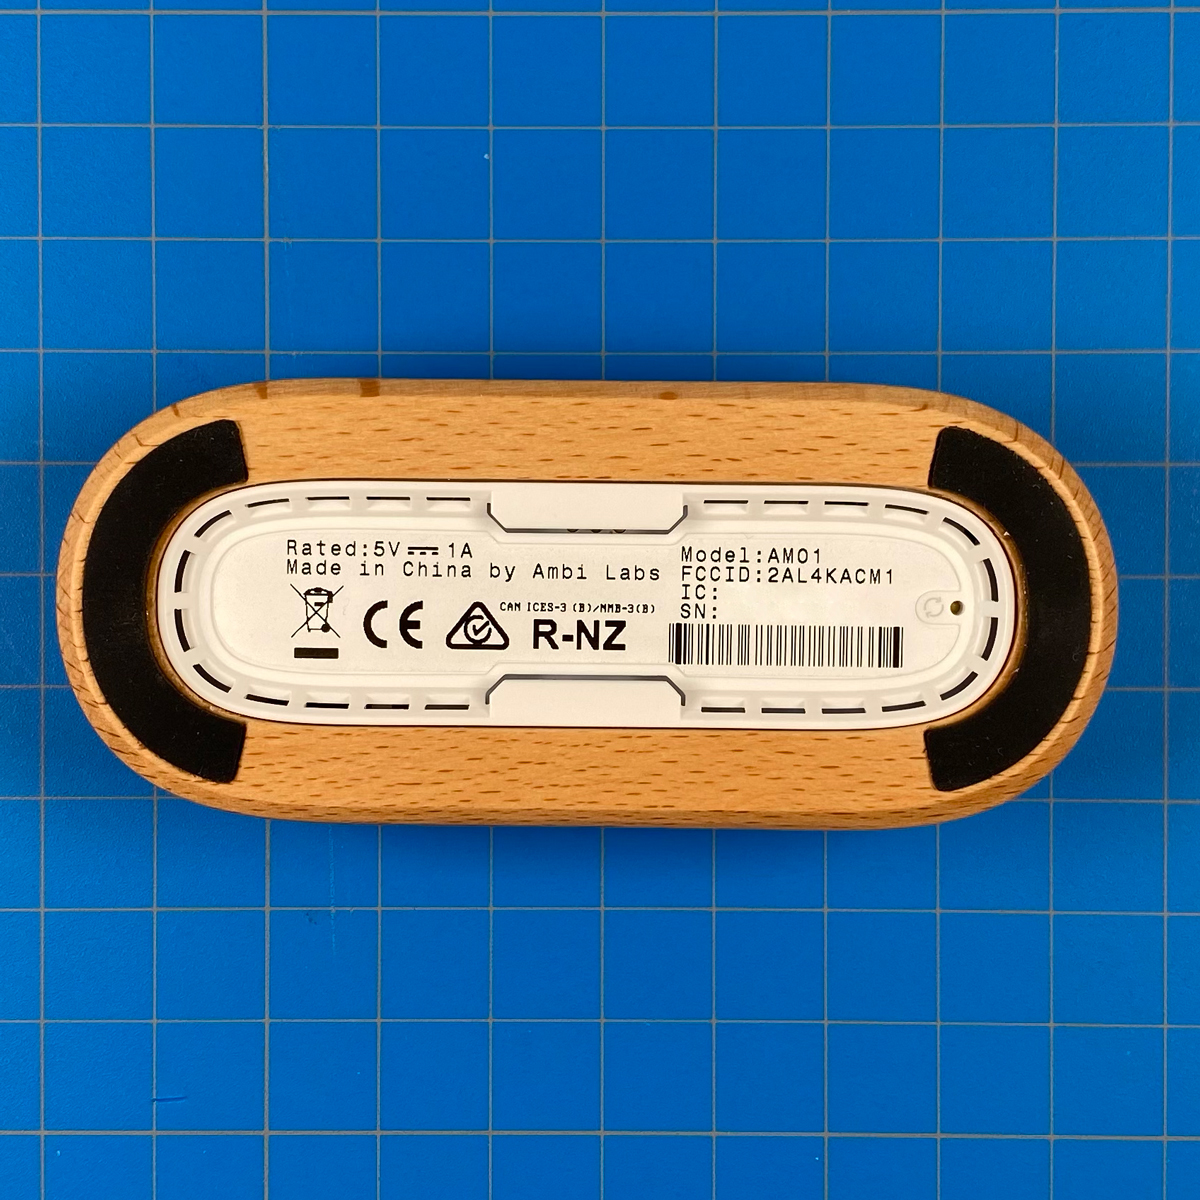
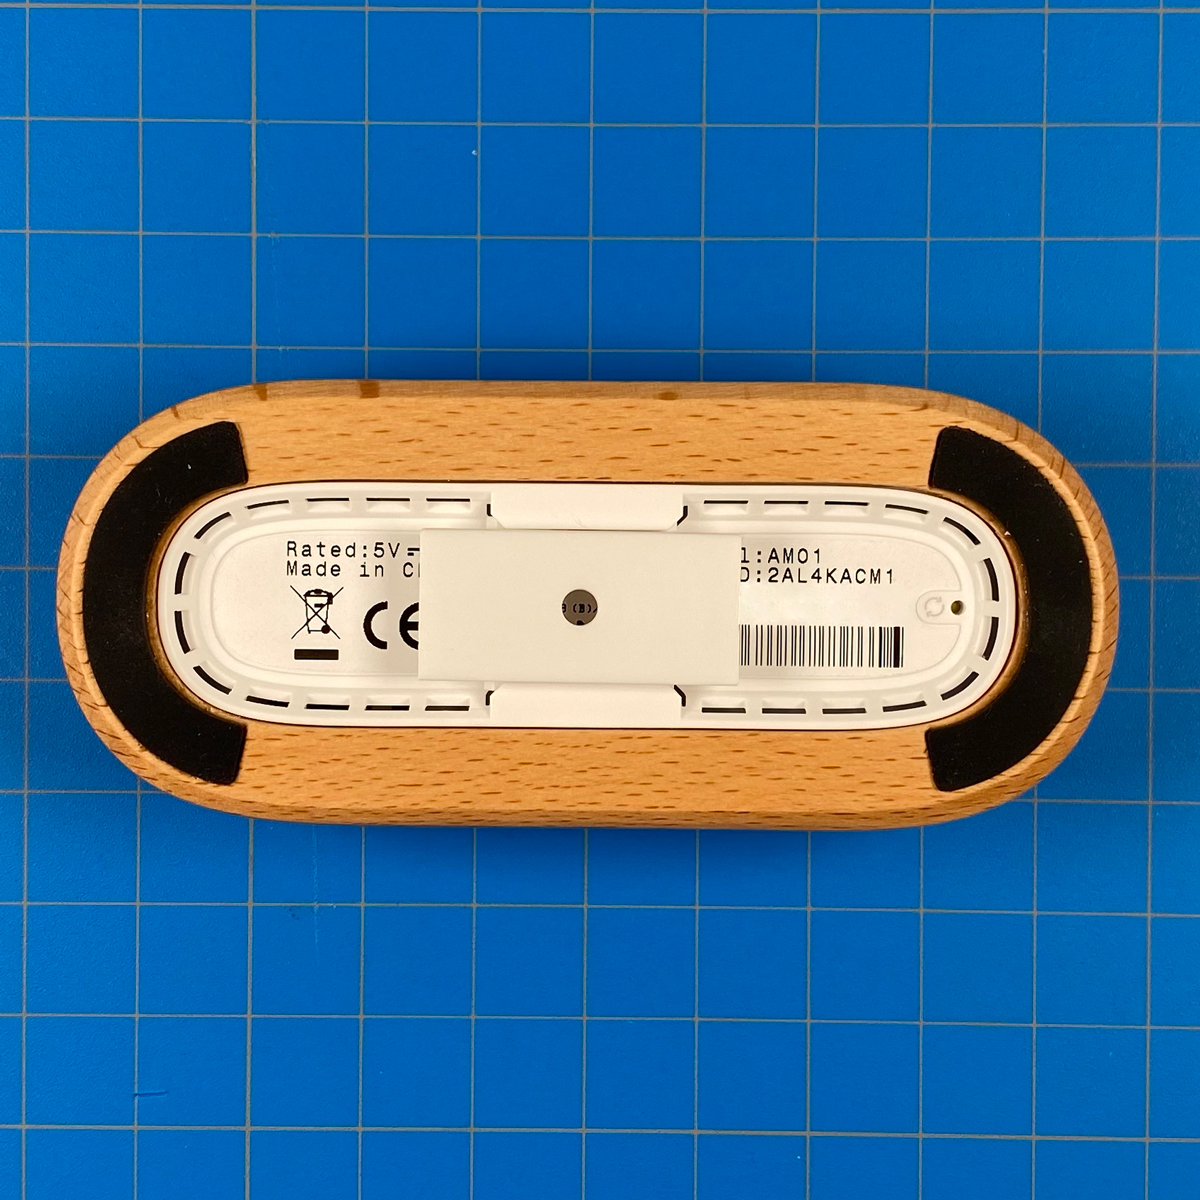
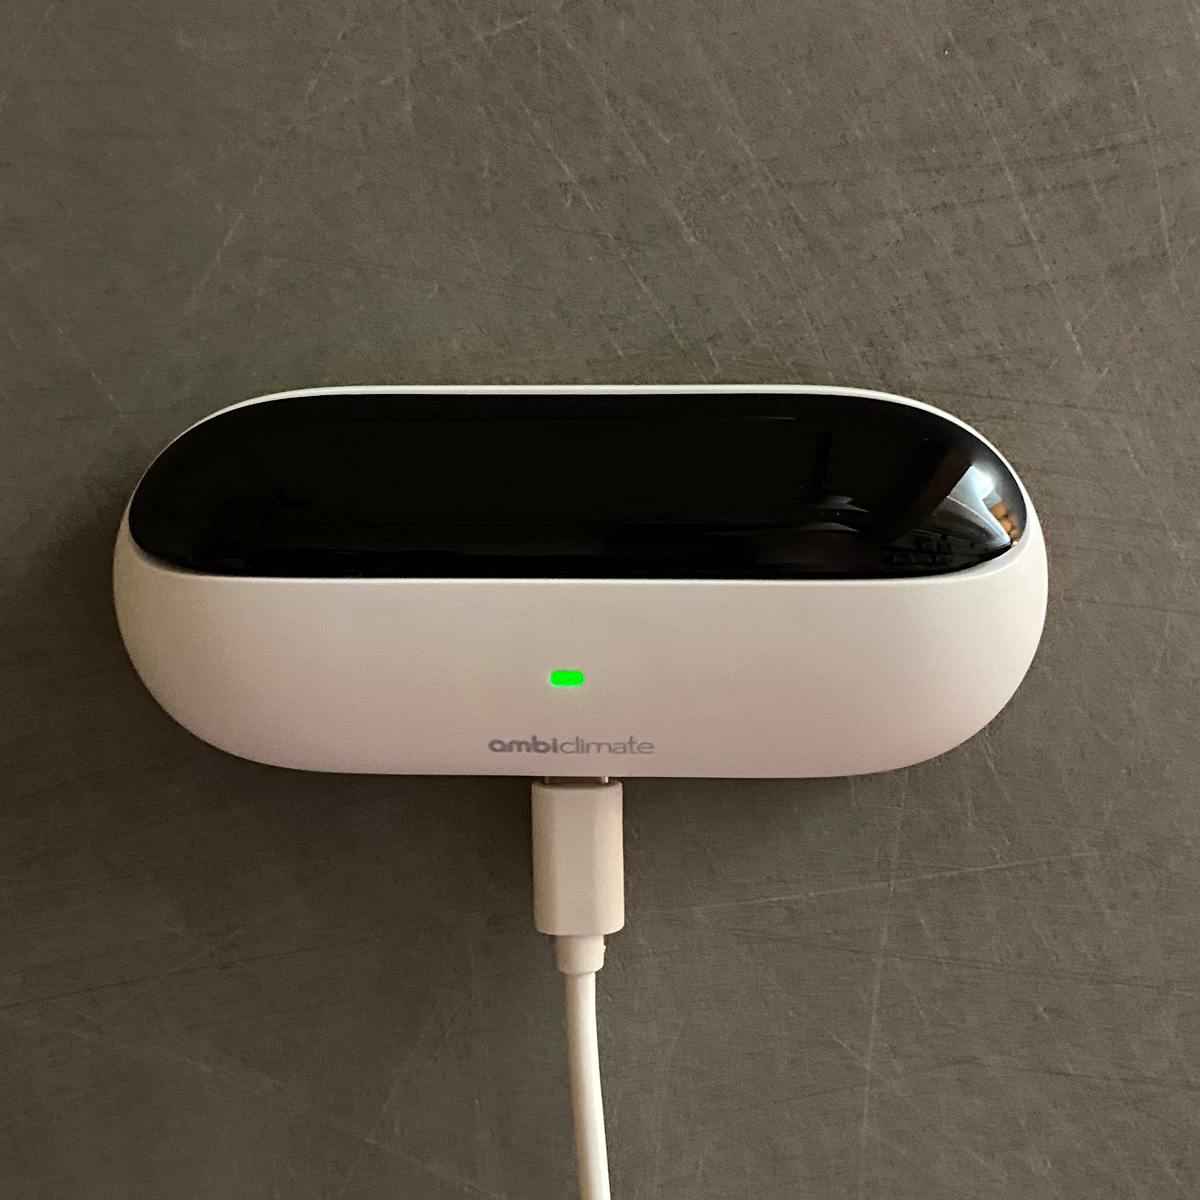
- 110.2 x 24.5 x 46.8mm / 4.33 x 0.96 x 1.85in)
- 50.8g / 1.8oz
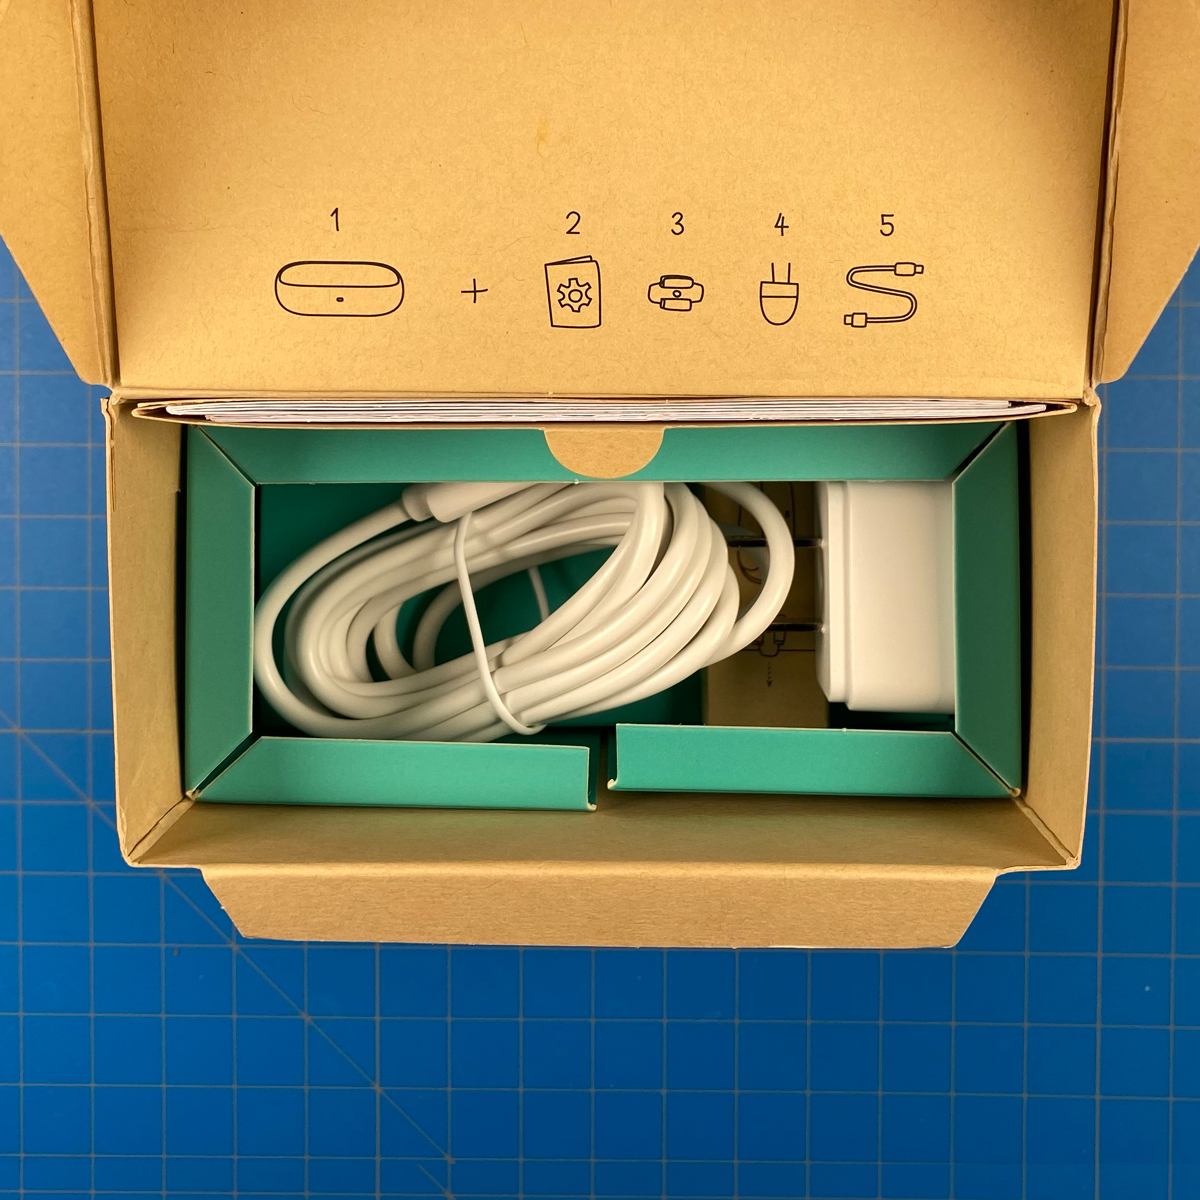
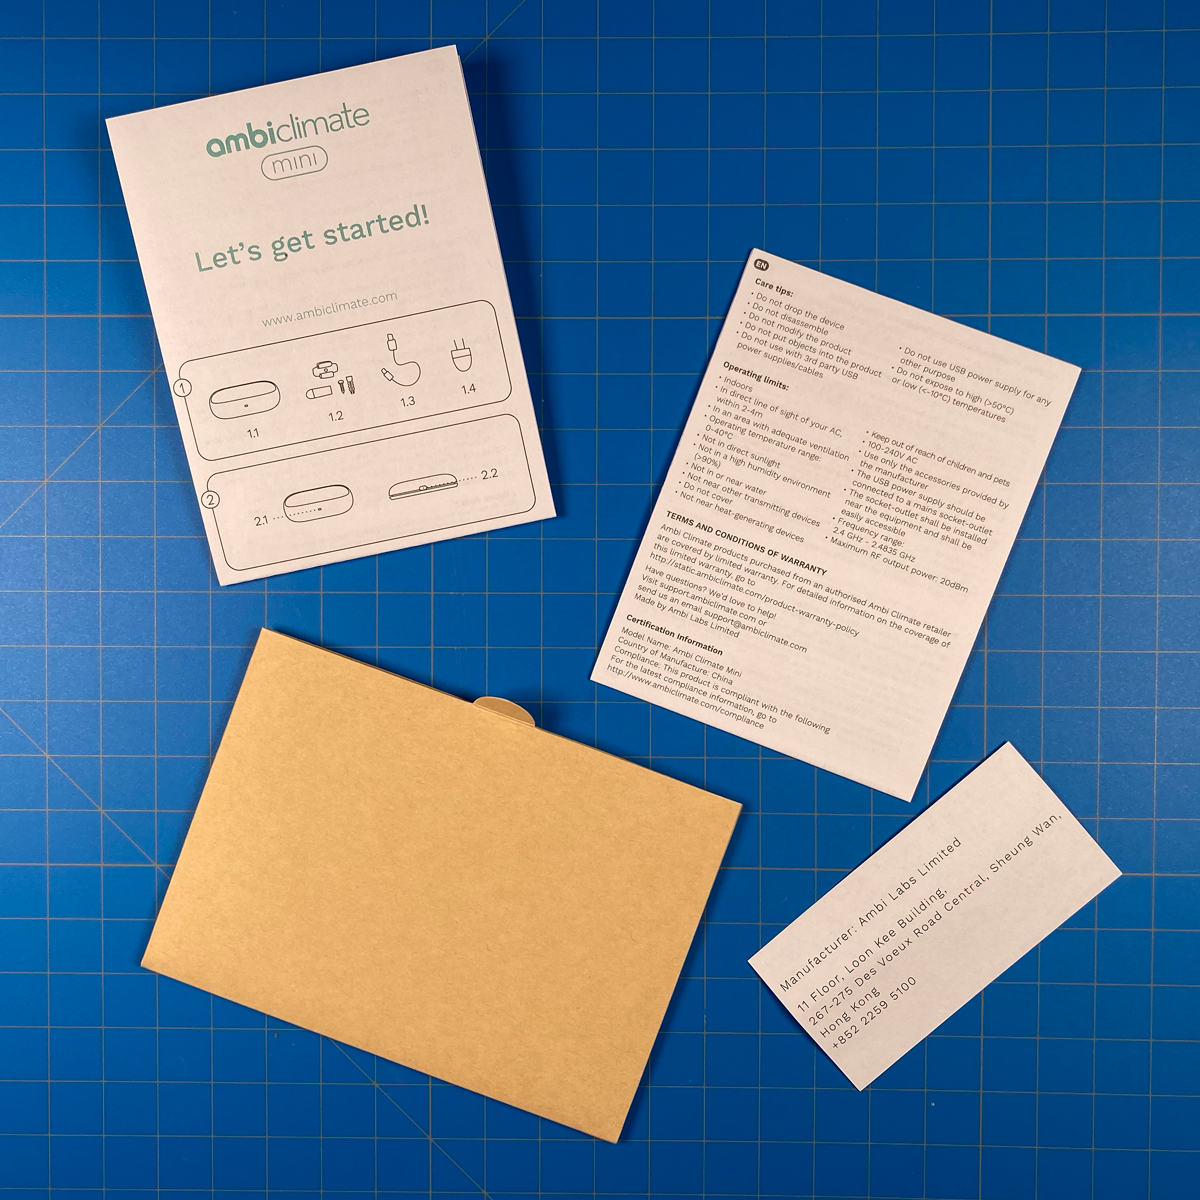
In addition to all of the above, there’s a small box containing a wall mounting bracket, a screw, a matching rawl plug, and a single 3M double-sided adhesive strip. The documentation includes a fold-out sheet that goes through the basic setup process in a variety of languages – English, Chinese (trad), German, Finnish, French, Italian, Japanese, Norwegian, Spanish, Swedish.
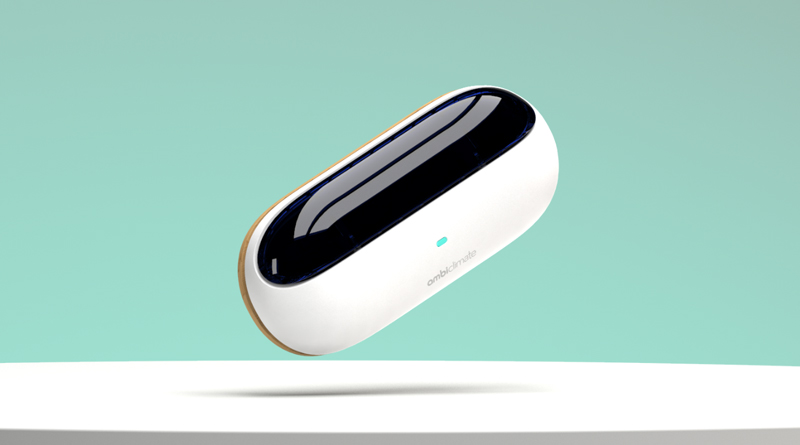
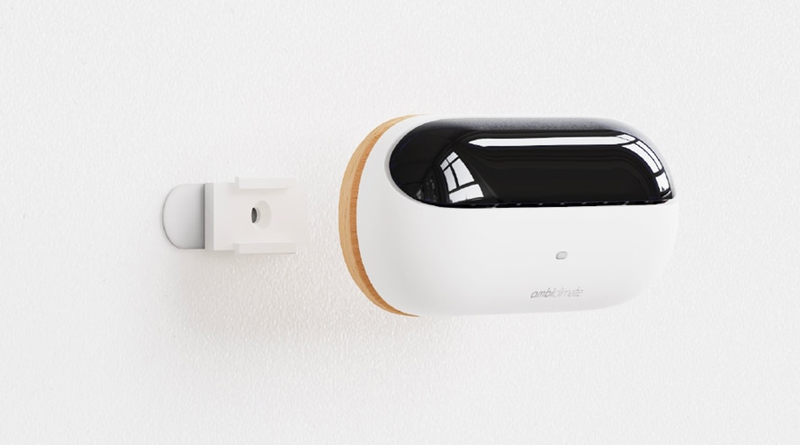
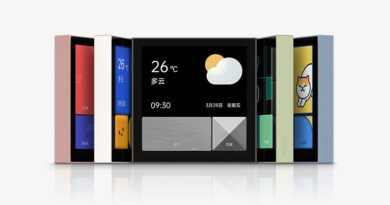
THE AMBI CLIMATE MINI


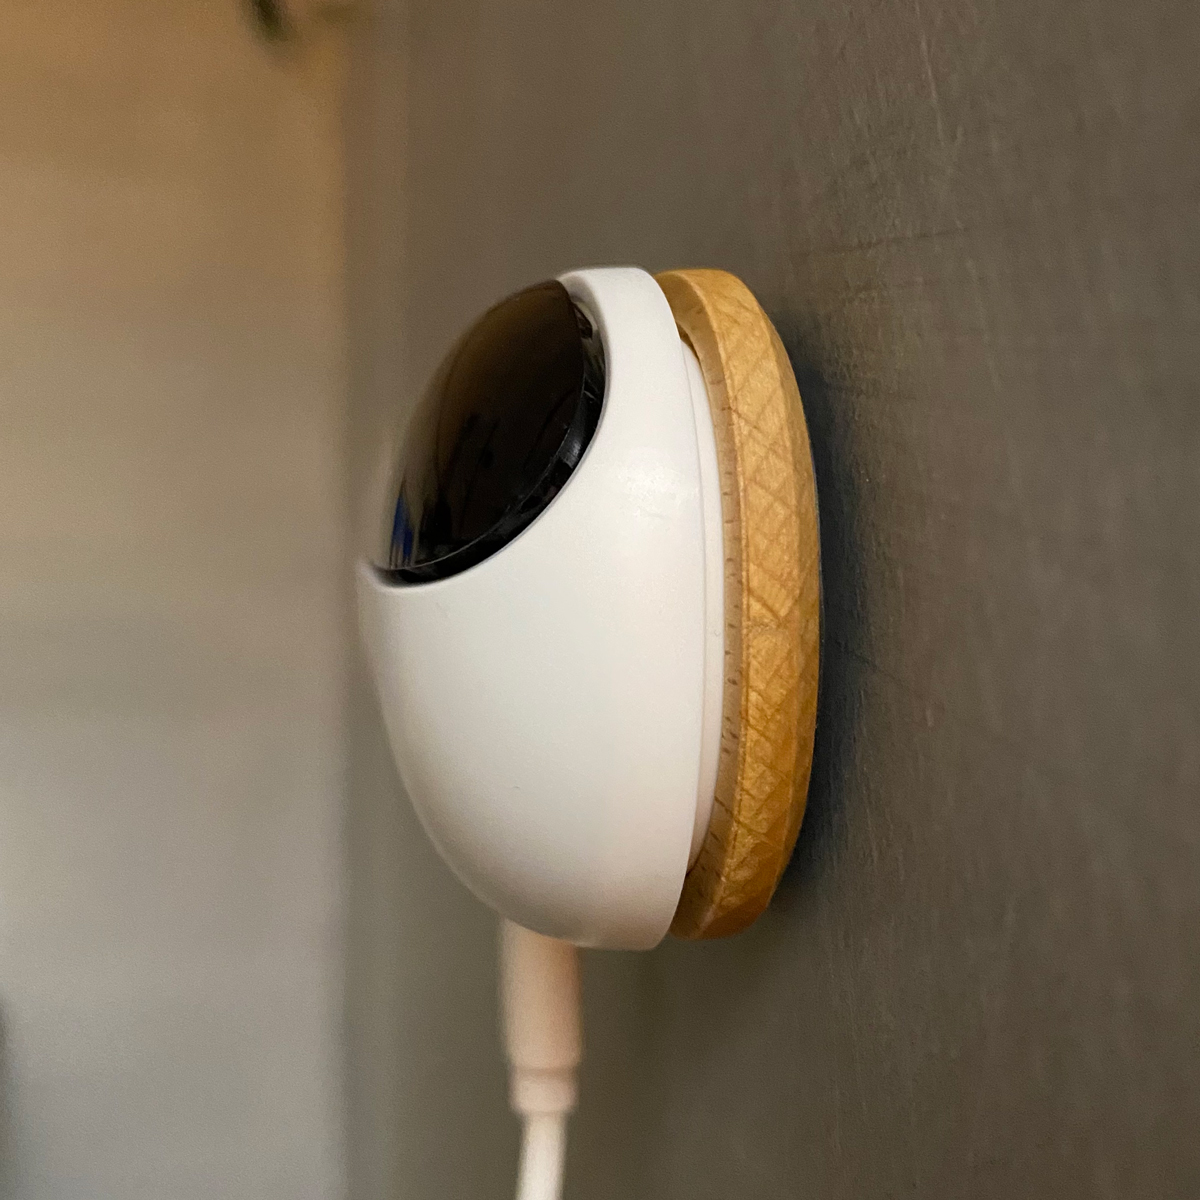
INSTALLATION


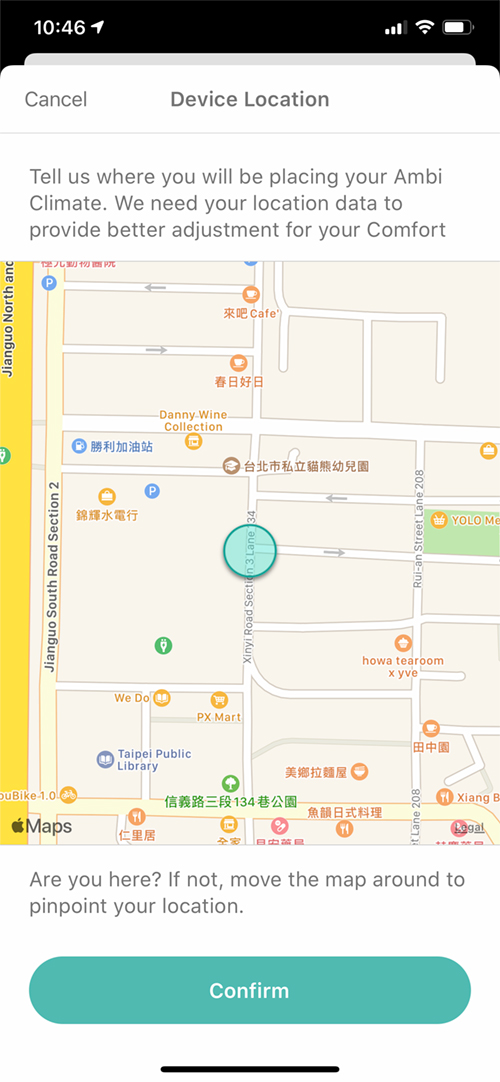

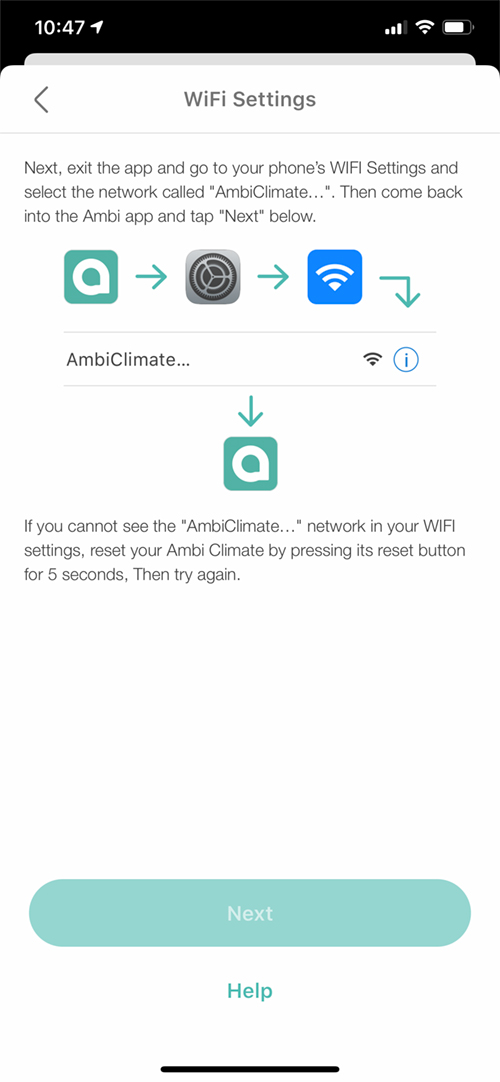
With the Ambi Climate 2, I had odd issues with connecting to one of my WiFi networks but somehow managed to overcome it eventually. I’m happy to say I had no such issues with the Mini and was able to connect it to my network, although it did take its time doing so.
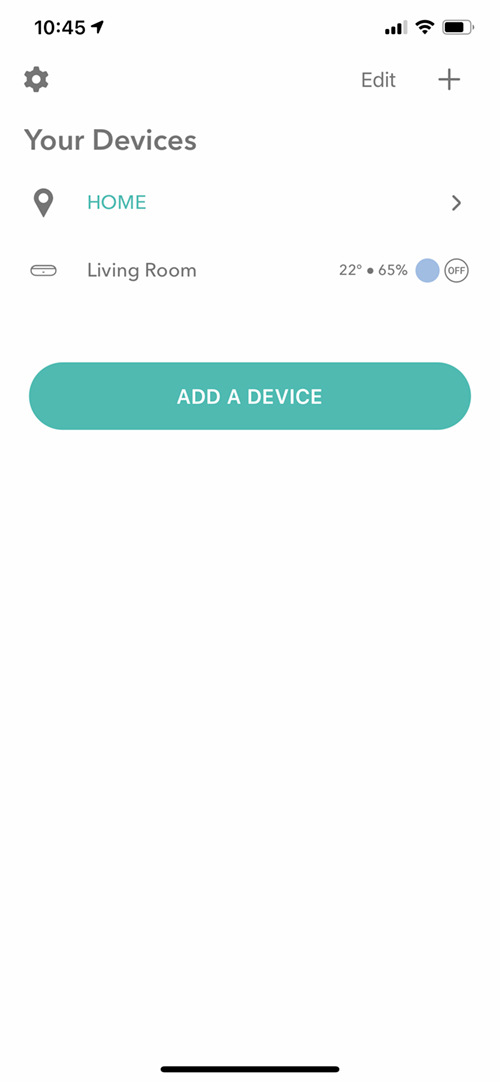
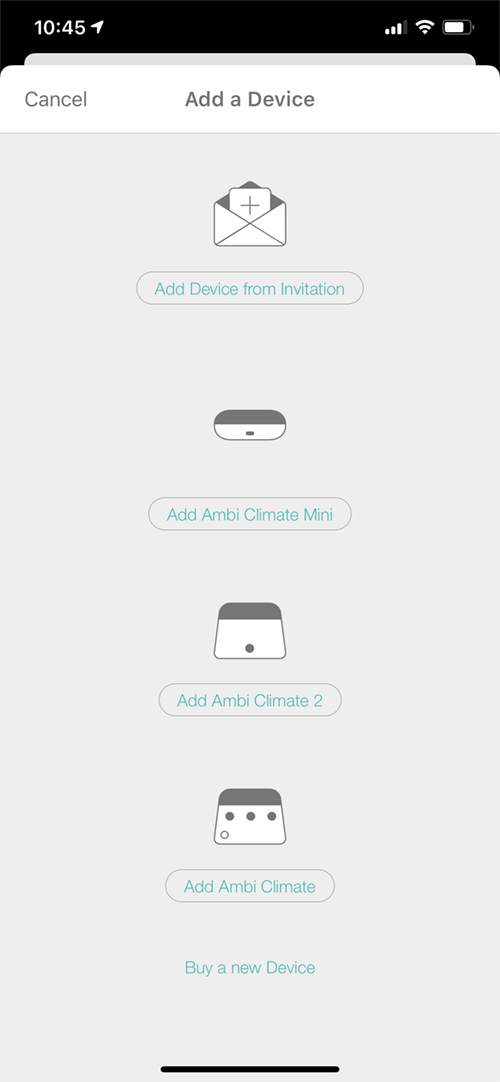
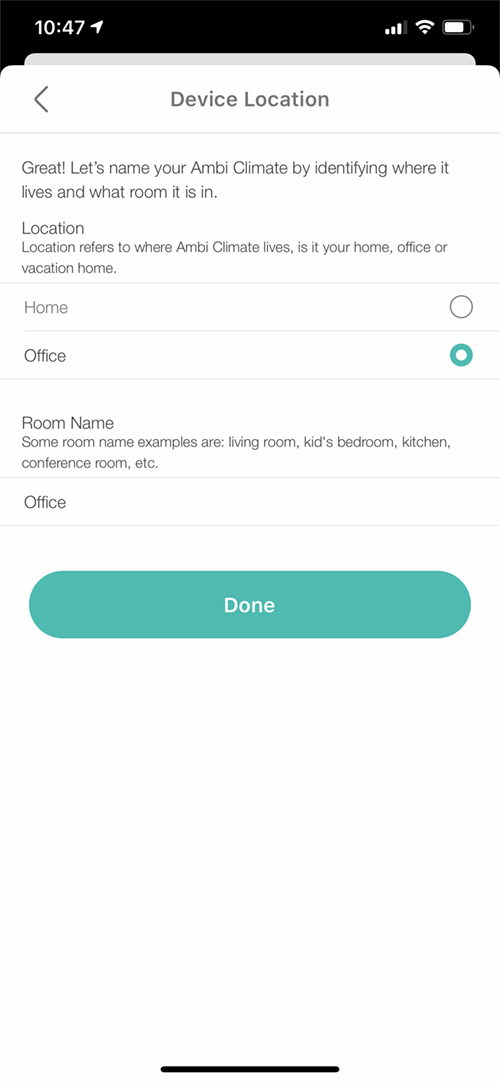
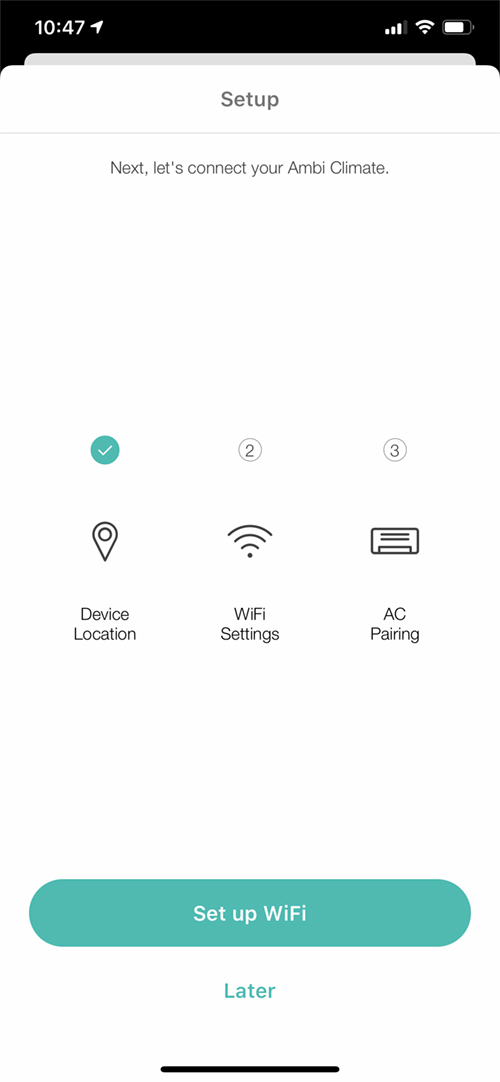
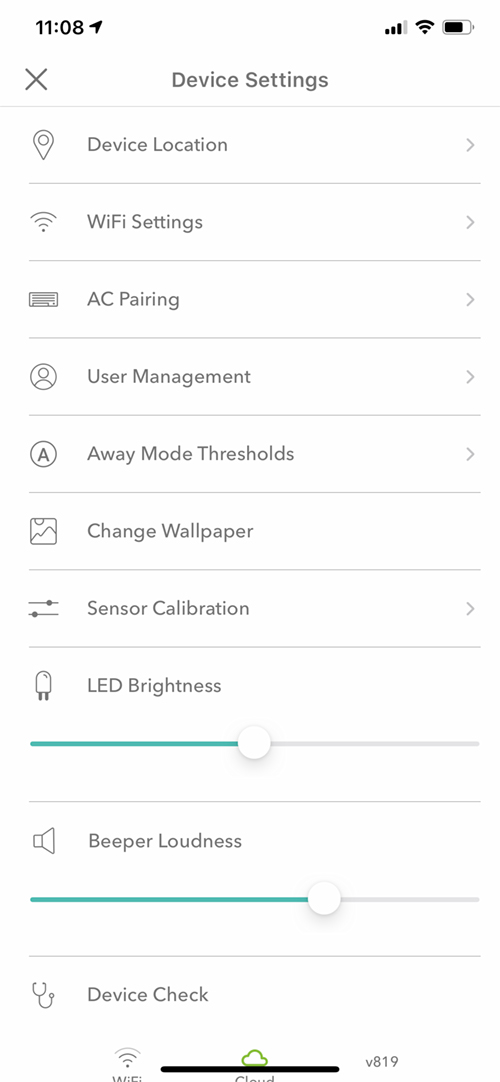
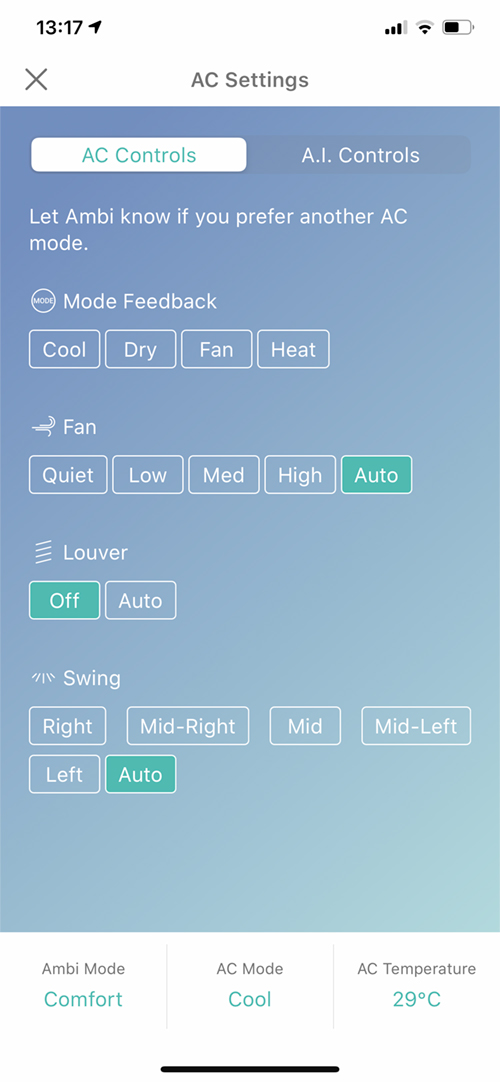
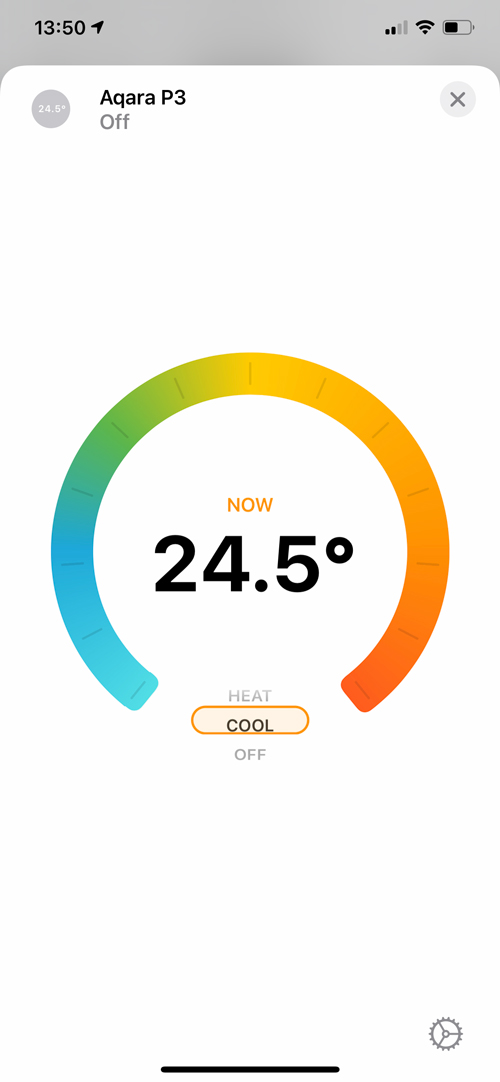
After that’s all in the bag, you need to go through the process of setting the Mini so that it can control your AC. It’s a short process thankfully, which in the first instance asks you to enter the details of the make and model of your remote, as it’s the remote that is being replaced by the Mini, essentially. If your model isn’t listed, it’s simply a case of instead, teaching the Mini to learn the basics of your remote. This requires just a few steps that involve pointing your remote at the Mini, so that it can figure out the remote and what functions of the AC it can control. After it’s done, it’ll tell you what your AC is capable of via the Ambi Climate app. This will include the basics, like setting the temperature and the mode (Cool, Heat, Auto, and Off), but it can also include things like the fan speed, and control over the swing and louver of your AC (these are the blades that direct the flow of air from your AC).
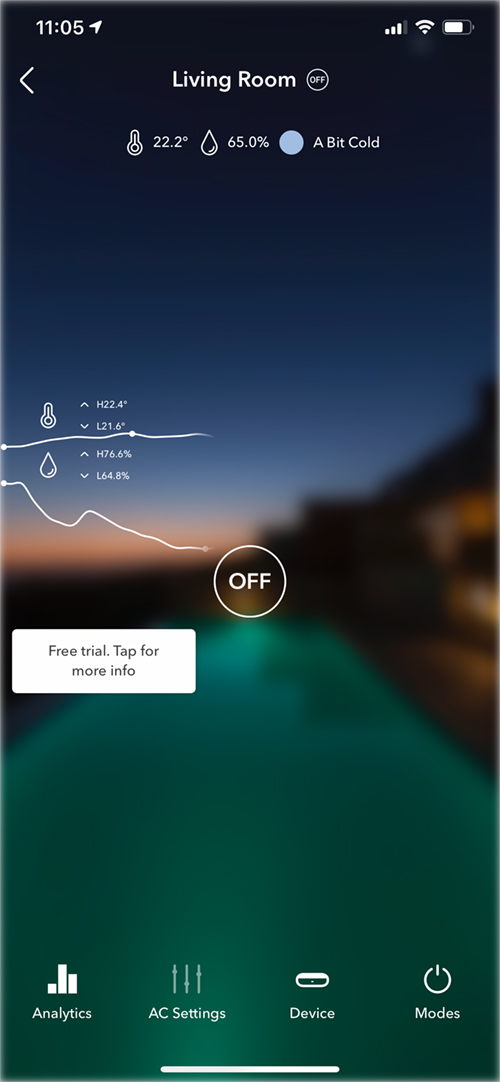
If you haven’t figured it out by now, the Ambi Climate Mini is essentially a wall-mountable IR remote control, connected to an app, that can send instructions to your AC, as well as set conditions for when it comes on and off (via timers), or maintain a specific temperature range. Whilst some of this may be achieved with your original remote, the app and device also let you control the device whilst you’re out of the house, so this is where it’s taken beyond the realms of even the fanciest hand-held remote you can think of.
AMBI CLIMATE APP
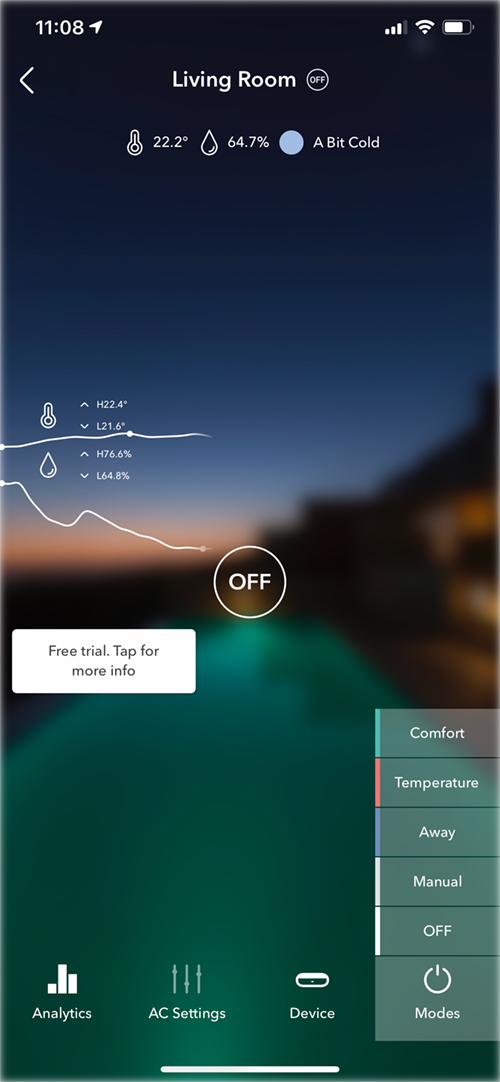

- Comfort mode
- Temperature mode
- Away mode
- Manual mode
- Off
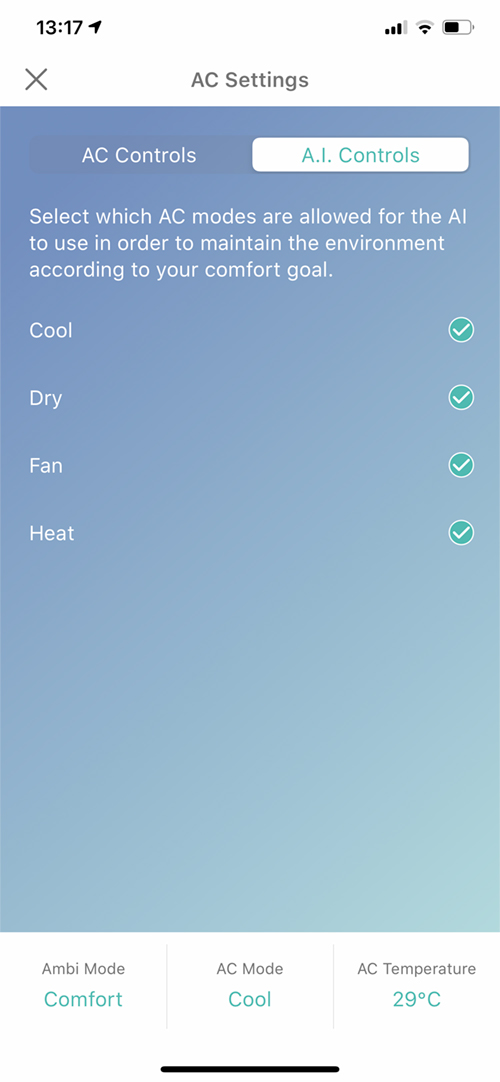
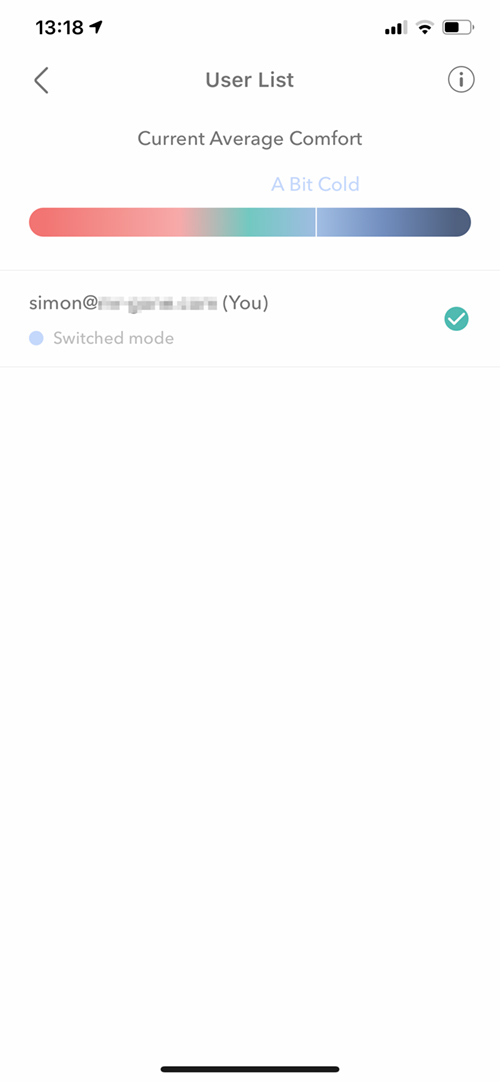
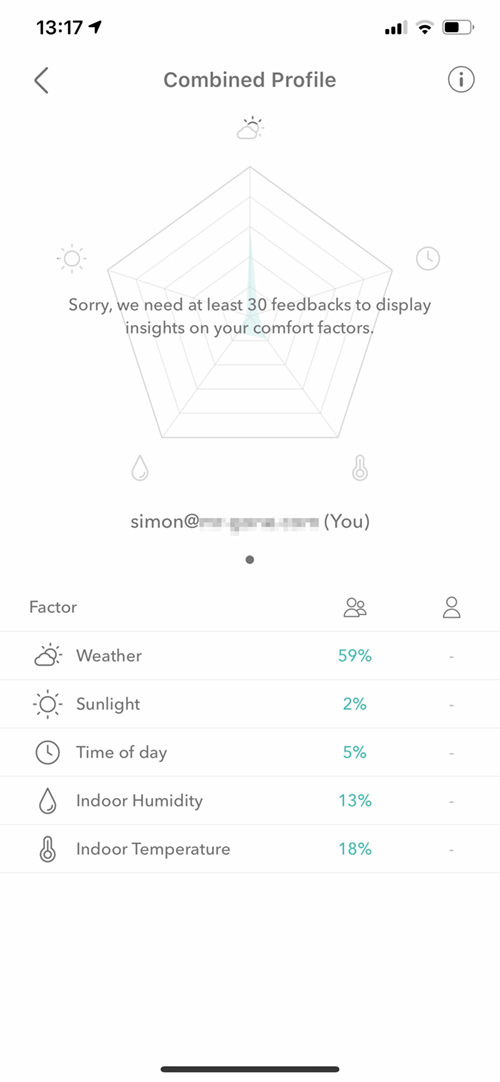
All of these modes, in addition to other options I’ll skate over are also available to owners of the Ambi Climate 2, so nothing has changed in this respect, apart from the fact that for Mini users who want to use the A.I. functionality, will now be required to pay for it, after the free one month trial. You can still use the other modes without a subscription, but you’re going to have to set the AC yourself without Comfort mode, which basically controls the AC for you, based on the feedback you provide in this mode. It takes time for the A.I. to learn your preferences, as it’s built, in some measure, on you telling the A.I. if you’re too hot, a little hot, too cold, a little cold, or just right. It takes this data, in combination with other factors, like local weather conditions, the temperature and humidity in your room, and thermal readings of your surrounding provided by the two light sensors (IR light, and visible light sensors) to build up a picture of your environment, and what you feel is comfortable. It all sounds quite impressive, and for that reason, you can maybe appreciate more why the company want to charge for this functionality, which also requires a server connection that they have to maintain. I’m not going to try and convince you one way or another as to whether it’s worth it or whether the company should be charging for this, but to paraphrase a saying, “there’s nothing in life that’s free”.

Now if this all sounds like a lot of trouble, and just want to be able to control your AC in the simplest of fashions, then, of course, you can just speak to your preferred voice assistant to control the AC. If, on the other hand, you have ACs running for much of the day in different rooms (like in Florida for example), this could be of use for those than don’t want to have to constantly adjust the settings.
IN HOMEKIT


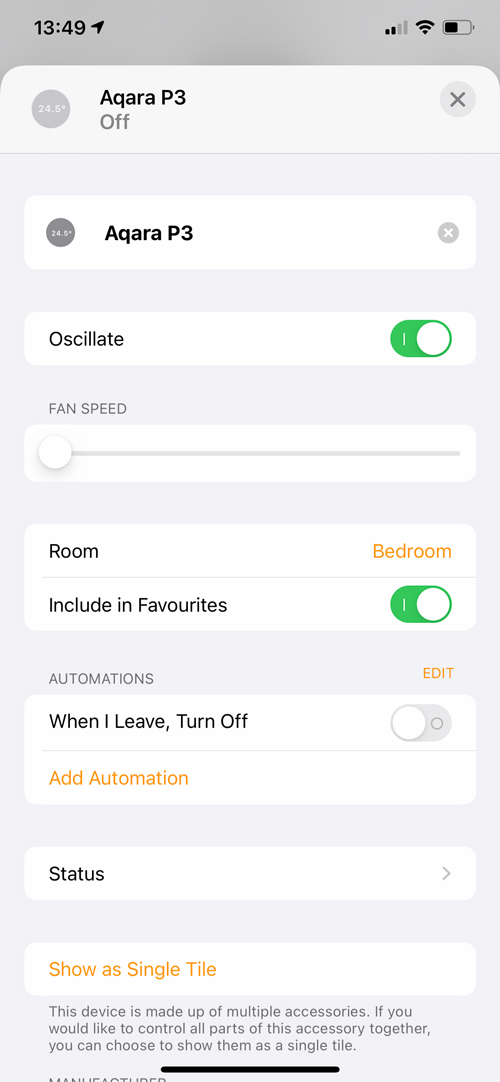
It should be noted that there are a few different HomeBridge plugins for the Ambi Climate devices, and some of the functions, like fan speed and oscillate are also exposed to HomeKit. It just depends on which plugin you go with.
AMBICLIMATE MINI IN USE
I currently have the Mini running in HomeKit using the macOS app Ambi Bridge. I’ve also had it running in HOOBS, although my HOOBS box was offline for a period of time during my tests, so I stuck with Ambi Bridge. The small disadvantage with this option is that it relies on your computer running in order to control it via HomeKit, however, if you’re running Google or Amazon devices too, then there’s always something available to control it.
I was also going to mention that the other alternative to HomeBridge plugins would be the Siri Shortcuts integration, however, at present, I feel it’s rather limited, and as such isn’t a great alternative right now. In Shortcuts, you only have the ability to set the Comfort mode (so essentially turning the AC on, but only in this particular mode), or turning your AC off. They really should have more options, at least for turning the AC temperature up or down, so I’m not sure why it’s so limited.
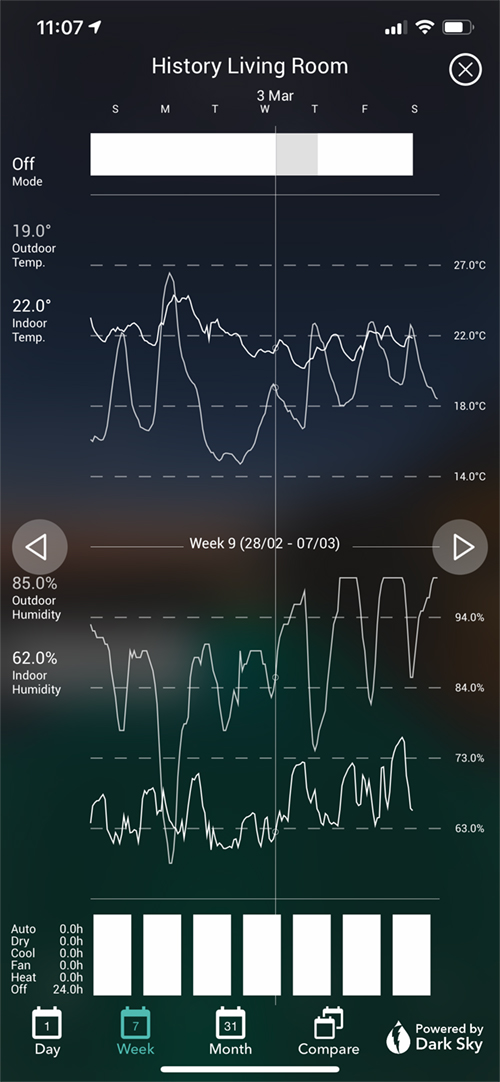
That all said, if you’re going to use the A.I. functionality offered, it’s going to be a case that you shouldn’t need to control the AC yourself at all. Whether the subscription cost is warranted, is down to the individual, but the vast array of data you can glean from the Mini and the app is quite impressive nonetheless.
If I were to boil things down to exclusively using the Mini in HomeKit, then I would absolutely prefer they have official support, but I can’t see that happening for the time being, which I think is a shame. Still, if the company believes in their A.I. functionality to any large extent (which I’m sure they do), then having HomeKit integration does seem like a step-down, given what isn’t exposed to HomeKit. With that in mind, if you want a simple AC controller, there are a few other options available to you.
Full disclosure: Ambi Labs provided HomeKit News with the Ambi Climate Mini for the purpose of this review. No other compensation was made, requested or has not in any way influenced our opinion of this product.
Ambi Climate Mini

Pros
- Numerous sensors for accurate data
- much smaller than previous model
- Slick and modern design
- A.I. for maintenance free control
- Extensive AC controls
Cons
- No official HomeKit support
- Monthly fee for A.I. option
Maybe im missing something but all these remotes are USB powered. I have no idea why. That seriously restricts placement capability and makes all the process messy. Most of the split units either have wifi or can be equipped with wifi module these days what makes life much easier. Additionally none of these remotes “talk” to the other thermostates. Tado is a great example. i have Tado 3+ thermostat but it does not talk to air condition using Tado AC controler. Thats major omission in my opinion as they could balanse the heating using floor heating and split AC unit.