Mi Air Purifier 2 (review)

I know what you’re thinking – what the hell is a Xiaomi/Mi product doing on a HomeKit website? Well yes, normally this wouldn’t be seen anywhere near a site like this, but as luck would have it, there’s a bit of software called ‘HomeBridge’ which to the uninitiated, allows non-HomeKit smart devices to communicate with HomeKit, and therefore appear in Apple’s Home app.
I’ve done this myself, running HomeBridge on my iMac, and now I’m able to pretty much control all the main aspects and functions of this Xiaomi Air Purifier – and that is why it’s here! Besides these reasons, since the introduction of Siri Shortcuts, and with the Mi Home App integrating Shortcuts, you now have basic control over this device, even without using HomeBridge.
So, what’s it like? First off, most people will be aware of how cheap Xiaomi ecosystem products are, and this was no exception, coming in at around UK£95.00. That’s damned cheap for any air purifier, so even if it wasn’t going to work with HomeKit, I’d still buy it. Where I live, pollution is an ongoing issue, so this is more essential than anything else.
So for this price, what do you get? I won’t go into the technical nitty-gritty, but it clears the 99.9% of the harmful particulates in the air in your house – so pm10 and pm2.5, pollen and dust amongst other things. it can’t remove VOCs (Volatile Organic Compounds) without the relevant filter, however.

It has three basic settings; Auto Mode, which allows the air purifier to increase or decrease the speed of the purifier fan depending on the readings from the built-in pm2.5 detection unit. A Night Mode, which is essentially a slightly lower speed than standard, but a lot quieter, and Manual Mode, where via the Mi Home app (and Apple’s Home app or via Siri Shortcuts, but we’ll get to that…) you can adjust the speed to your liking, from 10% – 100%.
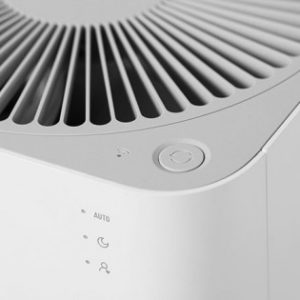
There are three small green LEDs on the front to indicate which mode is running, and there’ also a larger green LED at the front, which changes to red when the air filter is in need of changing.
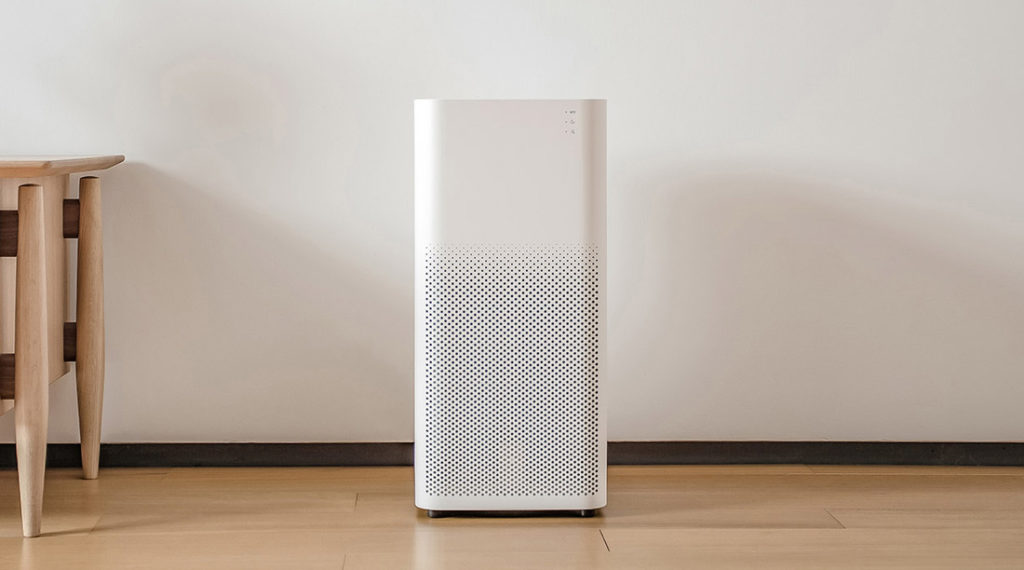
On the top, where the fan sends out the clean air, there’s a simple on/off button with another LED indicating whether the device is connected to your network. all four sides have a series of small holes allowing air and particles to be drawn in, cleaned up and then sent out via the fan at the top.
So back to HomeKit; Once you’ve got it all running via HomeBridge, the Air Purifier appears as a device that you can turn on or off, When you long press on the icon, it once again gives you a toggle switch to turn the device on or off, but there’s also a button that allows you to change the speed of the fan via the standard Home app slider, and when you click on Details, you can even switch between Manual and Auto modes or enable or disable the Child Lock, to prevent it from being messed around with.
But as if that wasn’t enough, the air purifier has its own set of sensors – one for temperature, one for humidity and finally the pm2.5 sensor. All of these appear as separate tiles within the Home app interface.
On the subject of the pm2.5 sensor, it has to be said that there’s a lot of evidence indicating the inaccuracy of built-in sensors, as they’re only giving readings from around their immediate vicinity, which is where the air is naturally already clean. With this in mind, I’d suggest getting an independent device for measuring these kinds of readings. I have a Kaiterra Laser Egg 2, and when you compare the readings between the two, it’s quite obvious that the sensor in the purifier is one of its only real shortcomings.
If you don’t go down the HomeBridge route, the much simpler alternative is via Siri Shortcuts. I won’t go into the details of how to set up the automations for Siri Shortcuts to work via Mi Home, as I go into this in detail elsewhere, but with this option, you can setup Shortcuts for the following;
- turn on
- turn off
- turn on/off
- switch to Sleep mode
- switch to Favourite mode
- switch to Auto mode
- Cycle through modes
All that being said, it’s a very stylish piece of kit, and it’s really cheap. Add to the fact I can add it to Homekit with just a bit of software and it has really become part of my HomeKit family!


