
Onvis Security Alarm Contact Sensor (review)
With the recent news that the Abode Iota hub/Camera has become HomeKit compatible, which also includes an alarm system, the notion of protecting one’s home – via HomeKit – has come to the fore again in many peoples’ minds. Of course, this isn’t something new, but with the aforementioned Abode, and Honeywell being quite expensive for some, or maybe even overkill if you’re living in a small apartment or shared accommodation, so devices like the Aqara hub with its built-in alarm have been of interest to the budget-conscious. When it comes to tight budgets, this new device from Onvis – the Security Alarm Contact Sensor – might be the thing some are looking for, with a combined contact sensor and alarm, not to mention a couple of other sensors thrown in for good measure, and no requirement for a hub. But can a budget device with everything thrown into such a small device be any good? Let’s find out.
PACKAGING
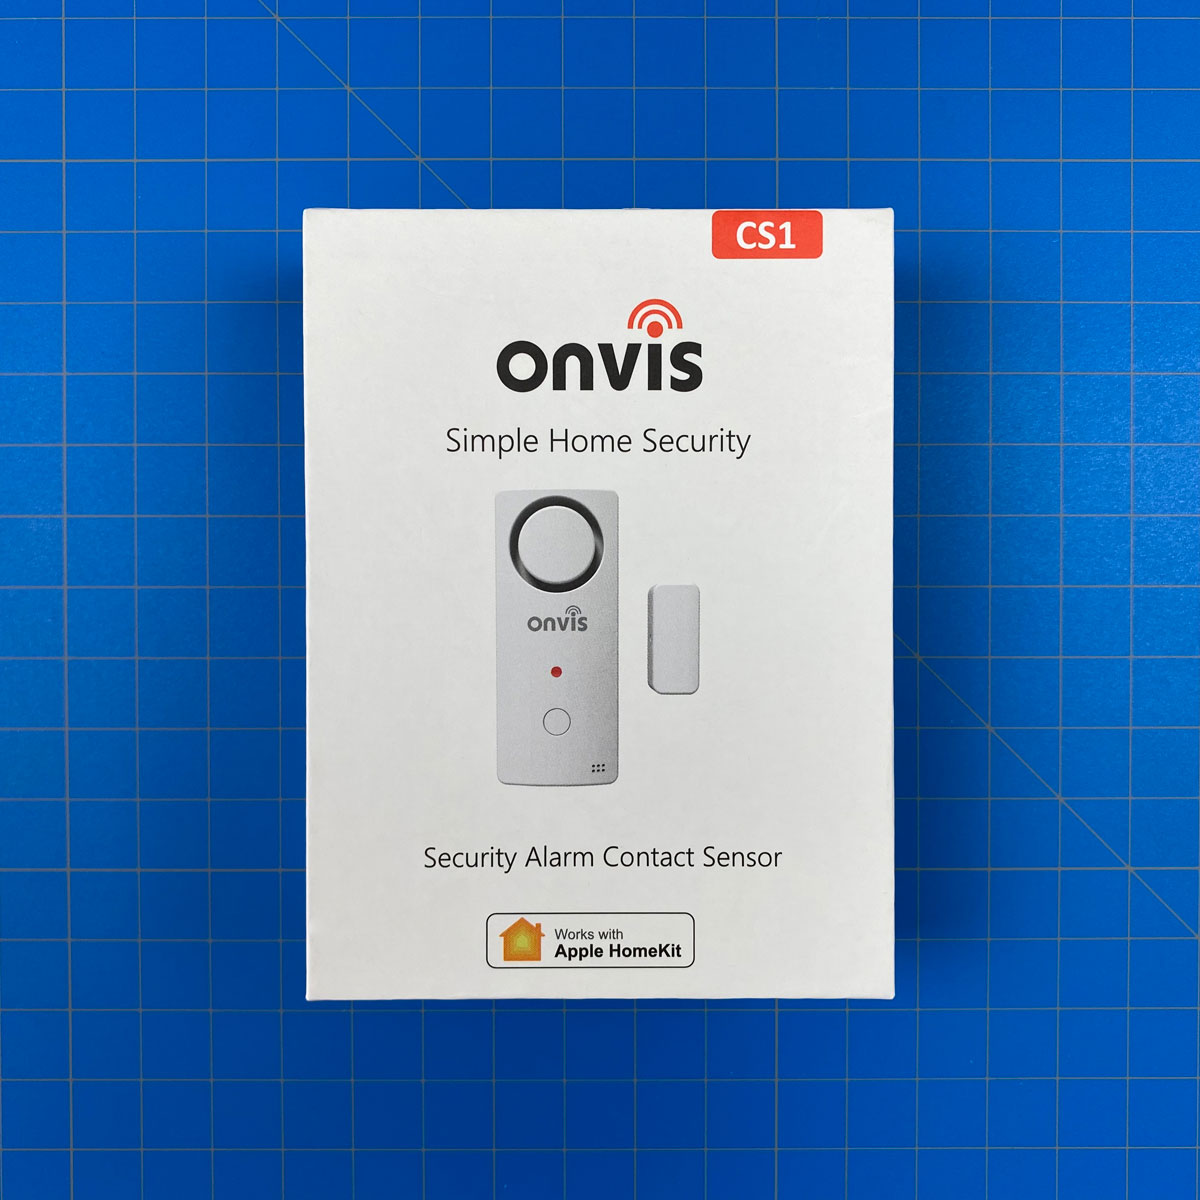
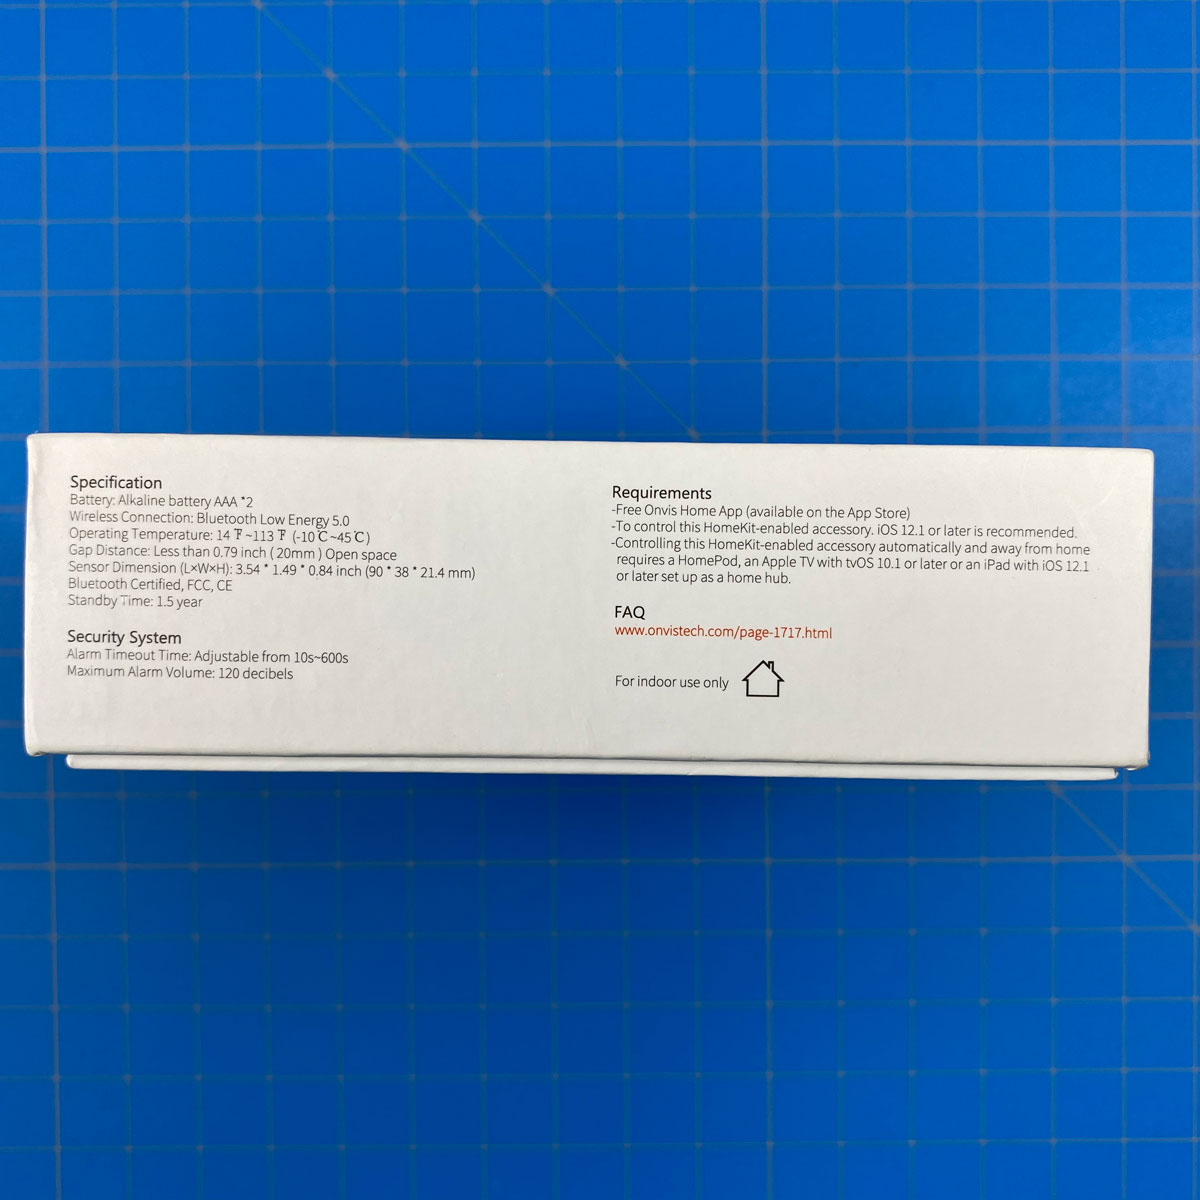
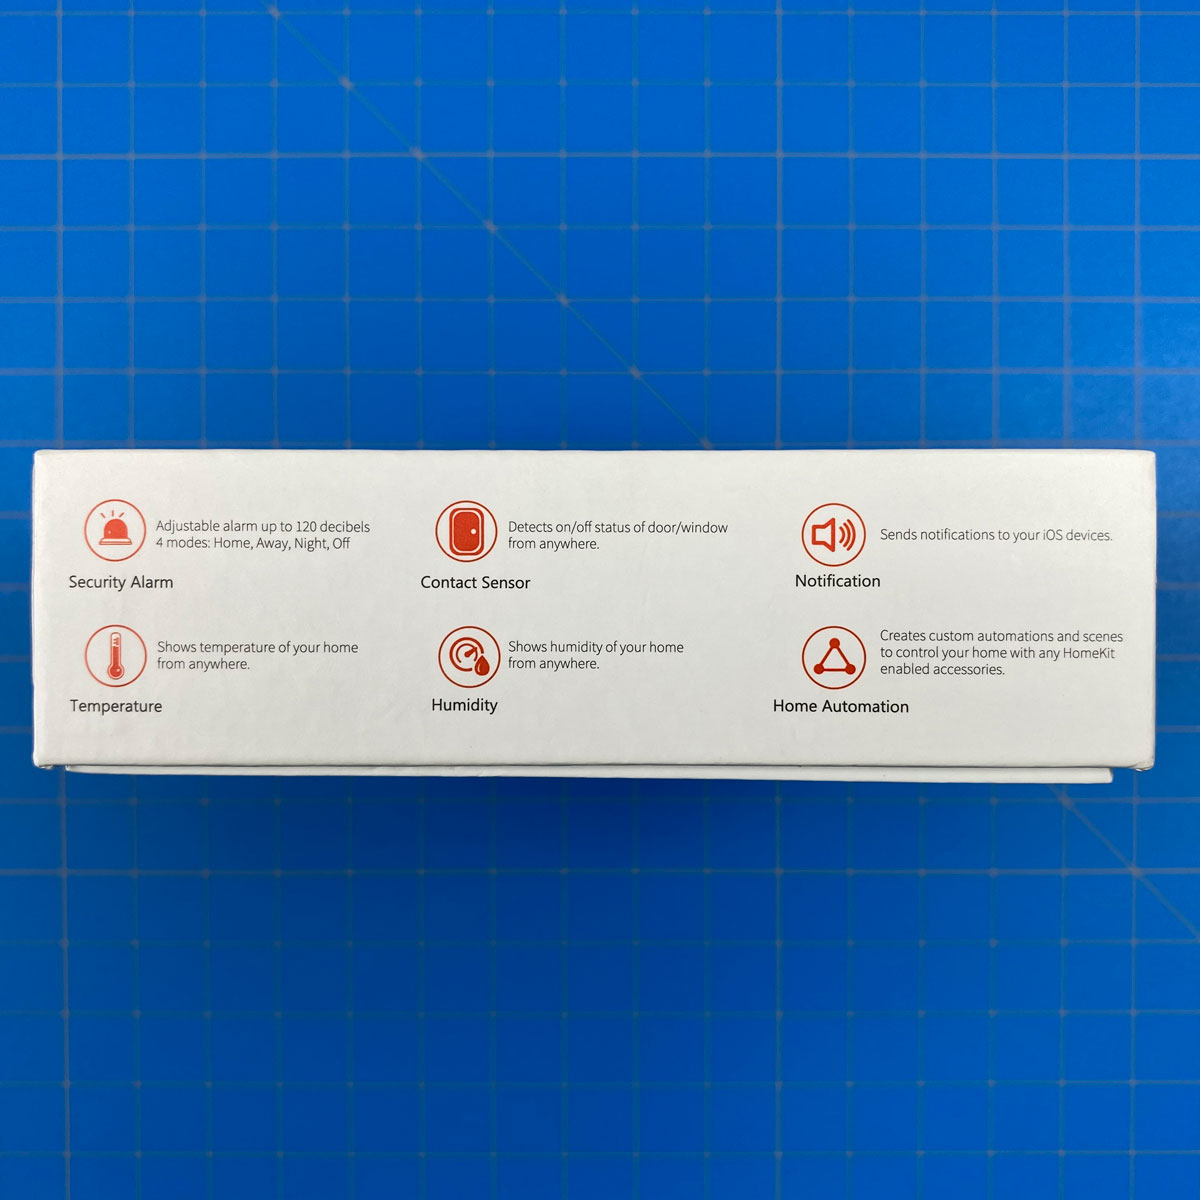
Regular readers of my reviews will know I appreciate decent packaging, as much as I despise poor packaging, and I’m glad to say this lands in the former category. It truly is a ‘box’ in terms of the very thick, sturdy card (like the kind you’d get for an iPhone) that’s utilised, so the dainty little device inside is well protected. The front is simple enough, with the product pictured along with the ever encouraging Apple HomeKit logo. The rear is all about the fine print and isn’t really of any major interest. One side of the box gives you a few icons indicating the basic features of the device, whilst the other side goes into specs and requirements;
- Security alarm – Adjustable alarm up to 120dB. Four alarm modes – Home, Away, Night, Off
- Contact sensor – Detect on/off status of your door or window from anywhere
- Notifications – Sends notifications to your device
- Temperature/Humidity – Shows temperature and humidity for the area where the alarm is based
- Home automation – Create custom automations and scenes to control your home with any HomeKit enabled accessories
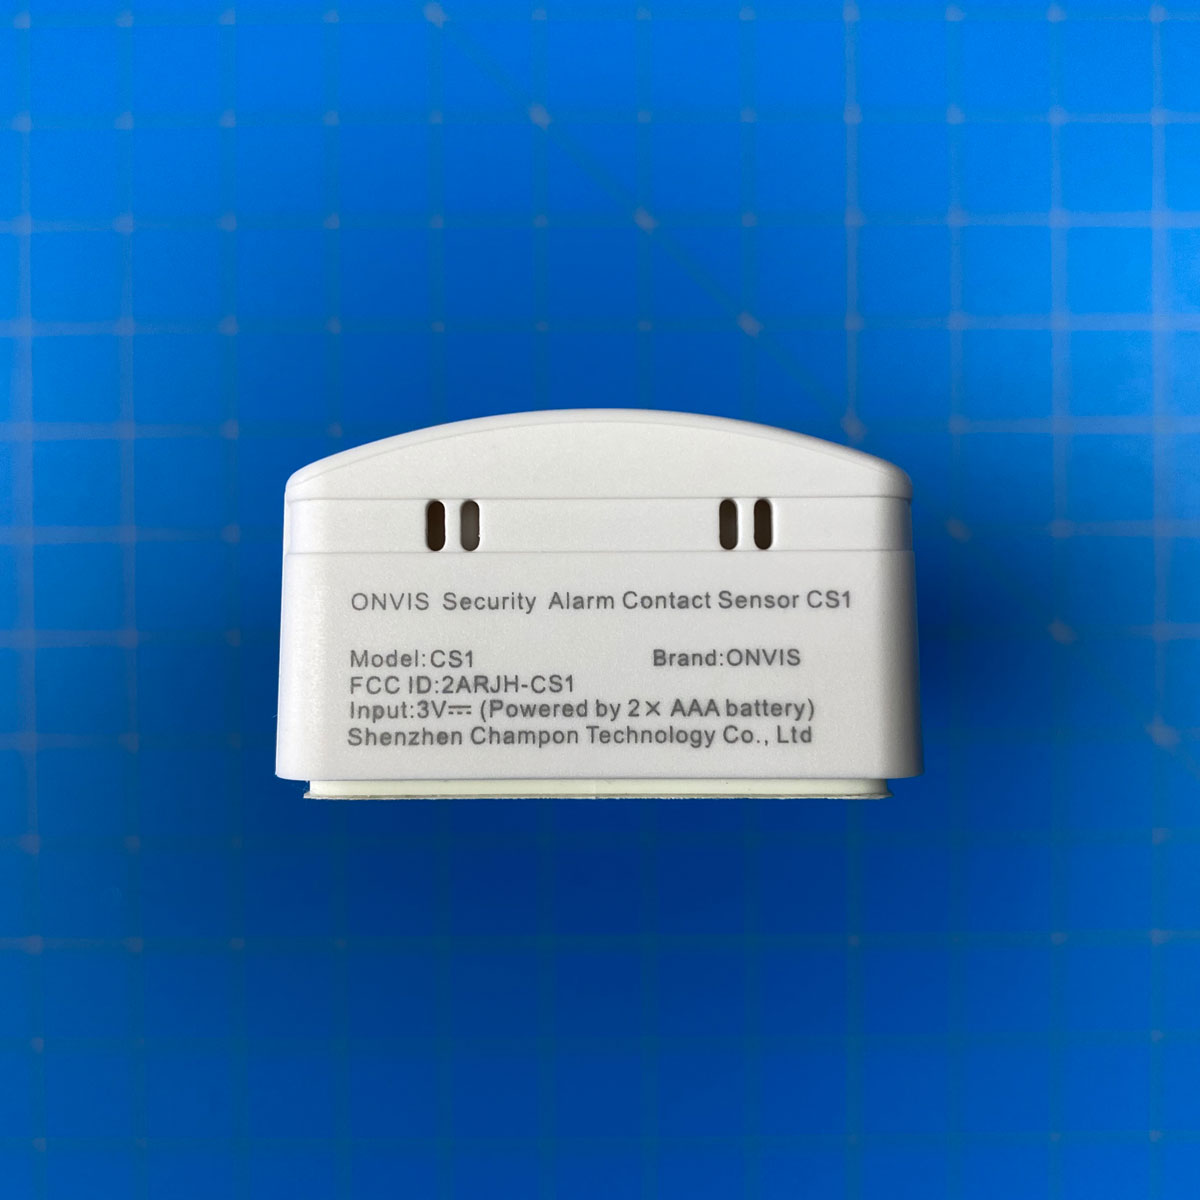
In terms of specifications and requirements, the device uses two AAA batteries, with a standby time of 1.5 years, and Bluetooth LE 5.0 as its method of communication. They recommend that you’re running at least iOS12.1, and if you want remote access or create scenes and automations, you’ll need a Home Hub, like the Apple TV4 (or higher), a HomePod, or a suitable iPad that’s permanently powered and connected to wifi. All fairly standard stuff. You’ll need to download the Onvis app for access to certain settings and updates, although apart from these, you don’t need to use the app for anything else, so you can use the Home app or other 3rd party apps, like Eve, as I’ll explain later.


Once the box is opened, you’ll see a small bag of contents, which includes the manual (all in English) including HomeKit code, a spare set of double-sided 3M stickers, a set of screws with rawl plugs, and a customer service card. Beneath that is the device itself – The alarm/sensor, the accompanying magnet and two AAA batteries, all firmly held in place with very dense foam. Just as a side note, the batteries in the image above will most likely differ from yours, as batteries weren’t supplied when Onvis sent the device to me – shipping issues apparently – so I provide these myself.
THE DEVICE
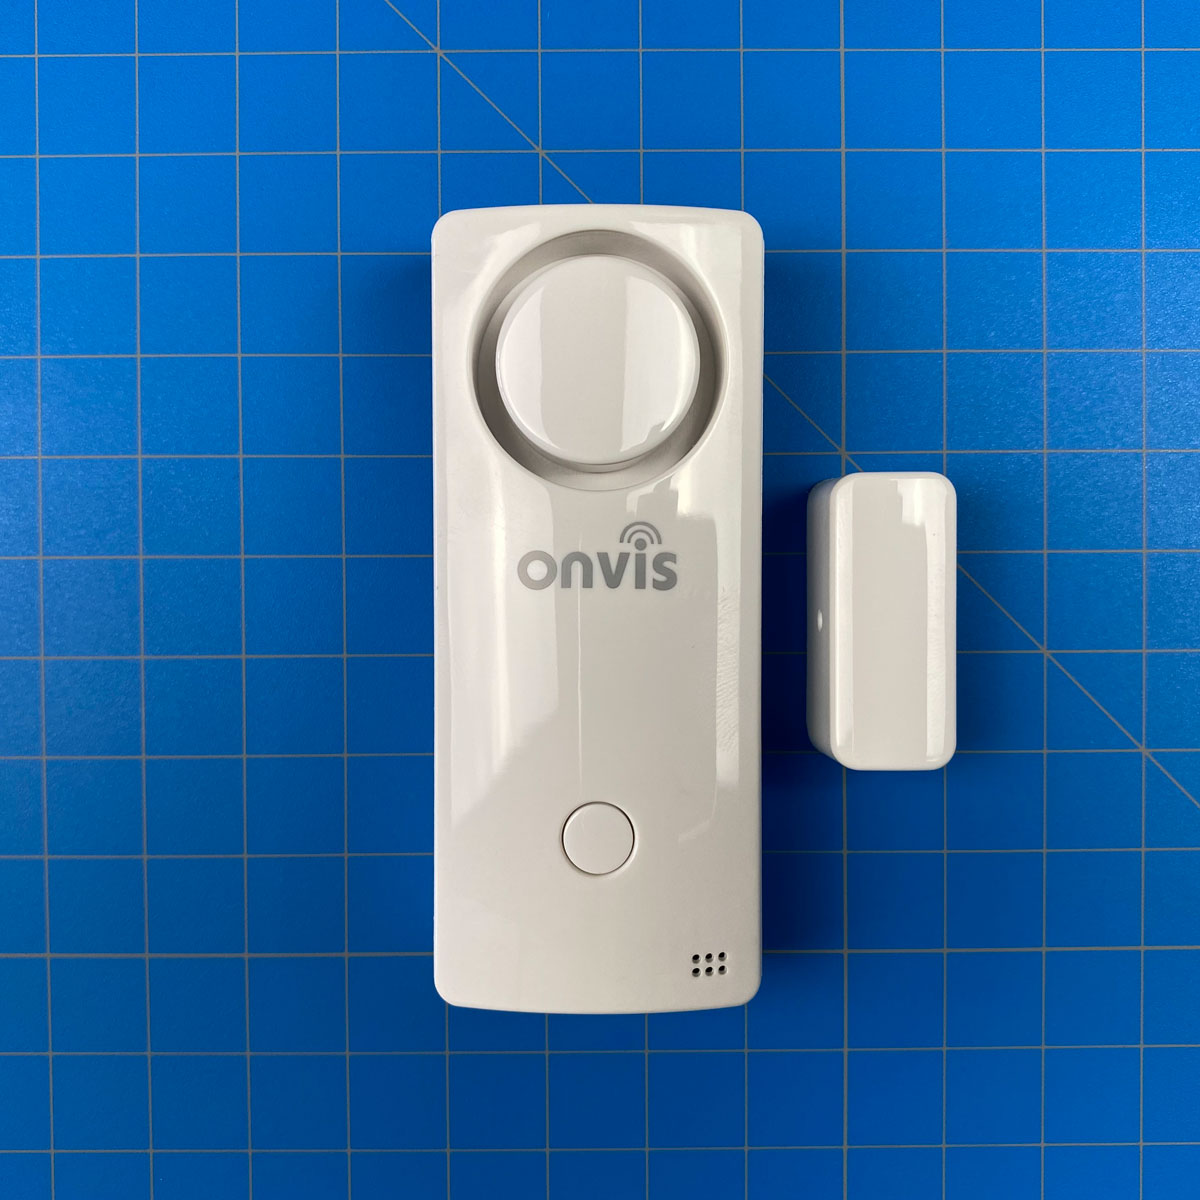

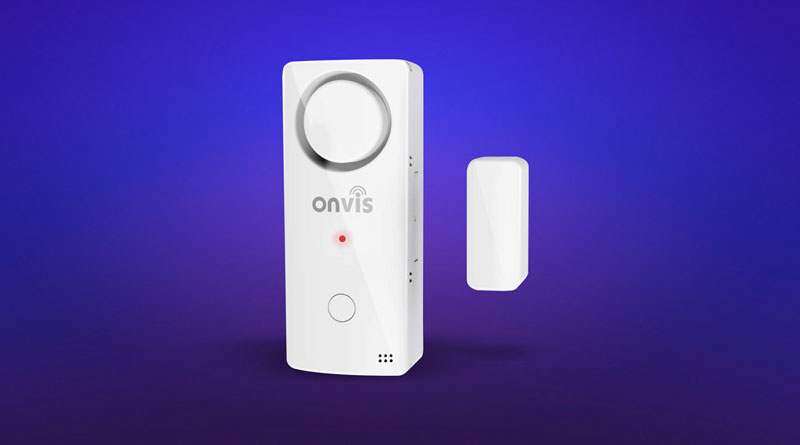
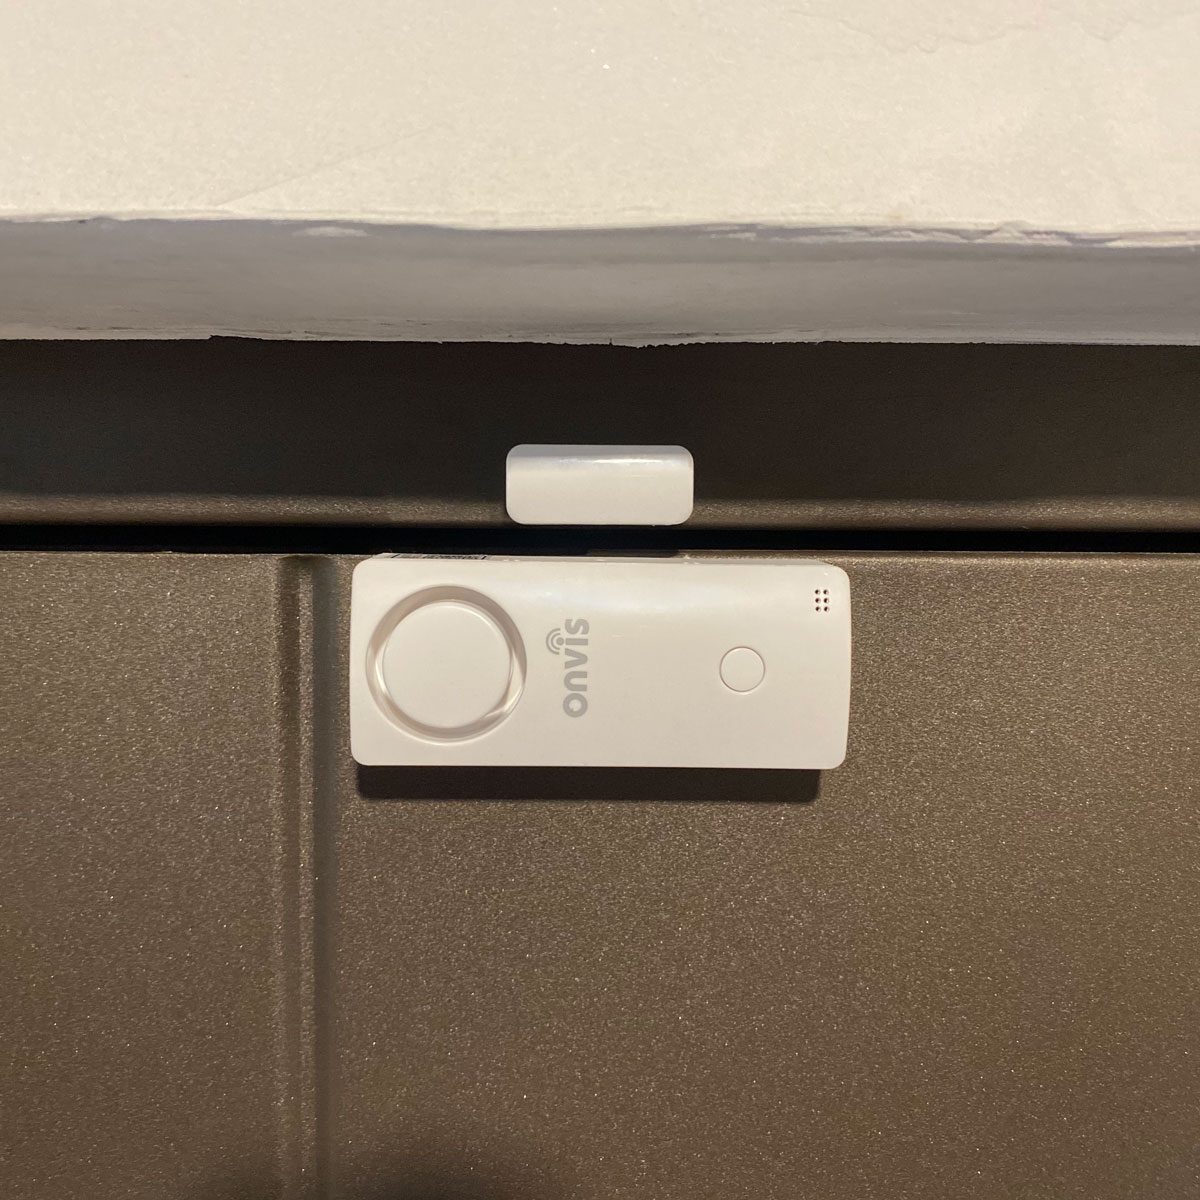
The Alarm/sensor is made of very glossy white plastic and has the alarm speaker right on the front, with the Onvis logo directly below. Underneath that is a hidden LED that flashes when the door sensor is activated. At the bottom is a reset button, should you need to get the device back to factory settings. When I first saw this device online, I actually thought it was bigger, but it’s actually not as large as I thought. The main sensor is 90 x 38 x 21.4mm / 3.54 x 1.49 x 0.84in. The magnet part is about a third of the size, at 34.9 x 15.7 x 14.8mm / 1.37 x 0.62 x 0.58in.

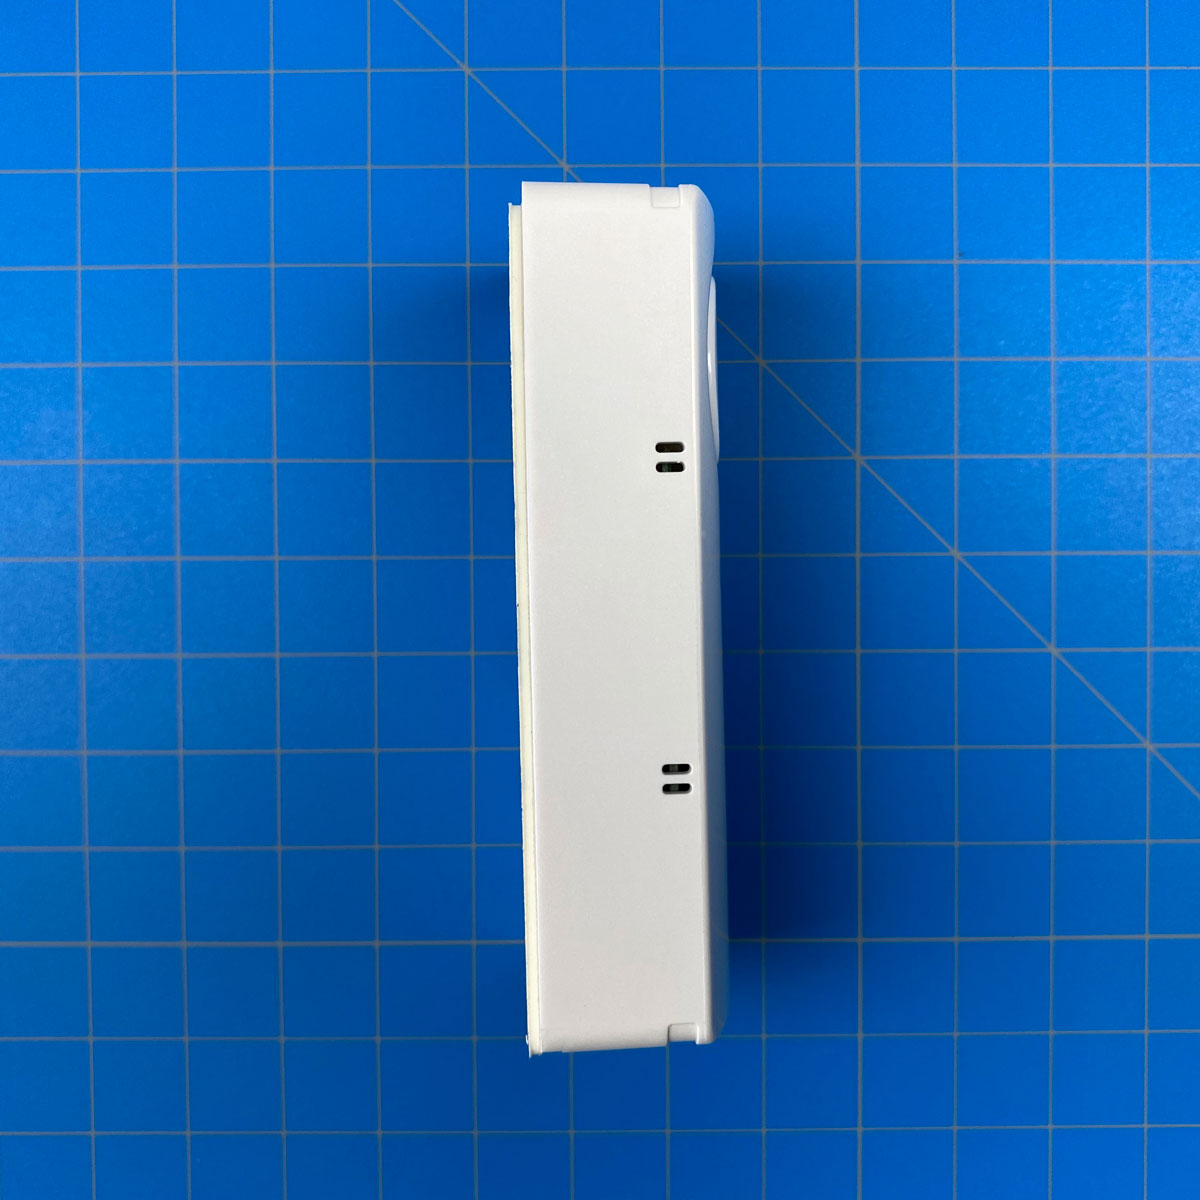
All around the body of the main device are openings, which I can only assume are two allow for the measurement of temperature and humidity. Yes, not only does this have a contact sensor with a built-in alarm, but it also contains temperature and humidity sensors. This may seem a bit odd, and I’d probably agree that it seems a bit gratuitous, but if you don’t already have any of these sensors, then it does provide even more value for money, although if this is situated on your front door, I’m not sure how important readings of these kinds would be. I guess it’s all down to placement. This is also the case with Onvis’ other HomeKit device, the SMS1 Motion sensor, which also has temperature and humidity sensors built-in. You can read our review of the SMS1 here.
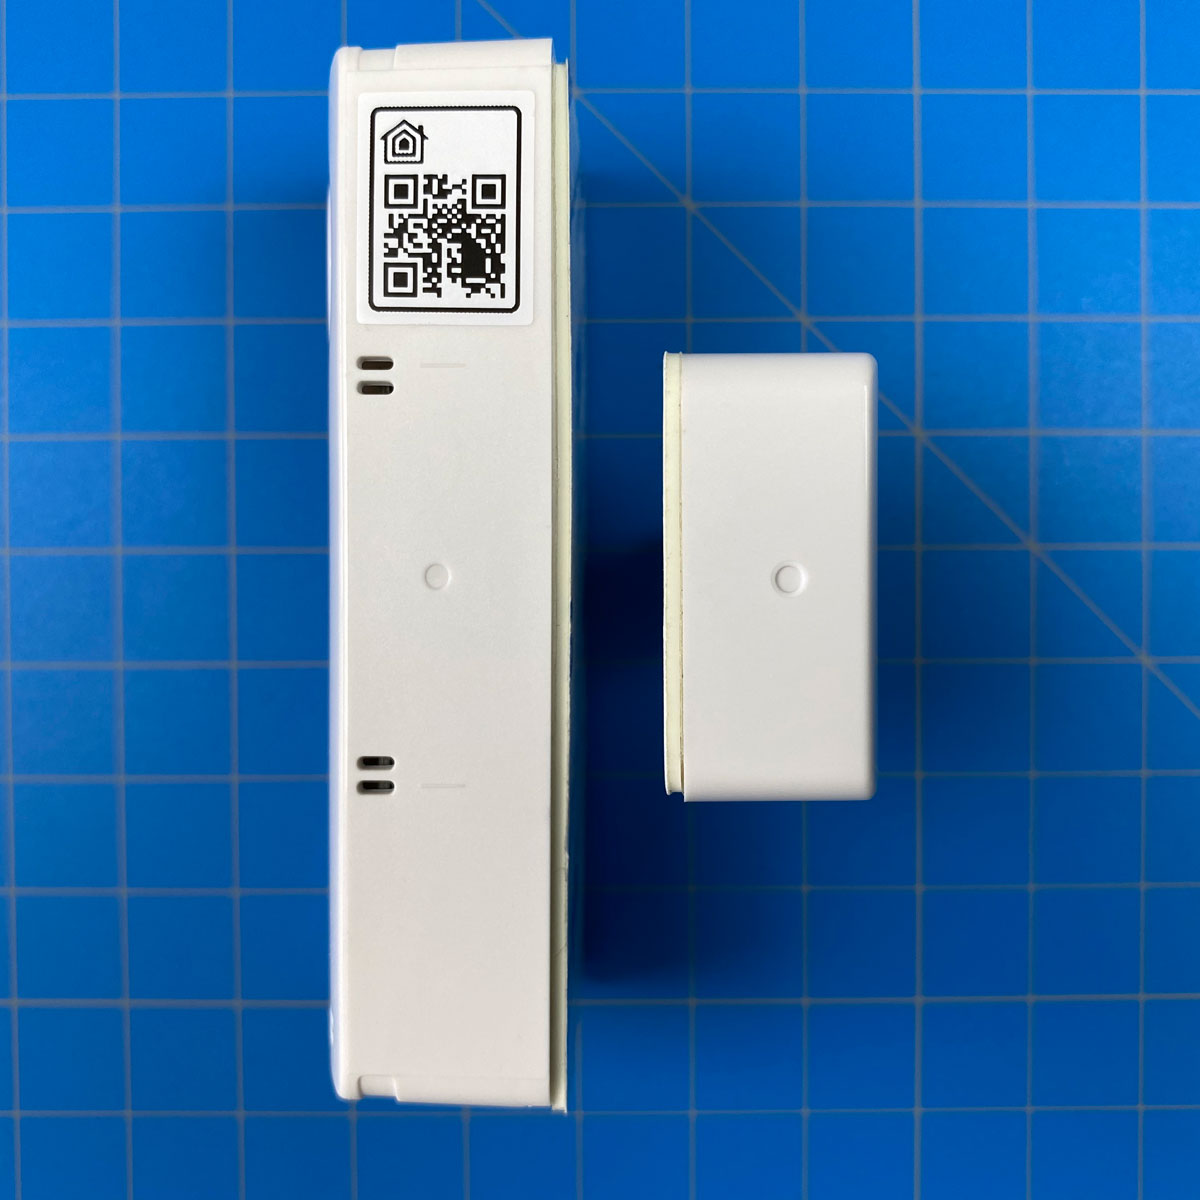
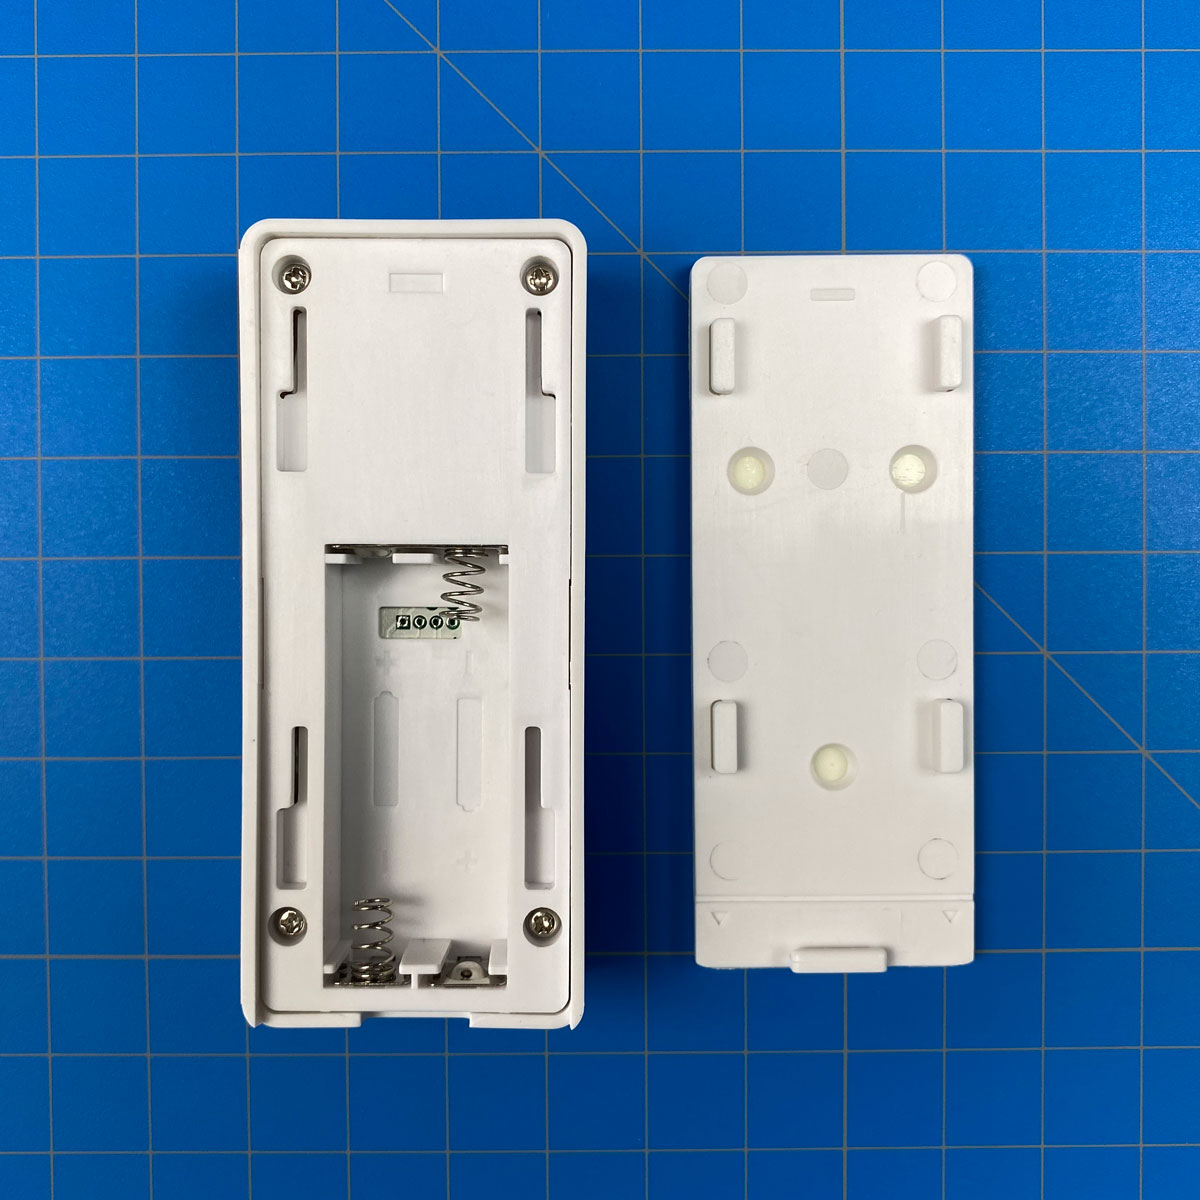
Both the main sensor and the accompanying magnet have an indented circle on one side to show where the magnet and the sensor should line up. The manual states that the gap between the two needs to be less than 20mm / 0.79in. Initially, I thought this was in reference to the distance between the two parts once they’d been placed on your door, with the door closed, but it, in fact, means that the two circles have to line up to within 20mm of each other in the vertical plane, so if for any reason you’re unable line the circle markers up exactly, then try to ensure they’re within the 20mm limit. Regardless of this, it’s always good practice to keep the sensor and magnet in close proximity.
The battery compartment holds two AAA batteries and is unremarkable except for the fact it’s really easy to open and close. I’d probably say too easy in some respects, and it probably would’ve been a good idea to include a small screw that stops the door from being slid off so easily, in much the same way that some video doorbell cameras can be secured. Despite it only being used for indoors, there could be a situation where someone does manage to get into your home, but isn’t deterred by the alarm and is quickly able to deactivate it by taking the batteries out very fast, which a secure screw would stop or at least seriously slow such an attempt down. Of course, you’d get the notification, but if you’re far from home and you’re hoping the neighbours are listening, it’s entirely possible that the alarm would get ignored if it only blasts out for a few seconds, with some people simply thinking the alarm was triggered by mistake. In most scenarios, a would-be thief would hightail it out of there as soon as the alarm is triggered, so the potential instance mentioned is maybe an extreme one, although still quite possible.
INSTALLATION AND SETUP
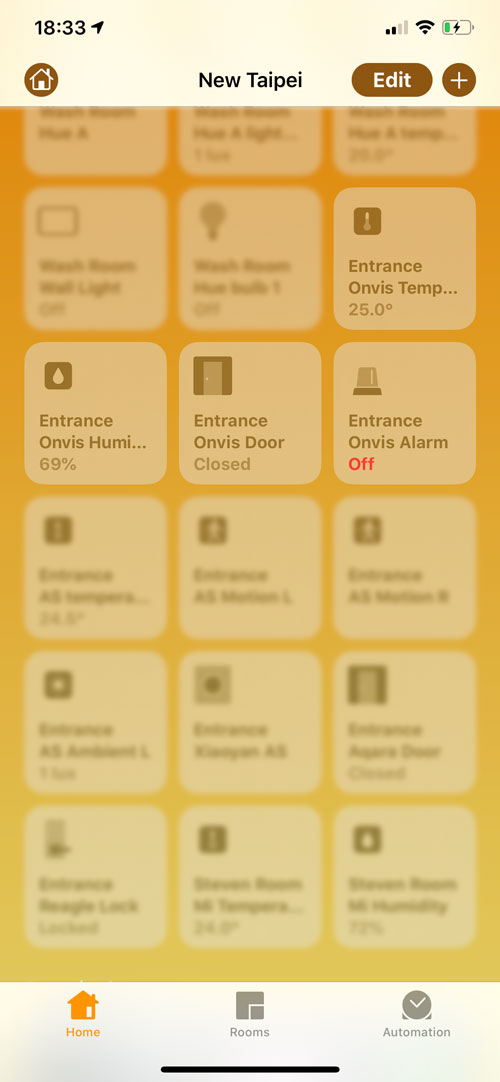
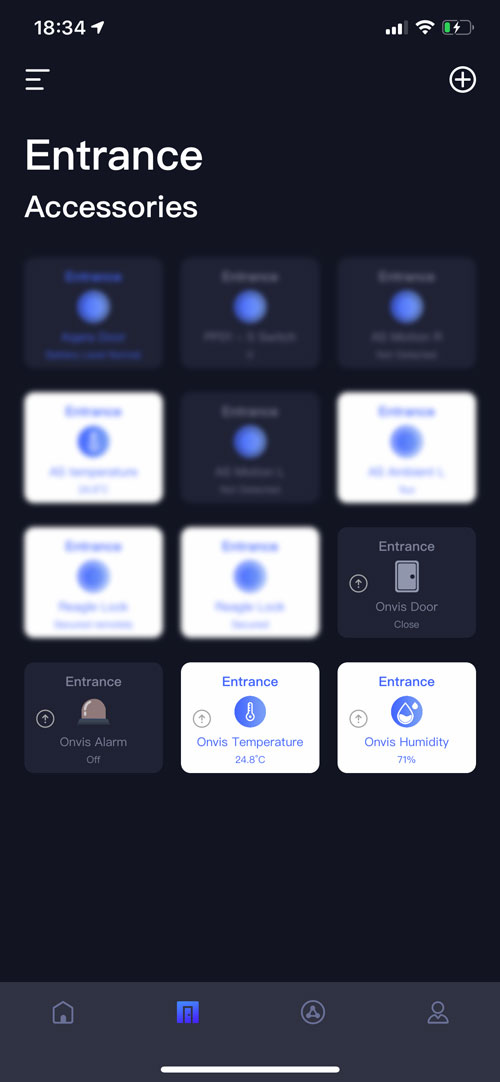
As the device is a fully-fledged HomeKit offering, you can simply add it to the Home app in the same way you would any other. However, just like other HomeKit devices, it’s also good practice to have the manufacturers’ app for not only updates but settings that aren’t always available in the regular Home app. As you can see in the screencaps above, once installed, the device gives up four separate tiles, although in the Home app they will initially be bundled into one tile, so you’re going to need to ‘unbundle’ them in the settings. There’s a tile for the contact sensor, temperature and humidity. Additionally, you get the alarm tile. This is pretty much the same situation with the Onvis app, giving you four tiles.
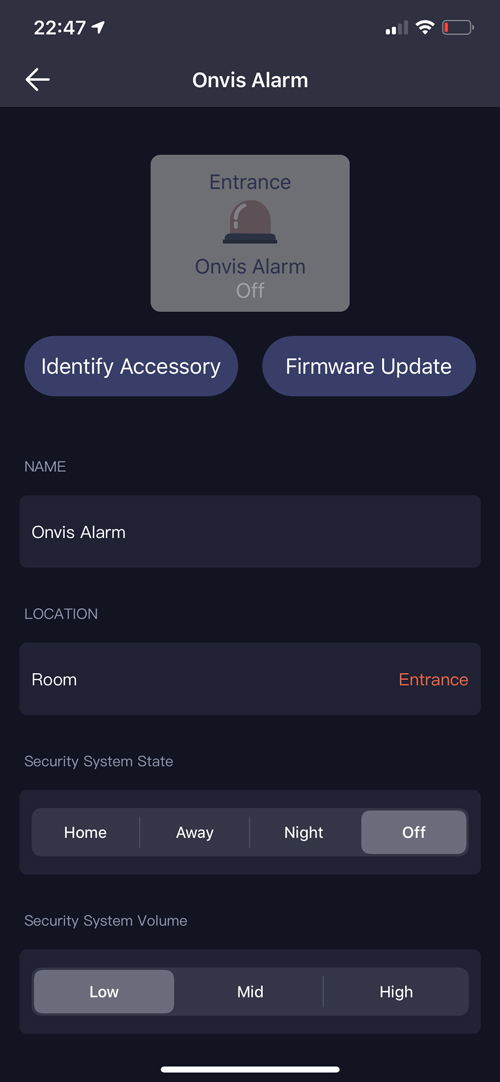

When it comes to customising certain aspects of the alarm, it’s best to do it in the Onvis app, as this is also where you’ll be able to download any firmware updates (hint: there will be ones waiting…). In the settings page, you can change the name of the device, as well as change its location. You can set any of the four states we’ve already mentioned – Home, Away, Night and Off.
You can also set the default volume of the alarm – Low, Mid and High. I’ve been informed that if you want to deploy an external sound source for your alarm instead of the built-in alarm, such as your HomePod for example, the company are working to add a mute option to the alarm modes very soon. Further down, you get to be able to adjust how long the alarm rings for, with a minimum of 10 seconds and a maximum of 600 seconds (10 minutes). Finally, if you’re in need of removing the device, you can do so with the help of the large red ‘Remove Accessory’ button.
ALARM MODES

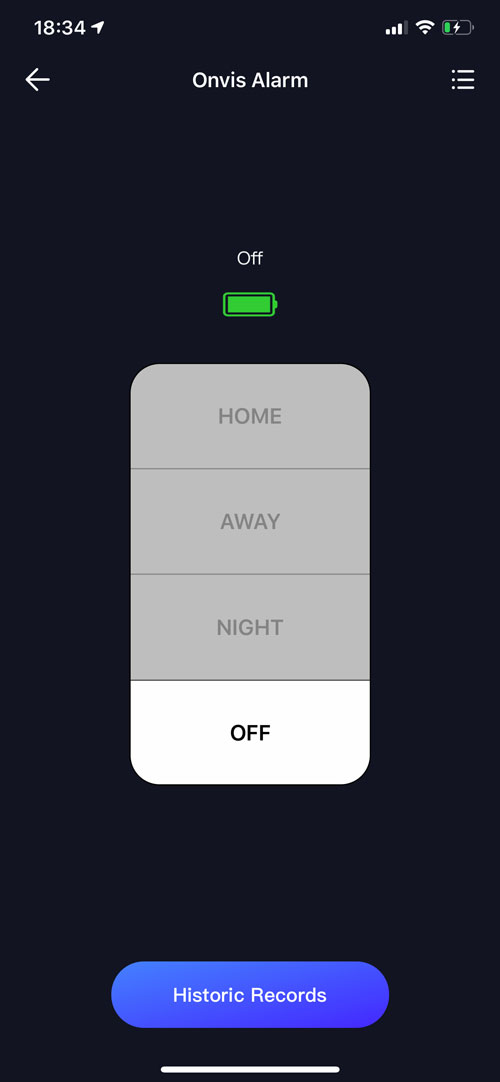
When you press on the alarm tile in either app you get access to the four separate alarm ‘states’ – Home, Away, Night and Off. This might seem a bit confusing to some who are just used to having ‘Off’ and ‘Away’, but essentially, these states are the starting point for your own setups or automations. The Onvis manual explains how they perceive these different states thus;
- Home (it’s referred to as Stay when you receive notifications) – Home is occupied, and the residents are active. The security alarm plays a ‘ding dong’ sound when the door opens (note: it’s nothing like ‘ding dong’). So, essentially this is the door not set to ‘alarm’, but merely notification, so you know someone has come home, while you – or someone else – is home.
- Away – The security alarm ‘beeps’ (the alarm sounds) for 30 seconds when someone triggers the contact sensor. The Alarm time can be set from between 10 and 600 seconds in the Onvis app. This is the basic armed alarm.
- Night – The home is occupied and the residents are sleeping. The security alarm ‘beeps’ (the alarm sounds) for 30 seconds when someone triggers the contact sensor. The Alarm time can be set from between 10 and 600 seconds in the Onvis app. This is the same as the basic armed alarm, but as I’ll explain later, they can differ.
- Off – The alarm is disarmed. Very simple.
Note: At present, the ‘Historic Records’ button seems to hang, although the company have already submitted a fix for this, so it should no longer be an issue once the app update has passed the standard App Store review process.
In order to get the Away and Night alarm modes to work differently, you need to create an automation that’s suitable for these scenarios, although in each case, these two modes will always trigger the built-in alarm.
I’m going to start off with the Home app for the moment, to make clear that whilst you have the four separate alarm states to choose from in the Home app, you aren’t able to set up external/3rd party devices to trigger them as such. This is fairly similar to how the Aqara hub works in terms of alarms, in that the Home app only facilitates activating or deactivating the different modes, not configuring them. So effectively, in the case of the Aqara hub, you have to set the device that triggers the alarm (which has to be a child device bound to the hub – i.e. Mijia or Aqara devices) in the Aqara or Mi Home app, depending on which of the two you’re using. In reference to the Aqara hub, at present, you only have the arm or disarm (Away or Off) options in the Home app. With the Onvis device, this expands on what modes you want to choose from, although it’s down to what you do with those modes that make a difference. What should be understood, however, is that just like the Aqara hub, only the Onvis contact sensor can actually trigger the alarm. The big difference here is that with Aqara, you can pick and choose your devices as the triggers for the alarm. As the onvis is a device unto itself, only its own trigger device – the contact sensor – can be utilised. As Onvis also make a motion sensor, along with the forthcoming HomeKit camera we mentioned a while back, it would make a lot of sense to include these as additional external trigger devices for the alarm, and after mentioning this to Onvis, they have informed me they’re working on an update to address this functionality.
With all that said, what can you do with these modes? I’d urge you in this instance to start looking at something like the Eve app, or other 3rd party apps that allow full control of these modes in automations. I’ll demonstrate why these apps are important to achieve this later, but first, its good to start off explaining the different modes in better detail. so for example, you might want to either set up a Scene (or automation), that sets the alarm to Away mode, (which by default arms the alarm). The scene can also include turning lights or heating off, of course.
For Home mode, this acts almost the same as Away mode, with the main difference being that whilst the alarm is ‘armed’, instead of the piercing alarm sound being triggered when the contact sensor reports the door being opened, it will play a chime, which I previously said was labelled a ‘ding dong’ sound. In actual fact, it’s a little bit like the electronic two-note beeps you might hear if you open the door to a local convenience store. This is ostensibly designed to let people who are already home, know that the door has been opened, but as they’re home, there should be no cause for concern, as it simply notifies you that maybe your kids have arrived home, or perhaps your significant other has gotten back from work. You might want to create a scene that, when the contact sensor is triggered under this mode, it also turns one light red in the room (or rooms) you spend most of your time in, to let you and others know someone has come home, as otherwise in order to be notified by the chime alone, it’d have to be set to maximum volume if you were at the other end of the house.
Night mode is more of the same but is more akin to Away mode in that if the door opens, the regular 120dB alarm will sound. As before, it should be stated that in order to get a different experience from Night mode compared to Away mode, you might want to work out the appropriate scene and corresponding automation. So, if the alarm is triggered in Away mode, you’ll want the alarm to turn on (as it will do by default), and maybe have red lights come on where the entrance is, to scare the would-be intruder. But, if you set Night mode you might want additional lights to trigger perhaps, like your bedroom lights to come on at 100% brightness, to alert you if your phone is set to ‘do not disturb’ for example.
When you select any of the four modes in either the Home or Onvis app, the sensor will play a tone to let you know;
- When you select either the Night or Away modes, the sensor will give out a short single tone.
- If you select the Home mode, it will give the two-tone sound mentioned previously.
- If you select the Off mode, it will give out two short tones in succession.
CREATING SCENES AND AUTOMATIONS FOR THE MODES
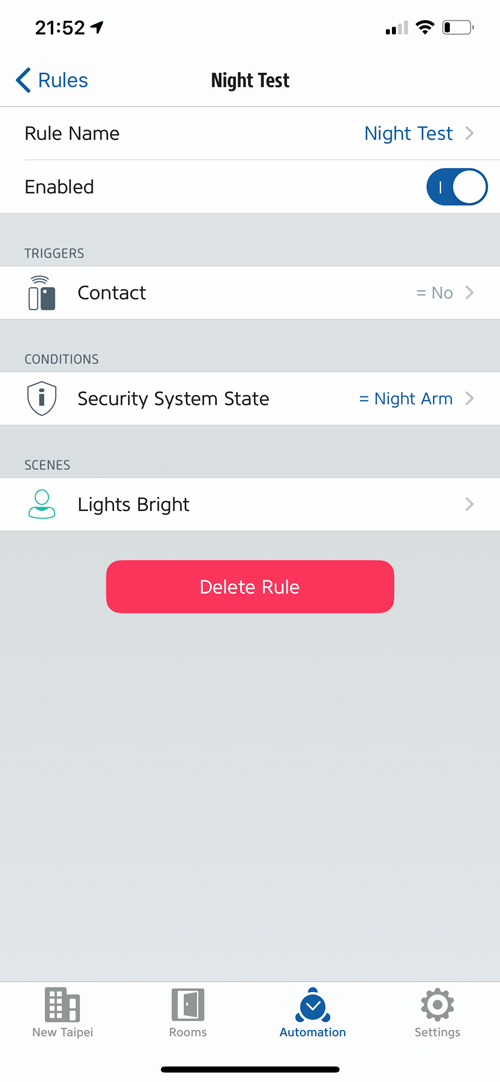
Unfortunately, the Home app doesn’t support automations that utilise the different modes, so it’s down to the Eve app or similar 3rd party apps to do the initial work. In the first image above, I’ve created a simple automation;
- If the Onvis contact sensor ‘contact state’ is ‘no’ (meaning the door is open)
- With the condition that the Onvis alarm mode is set to ‘Night Arm’
- Then activate the ‘Lights Bright’ scene (this turns the bedroom light on at 100% brightness)
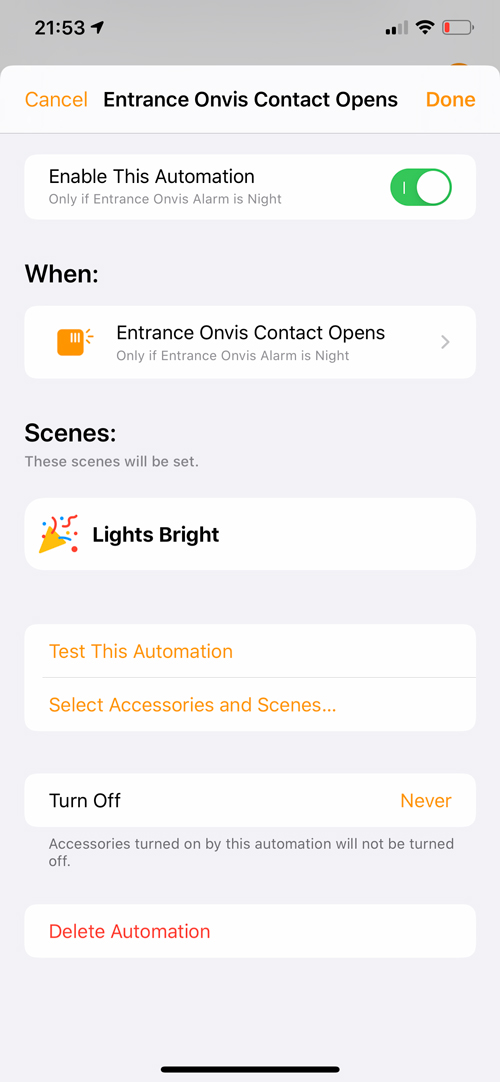
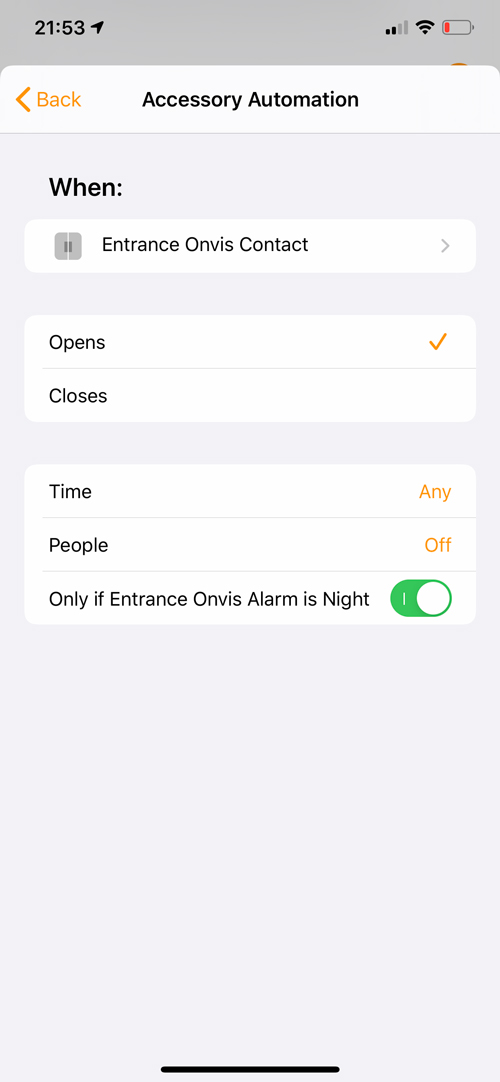
As you can also see from the second and third screenshots, once you’ve created the automation, it will appear in the Home app, almost as though it was created there in the first place. If you look at the other options available in both apps, you really can create some very complex alarm scenarios, so you’re only limited by your imagination and what devices you have that can be included in said automations.
PHYSICAL PLACEMENT OF THE ALARM/SENSOR
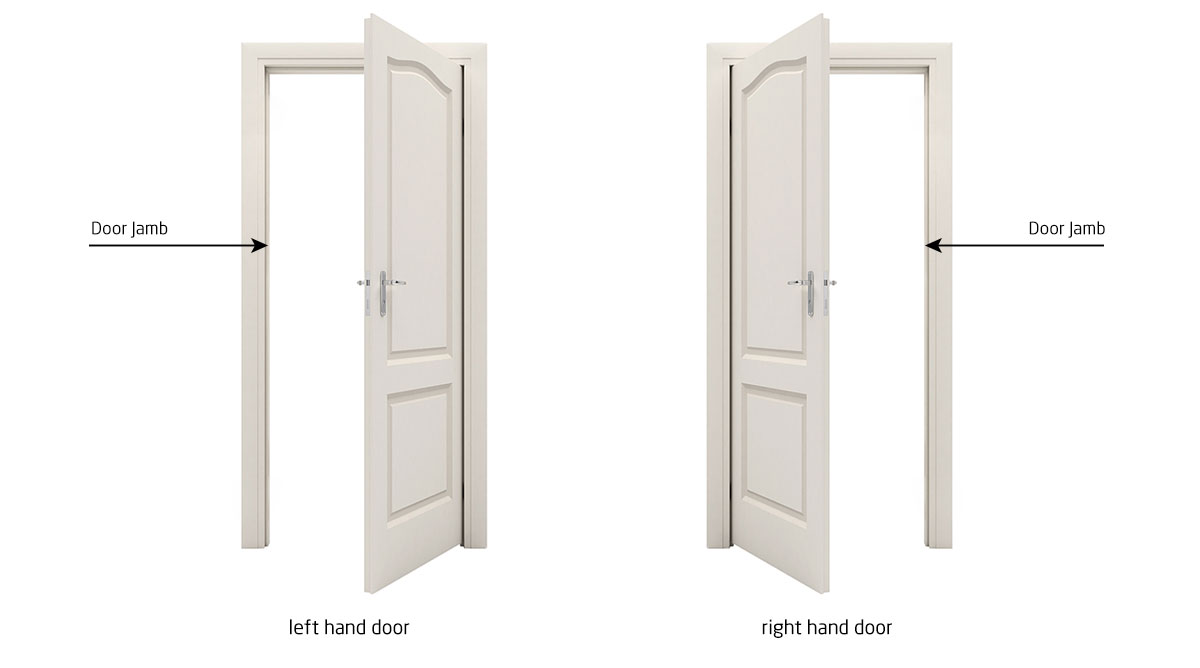
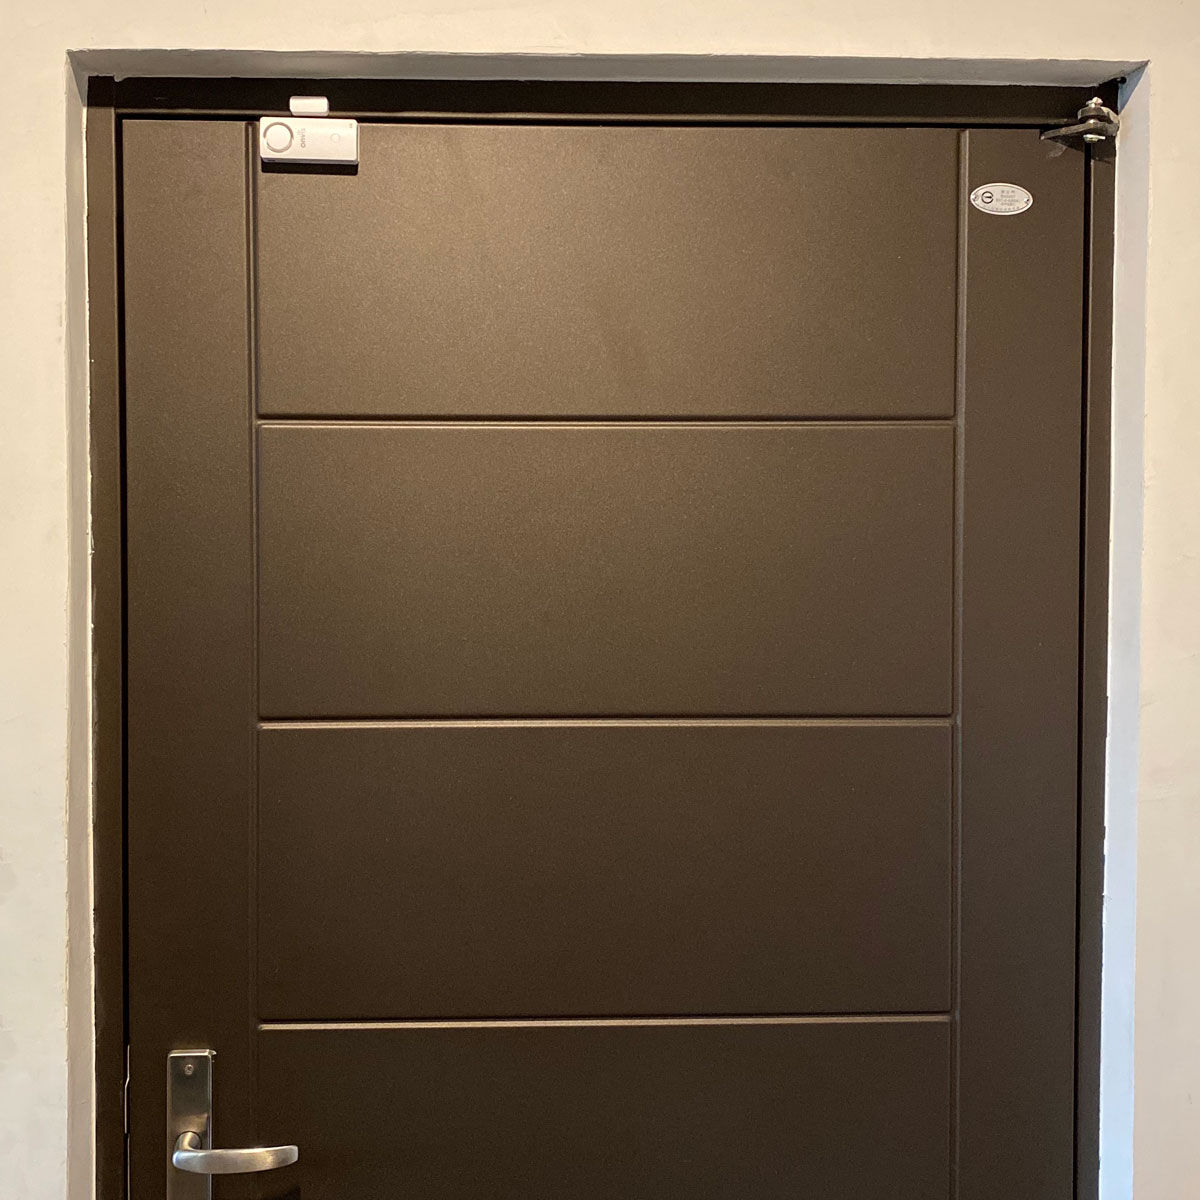
Like many contact sensors, the Onvis relies on two parts – the sensor and a magnet. The magnet is usually fitted to the door jamb, with the sensor part fitting to the door. Unfortunately, as is also the case with most contact sensors, the magnet within the main sensor is only on one side, and in the case of my front door, the door opens on the left from inside. The connection between the magnet and the sensor on the Onvis is on the right.
This means that in my case (left-hand door), the sensor has to be either placed upside down or placed at top of the door, sideways. Neither looks great, as the Onvis logo is upside down for the first option, and sideway for the second. It’s really not the end of the world, but it would have maybe been a good idea for Onvis to add a magnet to both sides of the main sensor, in order to accommodate door that opens on the left and right. If you have a door with a very large door jamb that can accommodate the main body, then it’s also ok to place the sensor there of course, but unless you happen to live in a palace or castle, most modern houses and doors only have moderately thin door jambs.
IN DAILY USE
When I initially installed the Onvis sensor, all went well, but after the first 24 hours, I did encounter a couple of issues. The first one relates to notifications; For some reason, the Onvis was sending random notifications to my phone via the Home app. These notifications simply reported on the state of the alarm – Away or Off for example. A colleague of mine has reported the same issues with his test unit and has been experiencing several of these notifications. In my case, it has been maybe 2 or 3 a day, and as of writing this review, they seem to have largely stopped. The company are aware of this issue, and I’m told a fix is nearly ready. The other issue I initially had was that the device disconnected on a couple of occasions. I removed and reinserted the batteries and it came back, but what I eventually noticed was that it was basically a little too far from my iPhone and Home Hub (Apple TV4K), and so would disconnect due to a lack of a connection. I was able to simply remedy this by activating a second Apple TV I had in the same room as the Onvis, that was previously not set to act as a Home Hub. As soon as I did this, I haven’t experienced any further disconnections, which is a relief. It does show, however, that despite this being a Bluetooth 5.0 device, which should have four times the reach of Bluetooth 4.2, the reach and signal isn’t as strong as I’d expected. Could this be a bug within the coding for the Bluetooth chip? I don’t know, but I feel it should be better, and hopefully, the company can address this if it is indeed less than it should be. In truth, as many people are aware, there are some serious issues still to fix with the Home app in iOS 13, so it’s hard to place too much blame with the device itself, as at least three times a day, I have to reboot the iPhone in order for the Home app to behave itself, which makes testing devices like this all the more harder, if you haven’t gotten an app to create a normal, stable environment to test it in.
In terms of the alarm, it’s loud, but not quite as loud as I’d expected. Still, at a maximum of 120dB when it’s triggered, which will be essentially right next to where any unauthorised entry will take place, it’s more than enough to make all but the most determined (or profoundly deaf) intruder flee the scene.
Although admittedly, I’m not a massive fan of Bluetooth devices, their Bluetooth motion sensor has been very reliable, and so far, since activating the 2nd Apple TV, the Alarm Sensor has behaved very well too. Obviously, to really know how reliable something is in a broader sense, it takes a long time to evaluate, but one could also argue as to how long one should test a device to deem it reliable – if something is designed for years of service, and you test it for a year before it fails, was that long enough to deem it reliable? I’ll leave that for you to decide, but for the time being, taking into account the current state of things, it seems decent enough, especially for the price.
SUMMING UP

I didn’t have very high expectations for this device, simply based on the principle of how it works compared to a dedicated or even semi-dedicated alarm setup. However, whilst this probably isn’t suitable for larger house perhaps, there are definite use cases for this; maybe you want to use this for a separate outhouse or garage door (within range of course), or maybe even a backup to a door with a sensor already in place. I would suggest that a device like this is ideal for people in smaller apartments or even people who live in shared accommodation, with their own lockable room perhaps. It could also be useful in student accommodation, where there tend to be a lot more comings and goings. It’s also fair to highlight the fact that as it’s Bluetooth, there’s no requirement for a hub, and it doesn’t rely on wifi (except for remote access), so it does have a lot going for it.
I’ve already highlighted the potential for this device to be disabled by simply removing the batteries, although as I also stated, it’s unlikely that someone will spend the time to locate the alarm and figure out how to open it, with 120dB blasting their eardrums, especially when it’s bound to attract a fair bit of attention, so this is an uncommon scenario, to be fair. Ultimately, it would be better if you could choose other devices to trigger the alarm based on the type of mode the alarm is in, but this is how it is with all alarm systems in HomeKit, in that the alarm can only be triggered by devices in its own ecosystem. This is where, in some ways, the Aqara system has the edge, as you can assign different sensors to act as the trigger in different modes. The Aqara system doesn’t currently expose the four modes in HomeKit at this time though, and the US Aqara hub is almost twice the price of this Onvis alarm sensor, even before you start buying sensors, which can range between $10 – $20 apiece. If you already have some Aqara sensors and the hub, you probably won’t need this, assuming Aqara does bring the four modes into HomeKit.
It’s also fair to say that there are a few kinks to work out, but I’m already aware that many issues that existed when this was being tested, have been fixed very quickly by the Onvis team, so I feel confident that any outstanding issues will be addressed equally quickly. So, all that being said, for the price, this is a handy backup device, even if you have an alarm system in place.
Thanks to Richard B for the help with understanding the alarm modes.
Full disclosure: Onvis provided HomeKit News with the Security Alarm Contact Sensor for the purpose of this review. No other compensation was made or requested.
Onvis Security Alarm Contact Sensor
Pros
- All in one product
- Low price
- Simple to install
- Supports the four alarm modes
- Great for shared accommodation
Cons
- Bluetooth range limited
- Too easy to remove batteries
- Better suited for right opening doors
Pingback: Onvis Security Alarm Contact Sensor (review) - HomeKit News & Reviews - YokyHome
I just found your site and it’s a wealth of HomeKit information.
I need to remind people to close the patio door at my AirBnB.
I have Eve door sensors and Eve energy smart switches but the problem is that I need a delay before activating a chime.
Will this chime let me set a delay?
If not, do you have any other suggestions?
Thanks!
This is possible, but first of all I’d need to know more about the chime you mention. Is this something separate from HomeKit?
Actually, I haven’t even found a chime that would work.
I guess it could be any 110v sound device that could be plugged into an Eve Energy plug.
I was hoping that Onvis would solve my problem but it seems to only activate the chime when the door is opened.
Hi John, sorry I misread your original message and didn’t realise you were actually referring to the chime in the device itself. I don’t think it’s possible to do what you want to with this device, unfortunately, but I’ll double-check to make sure. The one device that could do something like this would be the Aqara hub and an Aqara contact sensor.
Hi, thanks for sharing this awesome device. I just purchased it and will be setting it up soon. Two questions: First, you mention that other HomeKit accessories cannot do different things based on the mode of the Onvis Smart Device, at least not using the Apple Home app. But, would I be able to use the Home app to set up basic scenes and automations such as, an automation to put the Onvis in away mode whenever I leave home, or a “Good Morning” scene that puts Onvis in Home Mode while also making the coffee and so on?
along the same lines, can this sensor be used like any other contact sensor, like eve, with other accessories? Like can I set up an automation in the home app, such that when the door is open, regardless the mode, a light turns on or something?
Secondly, on a somewhat related topic, I love the idea of playing an alarm or chime sound on the HomePod. But, let’s suppose I set up an automation to play a chime on the HomePod when a door is open. Now what if I happen to be listening to music on the HomePod when someone opens the door. Will the HomePod play the chime and then return to the music that was previously playing, or will it play the chime and then stop music playback, requiring me to ask for what I was previously listening to?
Hello Matthew, in answer to the first question, yes you can create a scene which allows for any of the modes to be activated (deactivated). You can also do the same in an automation. So for example IF ‘smart bulb A’ is turned ‘off’ THEN set the Onvis Alarm to ‘sleep’ mode.
As for using the contact sensor part of the Onvis like other devices in automations, yes you can do that, as essentially it is a contact sensor just like the Eve.
As for the second question relating to audio and HomePods, I can’t answer that as I don’t have a HomePod, but I will enquire with some colleagues who do have one, and get back to you.
Regarding the “random” notifications: I got one a few days ago and every time I close the door I get a notification that the alarm system has been disabled. Is that how it is supposed to work? There is no new firmware available, could you check which version you have please.
Hi, yes I get the same notification when the door is opened/closed. I’m not sure if it’s by design, but it’s not great and should be changed. The firmware I currently have is 1.1.4.
If this is by design it’s unusable. Wasted money if you ask me, no idea how it could make it past Apple’s product certification process.
Excuse me but I have to come back once more, do you know whether Onvis is aware of the issue? I really would like to keep the thing if there’s hope for a newer firmware.
Hi Anatol, they are aware of the issue, and I’ve been told that the company that makes the specific chipset for this device have now acknowledged the issue and have and are preparing an update to fix the issue finally. The new update may come with additional features too, but I’m not able to tell you what they are at this time. These additional features may roll out in a subsequent update.