
Fuse for iOS/WatchOS (review)
Just in the past couple of weeks, there has been a lot of buzz about a HomeKit solution that would involve wall-mounted iPads, complete with an app running 24/7 as a central control hub/panel, with the most recent of these to hit the app store being ‘Wallflower’ by ‘nxtbgthng’. The stock Home app can be used in much the same way to a large extent, and in most cases just as efficiently as many of these apps, but Fuse By Anthony Romano has taken a slight sidestep to this concept, by merging control of your HomeKit stuff with Apple TV, Sonos speakers, and even Chromecast devices, like the Google Home Mini. So if like me, your smart home isn’t 100% HomeKit, then a solution like this may be of some interest.
£4.99 (UK) | $4.99 (US) | €5.49 (EU) | Fuse (Facebook support page)
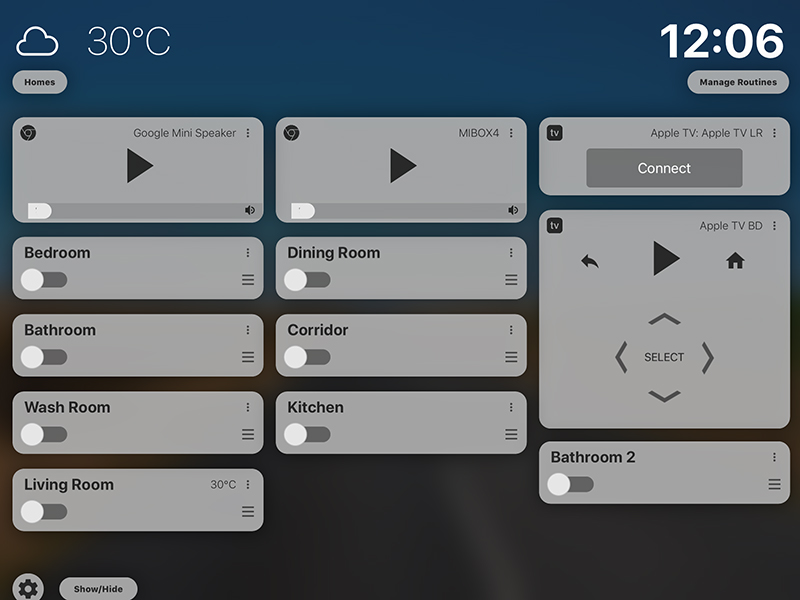

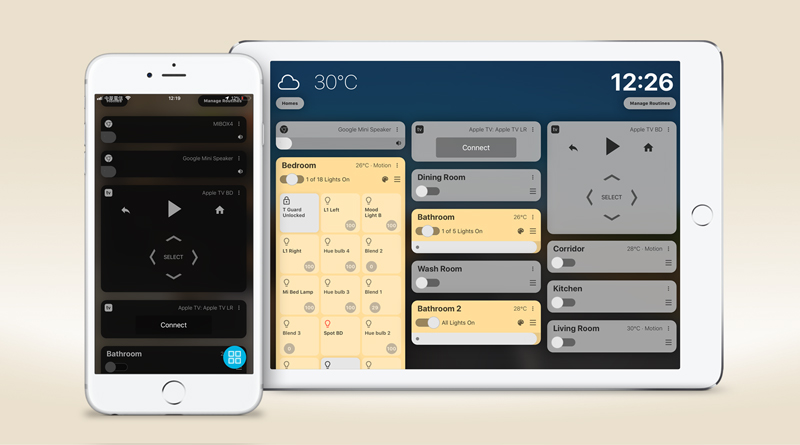
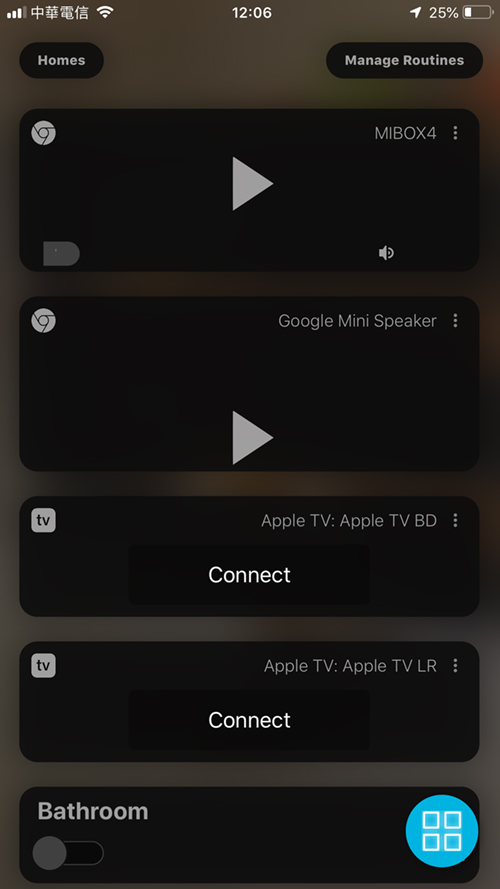
The app, that works for both iPhone, iPad and Apple Watch, is displayed as a series of ‘cards’. These cards represent rooms in your smart home, but also represent other audio/visual devices, like your Apple TV, Sonos Speakers or ChromeCast products, which in my case includes a Google Home Mini Speaker and a MiBox 4 Streaming TV box.
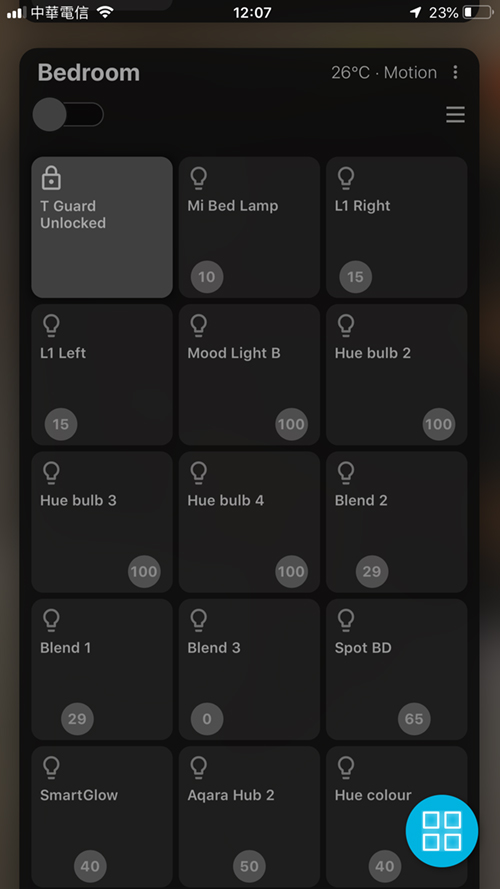
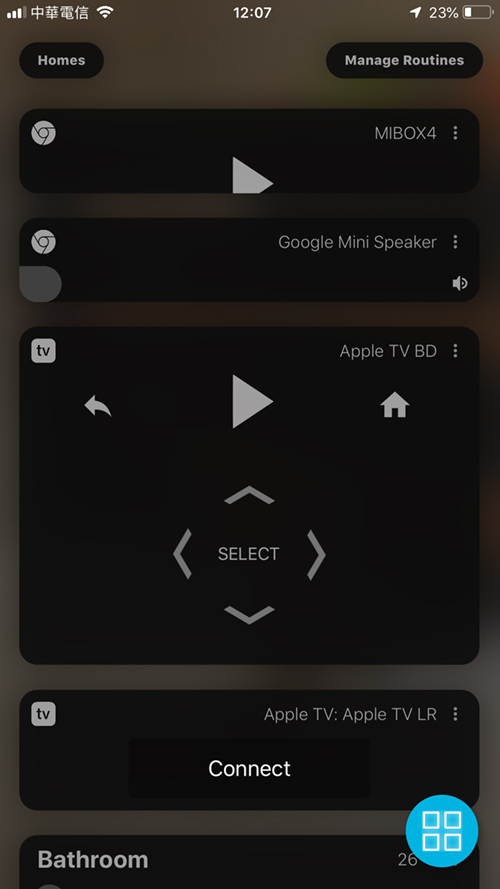
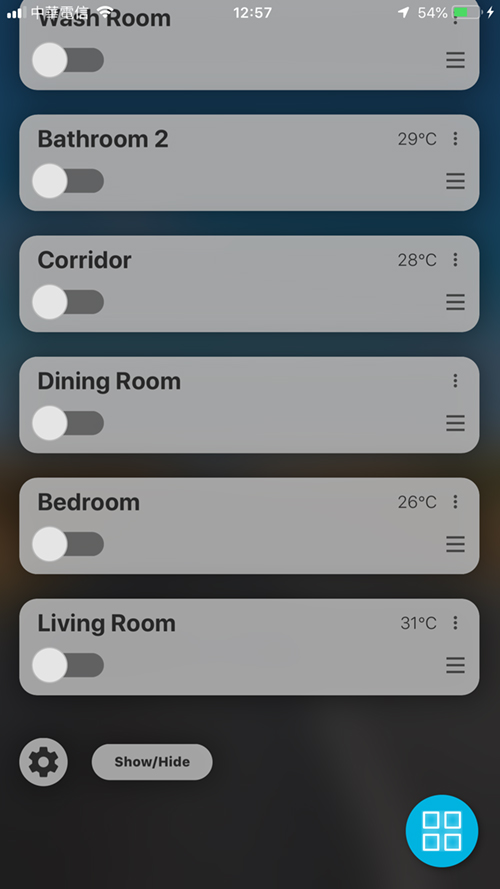
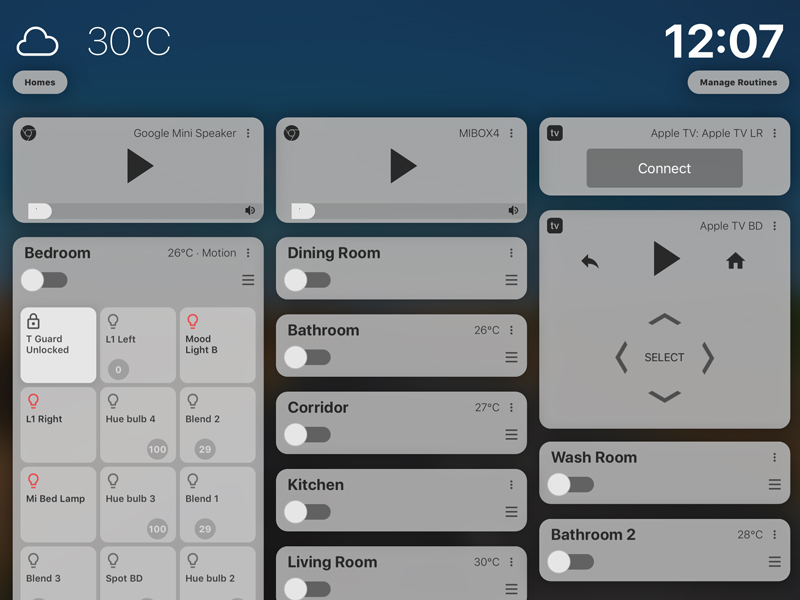
Starting off with the main display; At the top you get the time and current weather for your region, as well as a couple of buttons, to access your ‘homes’ (if you have more than one HomeKit home), as well as a button labelled ‘manage routines’, which we’ll get to in a bit. Getting into the main section we have the Room cards first. these collapsed cards show a simple horizontal slider/toggle switch that allows you to quickly turn the lights for that room on or off. You can even turn the lights on or off with a simple press of the collapsed card. Pressing in this way also expands the card slightly, to reveal a full-width slider for which you have more control to turn your lights on or off. if you have a temperature sensor or motion sensor in the relevant room, the current temperature or motion status will be shown in the top left of the card respectively. If you click on the hamburger menu icon in the bottom left corner of each card, it expands to reveal full tiles all of the HomeKit devices in the room the app supports, that the card represents. From there you can control lights individually. The expanded card will also show tiles for other HomeKit devices like smart locks and smart plugs. Unlike other HomeKit apps, this won’t display a tile for every device, so things like motion or temperature sensors are only displayed at the top as already mentioned, and will only show up if motion is detected, with some other devices totally absent, like my Laser Egg 2, which monitors Air Quality, humidity and temperature. I think even if these devices can’t be controlled via the app, it would still be better to see them. Devices like the Apple TV have their own dedicated card, that once expanded shows the basic Apple TV control as per the remote. The chromeCast devices (at least the ones that I have) only show a volume slider.
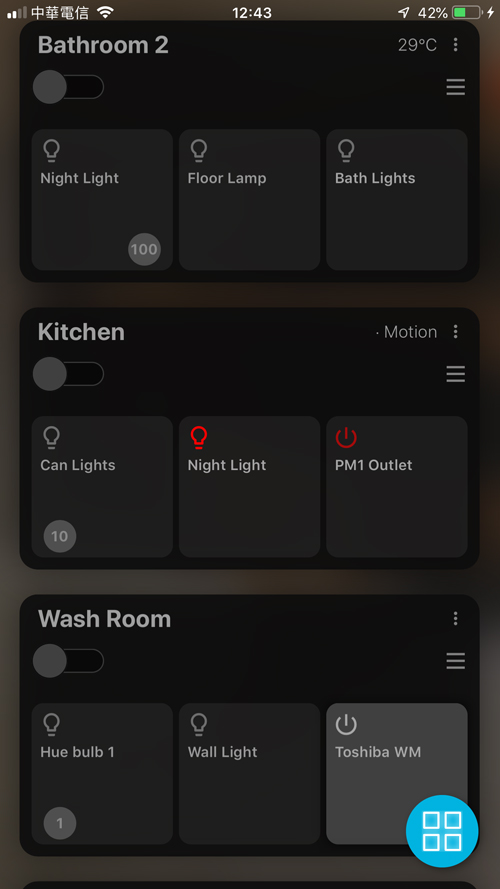
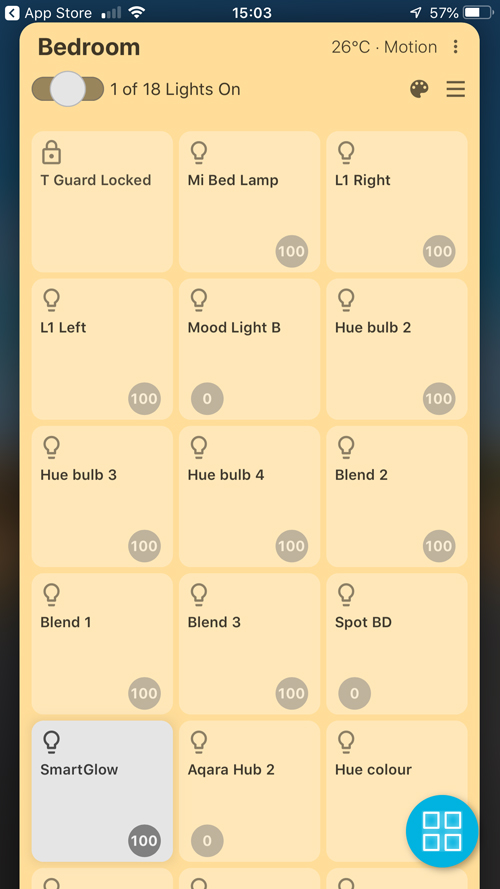
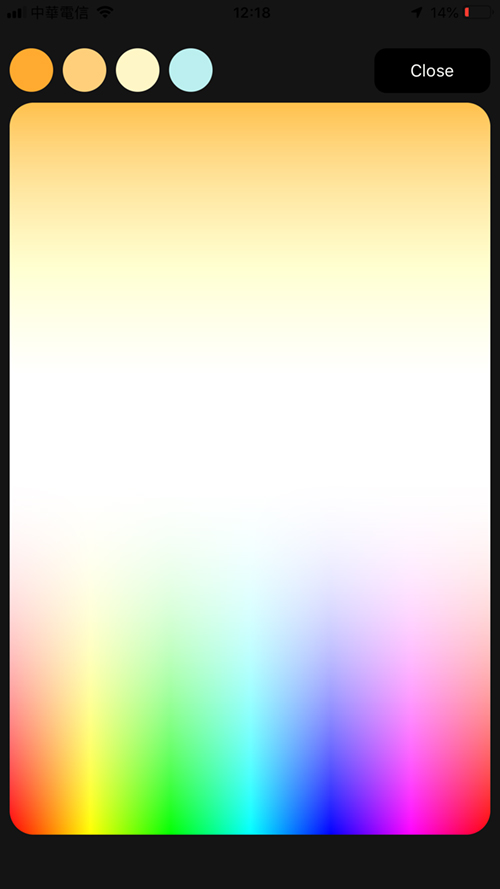
If the card for the room you choose has smart lights (and why wouldn’t it have?), then once one of them is turned on, the whole card lights up (even in the collapsed mode) to let you know there’s at least one light on. In the expended card, the light or lights that are on the respective tile(s) will be displayed in a separate colour. If for any reason a device or light is not responding, the icon in the tile for that device will be shown in red. For each tile that represents a light, the brightness level will be displayed in a small circle with the relevant number to indicate the brightness level. You can long press on this circle and drag it left or right to increase or decrease the brightness level. The circle will also then settle anywhere between the left or right of the tile, depending on the brightness level, so if the light is set to 100%, then the circle will appear on the left, while 0% will be on the right, and 50%, for example, will be in the middle. This is regardless of whether the light is actually on or off. Finally, if you long press on the tile for a particular light, you then get access to a screen to change the hue or colour temperature of the light. In the case of the image above, you can see that there are some presets for quickly setting a light to a cool or warm white. If your bulb is not capable of anything other than brightness levels, then this panel will not show up, although if your light is capable of creating warm and cool whites but not colours, then this panel is still accessible, despite you not being able to adjust any colour, so that probably needs to be addressed.

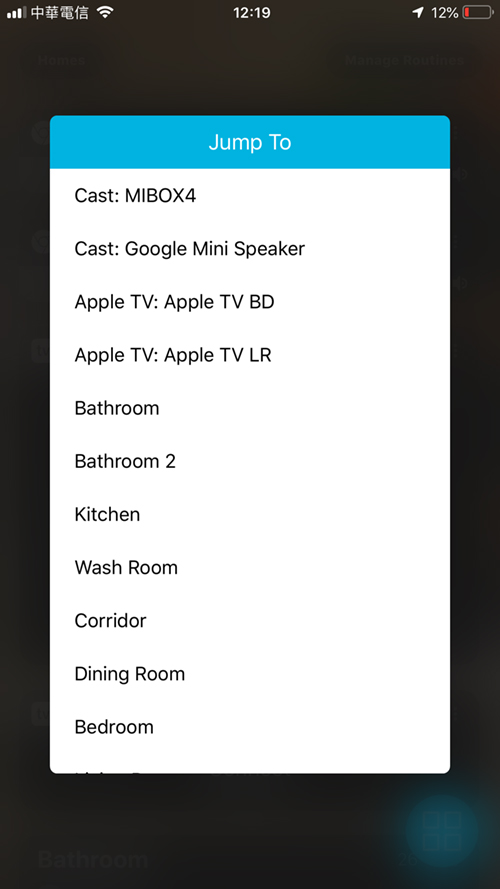
The main screen also has a blue icon that gives you quick access to all the rooms. The reason I say ‘all the rooms’ is that you have the ability to hide the cards for a given room if you don’t have any need to see it. The icon with three vertical dots above the hamburger menu icon allows for changes to the cards, so you can merge, hide or refresh the selected card.
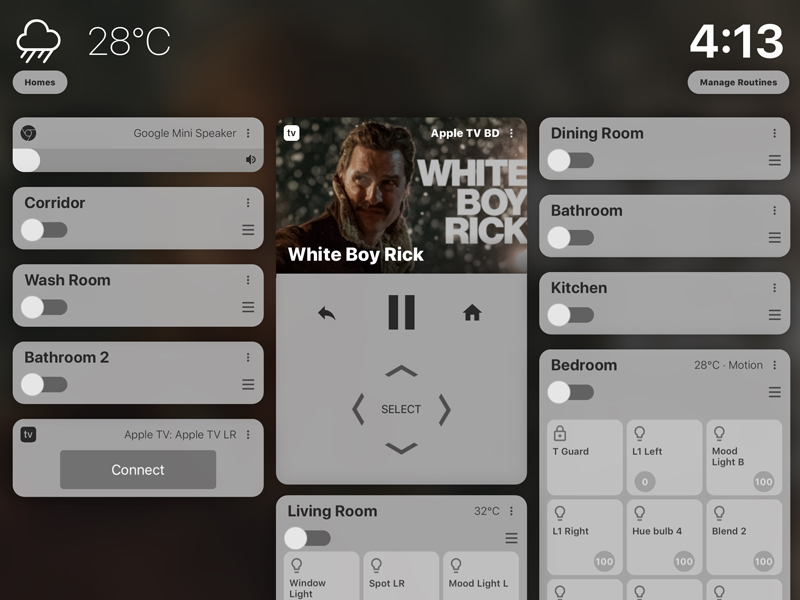
Finally, whenever you’re playing any visual media on your Apple TV, you will see a ‘poster’ for the film or TV show that’s currently playing. This also applies to audio streamed from my Google home Mini (for radio stations) and the MiBox 4, although in the case of the MiBox, whilst this is a video streaming device, unlike the Apple TV card, you don’t see a preview poster of the content being streamed with the MiBox 4.
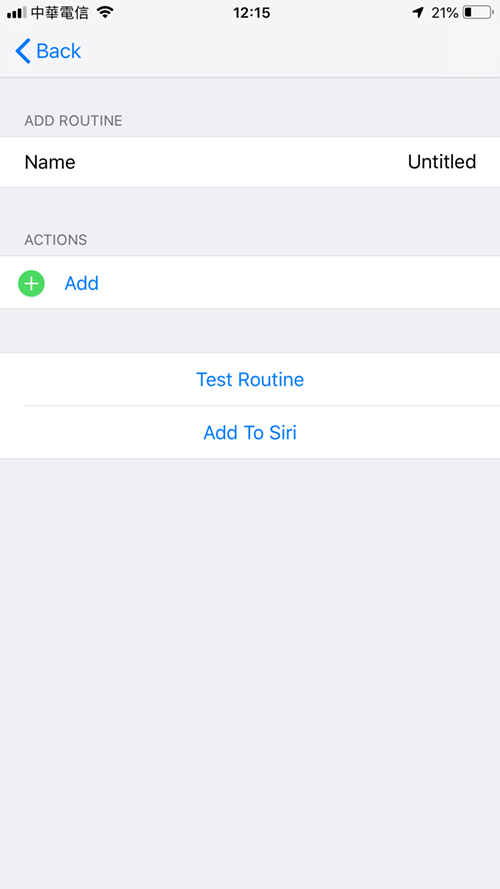
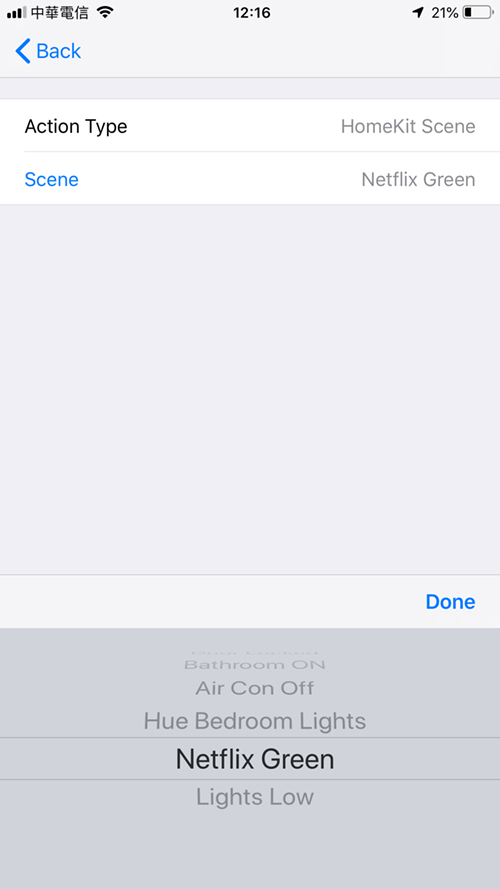


Apart from the fact that this app allows some HomeKit and Non-HomeKit devices to appear together, the app also makes use of Siri Shortcuts, via what the app calls ‘Routines’. These routines are essentially a quick way to combine either various scenes or other controls so they can to be tied together in one ‘routine’. You can add the following functions to a routine you create;
- HomeKit scene
- Play Sonos favourite
- Group Sonos
- Pause
- Play
- Previous track
- Skip track
- Increase or Decrease volume
- volume
- Set volume
- Set shuffle or loop state
- Left, Right, Up, Down
- Back
- Home
- Hold Home
- Select
- Execute another Routine
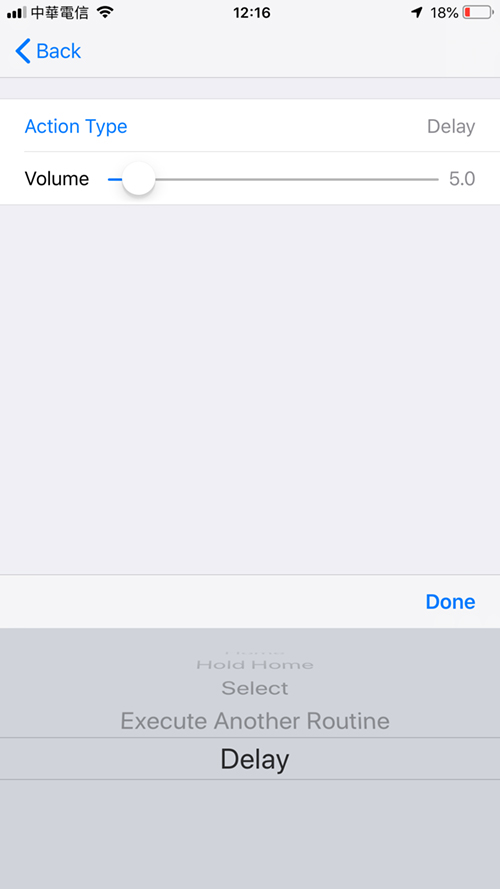
- Delay
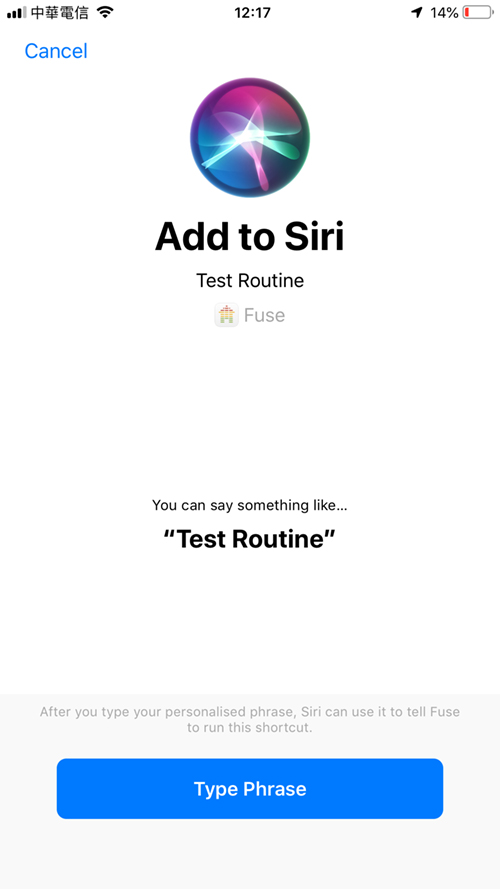
As an Example, I can set a Routine where I could pause a film playing on Apple TV, then after a 5-second pause (the ‘delay’ option), activate a HomeKit scene (lights bright). Once I create the routine, I can simply add it to Siri Shortcuts and create a ‘shortcut’ that can be triggered by a phrase that Siri will recognise as an instruction to start the routine. I don’t have any Sonos speakers, so I can’t really tell you how well they work with the app, but it should be fine if the routine I outline here is anything to go by, as it worked perfectly each time.
There are a few options available as to the overall look of the app, but considering the screen is covered in ‘cards’ things like backgrounds aren’t going to make too much difference to the look of the app home screen.
So at the end of the day, it has a lot going for it, and whilst there are a few cons to it too, it’s really not a bad app at all, and when you compare the one-off price to the proposed monthly/yearly fee being currently asked by the aforementioned ‘Wallflower’ app, this begins to look like a bargain.
I for one find it difficult to tear myself away from the Apple Home app, as it’s solid, if lacking in some features, and I like the Apple ‘look’. This app fills the gap where you want both very quick access to all your rooms with a lot less swiping, while also integrating other devices, like Chromecast products and Sonos, so it’s definitely one to be used in certain circumstances. As it’s not a HomeKit app in the sense that you can create scenes and automations, this kind of app does shine more as a control panel, and so it is better suited to an ‘always on’ iPad for the most part.


Pingback: Fuse for iOS/WatchOS (review) - HomeKit News & Reviews - Mo.bi - Mobile and Bitcoin
Is it a possibility when a button is pushed (for example: doorbell) a camera can be opened up, giving a lifefeed of the camera?