
Abode Iota Home Security Kit (review)
Protecting your home is a concept that has been around since the dawn of civilisation, and whilst electrical alarm systems are a way more recent concept, they too have been around for quite some time. Now that we’re seemingly in the midst of a boom in smart home electronics, it’s natural that alongside smart locks, motion sensors and security cameras, we’d also want systems that monitor the whole home in tandem with the aforementioned devices. This is where a company like Abode seem to be clued up in respect of smart home security, and as such – with their recent upgrades to HomeKit compatibility – they do warrant a closer look from fans of Apple’s smart home platform. Today, we’re having a look at Abode’s Iota Home Security Kit, which gives you a hub, with built-in alarm, camera, and motion sensor, along with a keyfob and a door/window sensor, all to get you started on protecting your home and family.
PACKAGING
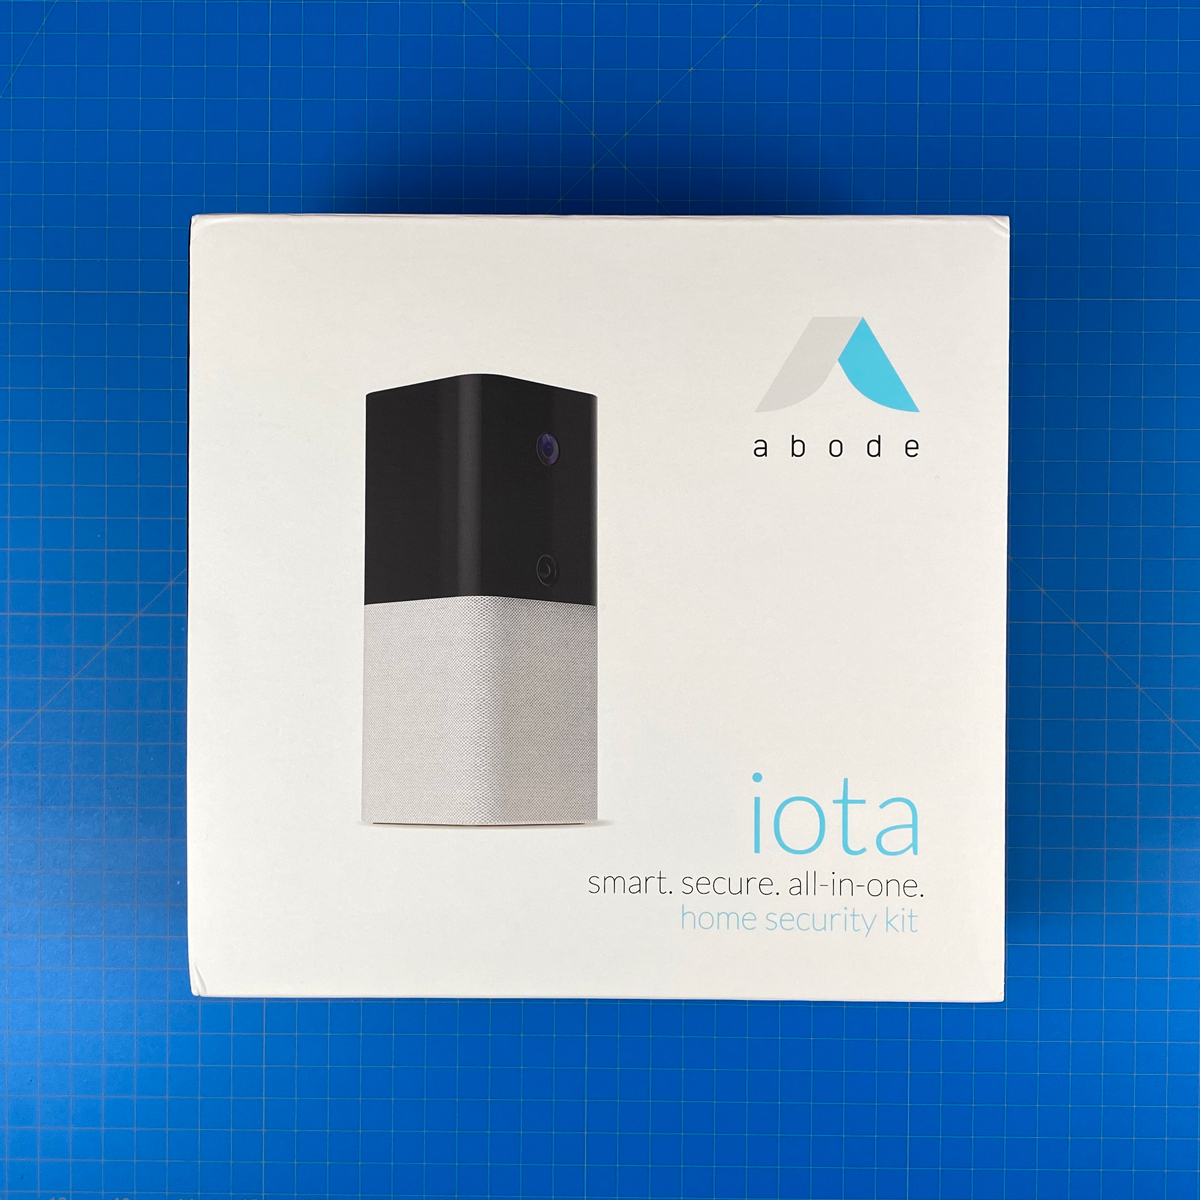


Whilst the Abode Iota Home Security Kit isn’t a small financial investment, you do get a lot for your money, and for that, you’d expect decent protection for the contents, which in this case is definitely true, with a very strong box protected by a thick cardboard outer sleeve. This sleeve presents you with all the necessary information you need if you happened to pick this off the shelf out of mere curiosity, although it does not explicitly state on the outside that this kit will work with Apple HomeKit (it does, trust me). Indeed, it doesn’t really go to any great lengths to explain all of the possible integrations it’s capable of – and there are many – possibly due to Abode wanting you to know that whether you want a more complete smart home or not, their system can work all by itself, without any help from any of the three main smart home systems.
When it comes to HomeKit integration, after I initially set the system up, I had to update the firmware, which was revealed soon after setup was complete. Once that firmware was in place, an option within the app was added to expose the gateway to HomeKit. Within this option, the app generates a HomeKit QR Code. As I was adding this device on my iPhone, I had to scan the code from my iPad in order to use it, but you can simply take a screenshot, or copy the 8-digit code down and enter it manually. It was all pretty seamless.
The front of the box displays the heart of the system, the Iota Gateway, along with the reassuring slogan ‘smart. secure. all-in-one.’, which reinforces what I’ve said about the system being able to be used in a standalone capacity. The front doesn’t feature the other parts of the kit, but a list of included content is shown on one side of the box, along with requirements, such as an Abode account (free) and an internet connection with a minimum of 1Mbps download/512Kbps upload speed.
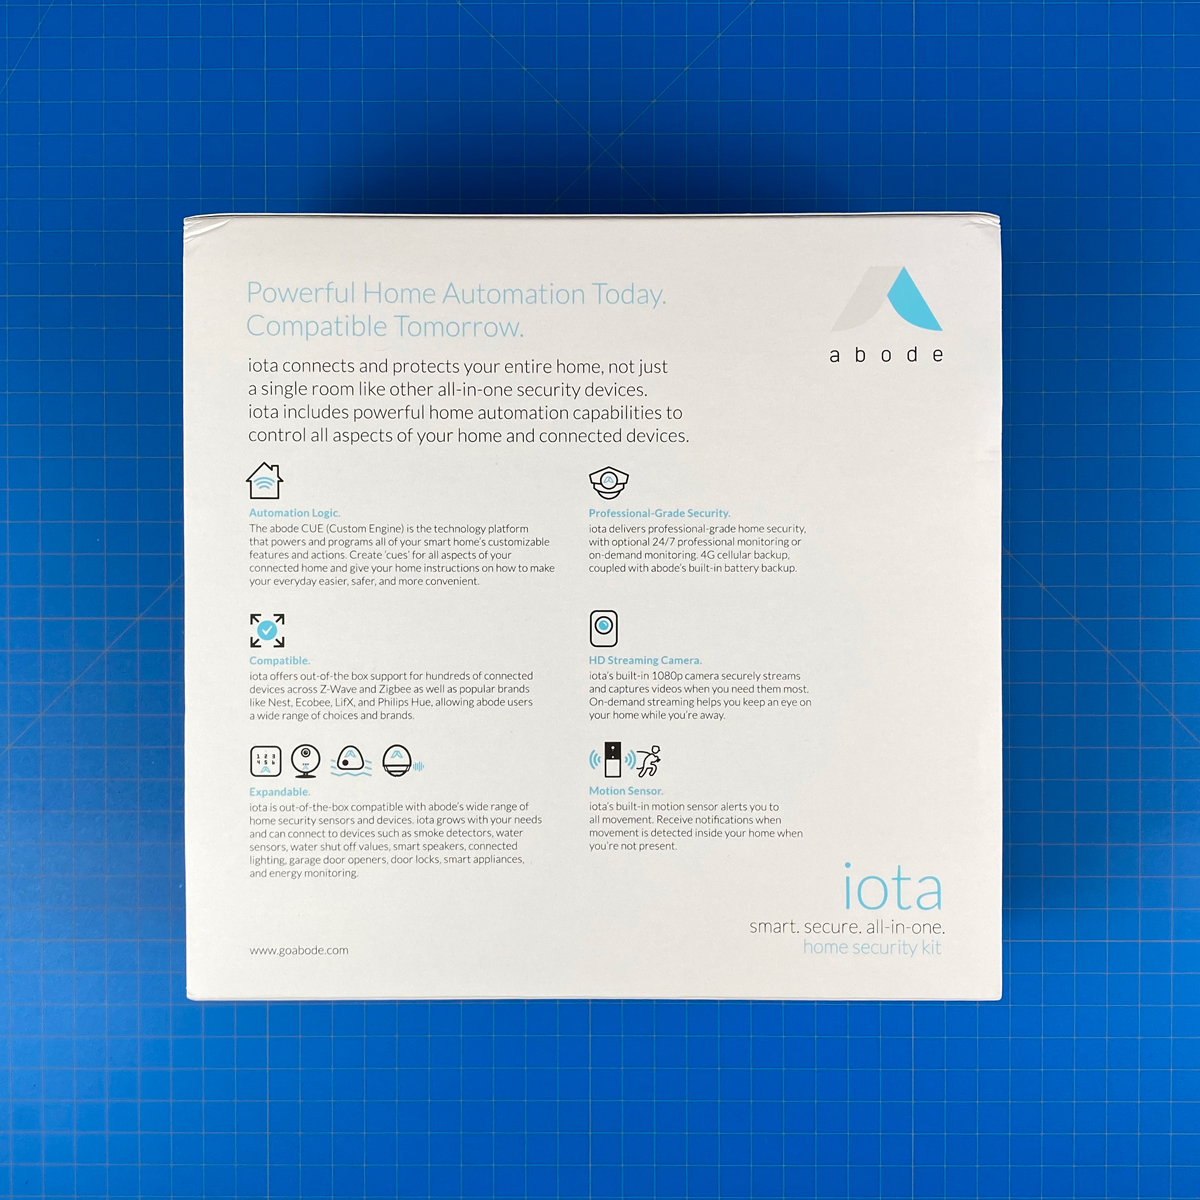
The rear of the box goes into a little more detail about the technology involved, compatibility with other devices, protocols, and brands (Z-Wave, Zigbee, Philips Hue, LiFX, Nest, Ecobee etc.), as well as an overview of how the system can be expanded upon*, and provide even more security, via optional paid monitoring packages, if required. The other side of the box outlines the simplicity of the setup, along with a mention of the Abode app, which you’ll need in order to set the system up initially.
* You can check out which Abode devices currently work with HomeKit via our listings page.
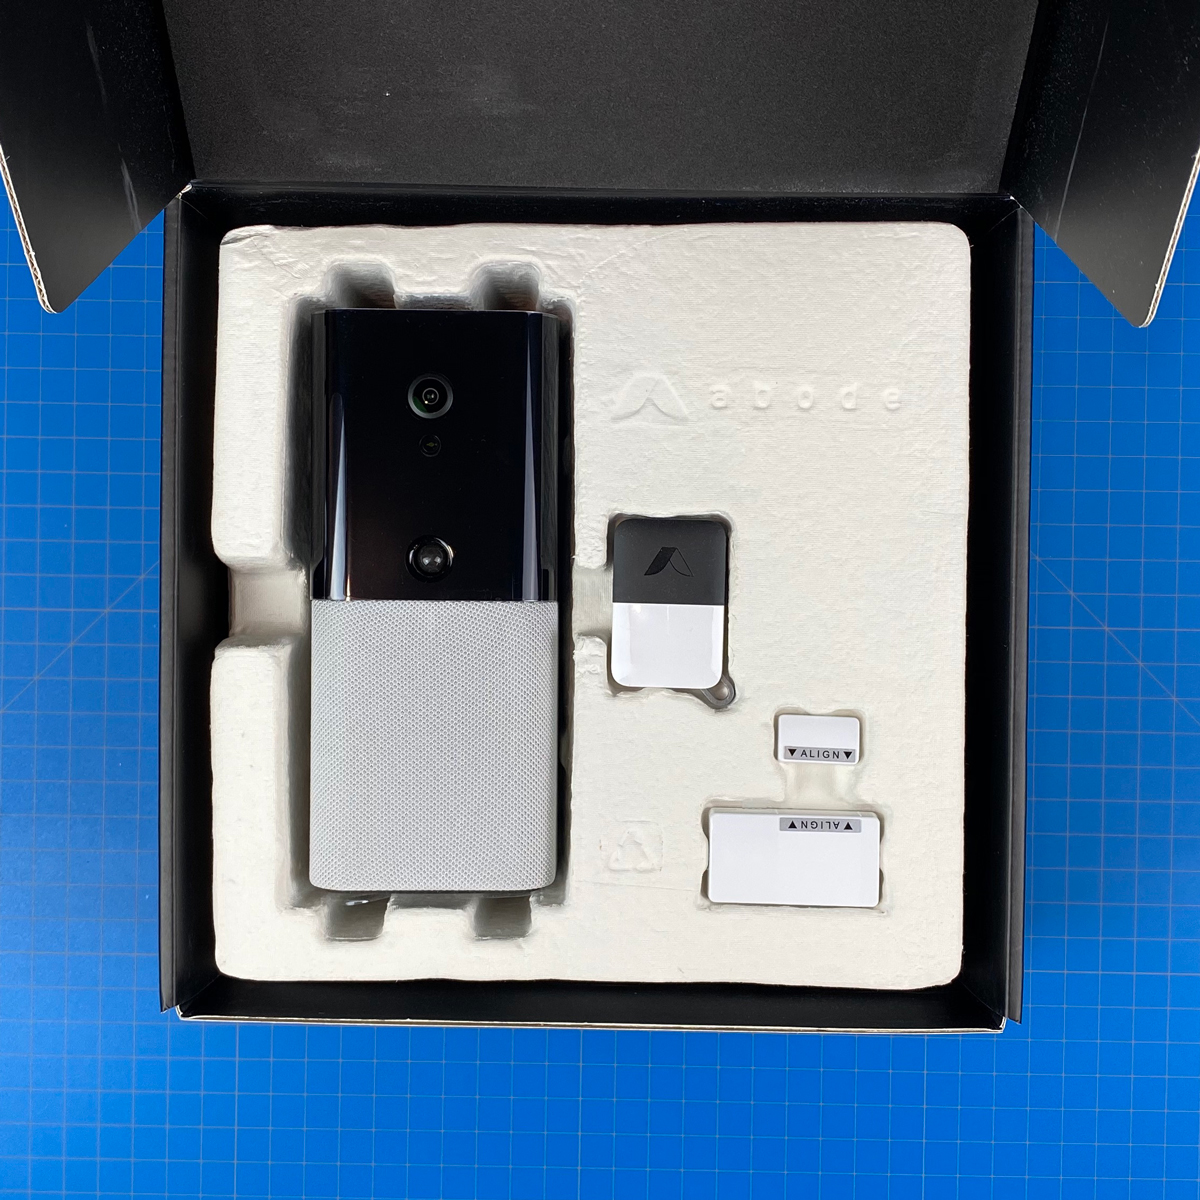
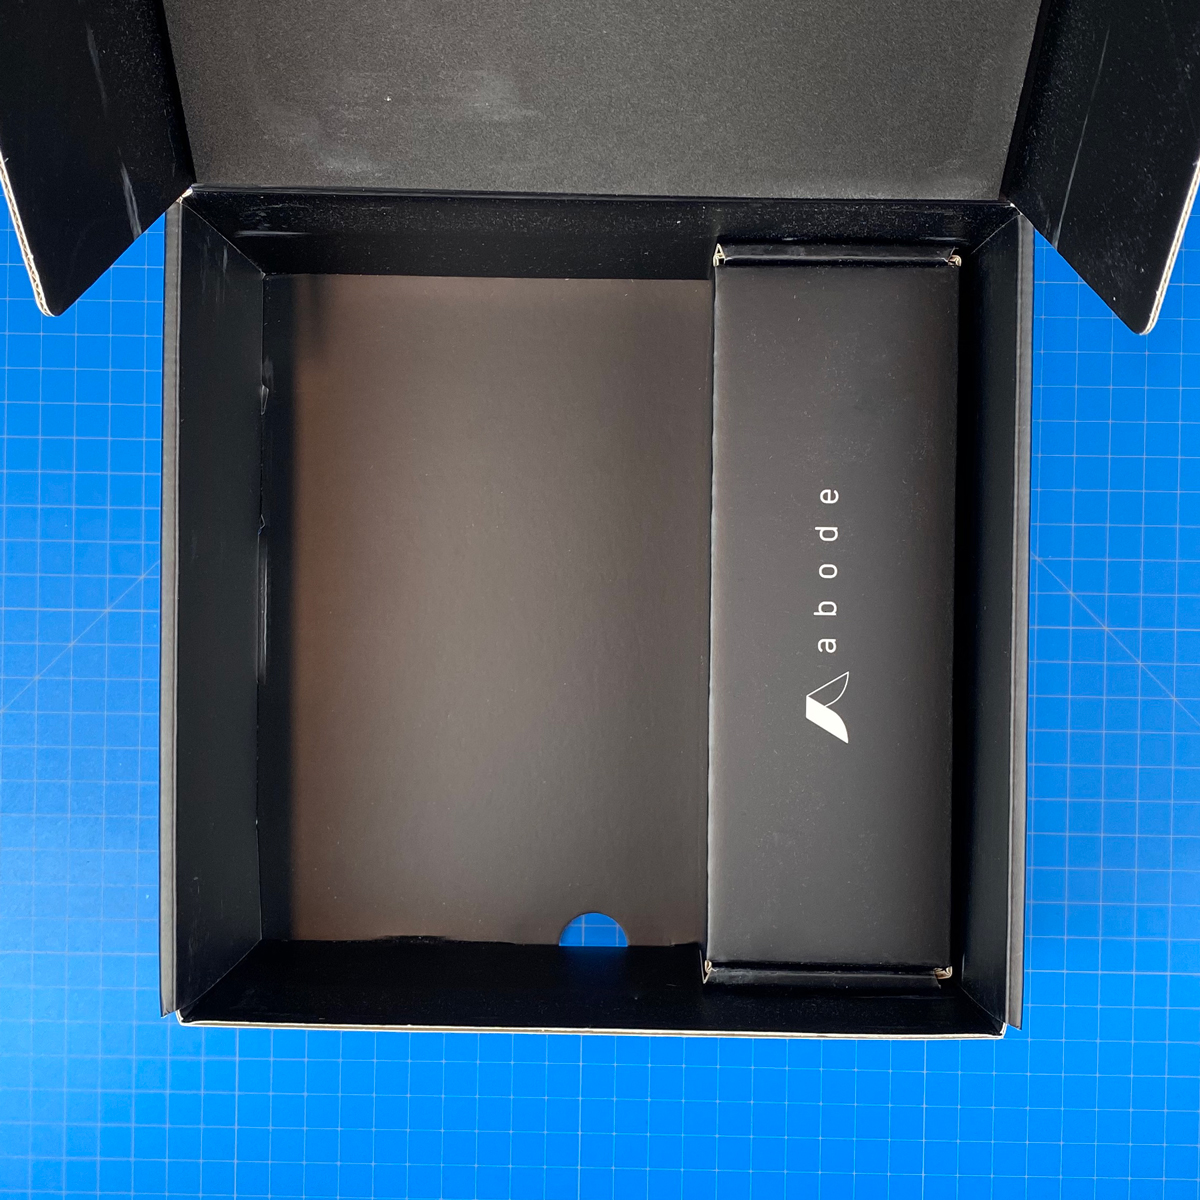
Once the outer sleeve is removed, you have the container in stylish black cardboard, that open via a flap. Upon opening the box, you’re greeted with the full set of devices that make up the ‘starter kit’, namely the Iota Gateway, the keyfob and the two halves of the contact sensor. Removing the top layer reveals another box that contains the power supply along with a few other bits and pieces.
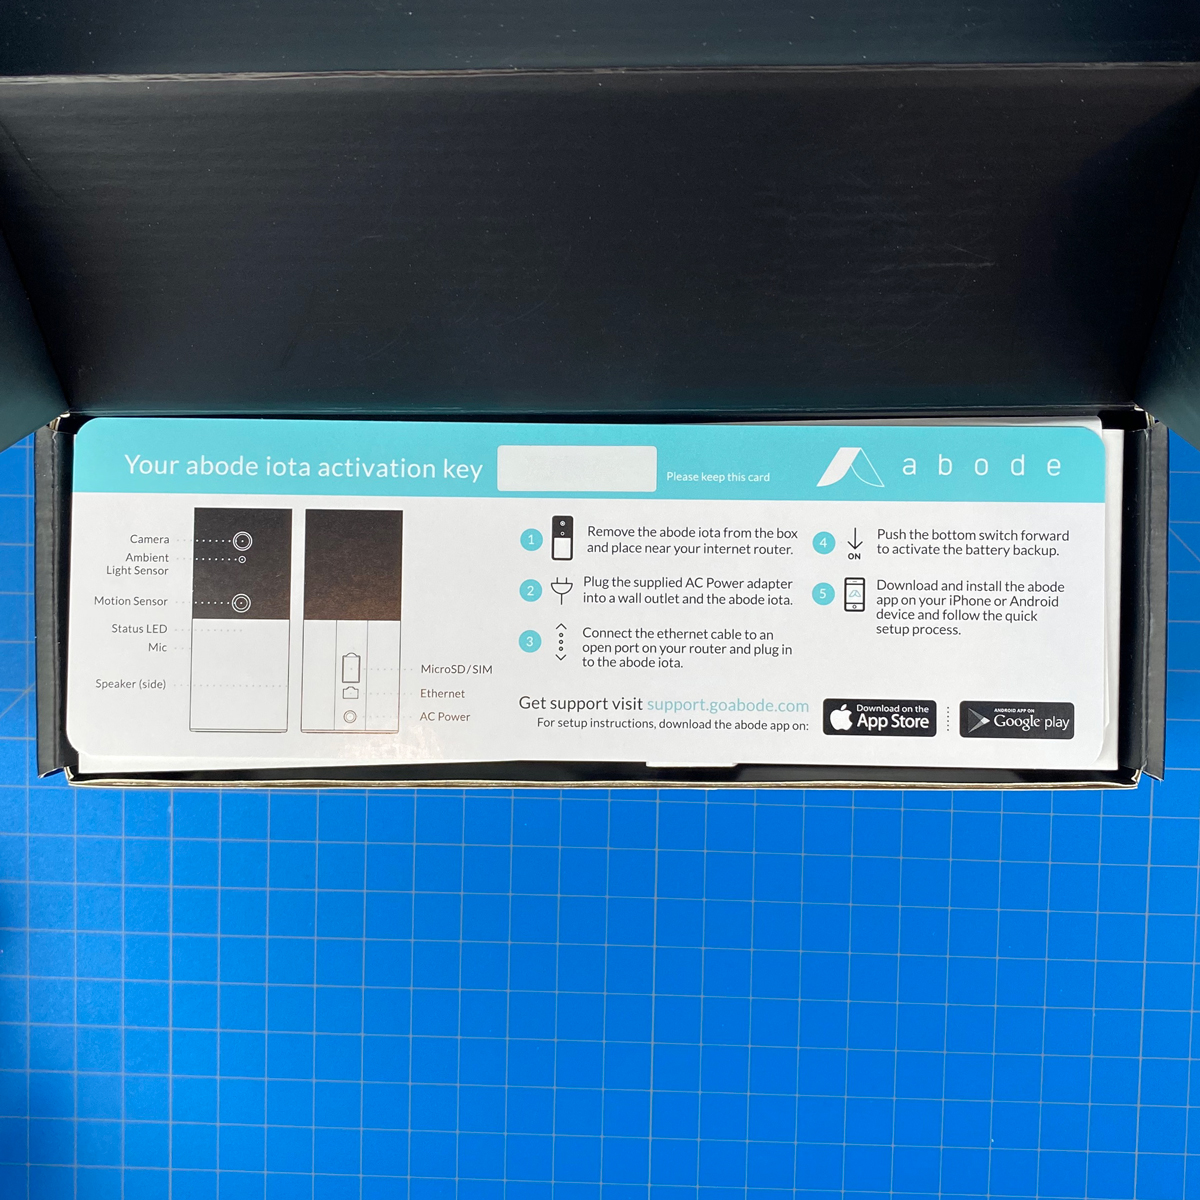
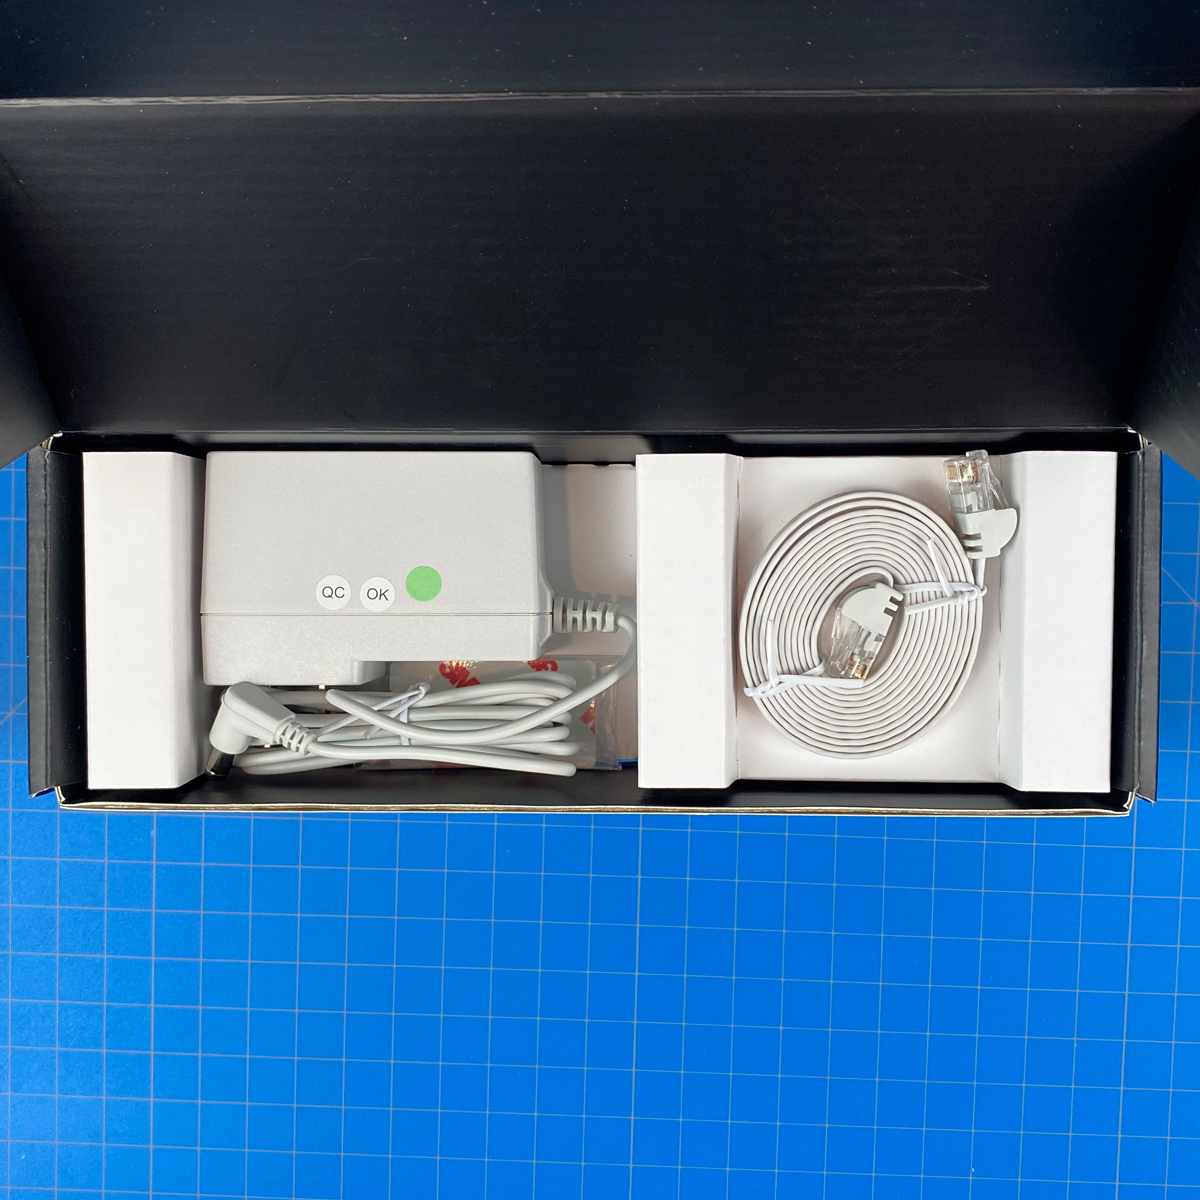

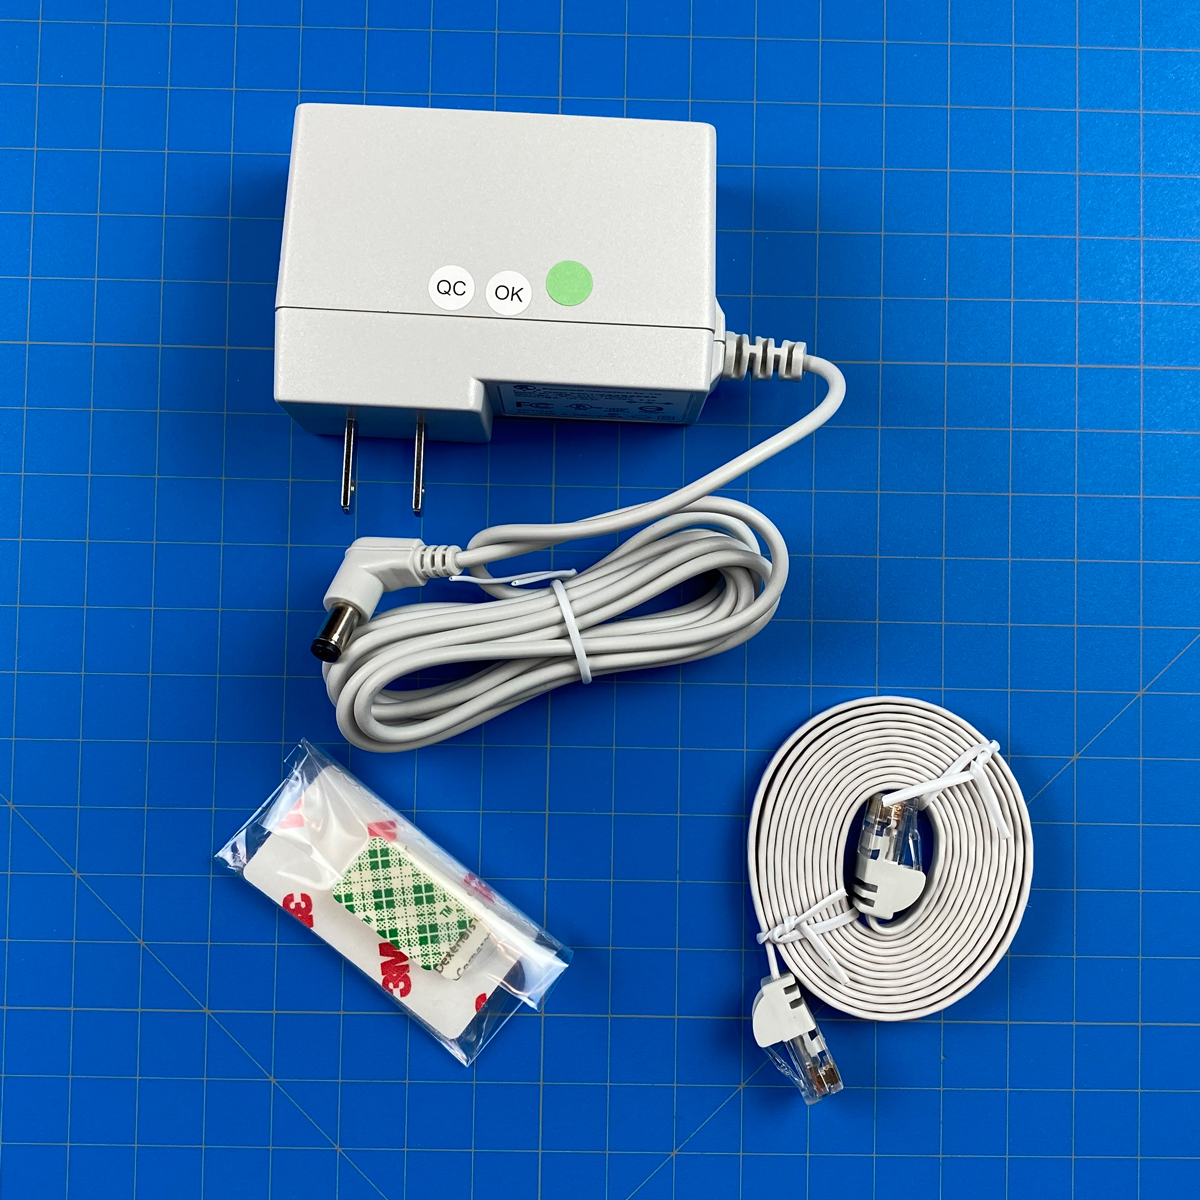
This second box primarily contains both the power supply and an ethernet cable, which we’ll mention later. Along with these, you get a paper slip that acts as a ‘cheat sheet’ to get your Abode set up running quickly. It also has an activation key printed on the top, which you’ll need when you first connect the device to the company’s servers, so it can be registered. It’s advisable to keep this document, or at least a copy of the activation key, in a safe place.
THE IOTA GATEWAY

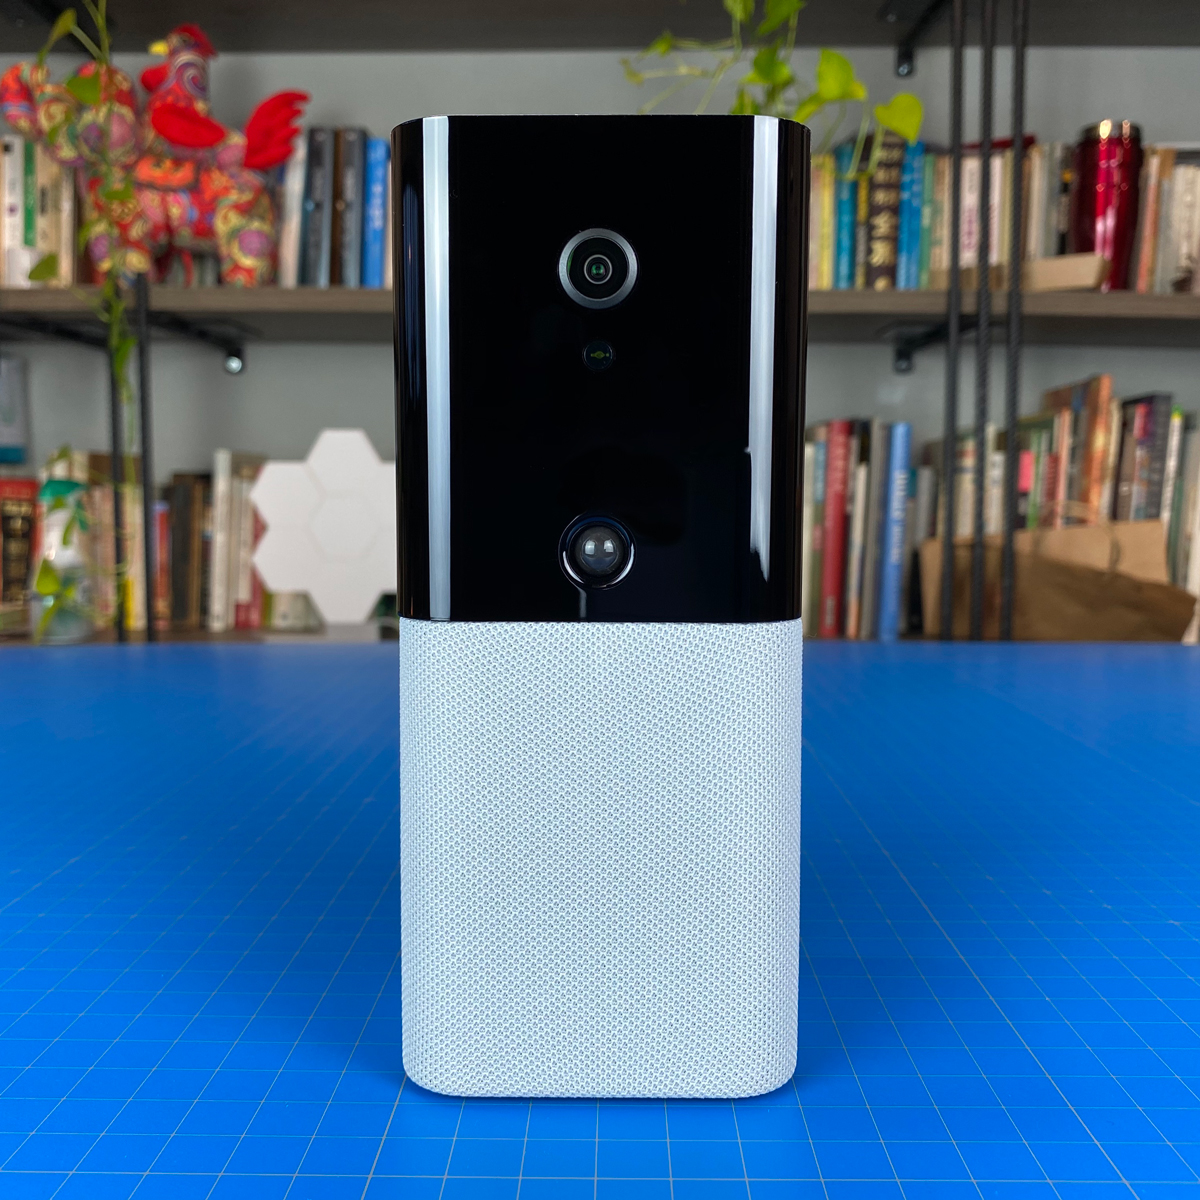
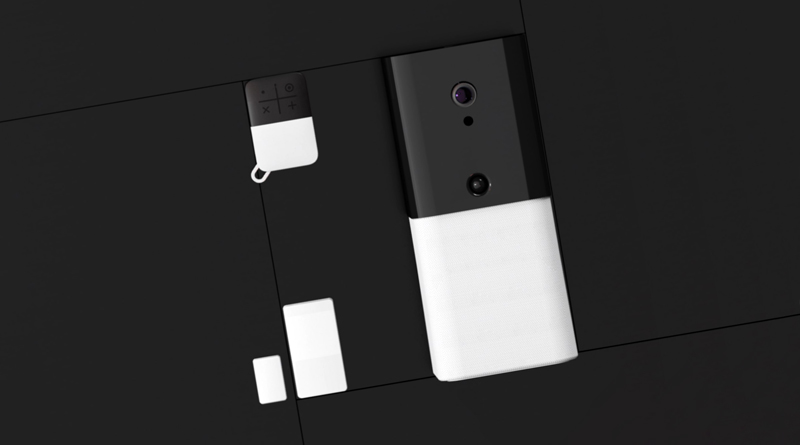
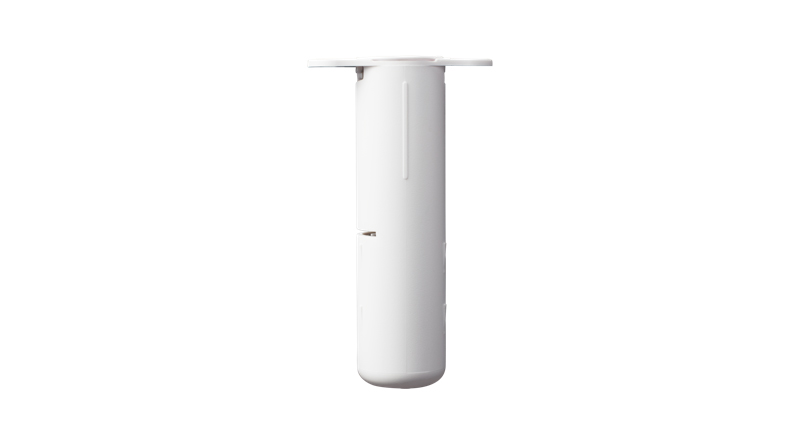
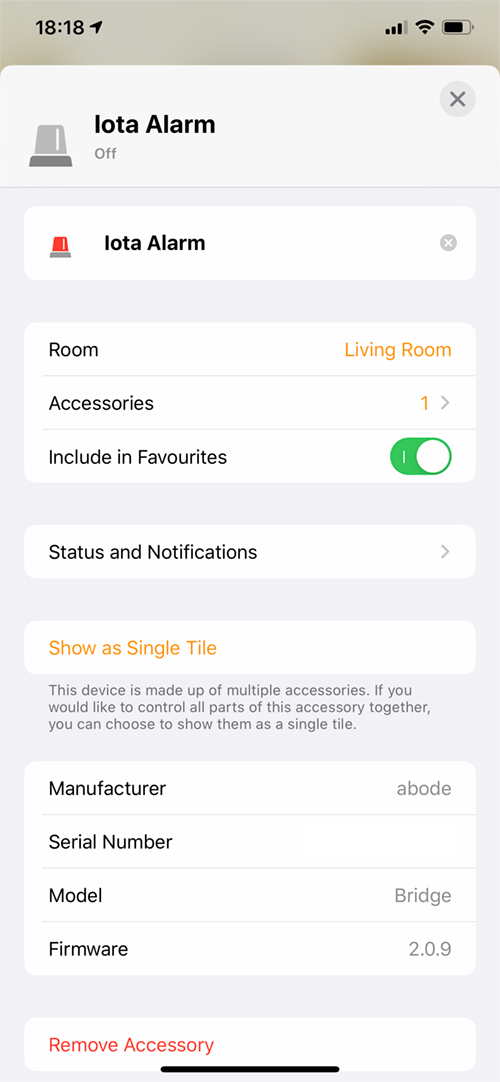
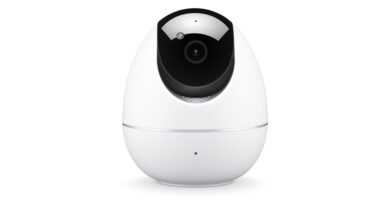
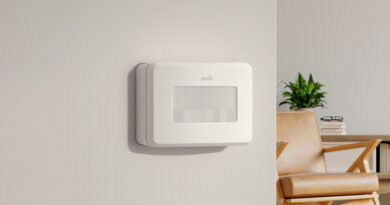
The centrepiece of the security kit is the Iota Gateway, which is an impressive looking device, that serves as the hub for your other Abode devices (in addition to other third party products), but has quite a few other functions; As well as being a hub to get your child devices exposed to HomeKit, it also has a built-in 93dB siren, a motion sensor, and a 1080p camera with a 127º horizontal field of view (67º vertical field of view). It also has a built-in microphone and speaker for 2-way audio. Visually, it really appeals to my taste, employing a stark, two-tone look for the top and bottom halves of the device. The top half is made of barely translucent plastic, housing the motion sensor and camera, whilst the bottom half is covered in a knitted mesh fabric, similar to what you’d find on the HomePod, that houses the speaker and microphone. Although the gateway isn’t especially tall, due to the imposing design it can perhaps appear larger overall. The gateway is 180mm / 7.1in in height, and 78mm / 3.07in deep/wide. One really staggering tidbit is that the Iota gateway can support up to 160 devices, which most people are unlikely to even get half-way to passing.
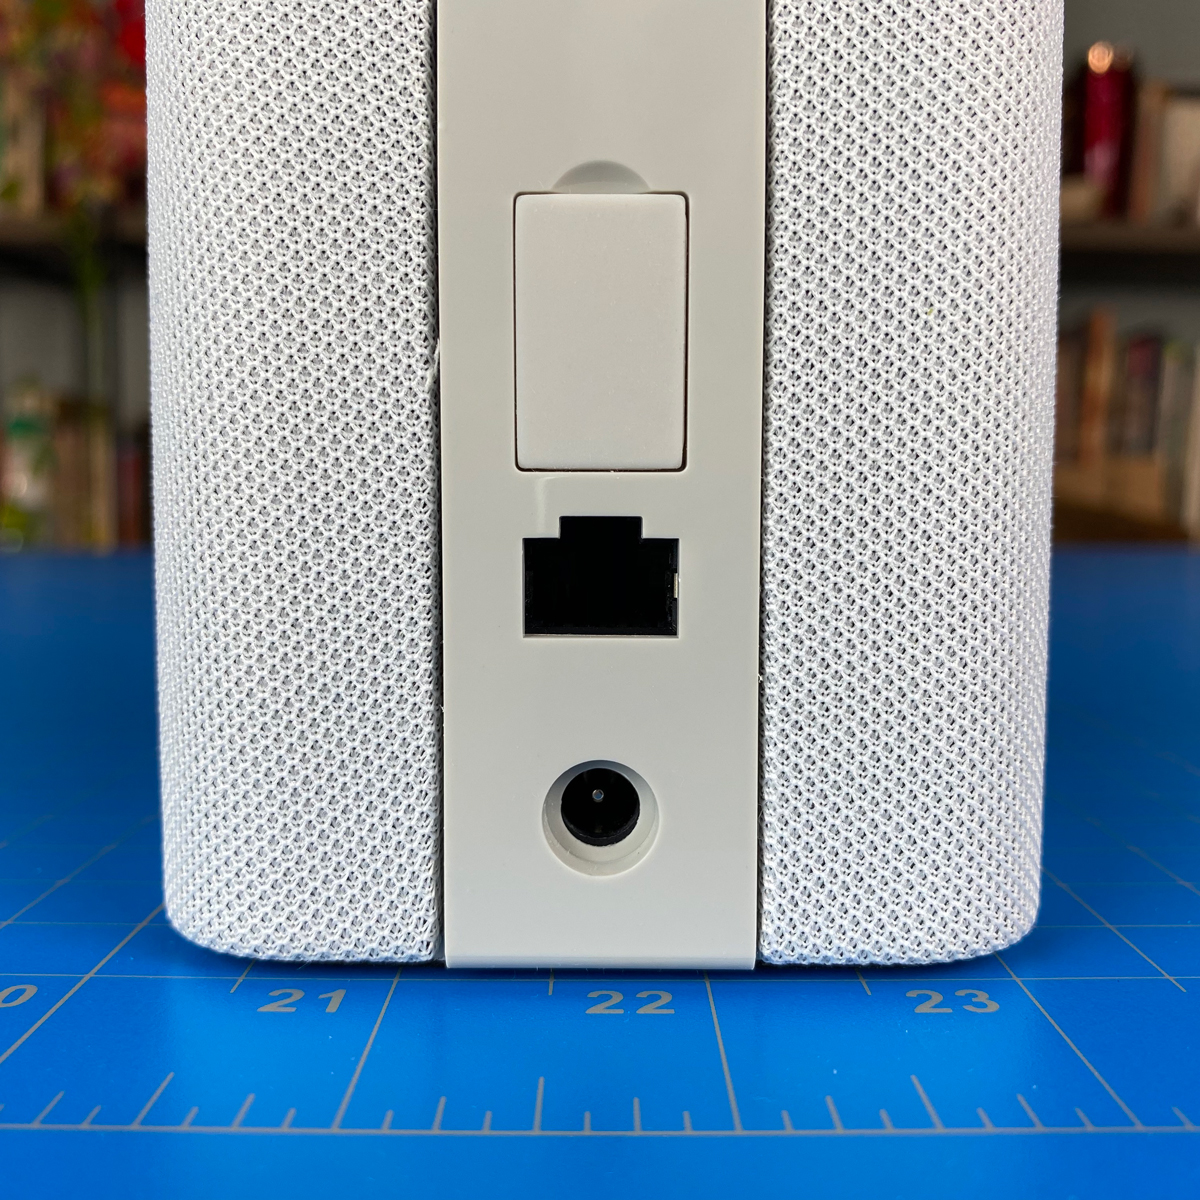

Both the motion sensor and the camera lens are visible on the top half of the front, with the bottom half only showing an LED status light when powered up. The rear of the device is sort of the opposite, in that there’s nothing to see for the top half, with the bottom section revealing the power socket and ethernet port, for the included power supply and ethernet cable. The gateway can be used with either 110-120v or 220-240v systems, so if you’re in Europe, for instance, this setup can be used without any issues. On the subject of the ethernet port, it’s good to note that this device can connect to your network by connecting it to a free ethernet port on your router, although the Iota is also able to connect to your network wirelessly. It can only connect via the 2.4GHz band, however, not the 5GHz band, which my D-Link Omna camera is capable of.
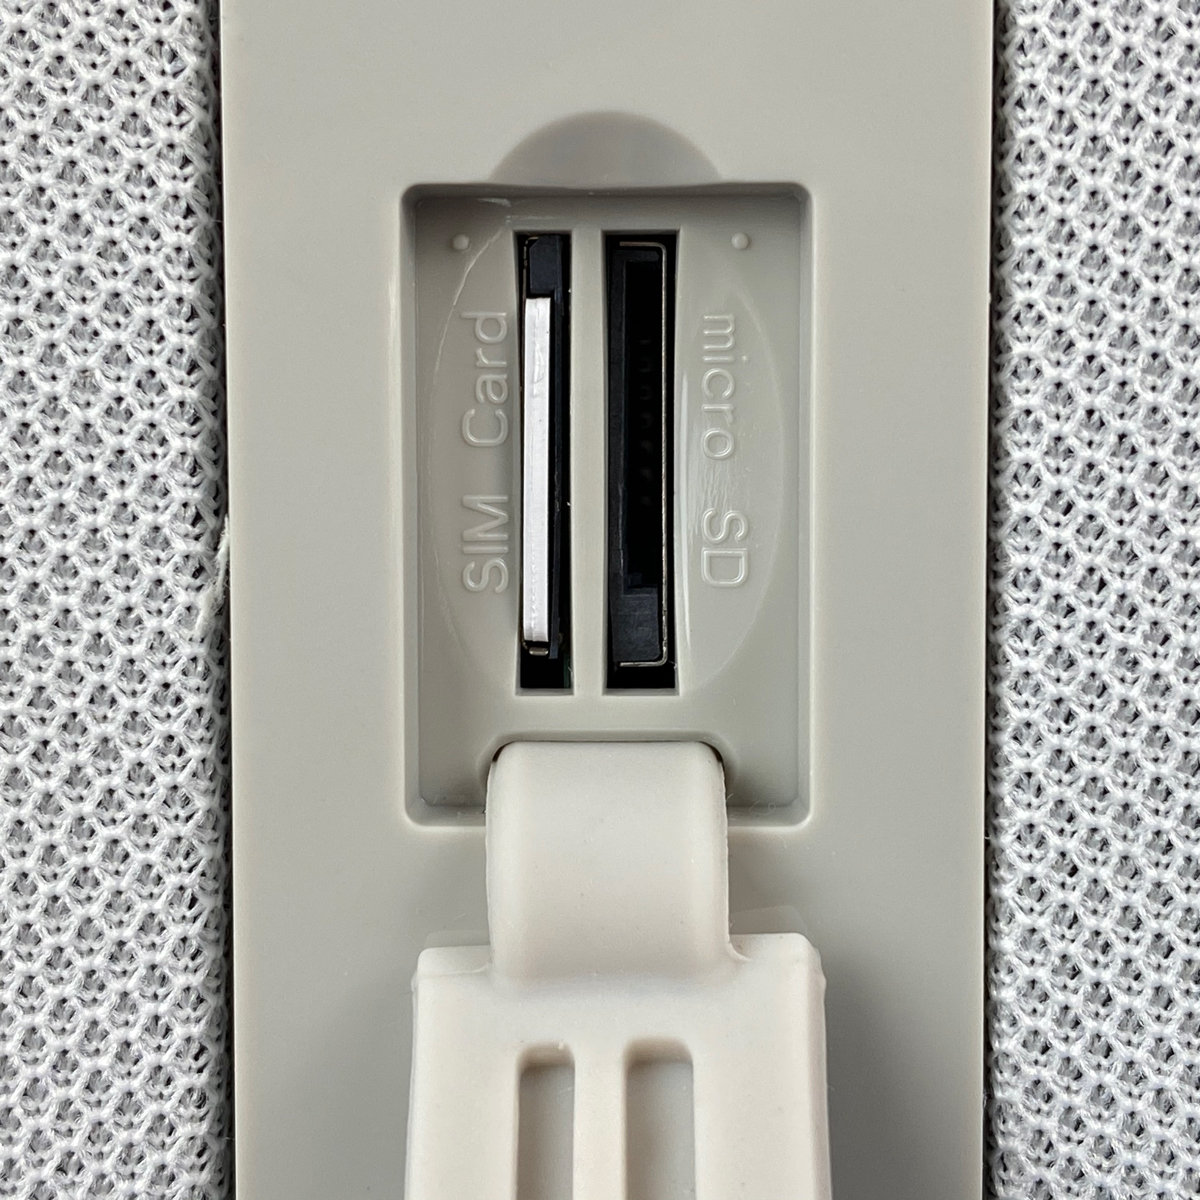
A closer look at the rear of the Iota also reveals a tab that when opened, shows slots for both a SIM card and a Micro SD card. The Micro SD card is for recording footage locally, as opposed to via Abode’s own servers, whilst the SIM Card slot – which actually comes with an included but unactivated SIM card – is to allow the gateway to keep connected to Abode’s servers in the event your internet connection goes down. This functionality is only available if you choose one of the company’s paid plans, however, and is also only available to North American customers, so it’s not an option for me living in Taiwan.
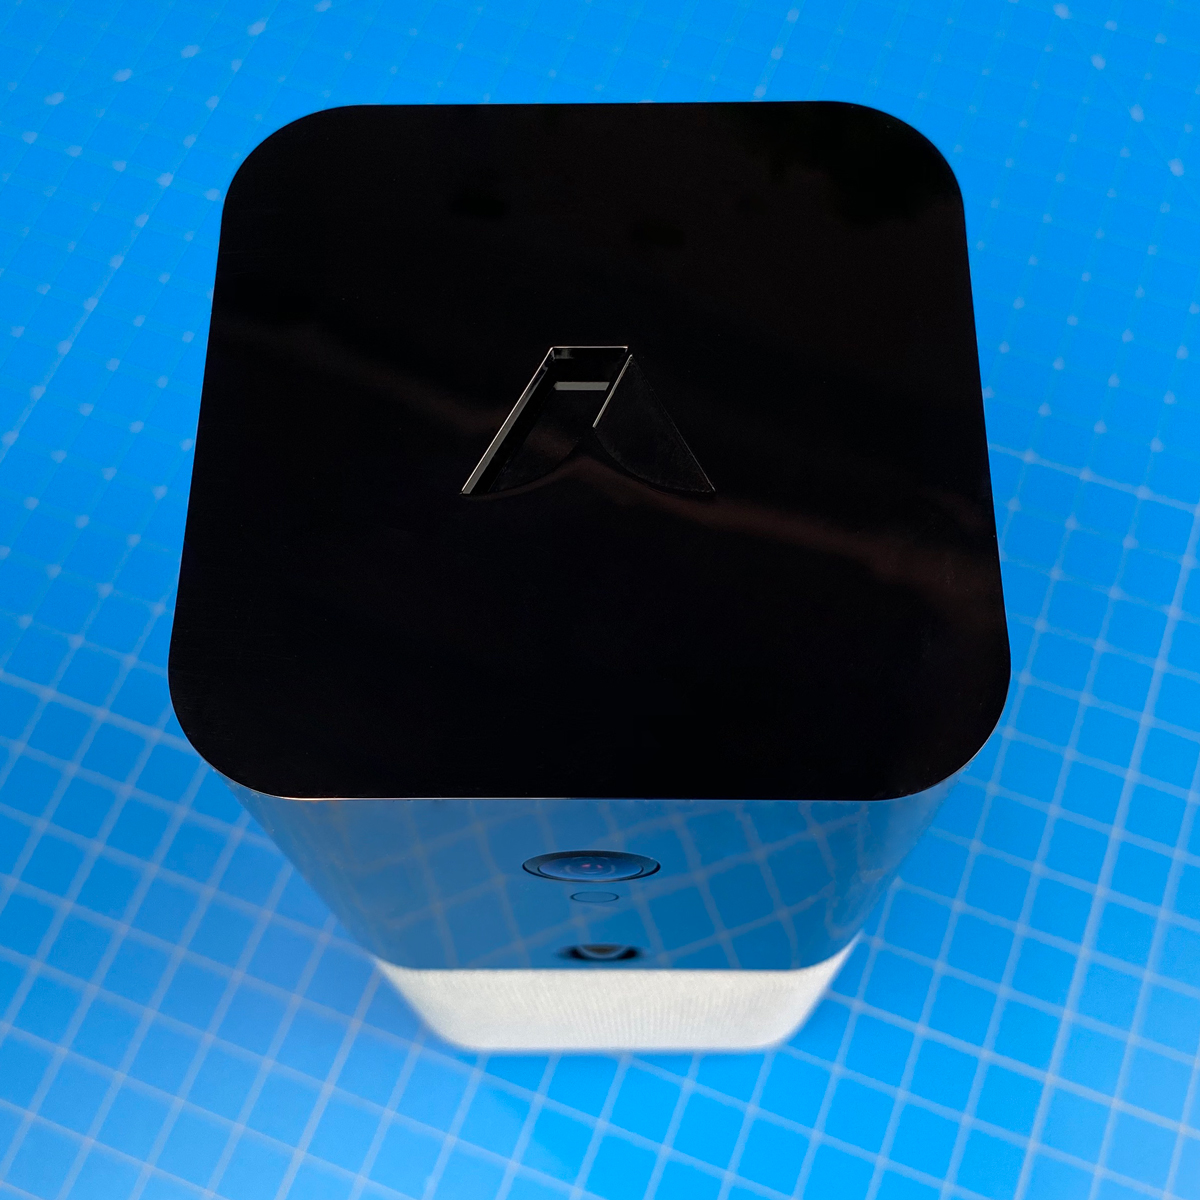
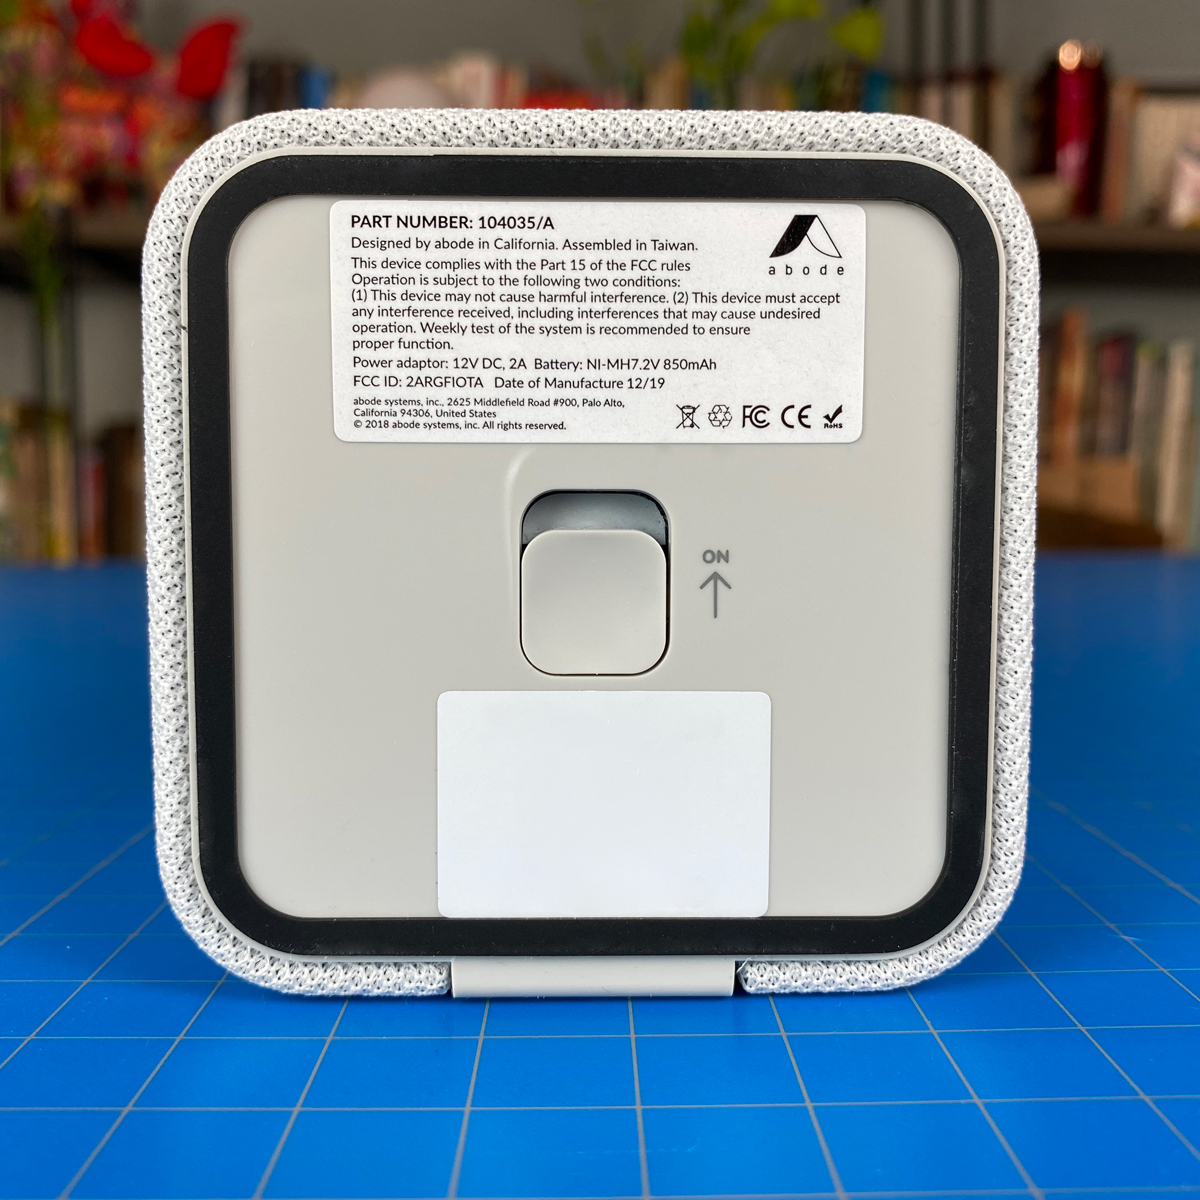
The top of the unit has the Abode logo cut into the black plastic, whilst the base features a switch that can be toggled on or off. This switch turns on the built-in backup battery, which is designed to kick in if power is cut to the device. The battery should last around 72 hours. Taking all of the protective features into account – the SD card for local recordings, the SIM card for continuous connection to Abode, and the backup battery if the power to your home goes down – it’s clear that the company are taking as many steps as they can with this gateway to keep it going under exceptional circumstances, which has impressed me mightily. The fact that it also has the camera, siren and motion sensor built-in, takes it even further, which we’ll look into next.

In terms of how the Iota gateway connects or communicates with Abode’s own-brand products, it uses AbodeRF, which is the company’s own version of RF433MHz. Aside from this, all of Abode’s gateways can connect to a variety of third party devices, either using Zigbee 1.2, or Z-Wave. Z-Wave seems to represent the lion’s share of devices that are compatible with Abode, with company’s like Aeotec, August, Fibaro, Leviton, and Schlage, just to name a few. It should be noted that if you’re integrating either of the Abode gateways with HomeKit, none of these third-party devices actually get exposed to HomeKit, not that you’re limited to one system or the other, of course. This does also mean that whether or not you’re using HomeKit, the Abode system can integrate with a lot of other systems, like Philips Hue, Yale, LiFX, Ecobee, Kwikset, Google Nest, and more.
THE IOTA CAMERA

NOTE: All screenshots of the Abode app are from the Beta version, which at the time of writing, is not publicly released, and so may differ from the version you may be aware of.
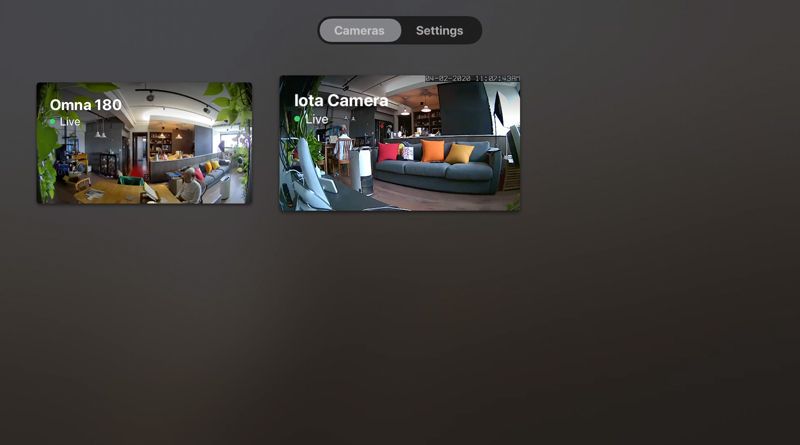
I’ve actually got quite a few cameras, some of which aren’t even in use, but all of them bar one, are not HomeKit compatible, being that they’re part of the Xiaomi smart home ecosystem. The one HomeKit camera that I do have, and have had for over two years now, is the D-Link Omna, and so this is the only camera I can use with which to compare the Iota camera.
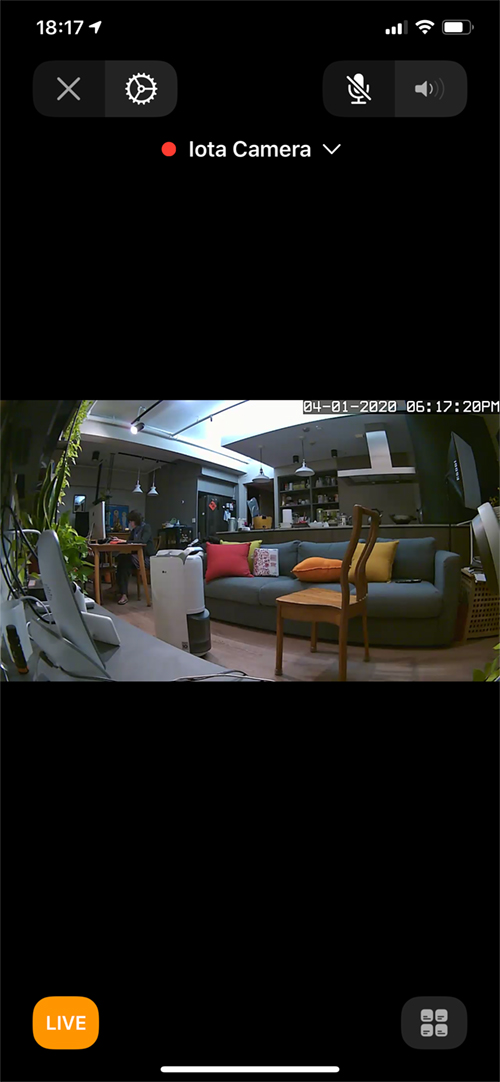
The Iota streams at 1080p, which is the minimum I’d expect these days, and although it isn’t compatible with HomeKit Secure Video (and I’m told won’t be), it’s still a fairly decent camera. The still and streamed images, while slightly different from the Omna in terms of overall colour, actually seems slightly richer and crisp. The Omna has a 180º field of vision (FoV) (compared to the Iota’s 127º FoV), so that could account for it, perhaps. Both the Omna and the Iota are connected to Wi-Fi, with the former using 5GHz, and the latter, 2.4GHz. When I’m in the Home app, the Omna launches the live stream faster on every occasion, with the Omna almost instantaneous. The Iota can take up to three seconds to show the live stream, although this difference could be down respective Wi-Fi bands each camera uses – could this be down to the 2.4GHz being more cluttered due to more devices being connected than to 5GHz? Possibly, I don’t know, but oddly enough, when the Iota was connected to the network via ethernet, it was even slower to start showing the live feed in the Home app.
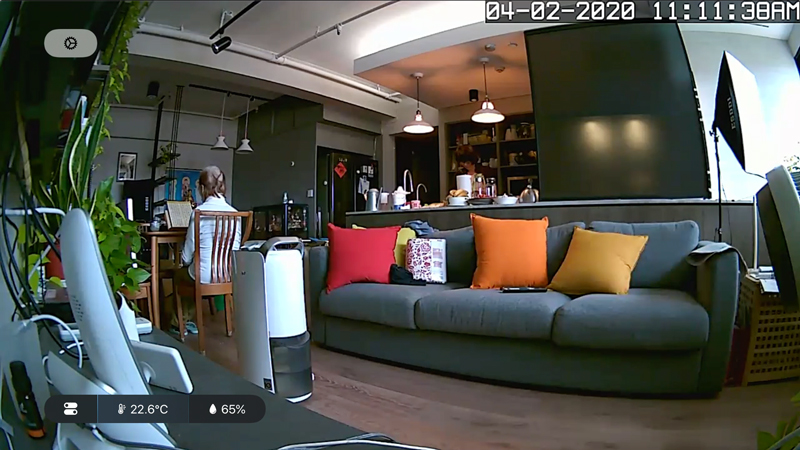
One thing I’m really not a fan of is the time stamp that shows in the top left corner. To me, it’s a reminder of the ‘old school’ Swann security cameras I used to have. Granted, it may be useful, but it would be preferable if there was an option to turn it off – which there isn’t unfortunately. Another slight negative is that the live feed on the Iota isn’t quite as smooth as it is with the Omna. The video feed is slightly ‘choppy’, almost as though a frame is missed every few of seconds, which is also noticeable if you watch the time stamp counting out seconds, where it will stop, before fast-forwarding a couple of seconds. It isn’t a massive deal in many ways, and I’m told a fix is being worked on to address this.
The Iota camera also plays nicely with the popular HomeCam app for Apple TV (as well as for iOS devices), so it’s nice to be able to stream your cameras directly to your TV screen when required.
As the camera is integrated with the gateway, along with the motion sensor and alarm, all three devices can work together in a variety of ways, either via HomeKit or totally within the Abode system. We’ll go into a bit more detail on that later, but for now, we’ll look at the other devices that come as part of the Security Kit.
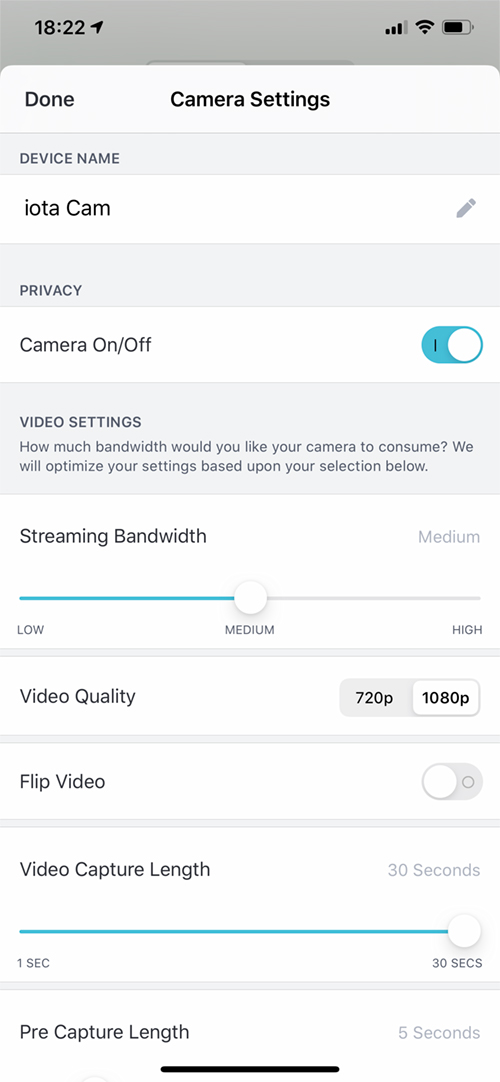
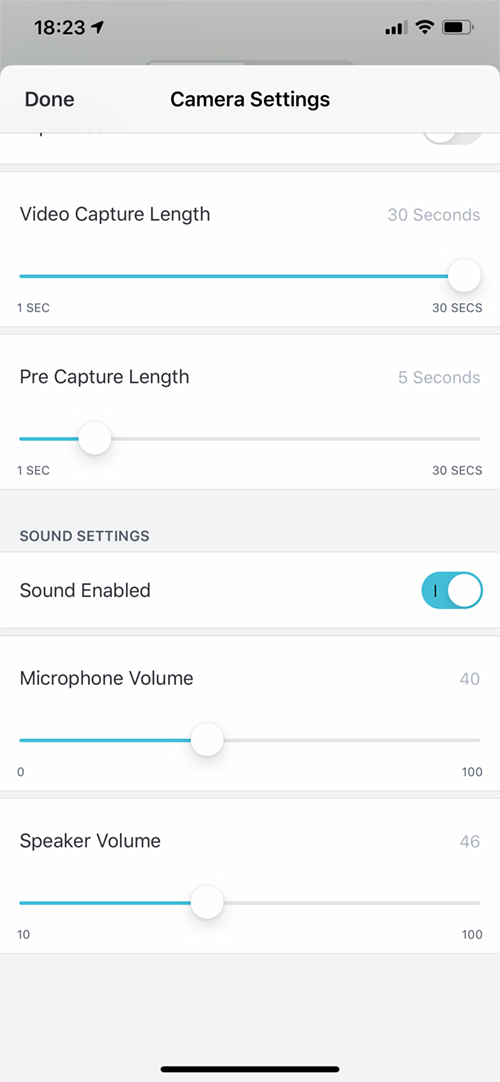
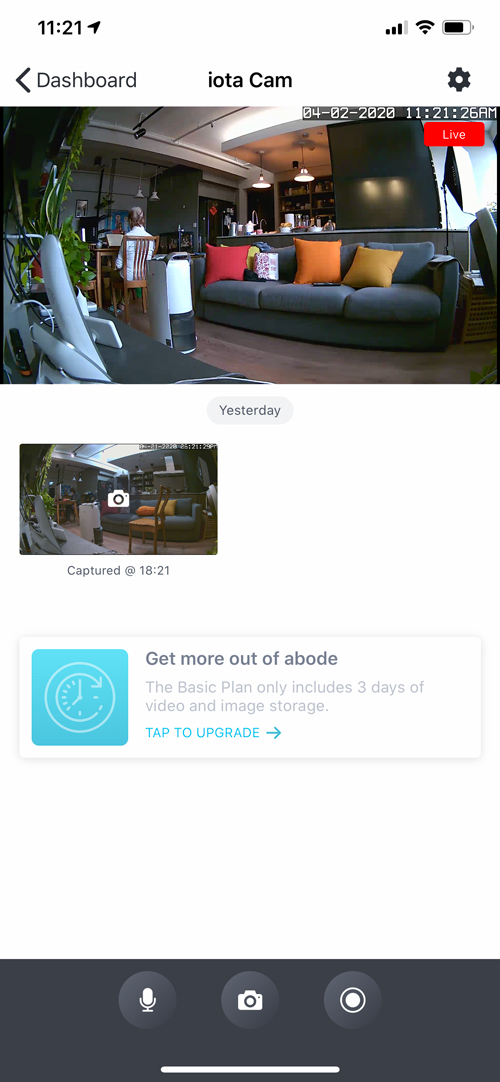
In the Abode app, there are several settings for the camera, including turning the camera on or off, adjusting the streaming bandwidth, video quality (720p – 1080p), the length of the video clip capture (a maximum of 30 seconds), a pre-capture option that allows you to catch up to 30 seconds of footage before a trigger has occurred. along with a few sound options.
IOTA GATEWAY MOTION SENSOR
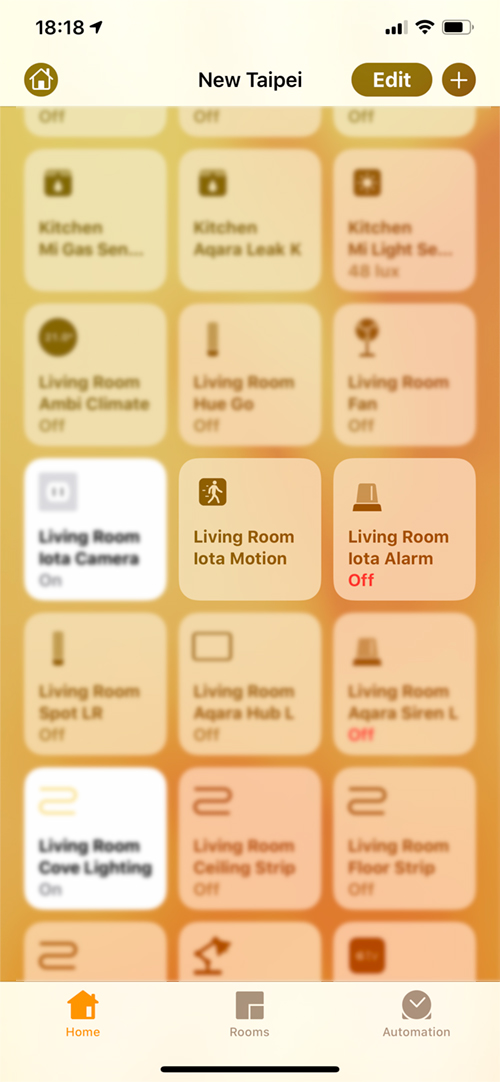
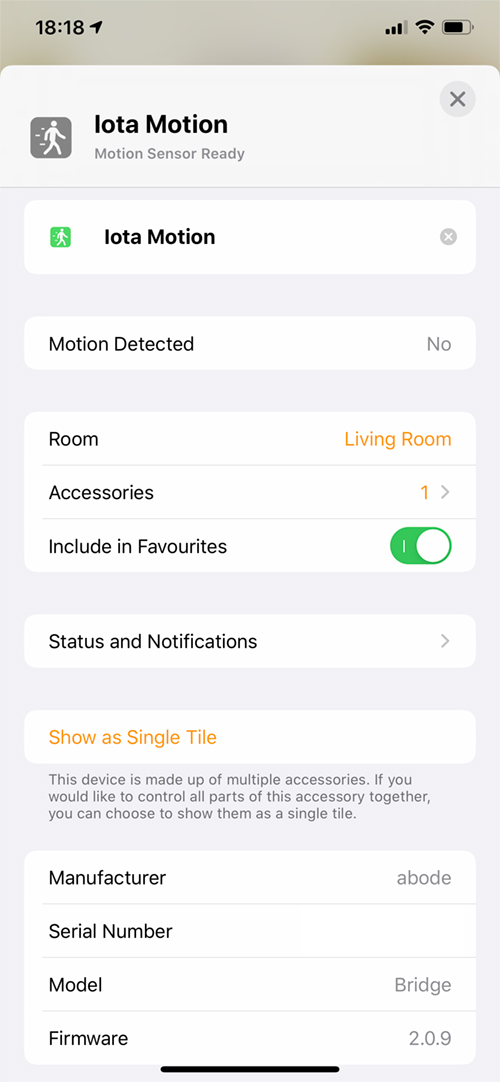

As already mentioned, the gateway features a built-in motion sensor. This get exposed to HomeKit in the normal way, and works exactly like any other HomeKit sensor, with all the same attributes. In the tests I set up for it that I tied to scenes, it worked every time, and whilst it wasn’t quite as fast as the Zigbee-based Aqara sensors I have, it was fast enough, and in fact, it’s less sensitive than my Aqara motion sensors, which I find a little too rigorous in detecting movement. The Motion sensor’s sensitivity settings can be adjusted (low, medium, high) in the Abode app, so in that aspect, it’s quite useful. The sensor is certainly more responsive than any of the Bluetooth motion sensors I have.
THE ABODE KEYFOB
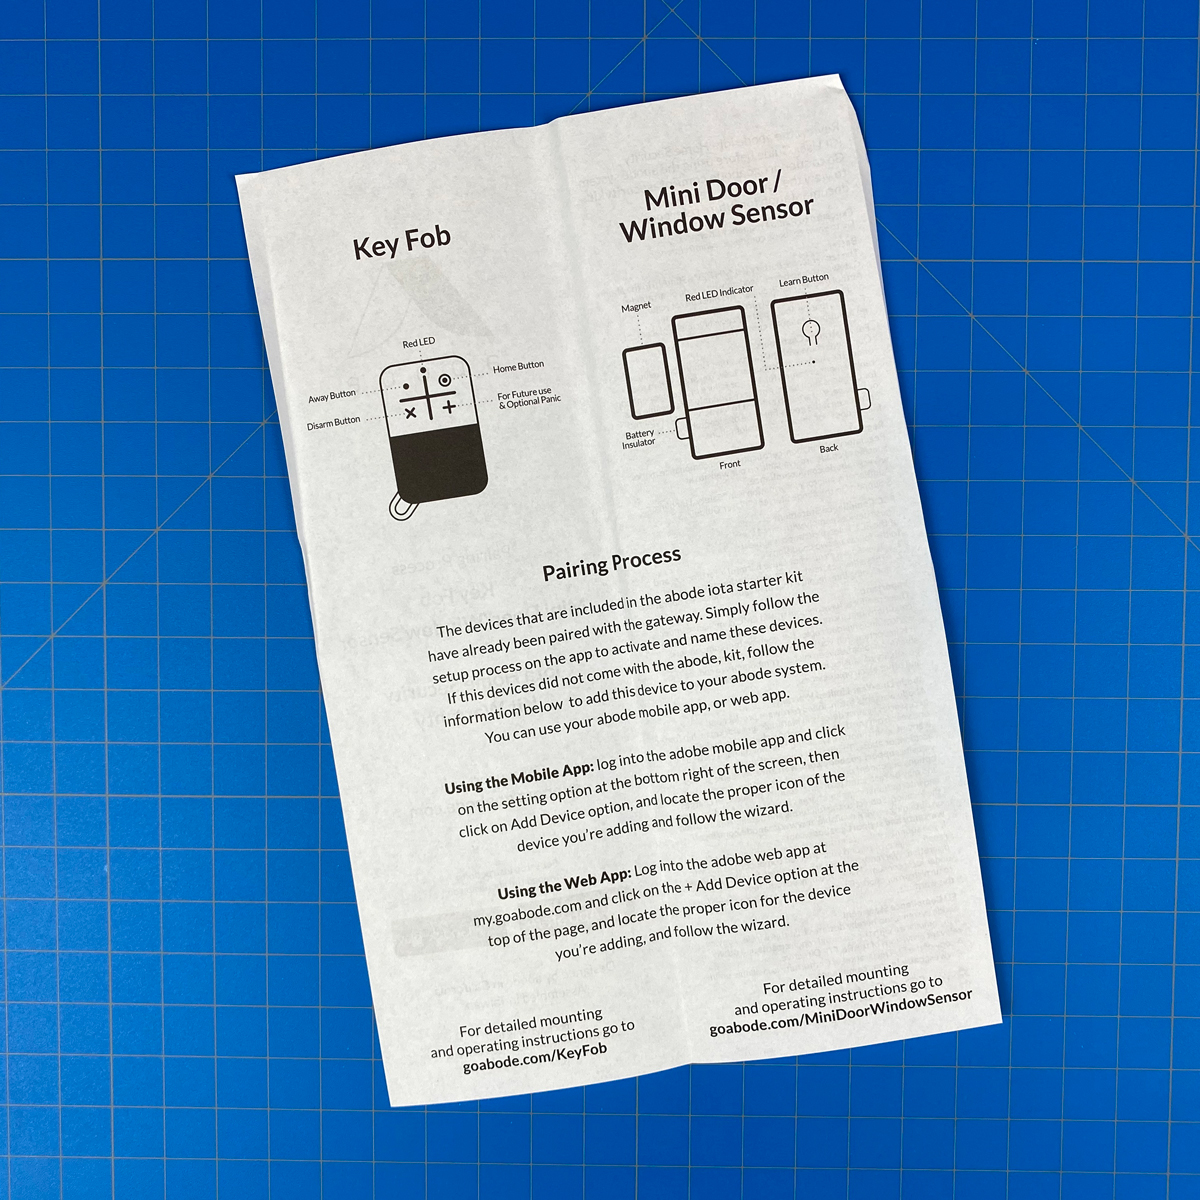
Both the keyfob and the mini window/door sensor that come with the Security Kit are already pre-paired, so there isn’t a lot required to get these two items up and running as such.
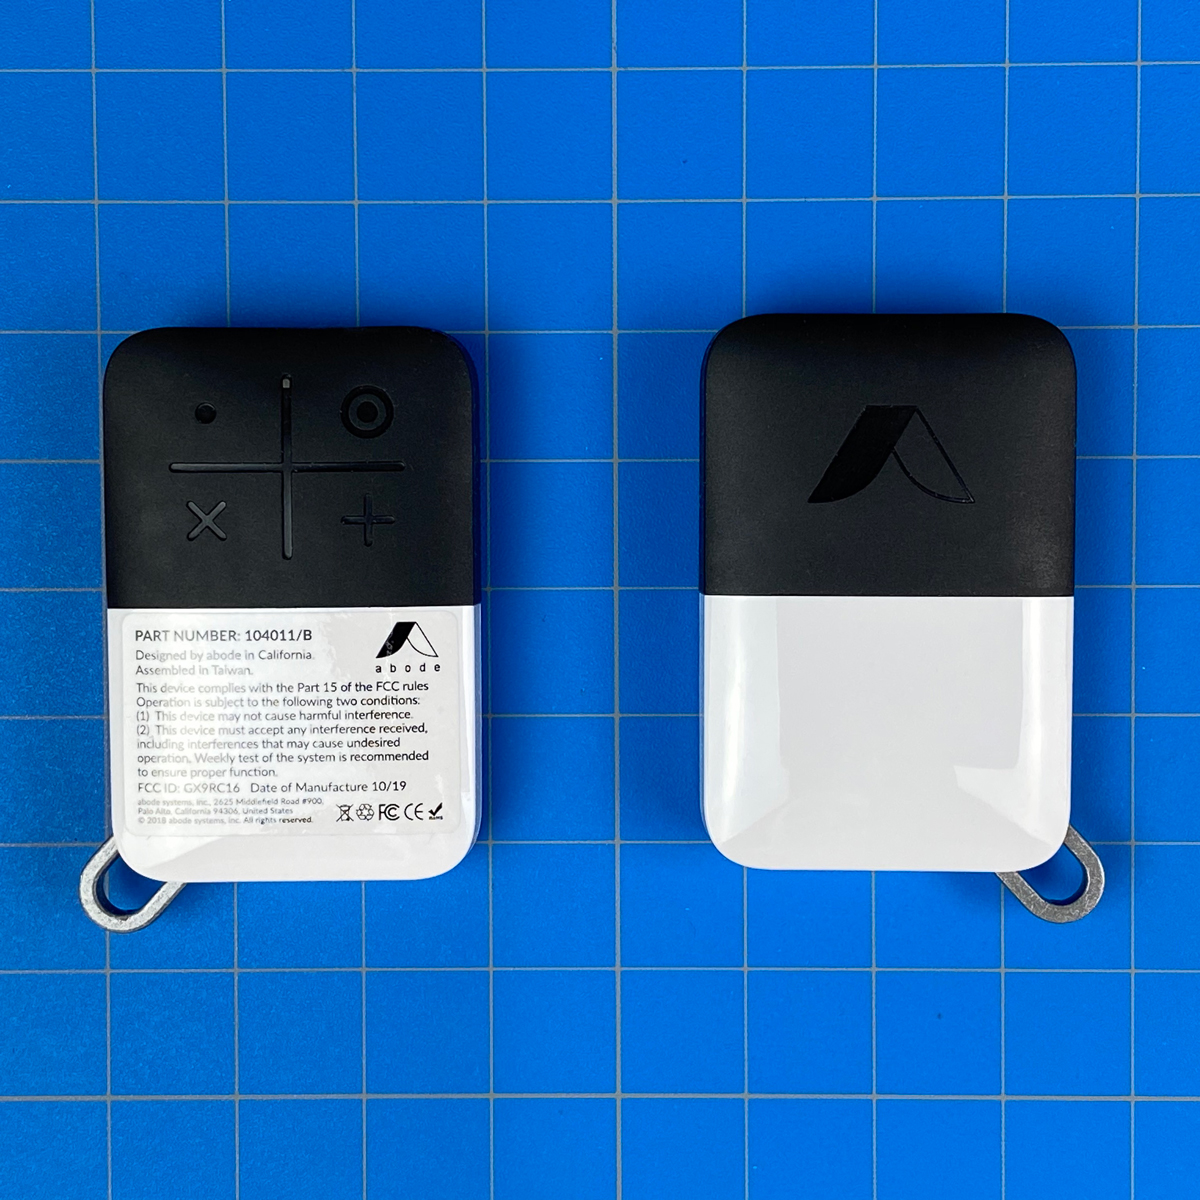
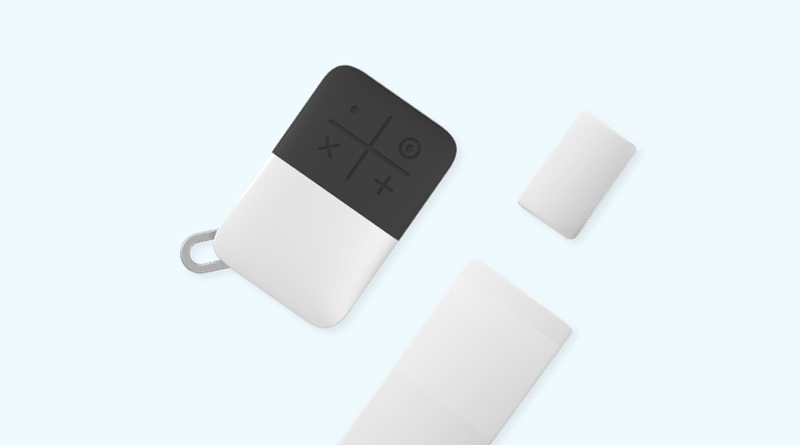
The Abode keyfob is a nice addition to the kit, that really does give off the impression that the company are all about security, insomuch as they realise that not everyone wants to use their phone all of the time. With that in mind, it’s great that if you prefer something more tangible, that can be controlled manually, with physical button presses, then a dedicated keyfob of this kind ticks all the right boxes. In terms of dimensions, it’s quite discrete, around the size of a small box of matches or slightly smaller than a Zippo lighter, although similar in overall shape, measuring 14 x 53 x 35mm / 0.55 x 2.08 x 1.38in (Depth, Height, Width).

As with the Gateway, the keyfob adopts the two-tone theme of 50/50 black and white, with only the black half having any functionality. One side of the keyfob has the Abode logo, whilst the other four distinct but subtle icons separated from each other with crossed lines. The top black half of the keyfob is made of matt-like rubber, with the buttons requiring only the smallest of presses, like the buttons on a TV remote, for example, so it’s entirely possible if you have this fob in your pocket, you could inadvertently arm or disarm the system. This could only occur when you’re in range of the hub, however, but it’s just something to be aware of. At the top of the vertical line is a tiny LED that flashes red whenever one of the four buttons is pressed. Only three of the four buttons currently have a function;
- The small circular dot activates ‘Away’ mode
- The small dot within a circle activates ‘Home’ mode
- The cross sets the system to ‘Standby’ or ‘Disarm’ mode
The fourth button with the ‘Plus’ symbol, doesn’t have a function and is reserved for “potential future use”, although the Abode website states that it can be programmed to be used as a ‘panic’ button. This isn’t a HomeKit-compatible product however and so doesn’t get exposed to HomeKit, so any customisation for the fourth button has to be performed in Abode’s own app.
The keyfob is powered by a CR2032 battery which can be accessed by pulling the white and black halves apart. According to the website, the keyfob can work up to 30.5m / 100ft away from the gateway, which is quite impressive, although this number probably refers to a ‘clear line of sight’ between the keyfob and the gateway, so once walls start getting in the way, that measurement will likely reduce. A cursory glance of the Abode website didn’t bring up information on battery life, but I suspect a minimum of 12 months would be about right, depending on usage.
THE ABODE DOOR SENSOR
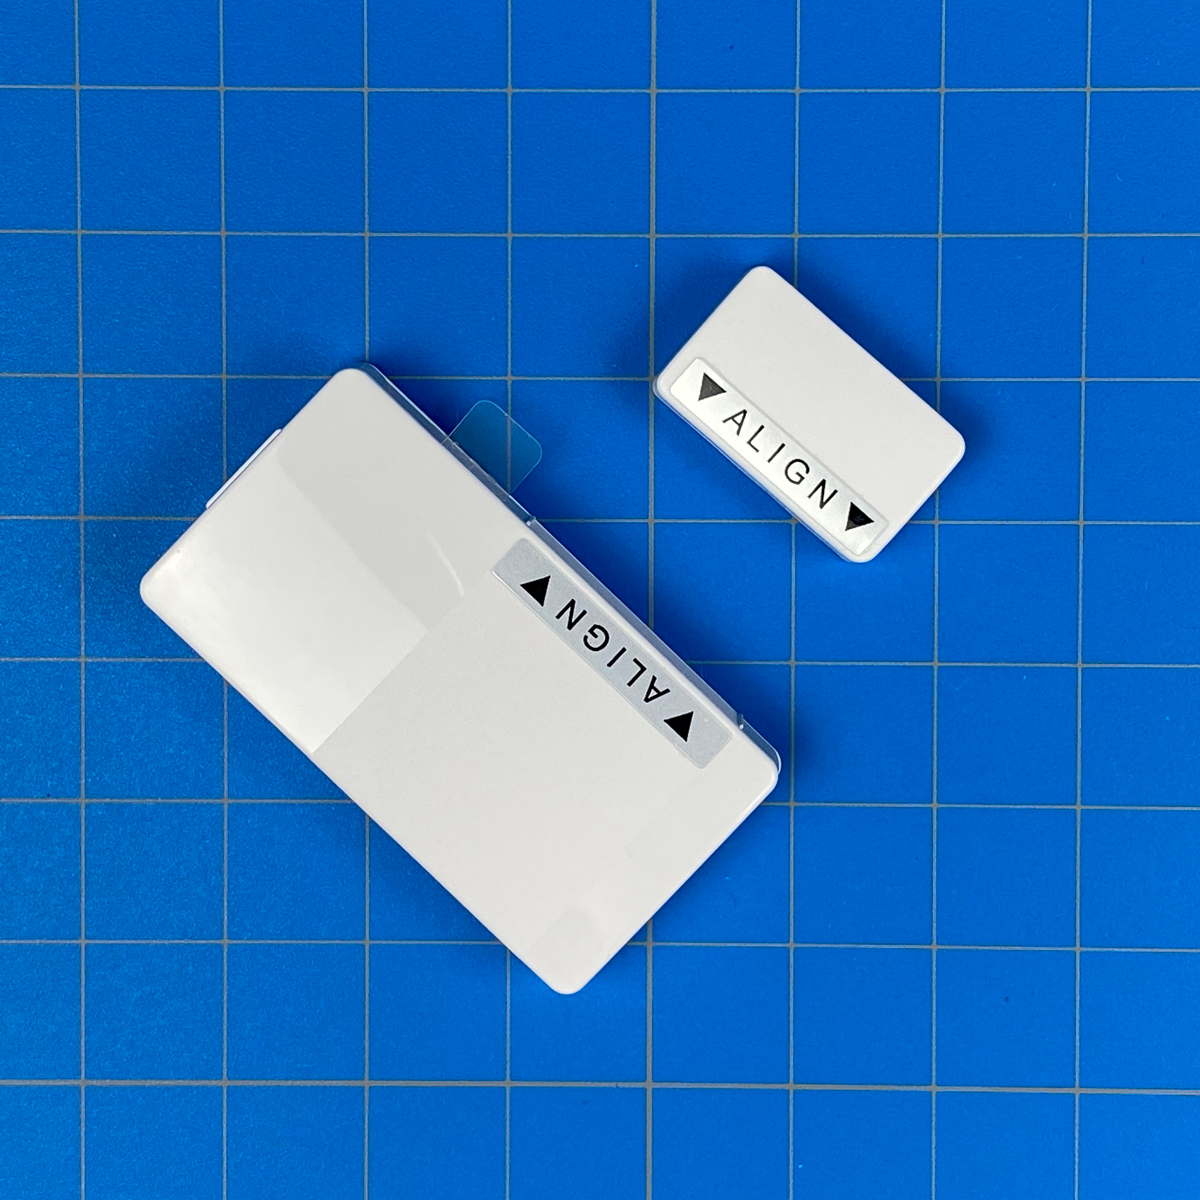
Door/window sensors are a really effective product type, as they’re so versatile. not only can they be added to doors or windows, but also drawers, jewellery boxes, or even your mailbox, as long as they’re in range of the hub of course. Door sensors are also quite basic in some senses, and usually take on the same form factor of the main body, which holds the electronics and transmitter etc, with the other portion a simple magnet housed in a plastic case.

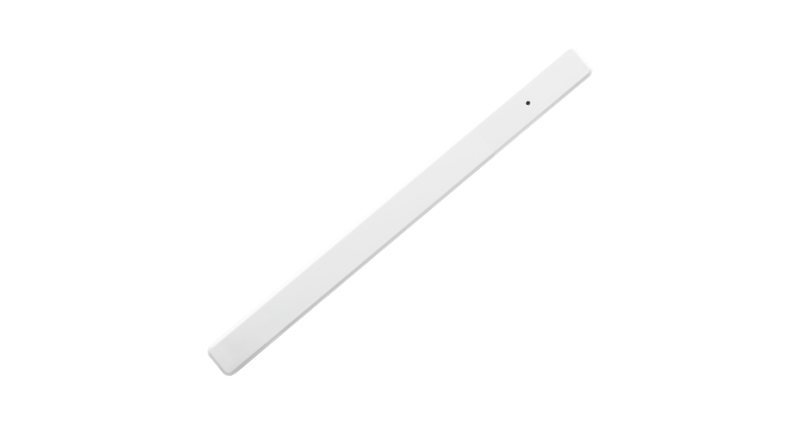
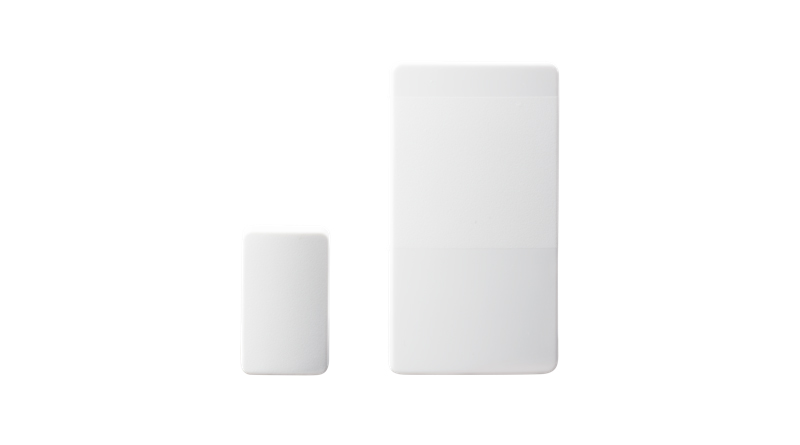
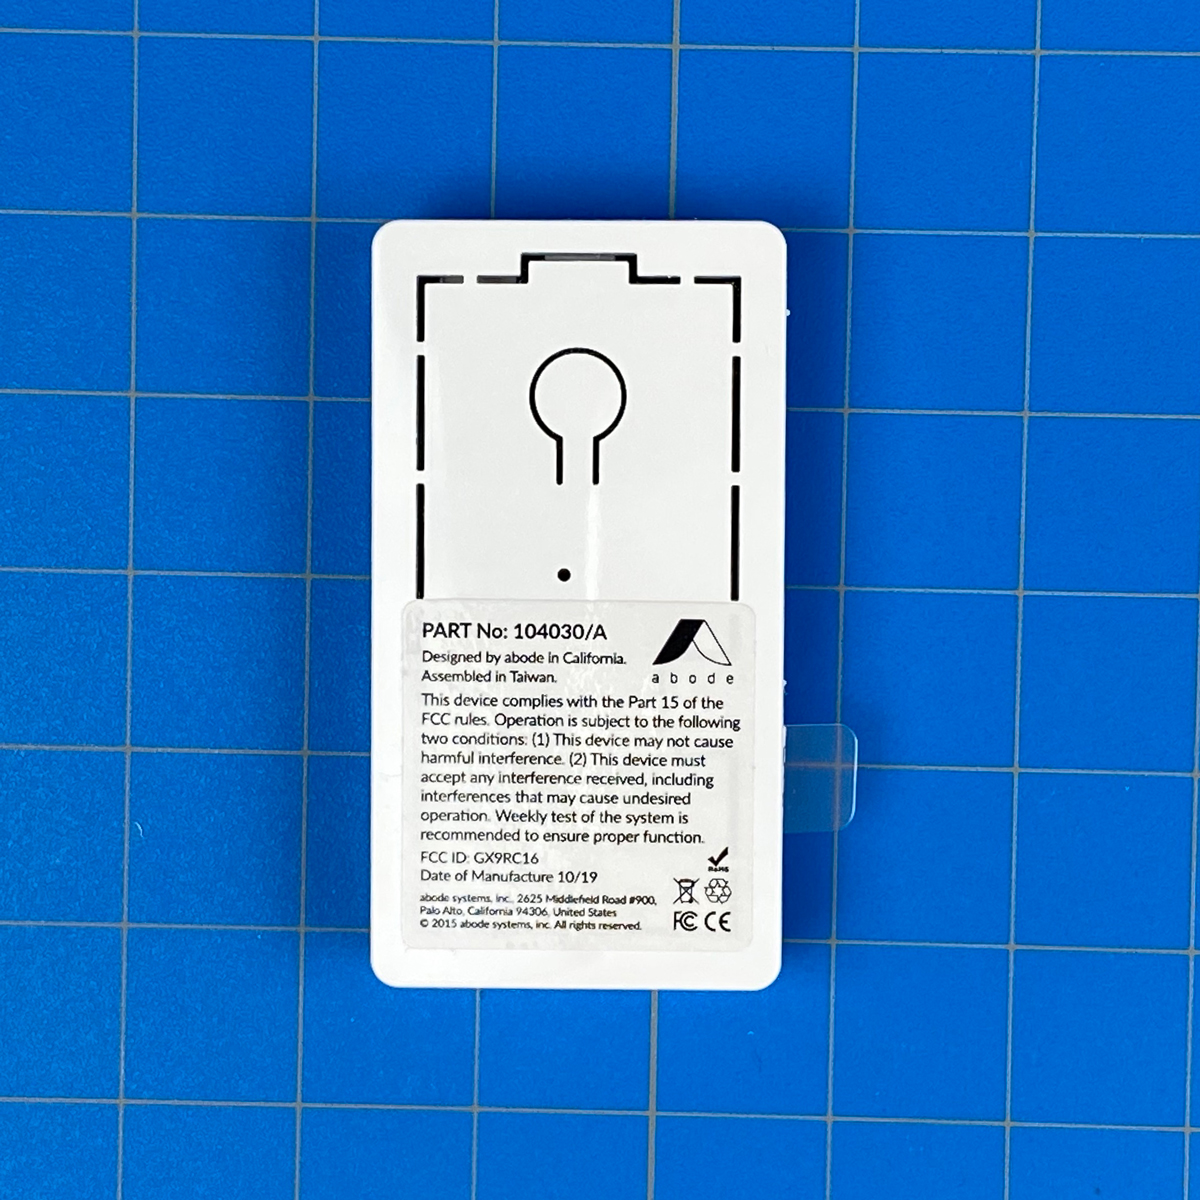
This is the case with Abode’s offering – dubbed the Mini Door/Window Sensor, which is actually one of four versions the company offers. This particular model isn’t the smallest contact sensor around, but it not massive either; main body – 11 x 53 x 29mm / 0.43 x 2.08 x 1.1in, magnet – 7.5 x 25 x 14mm / 0.3 x 1.0 x 0.55in (Depth, Height, Width). Once again, the company employs a two-tone effect to this product, although given that it’s meant to be a bit more unassuming, the effect is achieved with mildly contrasting matt and gloss plastic finishes. Thankfully, the stickers that indicate where to line up the two halves are removable. The sensor also comes with two adhesive stickers, although unlike the typical double-sided adhesive strip you tend to see, they provide two single-sided stickers, with velcro on the other side, allowing the main part to be removed from the door frame, in order to change the battery more easily.
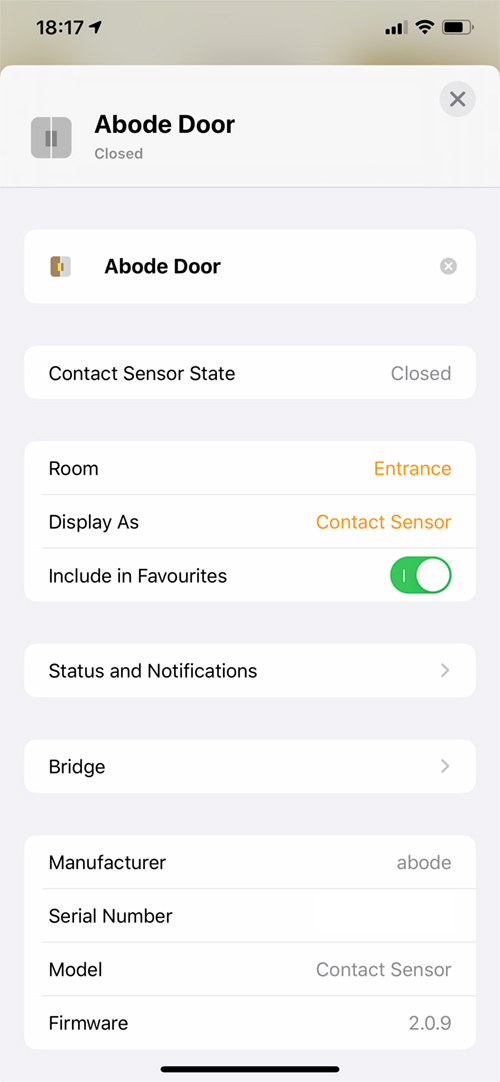


As with the motion sensor, this is exposed to HomeKit as a regular contact sensor and works well. The reaction times were almost on a par with my Zigbee door sensors, and (sorry, I have to say it again), but easily faster than the Bluetooth ones I have. The company claim up to four years of battery life, which is very impressive, even by Zigbee standards. The sensor uses a replaceable CR2450 coin battery. Overall, it’s an unassuming piece of kit, and rightly so, but it does the job well. It’s also great that it can work with the camera and alarm in a variety of different ways, which we’ll go into shortly.
THE IOTA ALARM/SIREN
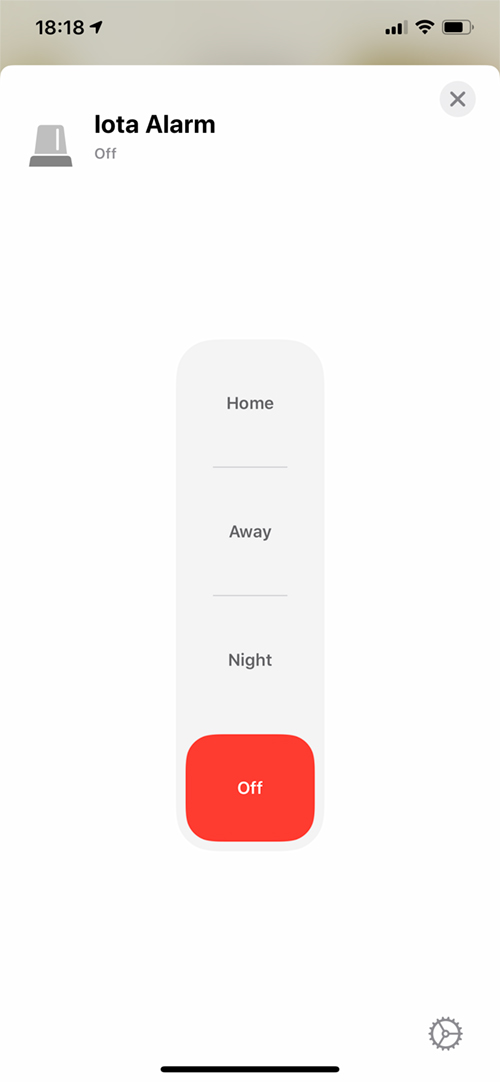
When it comes to the alarm part of this setup, it should be stated that whilst HomeKit has four modes – Off, Night, Away, and Home – the Abode system only has three – Standby, Away, and Home. Some other systems that include an alarm, like the Aqara hub, currently only have an arm/disarm option, however. Due to Abode only having the three options, it would appear that selecting either the Home or Night modes in the Home app, activates Home mode on the Iota Gateway and in the Abode app. That sort of makes sense, as there are only minor differences between the two, although It would be great if Abode was able to add the fourth mode for parity. So, in essence, the modes between the Home and Abode apps looks like this;
| Home app | Abode app |
|---|---|
| OFF | STANDBY |
| HOME | HOME |
| AWAY | AWAY |
| NIGHT | HOME |
Having briefly tested the alarm, I can attest to the loudness of it. It’s not just that it’s loud enough to deter potential an incursion into your home, but the quality of the siren sound is of decent quality, coming across – to my ears at least – as a more ‘full-bodied’ speaker, so the overall impression you get of the sound (for as long as you can bear it) is of ‘pro’ quality. I am, as you may have guessed, comparing this to my other alarm system, the Aqara hub, which whilst a great all-round piece of kit, is slightly let down by the speaker, which just isn’t as full sounding. Whether this increases the odds of an opportunist burglar fleeing at the sound of this particular alarm over another, is anyone’s guess, but it can’t hurt.


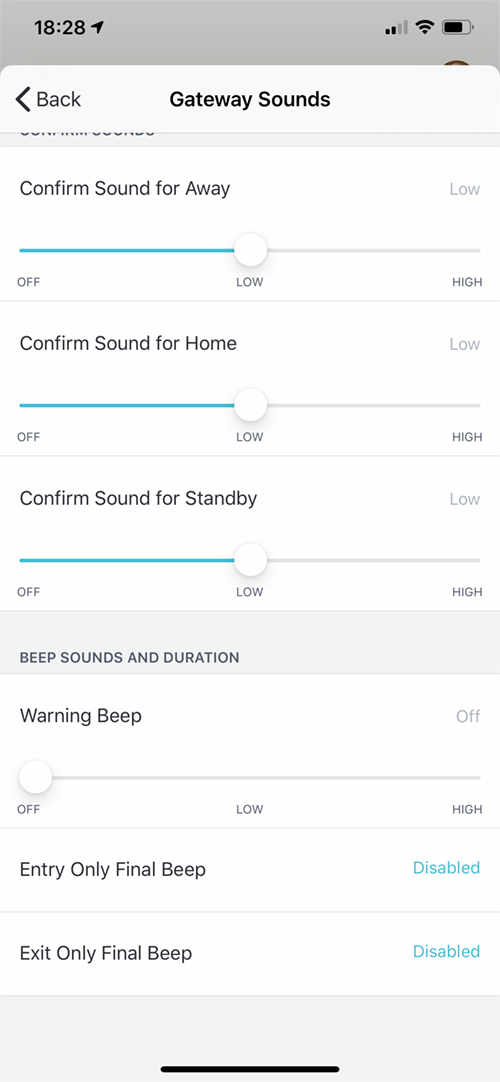
The Abode app has a more than sufficient amount of options for all aspects of the devices that come as part of the Security Kit, let alone additional devices that you might want to add in the future, so there really are too many to cover in a lot of detail, but just in terms of choices for the alarm siren, it has to be said, you won’t be disappointed. Options for the sounds are generally offered at three volume levels – Off, Low, or High – which covers door chime settings, delay sounds for the different alarm modes, as well as confirmation sounds. It really is quite extensive, as can be seen in the screenshots above.
OTHER ASPECTS OF THE ABODE APP
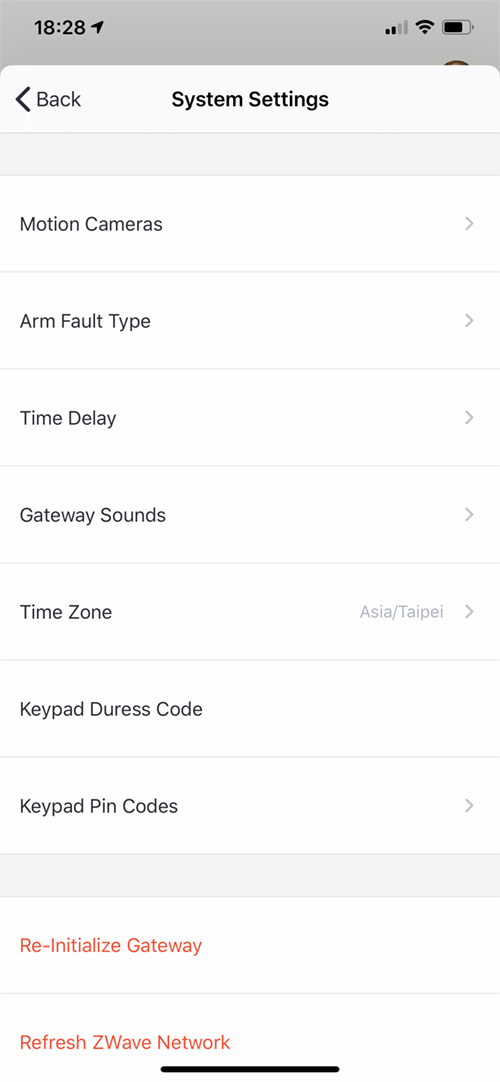

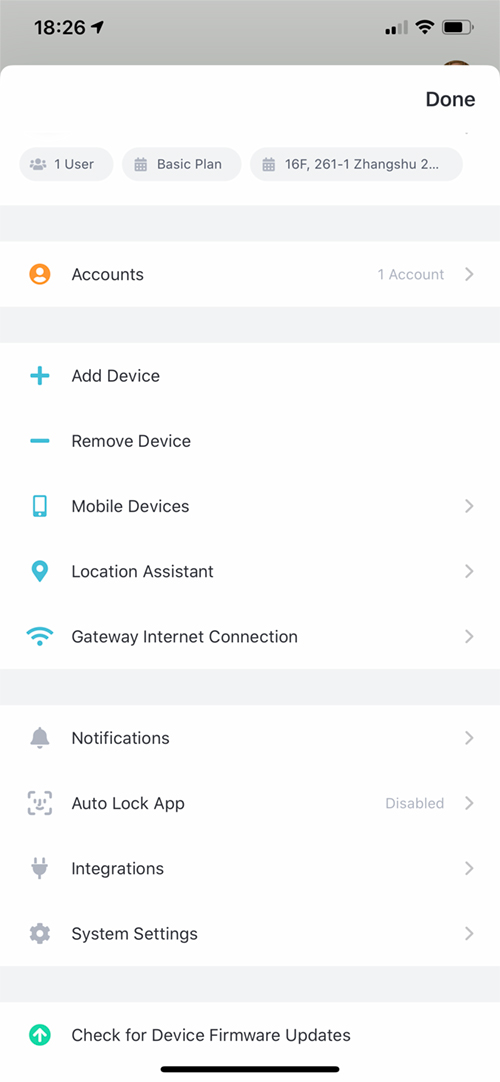
All of Abode’s child devices can work with the alarm portion of the gateway, so whether you want a simple low-level alert alarm that’s also sent to your phone if there’s a water leak, for example, or the full-blown panic alarm if the worst should happen, it’s all possible. Additionally, there are sections covering all aspects of the devices that connect to the Iota Gateway, as well as account, internet, and integration settings for connecting to systems previously mentioned. Much of this app, although still in beta, has replaced a large portion of what is currently accessible via the company’s web-based app, which is great if you don’t mind deving into a browser. Having pretty much everything in one app is the way forward though, ultimately, with the web-based app a decent backup option.
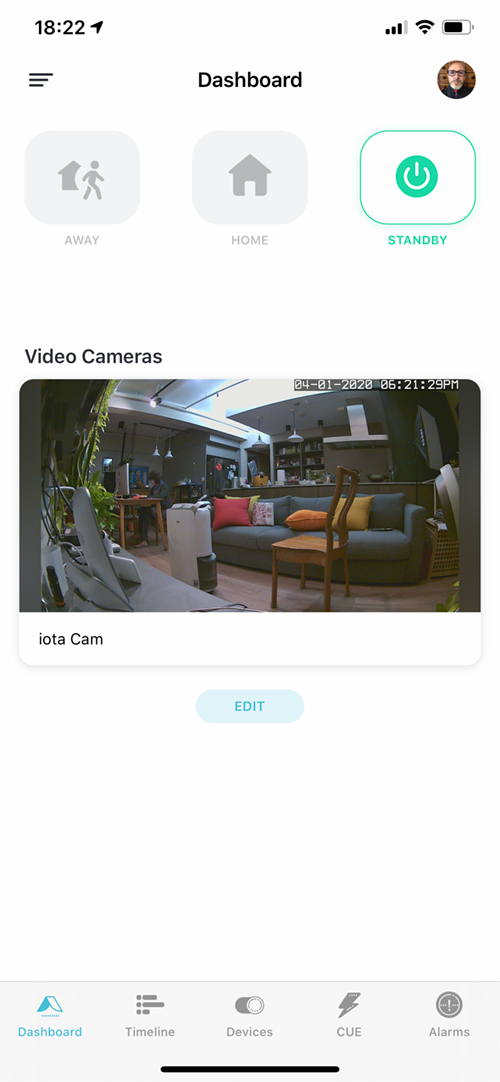


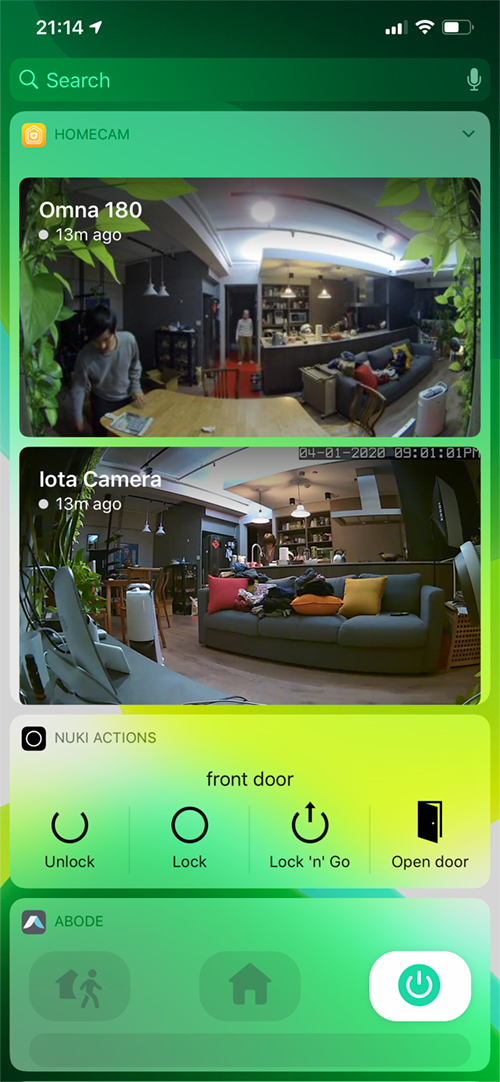
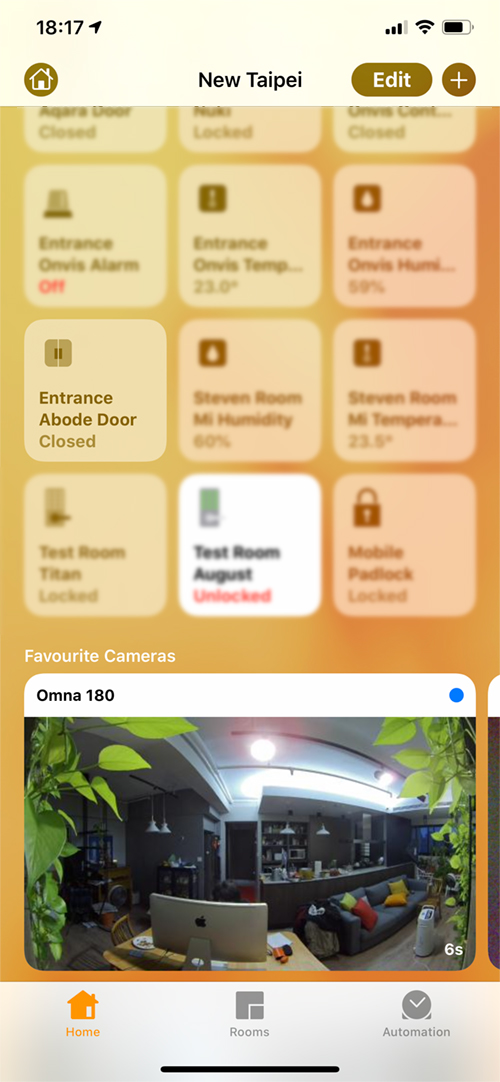
Wrapping up this overview of the Abode app, the main screen, and first of the five tabs at the bottom of the screen, simply called the Dashboard, gives you quick access to the camera along with the three alarm modes. Whenever you select the two active alarm modes (Home, Away), the gateway will count down, with 1 beep per second, so if you set the alarm arming delay to thirty seconds, you’ll get thirty beeps before it arms. Whatever amount of time you’ve set in the settings for the arming delay time, will also be reflected in a visual countdown effect within the icons for these two modes. The Devices tab gives you access to not only the camera, but settings for the built-in motion sensor, and any child devices that have been added. Here you can also group devices in any manner you wish, be that by room, or by sensor type etc. For the camera, you can also take a screengrab from the camera or record footage on the fly.
While Abode can play nicely with many systems it does appear to take itself seriously as a complete in-house security solution. This is why they offer a section labelled Cue, which allows you to create automations with rules, action and conditions. It’s possibly not as extensive as what can be achieved in the Home app for devices that aren’t security centred and also work with the Abode system, but it does offer a few options that aren’t possible for the alarm within the Home app.
SUMMING UP
I have to say that given the number of options you have with not only the Abode app but all the devices that can connect to the gateway, I’ve more than likely I’ve missed a few details here and there, so apologies if that’s the case, but there’s a lot! The depth of customisation for the siren is pretty impressive, and if you were to only use the Abode app without worrying about whether a device compatible with the gateway will be exposed to HomeKit, then you really are spoilt for choice. This choice is mostly sensors though, so don’t expect the Abode system to replace what’s on offer, in a broader sense, via Apple HomeKit.
What you do get is an all-in-one starter kit that does the basics, with you being able to add more as and when you want. That’s nothing new in some ways, as Aqara offer the same kind of choice. Still, Abode specialises in security in particular, and it’s evident when you see the paid secure monitoring options they offer it becomes apparent how seriously they take it. I haven’t really touched on these paid choices, as I’m really focussed on the hardware in the main, but even their plans are very flexible, and nowadays it’s all about choice for the consumer.
Has the system been good for me? At first, I did have an issue with the Iota gateway disconnecting once a day, which was quite disturbing, when you think that it’s the nerve centre of the system for security purposes. This happened when I was connected via ethernet at the time, and although I wasn’t directly connected to the router, I’d assumed it would be the best option. I have to admit that my system isn’t the best, and could do with a bit of streamlining, so I took to unplugging the gateway’s ethernet connection and went with a Wi-Fi connection instead. Soon after that, I’m glad to report the disconnections stopped. Whether the fault lies with my setup or not, I’m not sure, but as long as the gateway stays connected, I don’t really care how it does it. Aside from that, the keyfob and the door sensor have worked flawlessly, the motion sensor does the job well, and the camera is decent enough.
If we’re going to be fair, the slightly stuttering image from the live camera feed isn’t great, but I can live with it, and I do tend to look at the camera portion of the gateway as a bonus feature rather than a central one. After all, their other hub doesn’t come with a camera, and you can also buy separate cameras from either Abode or any number of manufacturers, so I’ll live with it. The siren/alarm part is what I consider the core feature, and as I’ve stated before, it’s LOUD. That’s all I need aside from reliability, even though where I live, we’re very safe thankfully. If it wasn’t for the fact that our apartment is already fully kitted out with sensors, I’d quite likely consider more Abode devices, as I’m really not too keen on Bluetooth sensors.
Finally, whether it matters to most people or not, I do like my devices to look good if they’re on show, whilst also having them blend in. The Iota does this in spades for me. I simply love the design. Taste is personal of course, but with this being both the heart of the system, as well as being a camera, it will get seen, and it should look good. I think it does.
Many of Abode’s products can be bought on Amazon.com, but it’s also worth checking out the company’s online store, as, at the time of writing, they are offering up to 50% off selected items from their range of products.
Full disclosure: Abode provided HomeKit News with the Iota Home Security Kit for the purpose of this review. No other compensation was made or requested.
Abode Home Security Kit

Pros
- Great design/built quality
- Bonus camera/motion sensor built into hub
- Lots of child device options
- Paid plans optional and flexible
Cons
- Camera stream could be smoother
- Not all child devices HomeKit compatible
- Only 3 alarm states not 4 like in HomeKit
- No option to turn off the video time stamp
Pingback: Abode Iota Home Security Kit (review) – NewsChest Technology
Thnx for the extensive review Simon. I was interested in Abode Iota for some time now.
Can you trigger the alarm from homekit? That would be a game changer.
Hi, hope you found it of use. At present the only sensors that can trigger the alarm are its own sensors, but that’s the case with all alarm systems within HomeKit at present, like the Aqara system. As their sensors worn with HomeKit though, in essence, they can be triggered from HomeKit, but just their own devices. I hope that makes sense.
I’m using Automation Switches Platform via Homebridge. With it and a little help from Eve app you can actually trigger an alarm from homekit. Issue is there is no good siren that I know of, which could be turned on from whitin the eco system. So I’m using a plug with a siren for that. Abodes Iota would give the system some stability and redundency, but only if it coud be triggered with any sensor whithin homekit.
If you start new and get only Abode sensors it looks like a great choice though.