

Thinka Z-Wave Hub for HomeKit (review)
I’m the first to admit that when it comes to smart home systems, I’m a relatively recent convert, having only really started looking at this kind of technology in early 2017, with some of my colleagues who contribute to this site, having been experimenting with home automation for quite a while longer. So when it comes to the wireless protocols that are currently floating around – WiFi, Bluetooth, Zigbee, RF433MHz, and Z-wave – of these, the latter is the one that I’m least familiar with, even though it has been around for quite a while. Not too long ago, Z-Wave was the kind of ecosystem that leaned towards professional installations, with a level of complexity that you no longer see with the advent of HomeKit. however, with the introduction of a new hub by Netherlands-based Thinka (pronounced Tinka), Z-Wave, and the products that use it, are now able to be exposed to HomeKit directly via their latest product, the Thinka for Z-Wave Hub. getting Z-Wave devices into HomeKit has been a thing before the introduction of this hub, but it was all achieved via HomeBridge or HomeAssistant, so with this new Thinka hub, things became ‘official’ for want of a better word.
Thinka sent us the new hub for testing a couple of months ago, and we’re finally in a position to give our thoughts not only on the hub itself, but how well it works with devices that connect to it, and more importantly, how well those devices work in HomeKit. Read on to learn more…
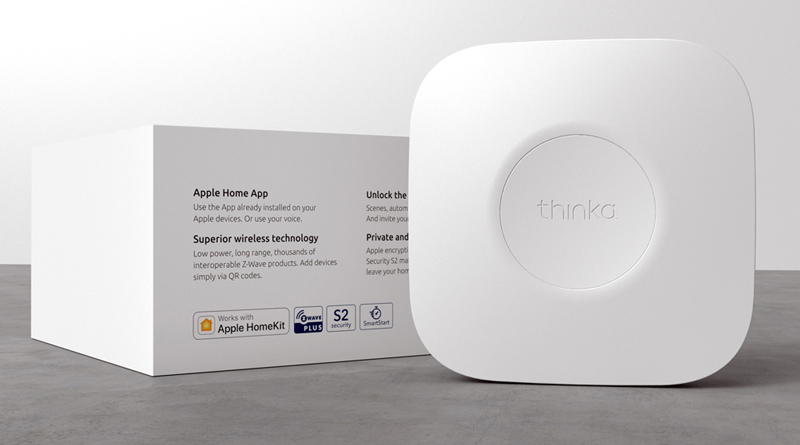
PACKAGING
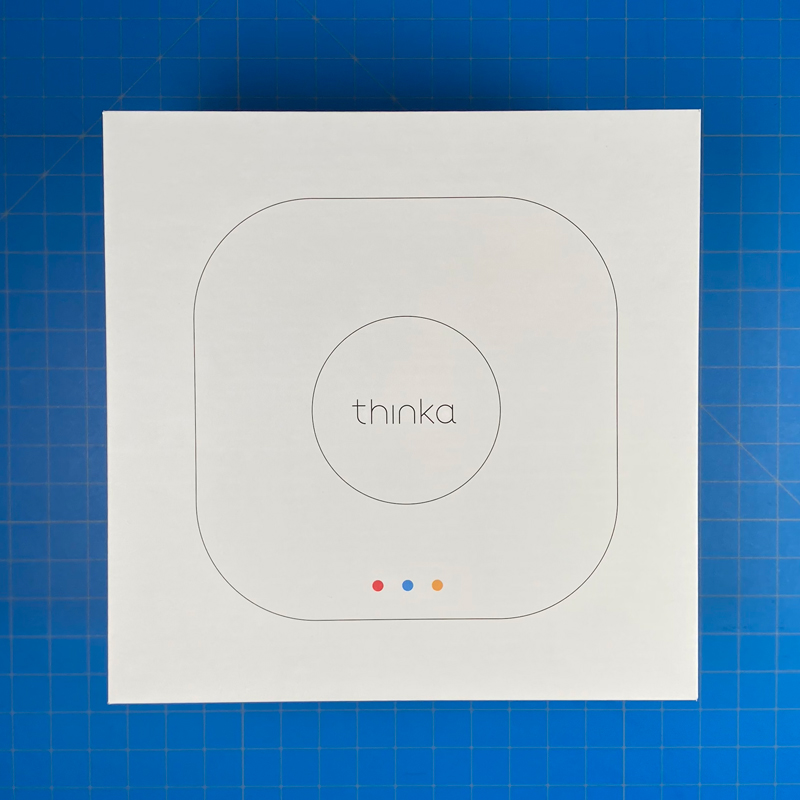
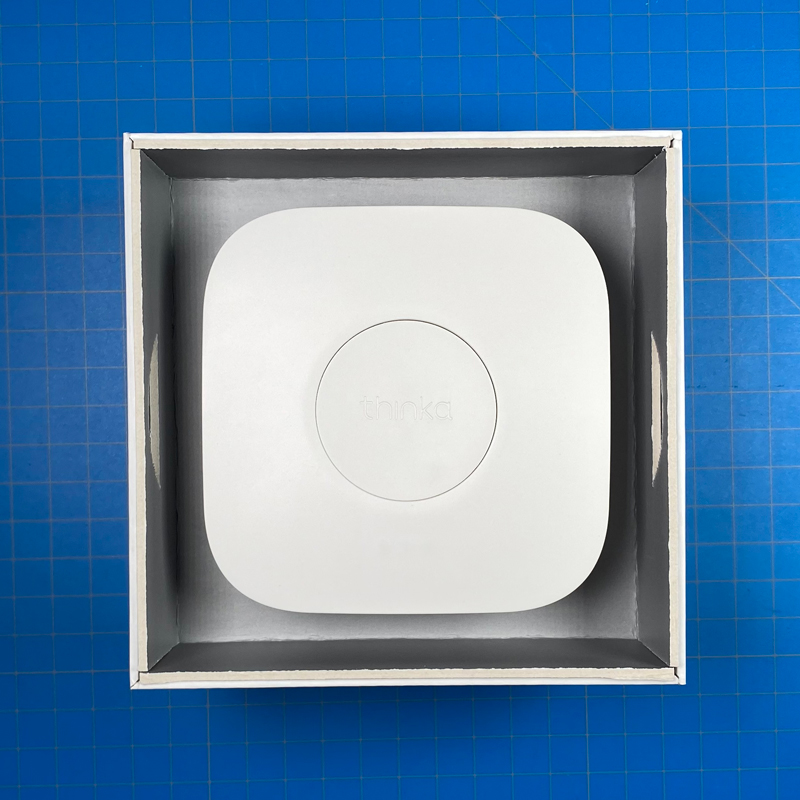
Given that this hub is a moderately expensive purchase (currently €429, or €354.55 without VAT), you’d expect everything to be premium, and if the packaging is anything to go by, then we’re good. The box itself feels very ‘Apple’ in terms of looks and materials, and I’ve no doubt this will protect your purchase without any trouble. The top is as minimalist as it gets, with a line drawing of the product inside.
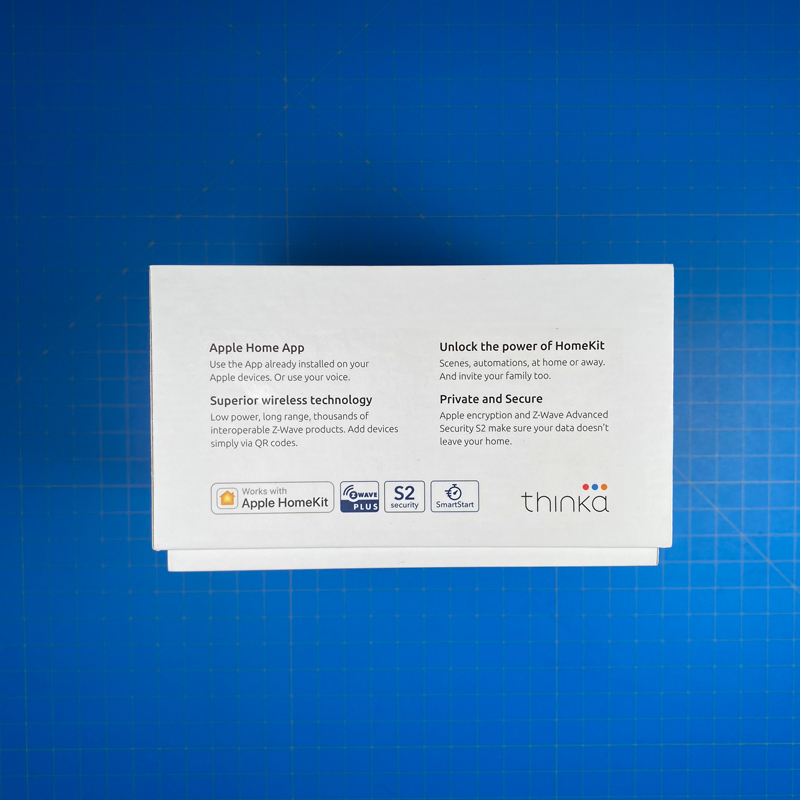
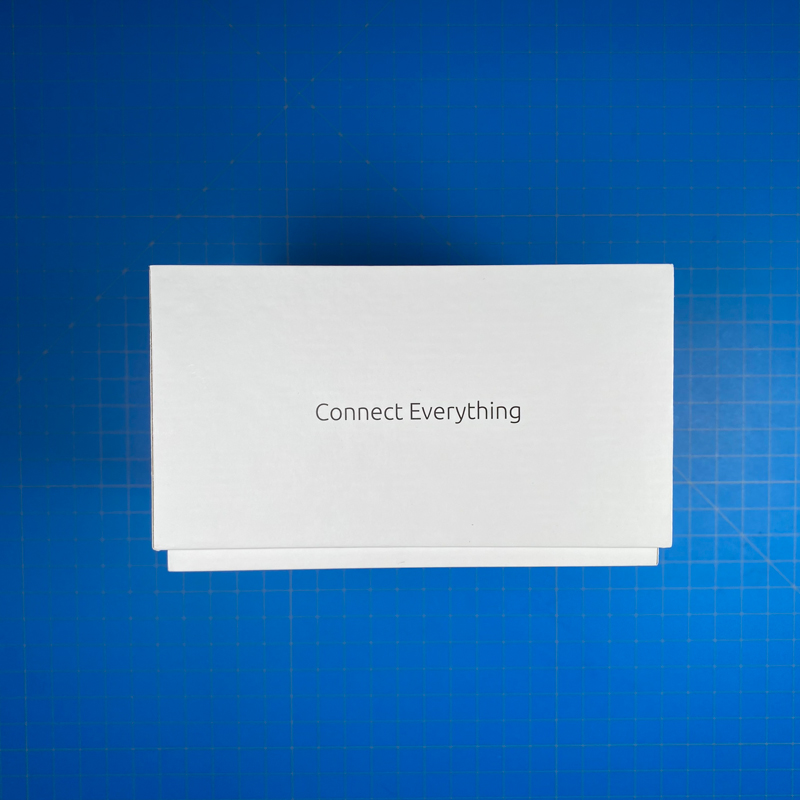
One side has the slogan “Connect Everything”, which I’ll come back to shortly, and another side simply lists some features and other details, including the Apple HomeKit logo (check!) as well as logos for Z-Wave Plus, S2 Security, and SmartStart.
So, back to the ‘Connect Everything’ slogan – what the company are saying essentially is that any Z-Wave device that goes through this hub will be exposed to HomeKit (as well as Google Home, or Amazon Alexa) as long as the device type or category is supported. The company’s website goes further, by stating that there are 3,000+ devices available to you, should you use this hub. There’s no way to test that claim fully of course, but I was sent some devices to test with the hub and proceeded to purchase some additional devices myself, as a way of independently verifying the claim to some degree. It goes without saying that it would make little sense for a company to make such claims at the risk of making themselves look bad and risk their reputation, so I’ve no doubt the claim is true, even if some categories are supported by Google, but not HomeKit for example.
So how have they achieved this? Typically, when a company makes a hub, it’s generally understood that whilst the hub is certified for HomeKit, the child devices that connect to it also have to be certified. With Thinka and Z-Wave, it would appear from our discussions with Thinka, that Apple has allowed the hub to let Z-Wave devices pass through to HomeKit unimpeded, due to Z-Wave’s own highly strict certification process. This makes a lot of sense, as Z-Wave isn’t an open-source protocol in the way that Zigbee is, and as such, any devices have to go through a series of checks in order to pass before they even connect to any hub, let alone one that allows access to HomeKit. This may go some way to explaining the high price being asked, not to mention giving the consumer with the means to buy such a device some extra peace of mind.
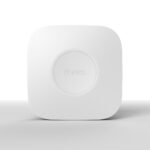
THE HUB
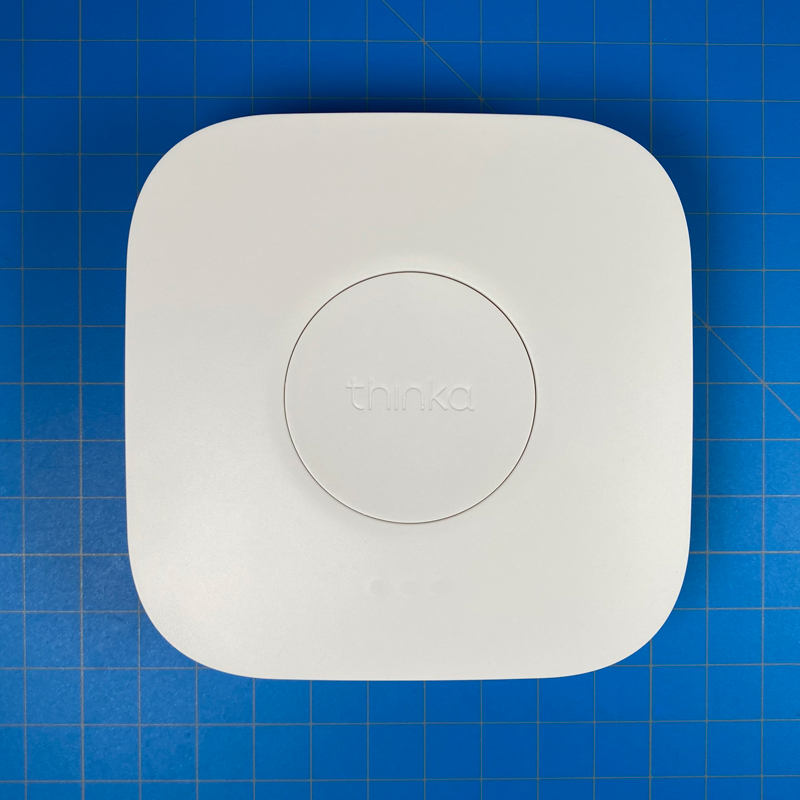
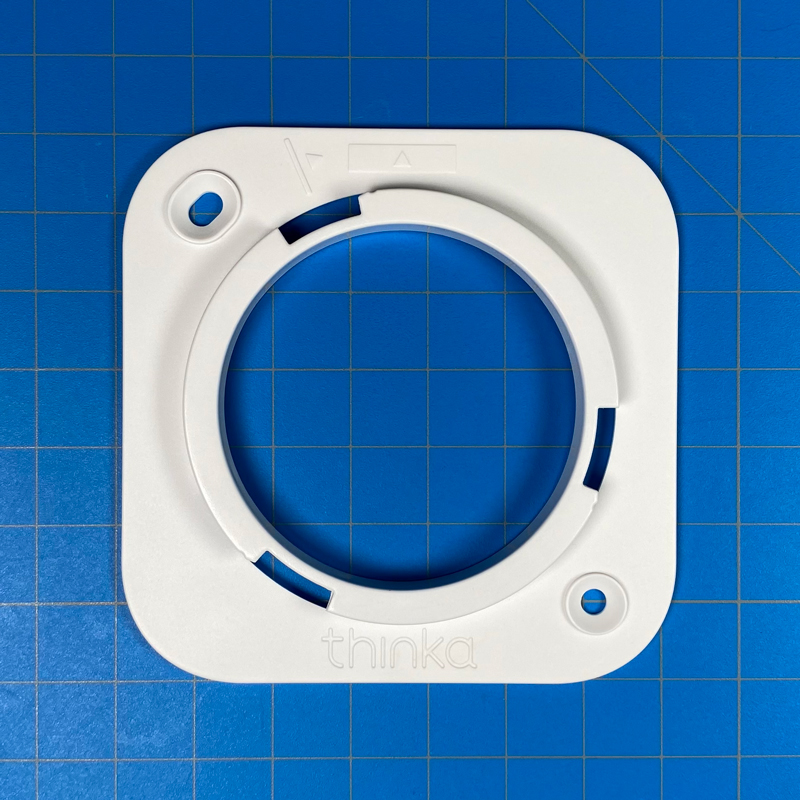
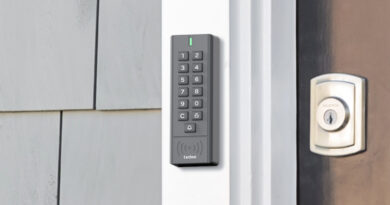
I think it’s fair to say that hubs, in and of themselves, aren’t terribly exciting products, unless they offer some extras, like the Aqara hubs that offer night lights, alarms, or ringtones, for example, and the Thinka is no different, with it being as minimal as you could get/want. It’s not entirely dissimilar to the Philips Hue Bridge, with a large circular button on the top and three LEDs underneath, although this is roughly twice the size of the Hue Bridge. The Thinka logo is indented on the button, and so when plugged in, the only part of the device that sticks out is a single green LED that stays lit during normal operation. All three LEDs will pulsate in blue when you’re in pairing mode, and as the front of the packaging hints at, the LEDs can display other colours and patterns, depending on what the hub is doing.
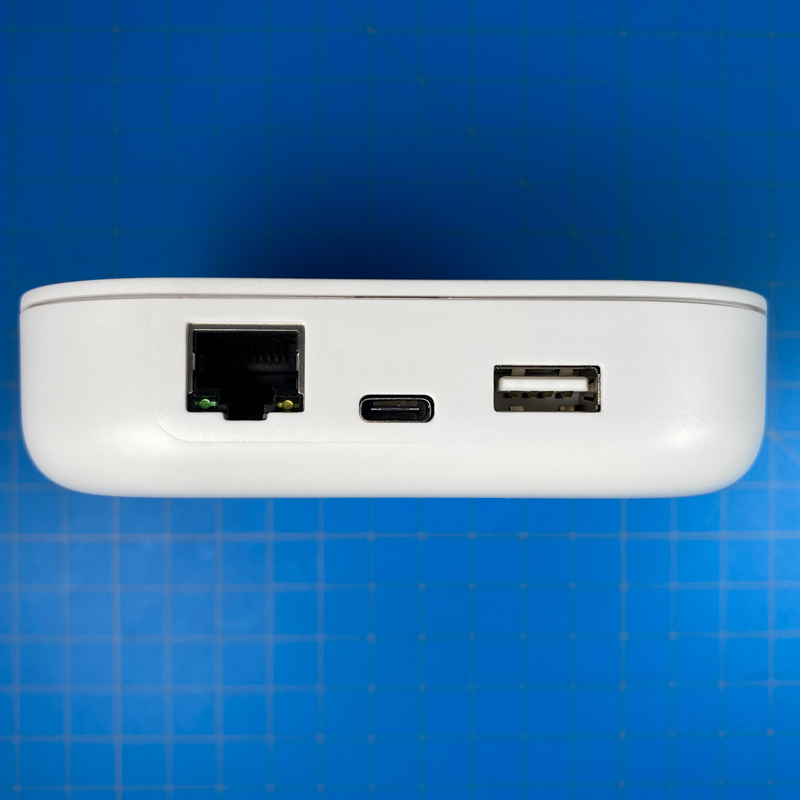
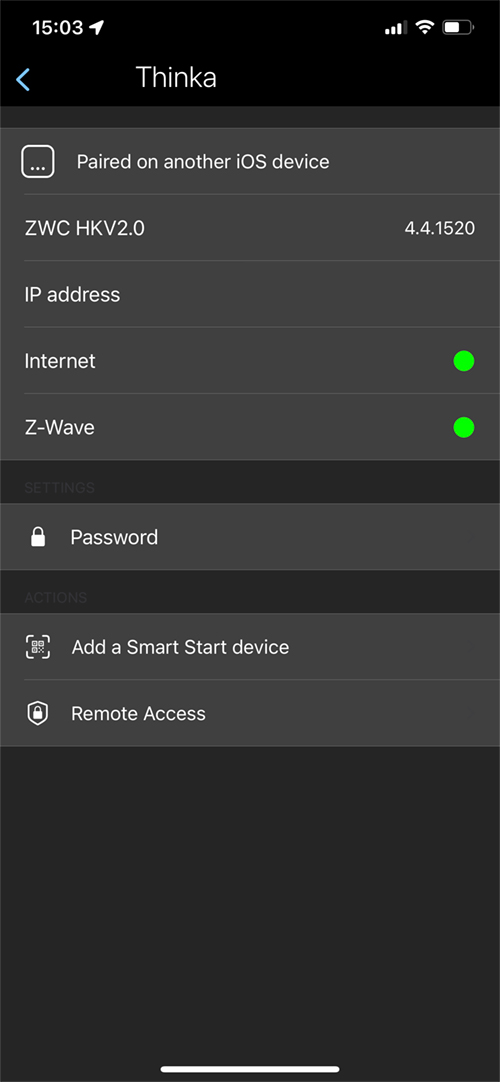
The Thinka is designed for a wired connection to your network only, so there’s no WiFi module inside. Thus, we get an ethernet port to allow you to connect the Thinka directly to your Router/Modem/Switch. Next to that is the power port which uses USB-C (exactly what you’d expect in 2021). Finally, there’s a USB-A port which we’re told is for diagnostics only as well as potential future features.
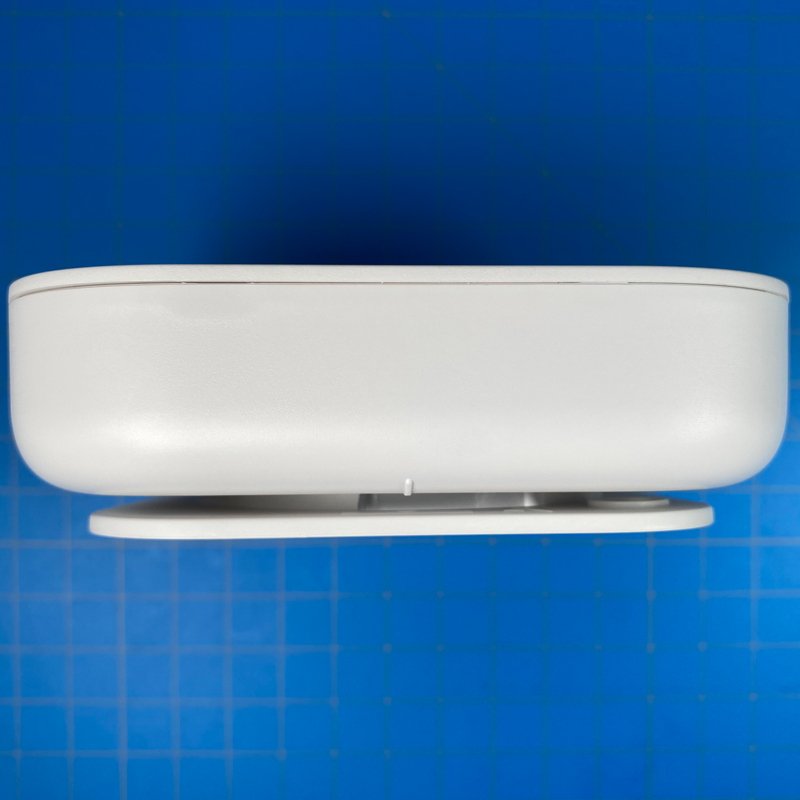
The Thinka can sit on any flat surface, but there’s also an included wall bracket, should you want to mount it to the wall. Even the feel of the hub connecting to the bracket feels well-engineered, which is easy to take for granted.
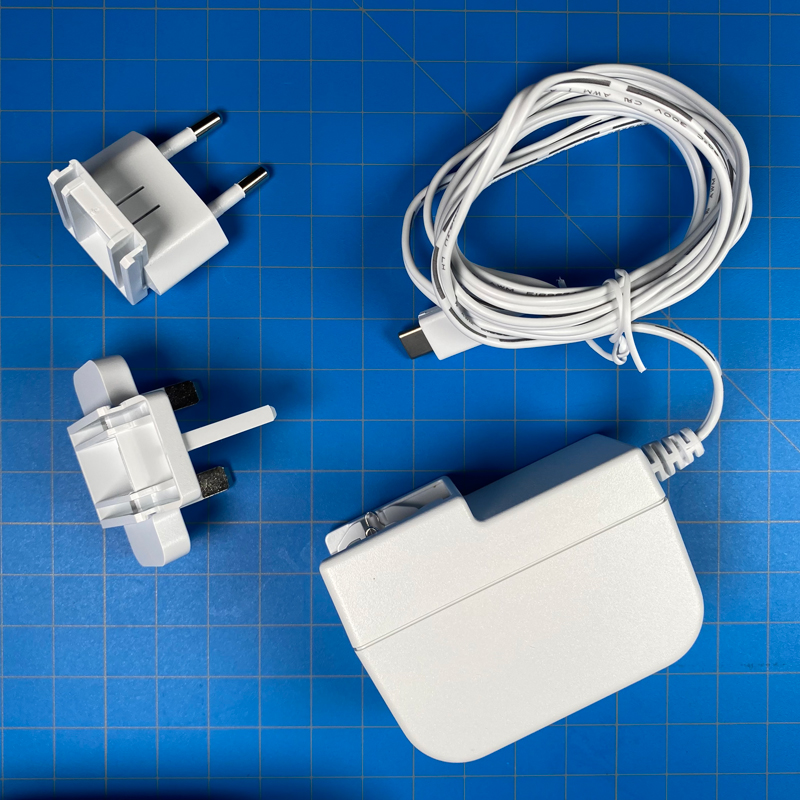
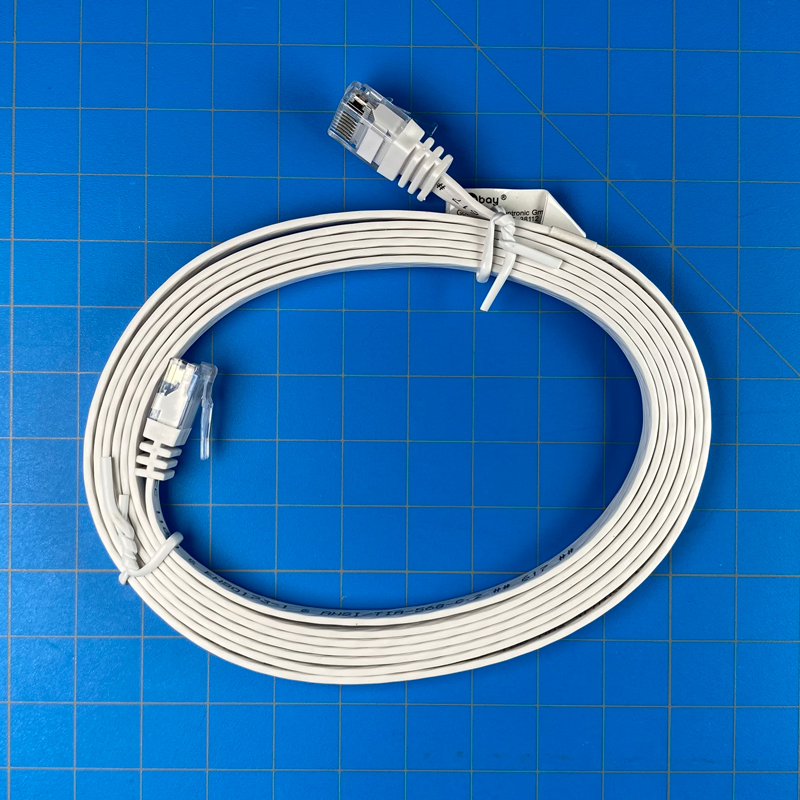
Also included in the box is a large power brick with ‘clip-in’ adaptors for both EU sockets (Type C) and the UK (Type G). As the hub isn’t officially released anywhere else besides Europe, there are no other adaptors included, although it’s likely we’ll see the hub released in the US in 2022, and so there should be an included US (Type A) adaptor when the time comes. And just as important is an ethernet cable to get the hub connected to your network.
THINKA SETUP
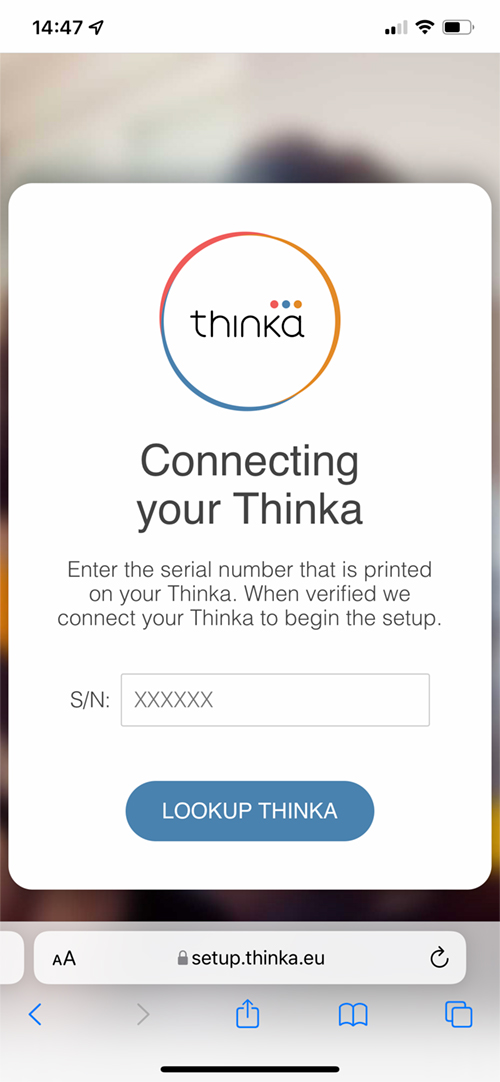
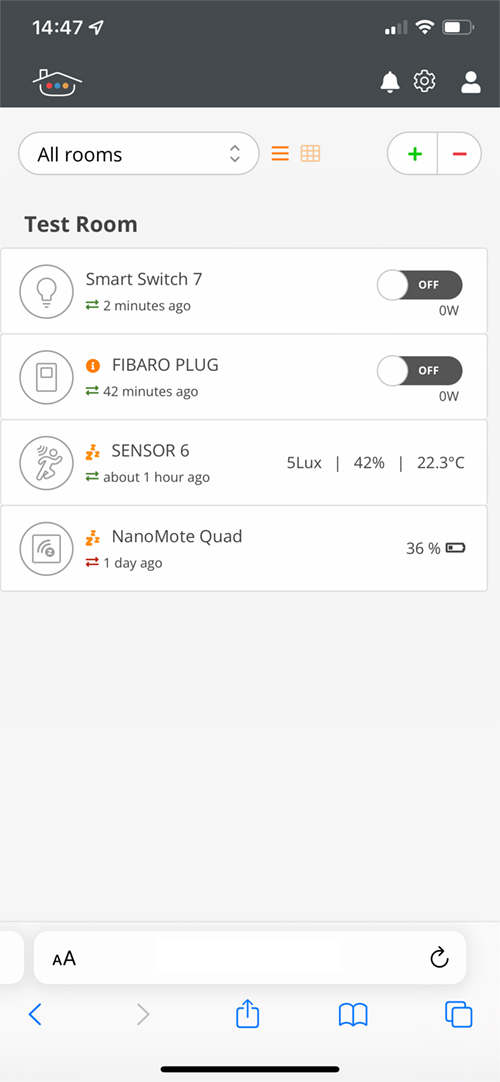
Even though the hub comes with a HomeKit code, it’s better to use the company’s browser-based app first for installation. You get a six-character code with the Thinka, which you use to detect the hub on your network, and then proceed to sign in or create an account to complete the setup. In the second image above you can see I’m already set up and have four devices connected to the hub;
- Aeotec Smart Switch 7 (plug)
- Fibaro Plug
- Aeotec Sensor 6 (multisensor)
- NanoMote Quad (wireless button)
Once added to your home, you can then add it to HomeKit via the company’s iOS app, which we touch upon later.
SMART SWITCH 7
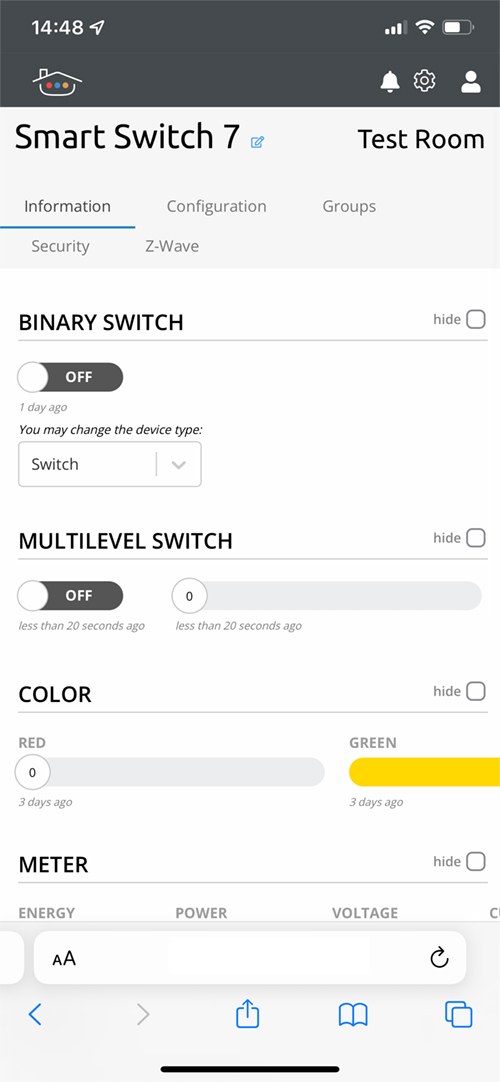

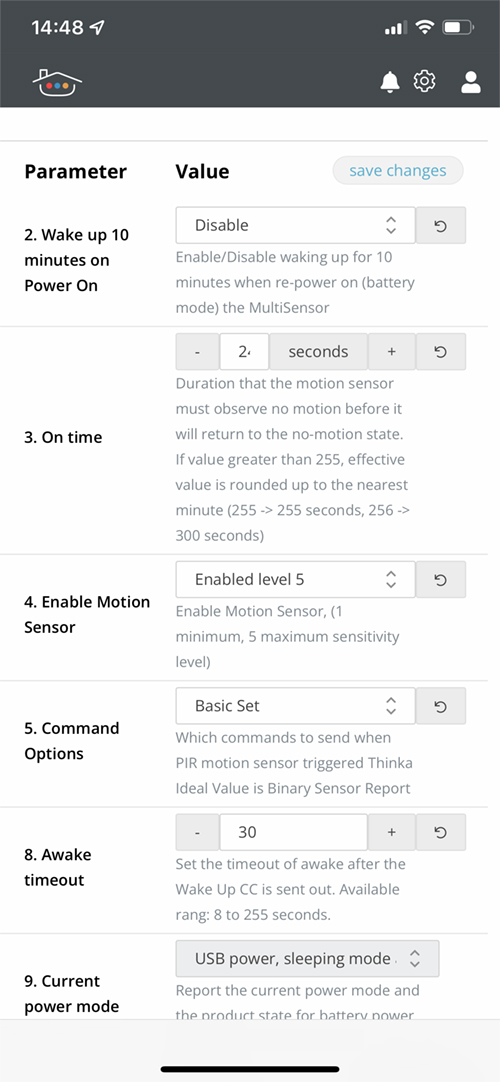
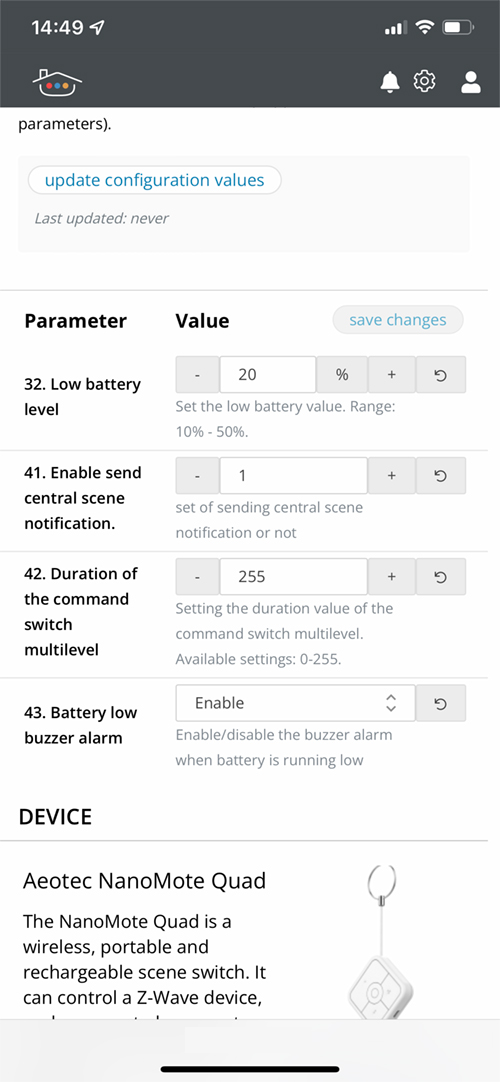
The Aeotec Smart Switch 7 is a smart plug with a switch that contains a colour LED that when exposed to HomeKit, can be separately controlled in terms of colour and brightness, as well as having the ability to simply turn the plug on or off. In the browser app, you can see the basic information for this plug when pressing on the device in the list. Tapping on ‘Configuration’ you get access to further settings, nearly all of which are not exposed to HomeKit, but can be used anyway, which includes things like power on behaviour when power is restored, as well as warnings for overloading the plug’s power capacity.
AEOTEC SENSOR 6
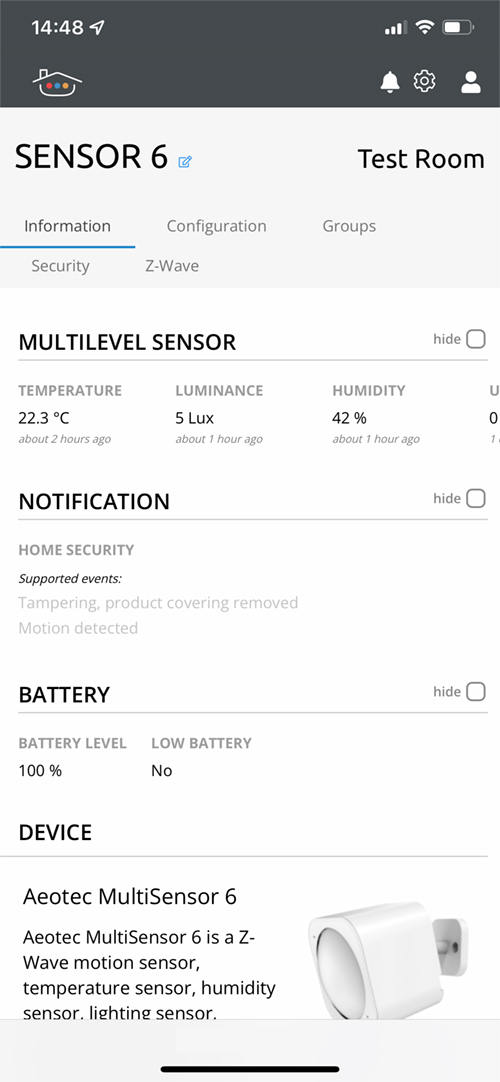
The same goes for all other devices here, including the Aeotec Sensor 6, where you can see the details for each sensor, as well as utilise different settings for each of the sensors. This particular device includes the following sensors;
- Motion
- UV
- Humidity
- Temperature
- Vibration
- Ambient light
It should be noted that only four of the six sensors here are exposed to HomeKit, with UV and vibration not supported.
NANOMOTE QUAD

When I started out testing the Thinka, wireless buttons weren’t supported, but just recently the company updated their hubs so they could support both wireless buttons and also Venetian Blinds. The NanoMote is similar to other wireless buttons in many ways, but it has four separate buttons, each with a single and long-press option (in HomeKit). Double press isn’t supported. It also comes with a keyring so you can have it hang with your keys, and even includes a rechargeable battery via a built-in Micro USB port.
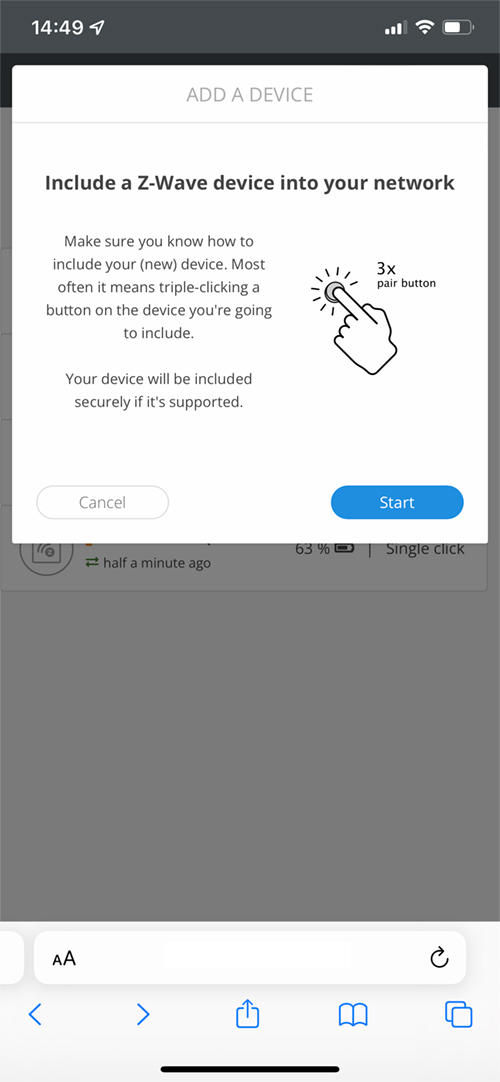

There’s an option to begin the pairing process to add child devices. Usually, this takes the form of getting the hub into pairing mode, whilst pressing a button on the child device three times, so not dissimilar to Zigbee in some ways. You also get access to the hub’s own settings of course, which includes things like firmware updates, resetting or even changing the region. You also get the option to set the hub up to work with other platforms, including Google Home, Amazon Alexa, and Olista.
THINKA IOS APP


The Thinka app is rather basic and is mostly for providing an overview of your hub or hubs, what rooms are added and how many devices there are. You can also add a hub manually here, although this is normally reserved for advanced users. You also use this app to add the Thinka hub to your HomeKit home, so assuming you’ve already registered the hub via the web-based browser, once signed into this app, the hub will appear, allowing you to add it to HomeKit, using the included HomeKit code.
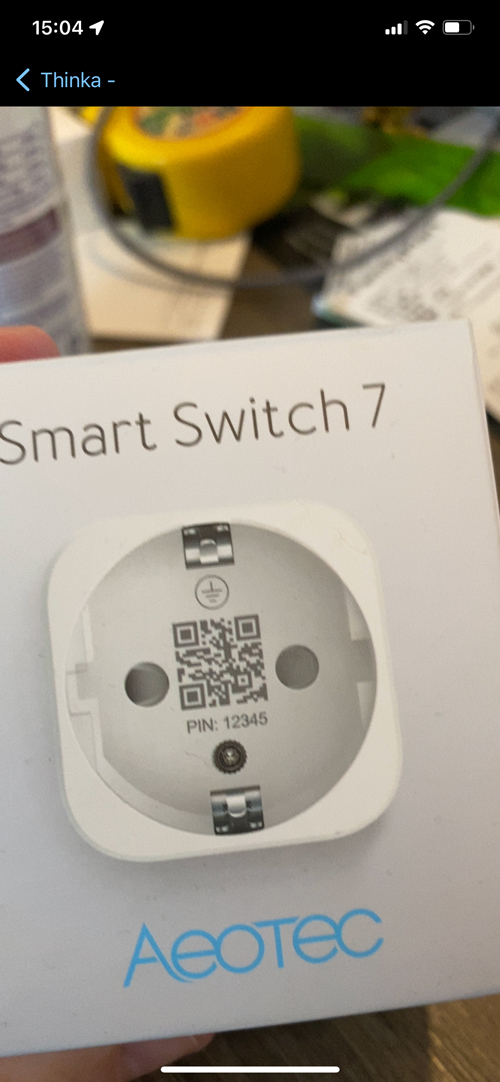
The app also gives you the option to add child devices using Z-waves latest ‘SmartStart’ function. This is a procedure, that, like HomeKit simply requires you to scan a QR code, in order to add a device. Unfortunately, there aren’t too many devices using this method yet, and of all the devices I used for testing, only the Aeotec Smart Switch 7 offered this method.
THINKA IN HOMEKIT


The Thinka hub is just a hub, and unlike some of the Aqara Zigbee hubs, offers no additional services. With this being the case, you can only see the hub’s existence by going into the settings for your HomeKit home, via ‘Home Hubs & Bridges’ where Thinka hub is listed. When you click on it, as with all other hubs, you get a few basic details, including how many accessories are connected to the particular bridge. In this case, it’s four, although strangely, the NanoMote is not listed when I look into this section. It could be due to Wireless switches only recently being added.
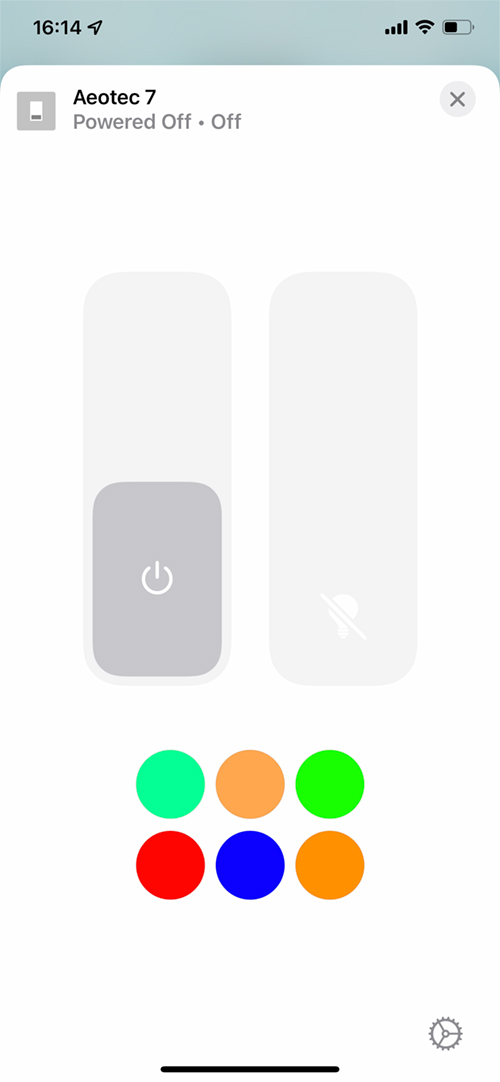
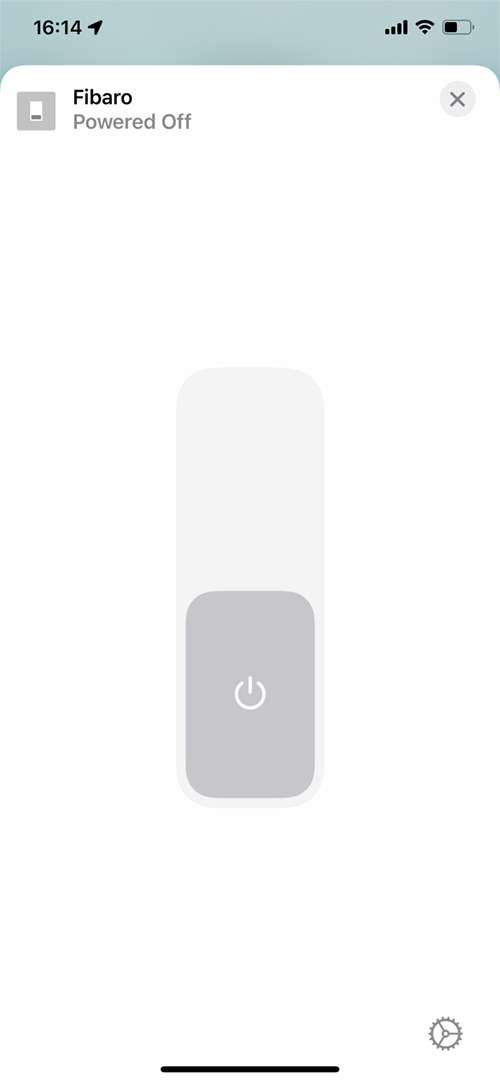
If we look at the Aeotec 7 smart switch (plug) you can see the on/off toggle switch is visible, as is a slider to control the brightness of the LED within the plug’s power button. You can also change the colour of this LED, although it’s so small it does make me wonder why they bothered. The Fibaro plug, on the other hand, only exposes the on/off toggle, even though the much larger LED ring on this plug would be handy for use in automations within HomeKit.
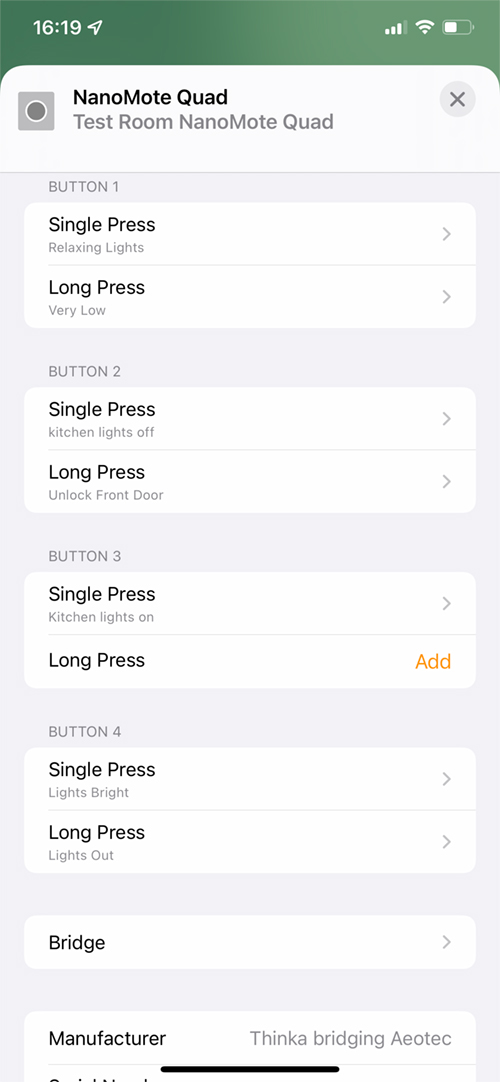
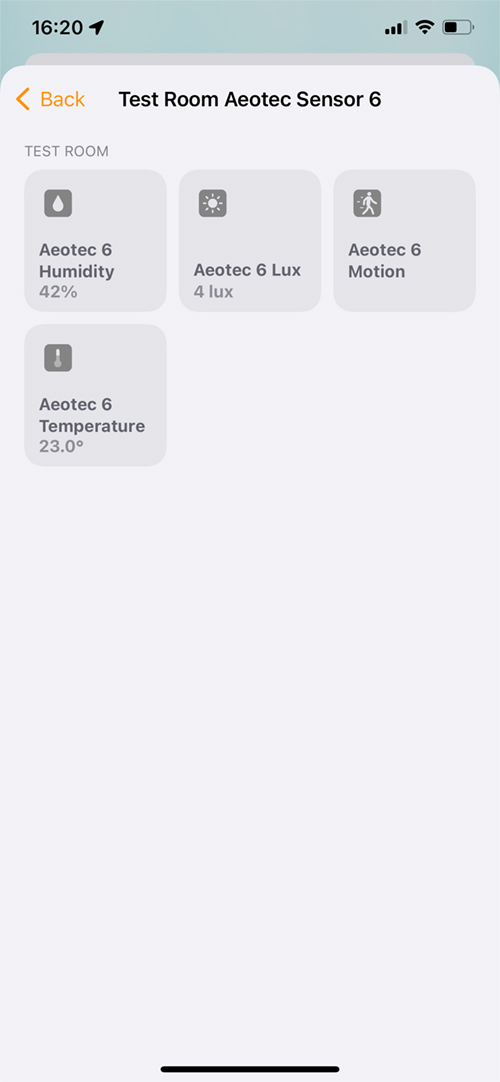
The NanoMote Quad Wireless button exposes all four buttons, but only offers single or long-press, so no double press option. The Aeotec Sensor 6 exposes only four of the six available sensors, with vibration and UV sensors missing in this case.
IMPORTANT CONSIDERATIONS AND WRAP UP
Even though I’m new to Z-Wave, I’ve been led to believe that Z-Wave uses what is generally referred to as sub-1GHz frequencies, but different countries and regions use slightly different ranges, so the frequency range in the US for example, is 908.4 ~ 916MHz, whilst Europe uses 868.4 ~ 869.5MHz. This means that your hub has to be set to the correct region to avoid any potential interference with things like cordless phones or other devices, but is also required by law in most countries. The good news is that the Thinka hub’s frequency range can be changed, however, the same doesn’t appear to be true of child devices. So, if you purchased a Z-Wave child device in the US, and wanted to use it with your Thinka hub set to the European frequency range, the child device won’t be able to connect to the hub. This shouldn’t matter in most cases, as there wouldn’t be much use for a US type Z-Wave smart plug in Europe, but for wireless devices like sensors, it’s more of a potential issue.
For that reason, I’m a little less enamoured with Z-Wave as a protocol overall, even though in many ways, as we’re talking about the Thinka hub, we can hardly blame the product for the protocol. As it stands with the hub itself, there was a bit of a readjustment to be made in my mind with how devices are added, and what extras they can offer within Z-Wave, not to mention the different methods by which a device can be added, but it has been a solid device in the time I’ve used it, so there are really no complaints as far as the hub itself is concerned, nor for that matter, the child devices that are connected to it.
The question around the price of the hub can’t be ignored, and whilst it’s easy to compare this to other hubs that use both Z-Wave or Zigbee, none of them quite offer what Thinka does – Zigbee hubs by Hue and Aqara do work with HomeKit, but only expose their own-brand devices to HomeKit, with very few exceptions. Other Z-Wave hubs don’t expose their devices to HomeKit at all, at least not officially, and so when you see what Thinka offers – Z-Wave devices from any brand, all exposed to HomeKit – it becomes more obvious as to why there’s a premium price for this device, not that I’m justifying the price, but then Thinka and any other company have no more requirement to justify its prices than we have to justify how much we’re paid for the work we do. It’s for the market to decide whether the price is worth paying.
You’re probably wondering if I would pay for this hub. The answer is no, but not because I don’t think it’s worth it. In my case, as you may have guessed, I’m already deeply embedded in HomeKit and have a plethora of devices that I’m quite happy with, which use Zigbee, WiFi, and occasionally, Bluetooth, with a tiny smattering of Thread. In my case, everything is pretty stable thankfully, and it wouldn’t make any sense, financially or otherwise, to begin replacing everything. If I were to start from scratch, would I buy the hub? Currently no, because the initial outlay is more than I can afford.
So, who is the hub for? I guess in the first instance, it’s probably most useful to those that already have a Z-Wave setup in their home, but want it integrated into HomeKit, without having to go down unofficial routes. For those that have a decent budget, and want a large choice of devices all funnelled through one hub, then all of a sudden, the prospect of having one hub for all devices instead of many, seems a more attractive option. The downside of having ‘One hub to rule them all’ is that if the hub does fail, then everything goes with it. This isn’t unique to Thinka of course, but as it works with all brands, it’s less likely you’ll be buying two of these to share the load.
This brings us back to the product itself and the company behind it. The product itself seems really (really) well put together, and the fact that you can call upon the company’s support team to examine any potential issues with your hub remotely should make you come to the conclusion that your hub isn’t going to be abandoned at the first sign of trouble, or that it’ll be superseded by another model in a year’s time.
The bottom line; the hardware is great, works solidly, and does (as far as I’ve been able to test) what it says it can do. If you’re serious about security, which seems to be the case with not only Z-Wave, but Apple, then maybe it’s time to put your money where your mouth is, and pay the extra. Your call!
Full disclosure: Thinka provided HomeKit News with the Thinka Z-Wave Gateway for the purpose of this review. No other compensation was made, requested or has not in any way influenced our opinion of this product.
Thinkz Z-Wave Hub for HomeKit
Pros
- Official HomeKit support for Z-Wave
- Excellent build quality
- Access to over 3,000 Z-Wave devices
- Supports various Z-Wave frequencies
Cons
- Expensive initial outlay
- Fractured methods of adding devices
Great review!
I just bought the Thinka hub. And it is really good. At last I could buy Fibaros double switches to automate the bathroom lamps that have always been a problem. and a lot of other cool, things, like the ultra thin door sensor: Sensative Strips Guard.
Thanks Bjorn. It’s certainly nice to have access to devices in HomeKit that previously were unattainable. As for the door strip, I saw someone setting this up in HomeKit on Instagram recently. Looks great.
Great review. I am wondering if my Z-wave switches that are currently working within my ADP (Home Security) App can also be used via this device/Home Kit at the same time? Or can Z-wave only connect to one App/Hub?
Hi, as I understand it, devices that use a hub, can only connect to one at any given time. So if you connect your Z-Wave devices to the Thinka hub, they will get exposed to HomeKit, but you won’t be able to have them connected to the hub they were originally paired to. Whether the app you mention is able to connect to Thinka hub and show these devices as well, like Aqara is able to, I’m not sure.