Onvis C3 Smart Indoor Camera (review)
Last year, despite HomeKit Secure Video being announced at WWDC, there was little to show for it for the rest of 2019. Fast forward to the middle of 2020, and all of a sudden the HomeKit world is awash with cameras, all proudly declaring “We Do HSV!” (if cameras could talk of course). This includes offerings from the likes of Logitech, Eufy, Aqara, Eve, and now Onvis. You can be forgiven for thinking “Onvis??”, but whilst this company are relatively new to the HomeKit scene compared to some, their parent company ChampOn is actually behind the manufacture of some products by more established names, like Koogeek, for example. Onvis has already graced us with SMS1 Motion Sensor (with temperature and humidity sensors), and the CS1 Security Alarm Contact Sensor (yes, also with temperature and humidity sensors…), and have a few more devices lined up for the rest of 2020 and beyond. For now, though, we’re looking at their C3 Smart Indoor Camera given that 2020 is looking more like ‘Year of the Camera’ than ‘Year of the Rat’…
PACKAGING

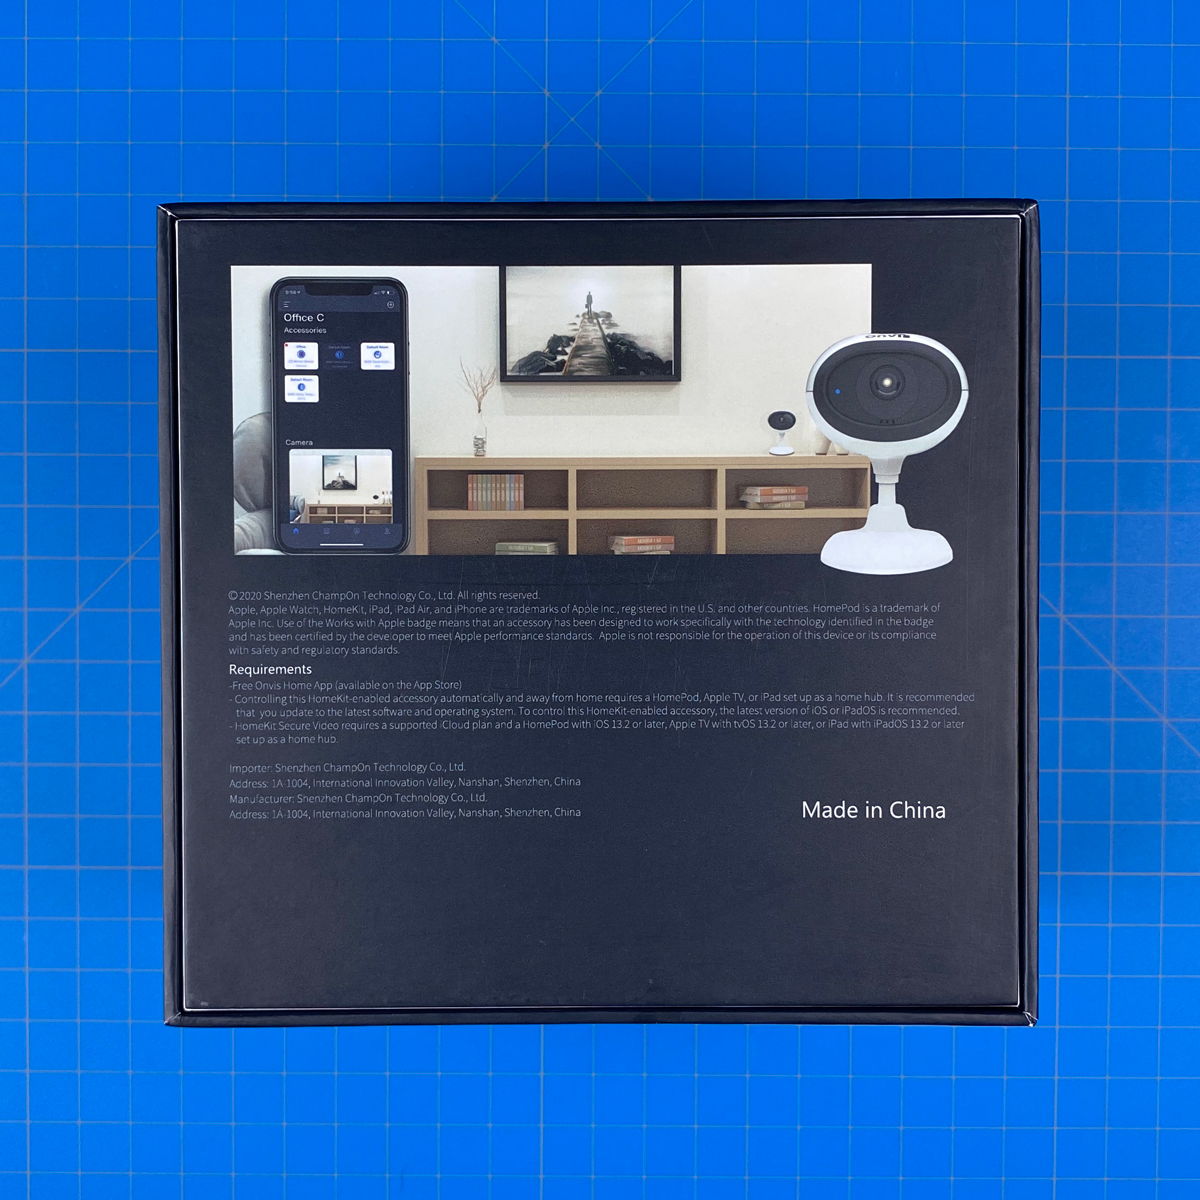
The front of the box simply features the camera, along with the some of the standout features, which we’ll get into in a bit, but it’s clearly designed solely for HomeKit, as are the other two Onvis devices previously mentioned. It also states that it works with HomeKit Secure Video (HSV). The rear of the box simply spells out some of the basic requirements, one of which is the Onvis Home app, although it actually isn’t if you don’t want access to the SD Card recording functionality. You’re still going to need the app for firmware updates, like many HomeKit products, however.
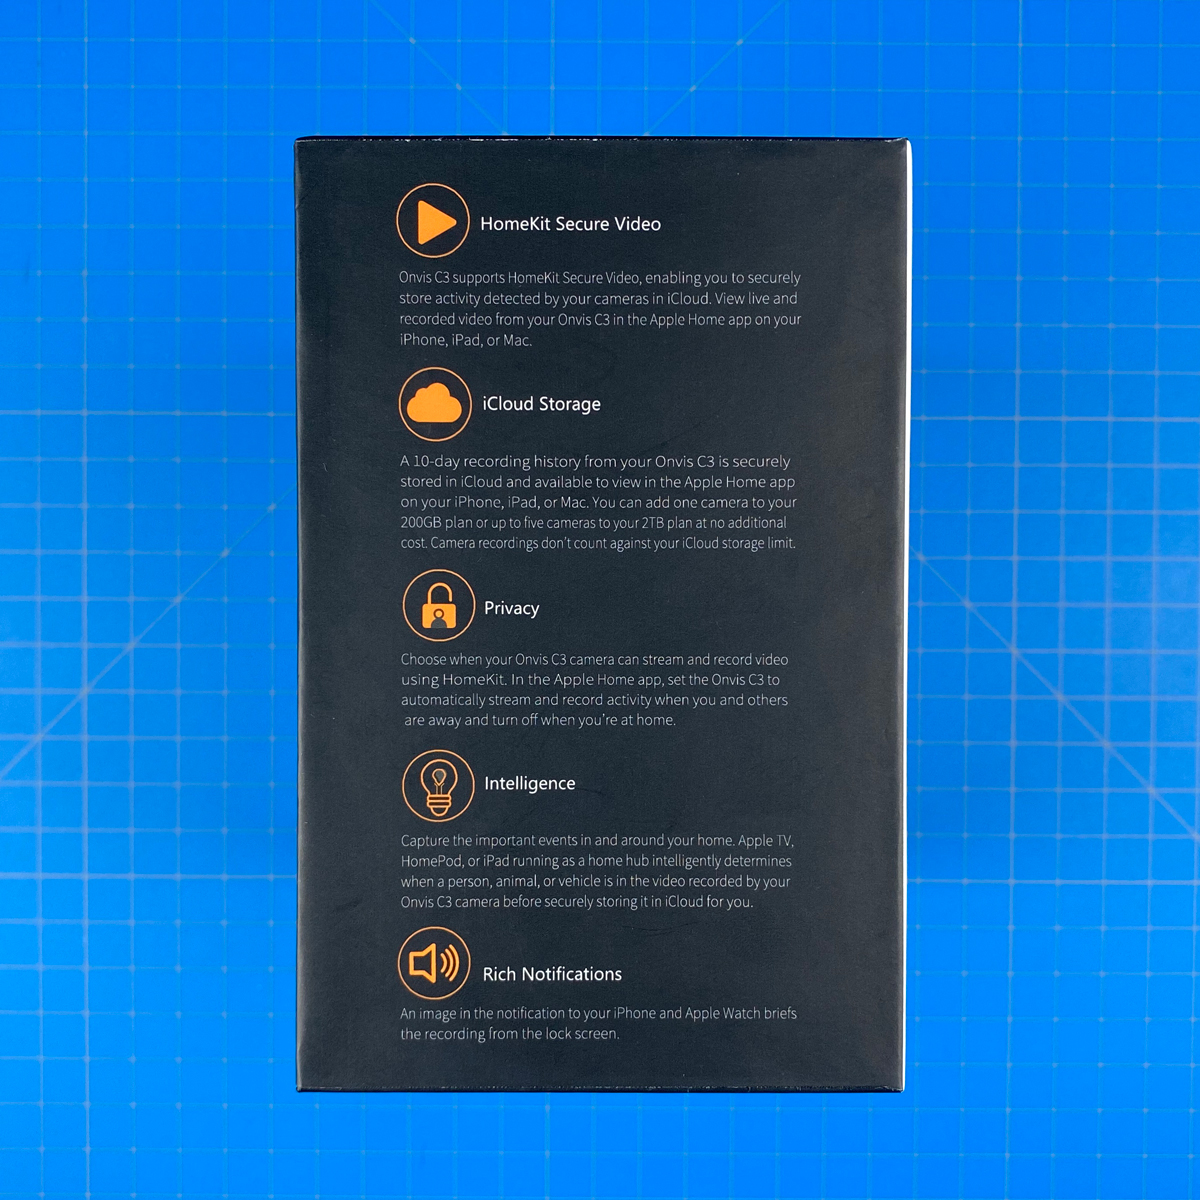

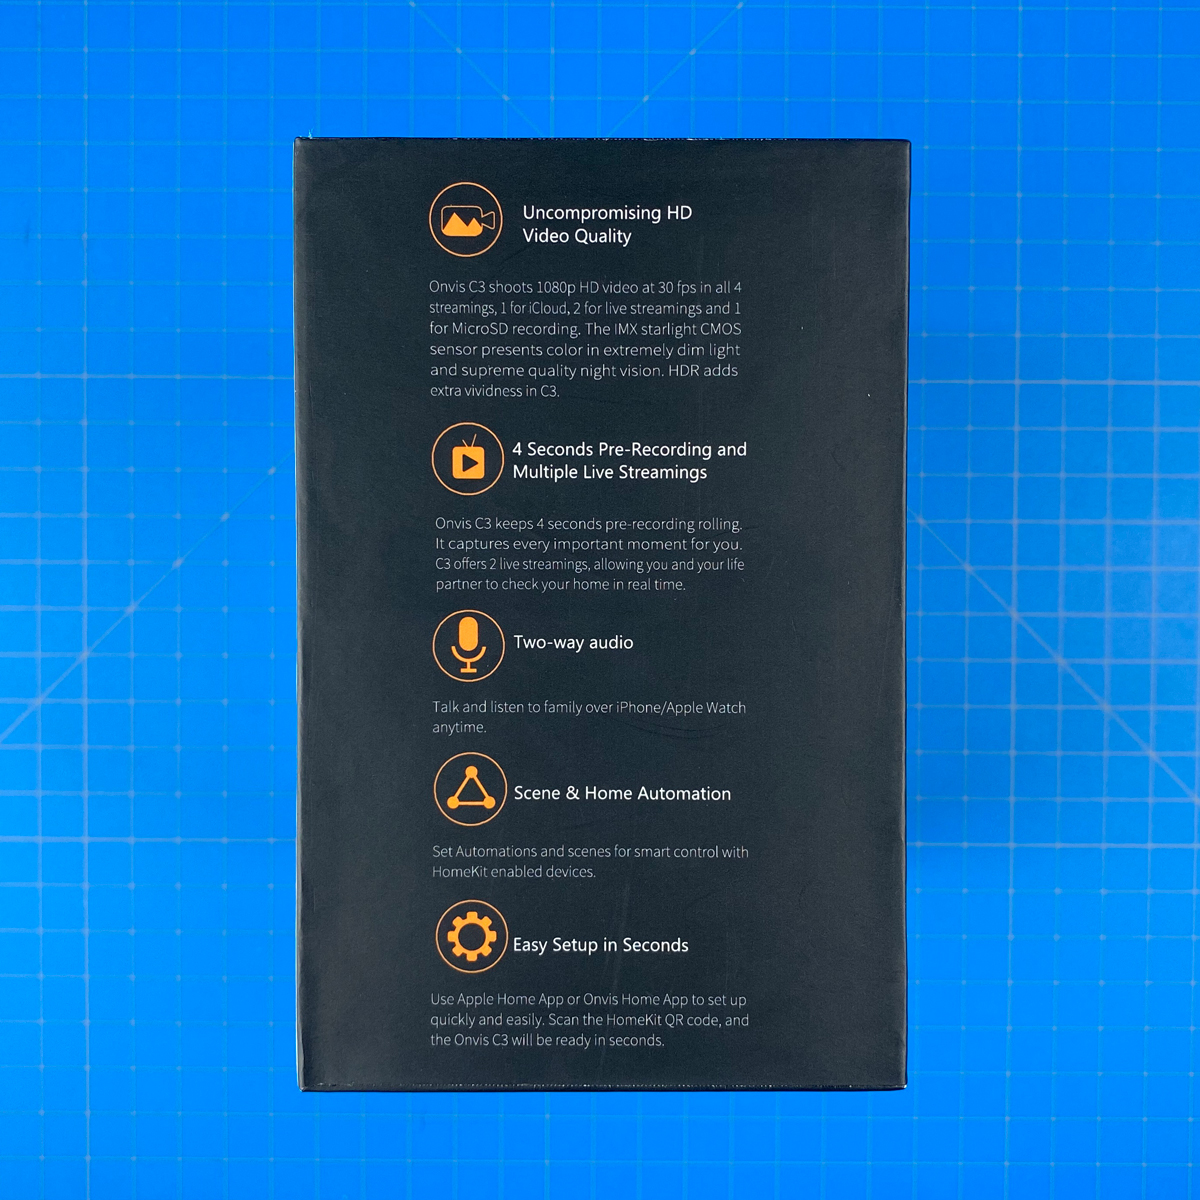
The rest of the box is adorned with a plethora of text, boasting the camera’s features and specs, for which we’ll simply list them below;
Specifications:
- Compatible with HomeKit Secure Video
- Onboard local recording to Micro SD Card, up to 128GB
- 2MP IMX Starlight Sensor
- compatible with 2.4GHz and 5.0GHz WiFi
- 2-way audio
- HDR (High Dynamic Range)
- 134º Field of View
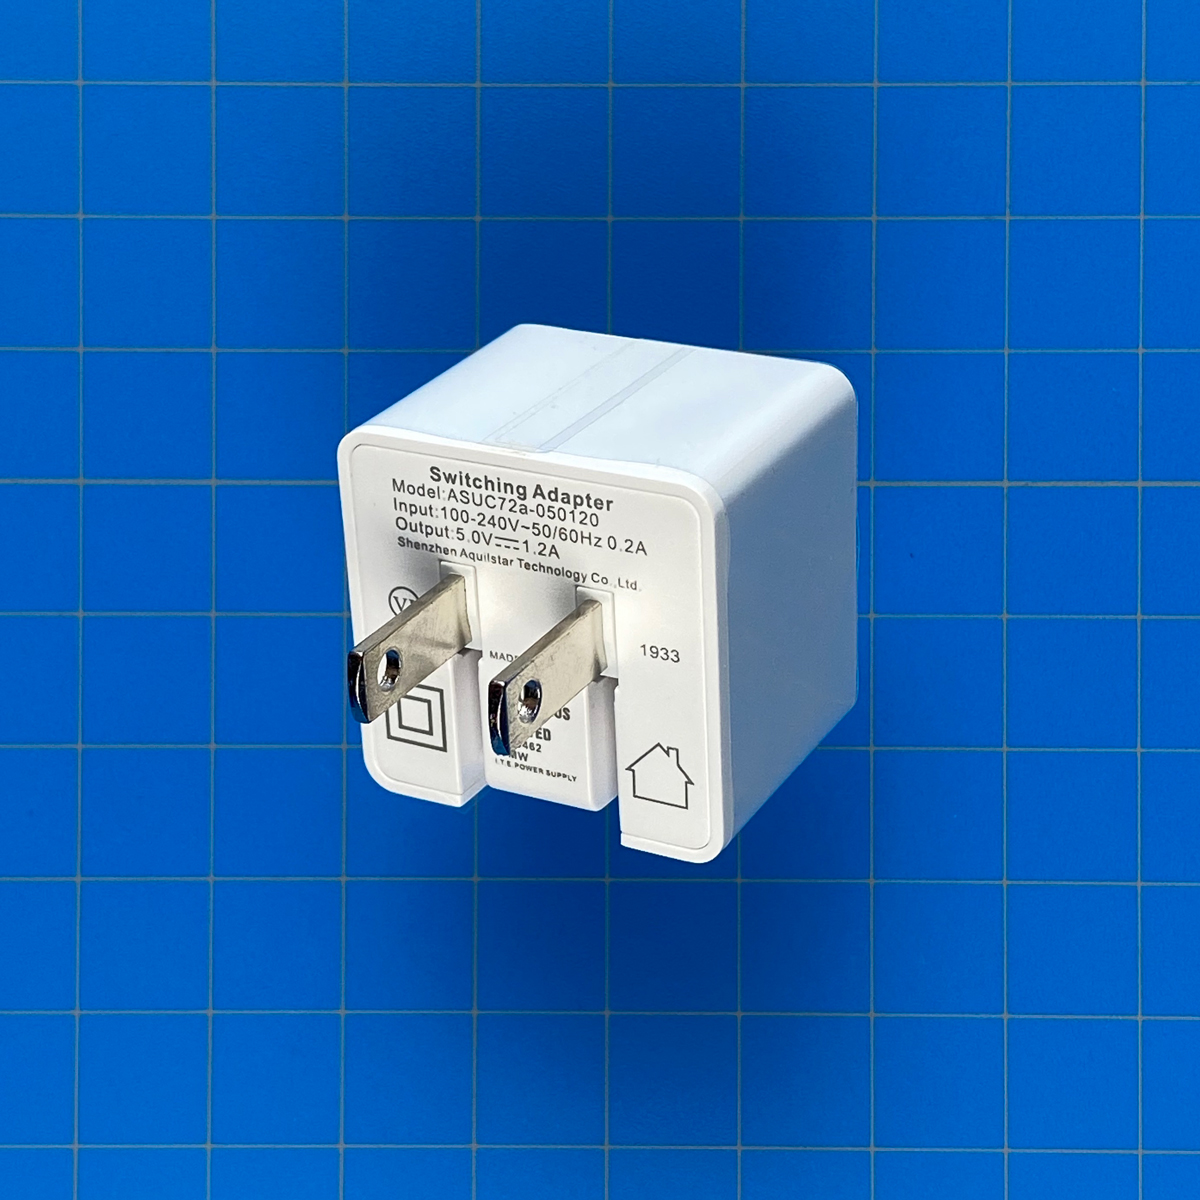
- 100-240V AC @ 50/60Hz
- USB > USB-C power socket/cable
- Four separate streams, each capable of 1080p HD video at 30FPS (1 for iCloud, 2 for live stream, 1 for SD card)
- 4-second rolling pre-record to SD card
It all sounds rather impressive in theory, but then no company presents their products as ‘average’ or ‘just ok’, so it’s what matters in my own findings that are important.
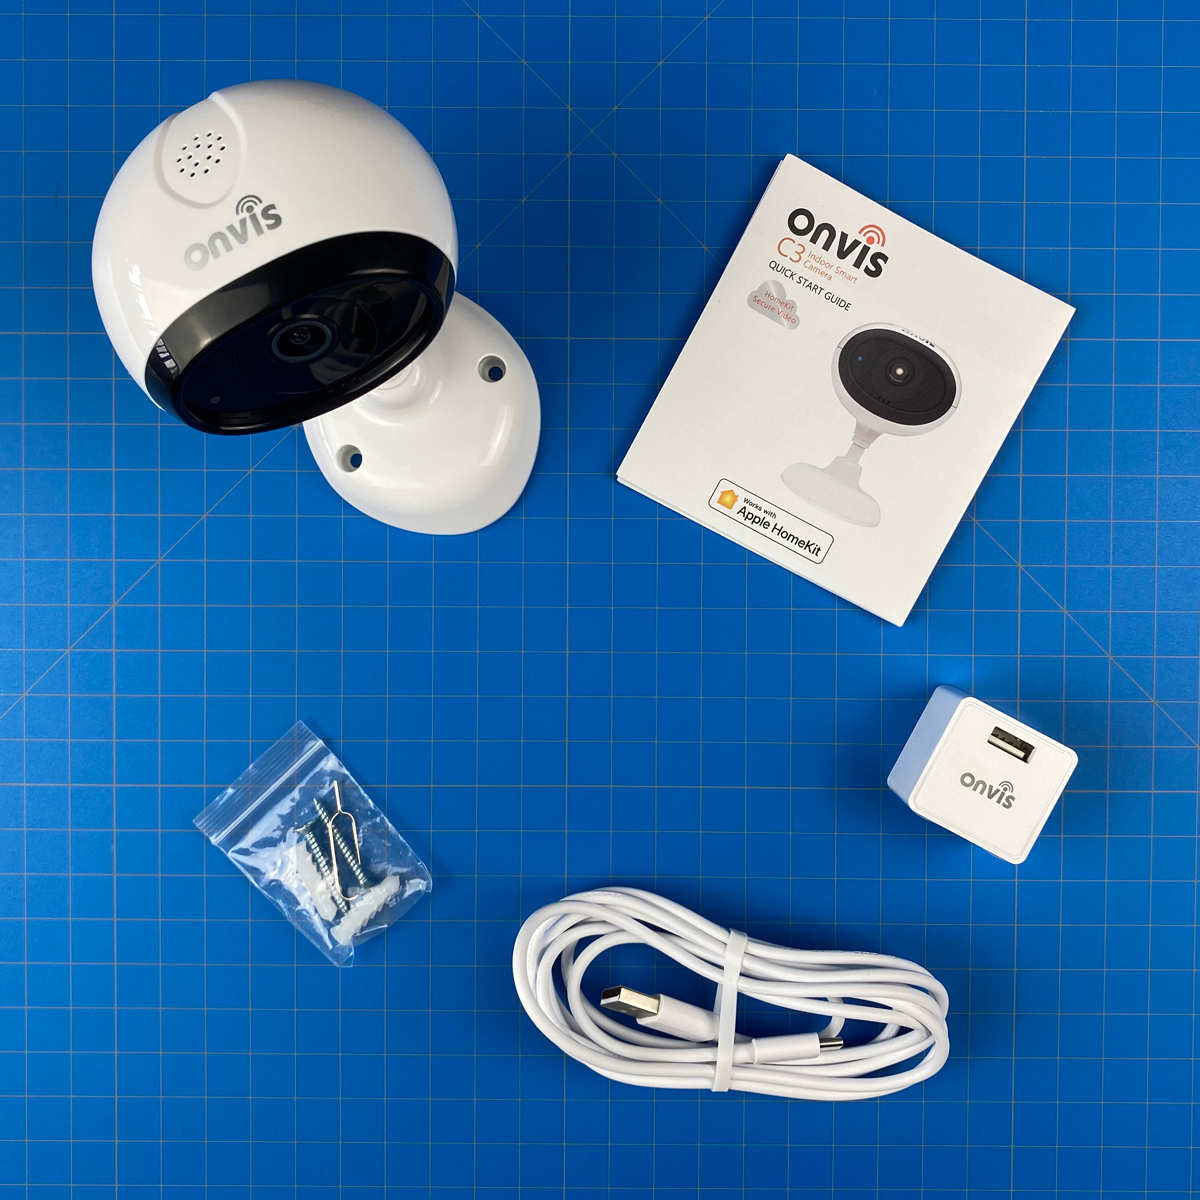
The complete contents of the box include the C3 itself, a manual in English, German, French, Italian, and Spanish, two screws and rawl plugs for affixing it to a ceiling or wall, a USB plug with foldable pins, and a 2m / 6.5ft USB > USB-C cable to power the device.
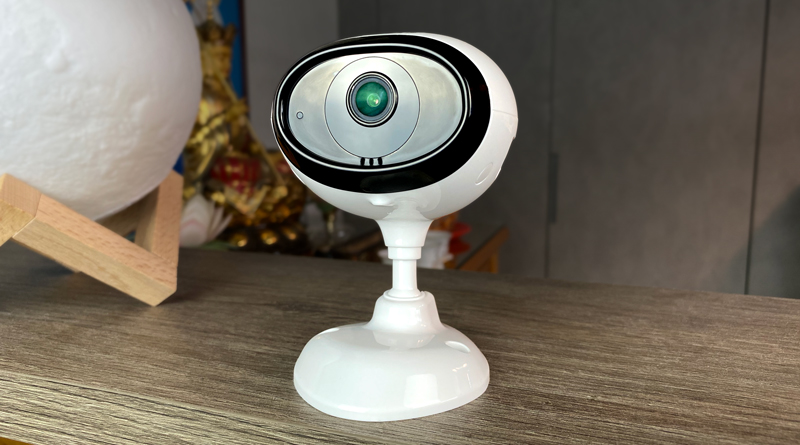
THE CAMERA
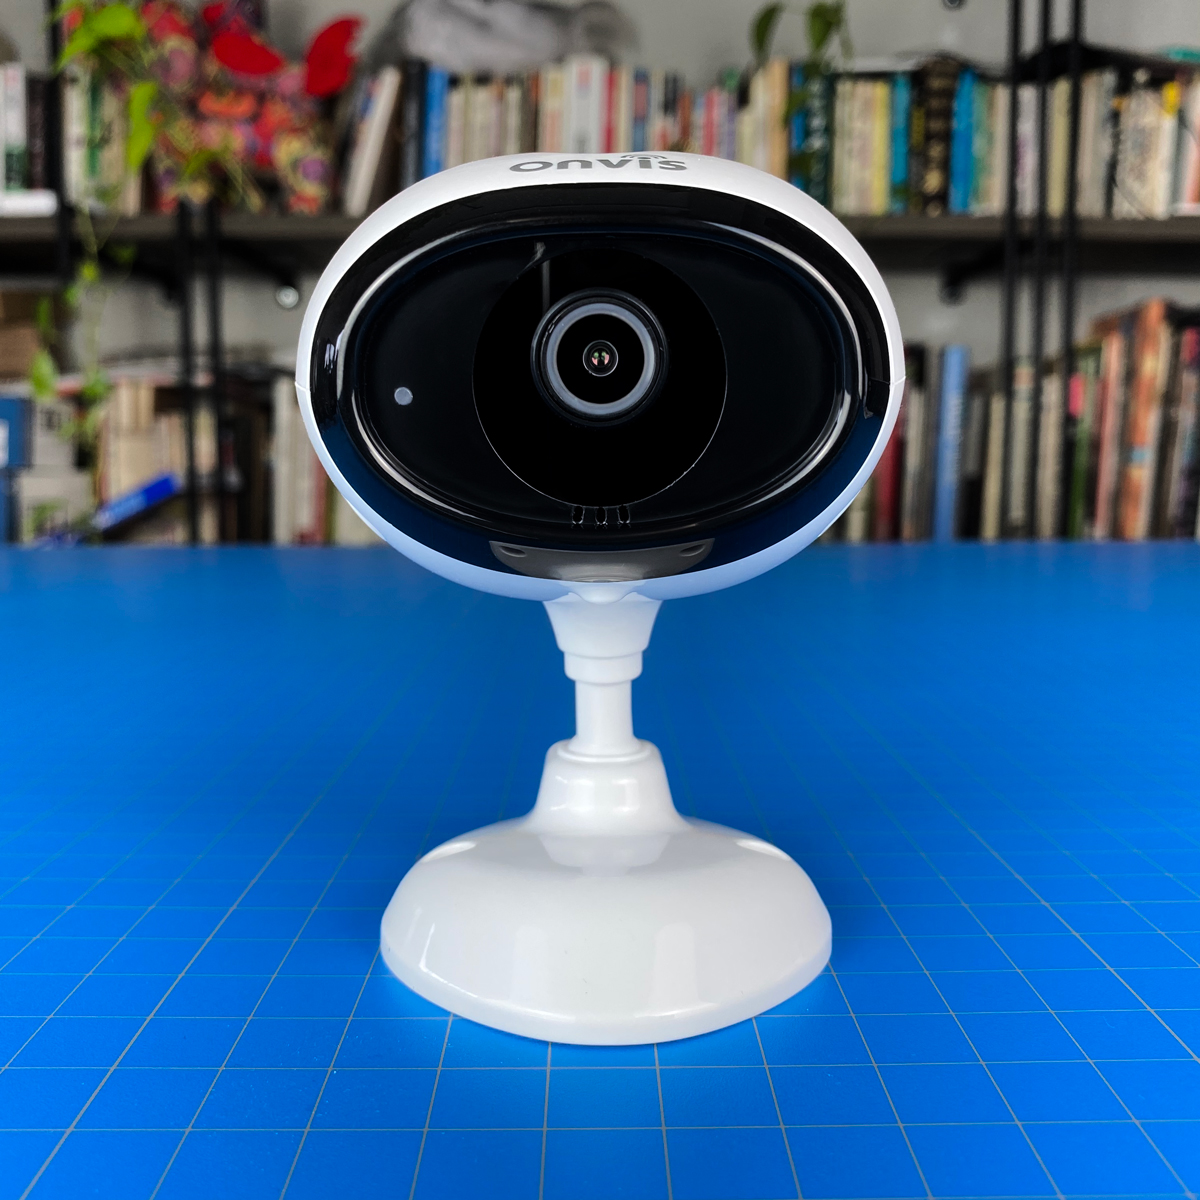

I know you’re thinking, this is an ugly camera, right? Well, yes, it’s not the prettiest camera around for sure, and I’m not going to defend it when compared the beautiful design of the Logitech Circle View, which is a lesson in minimalism all by itself, but then the ‘View’ is almost twice the price, and no local recording option. To be fair to the Logitech offering, it can also be used outdoors and offers a 180º FoV. Yes, it does look a bit like a mix of ET and the large eye you see on those War of The Worlds alien craft. I get it, it’s not a looker. But here’s the thing – it definitely has character, and this wouldn’t look out of place in the Jetson’s household. Still, if this is a security camera, you don’t want it to be seen anyway right, at least not in plain view. I can say that I love great design, and I do admire the look of the D-Link Omna, even three years on, but do I look at it at least once a day? No, I don’t. Taste is a personal thing of course, and so I’m not going to convince anyone on the looks, not that I want to, but it’s fair to play the Devil’s Advocate in this instance. The base of the camera is pretty damn ugly though, I’ll give you that!
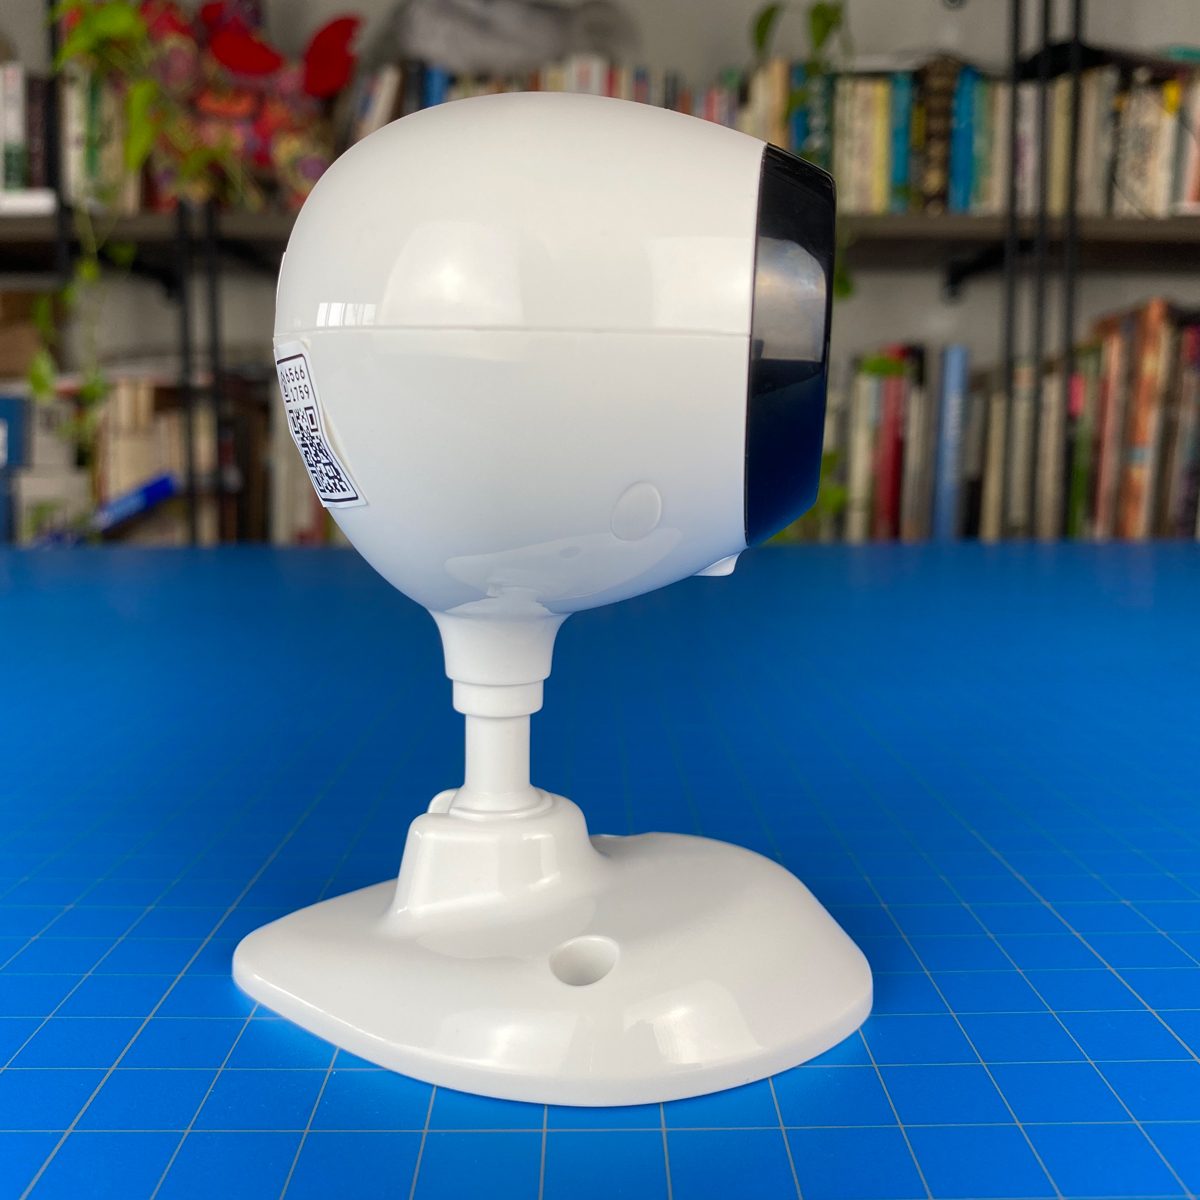
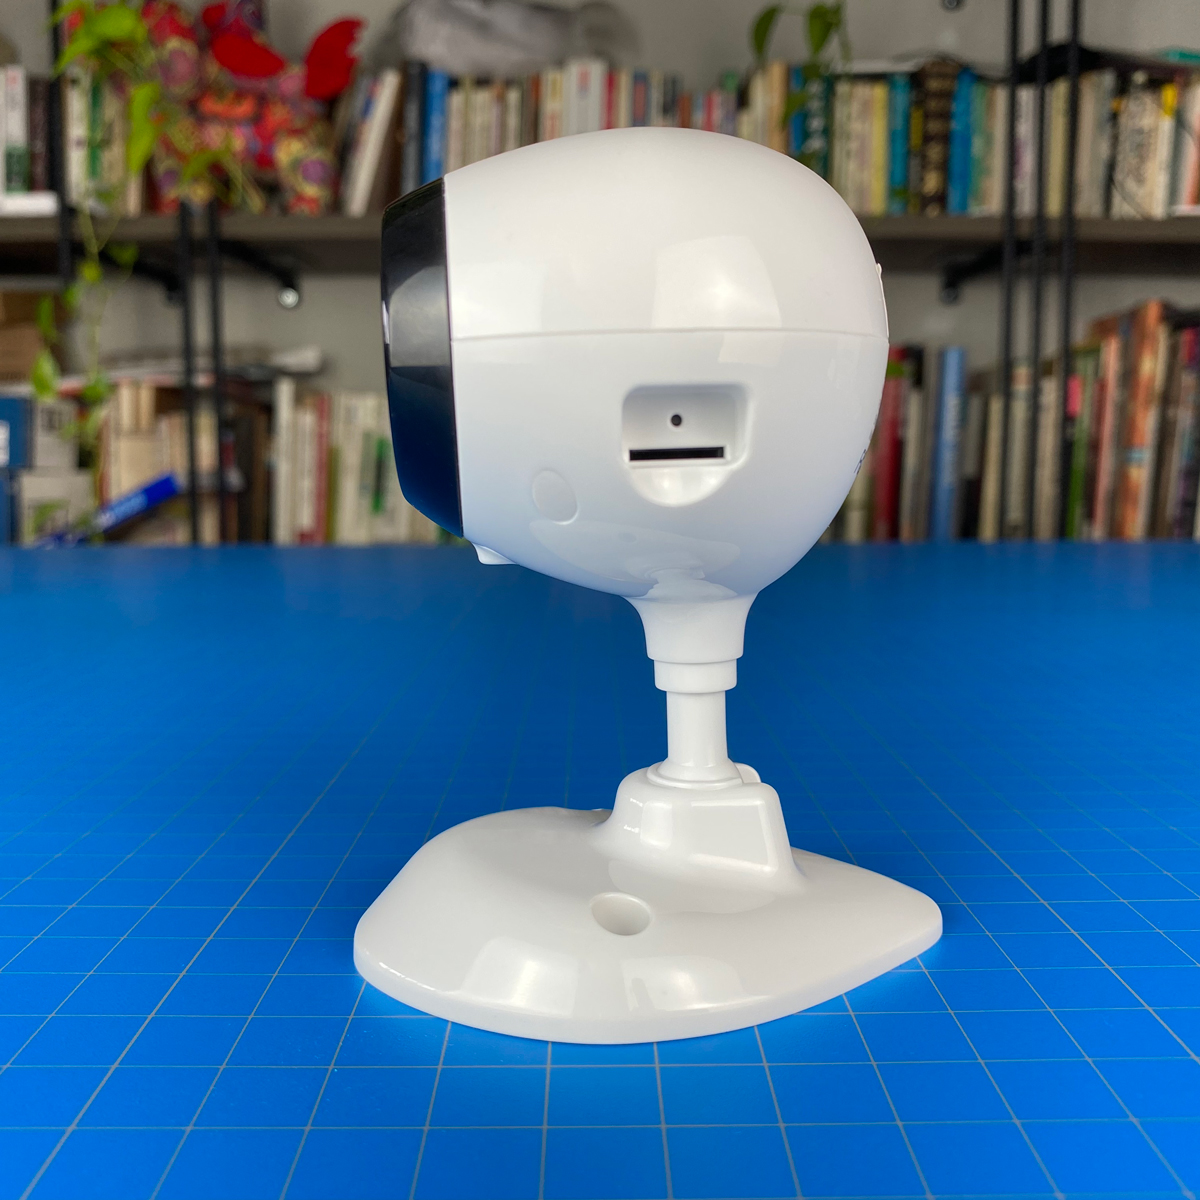
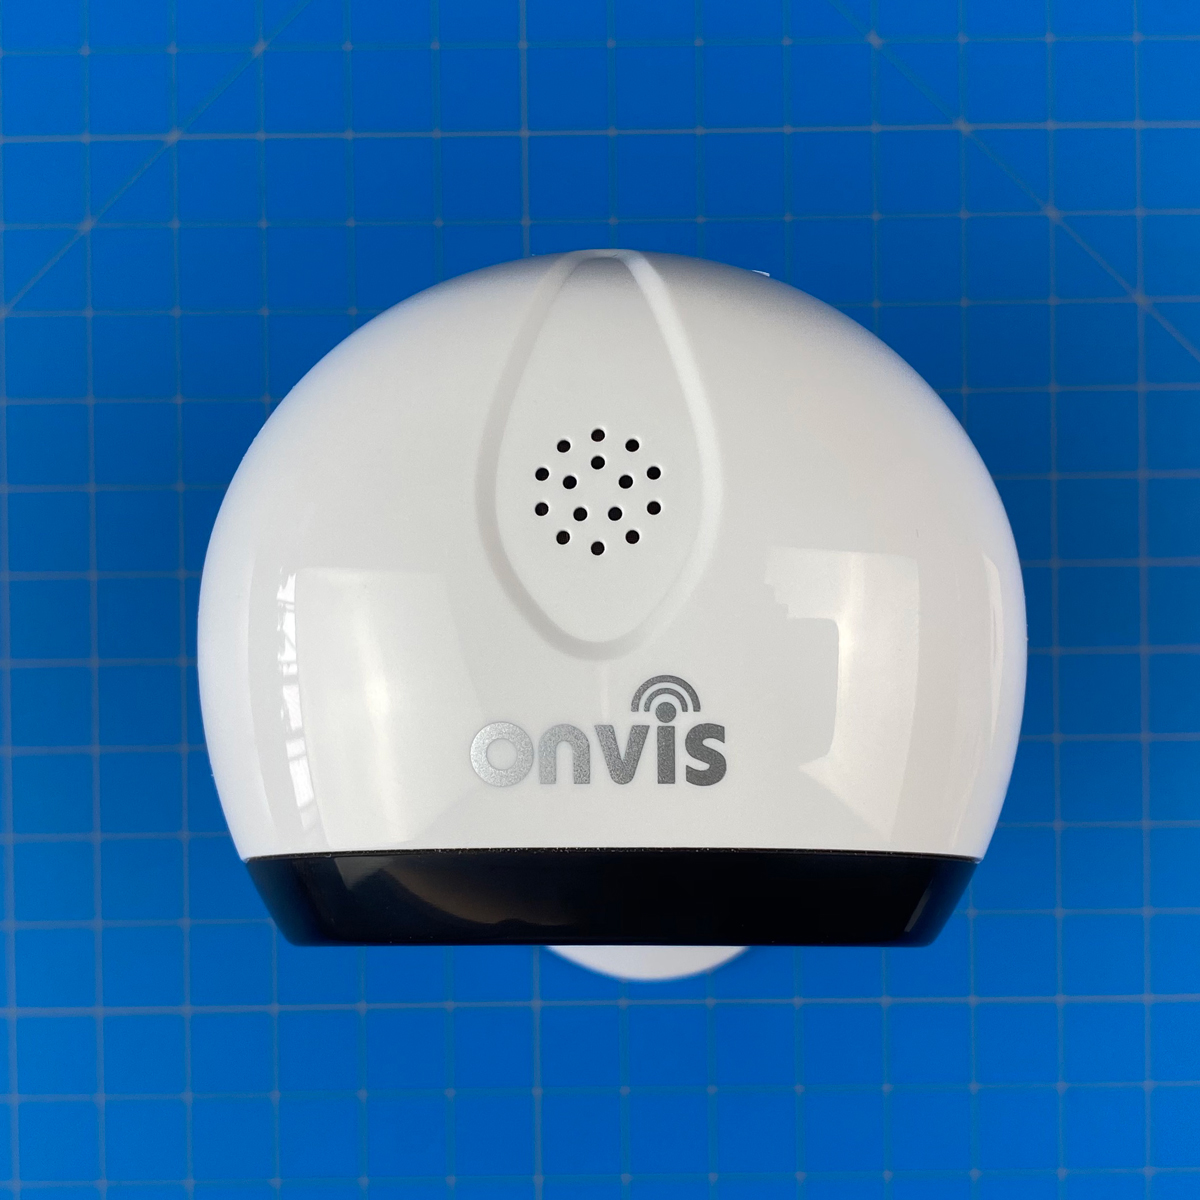
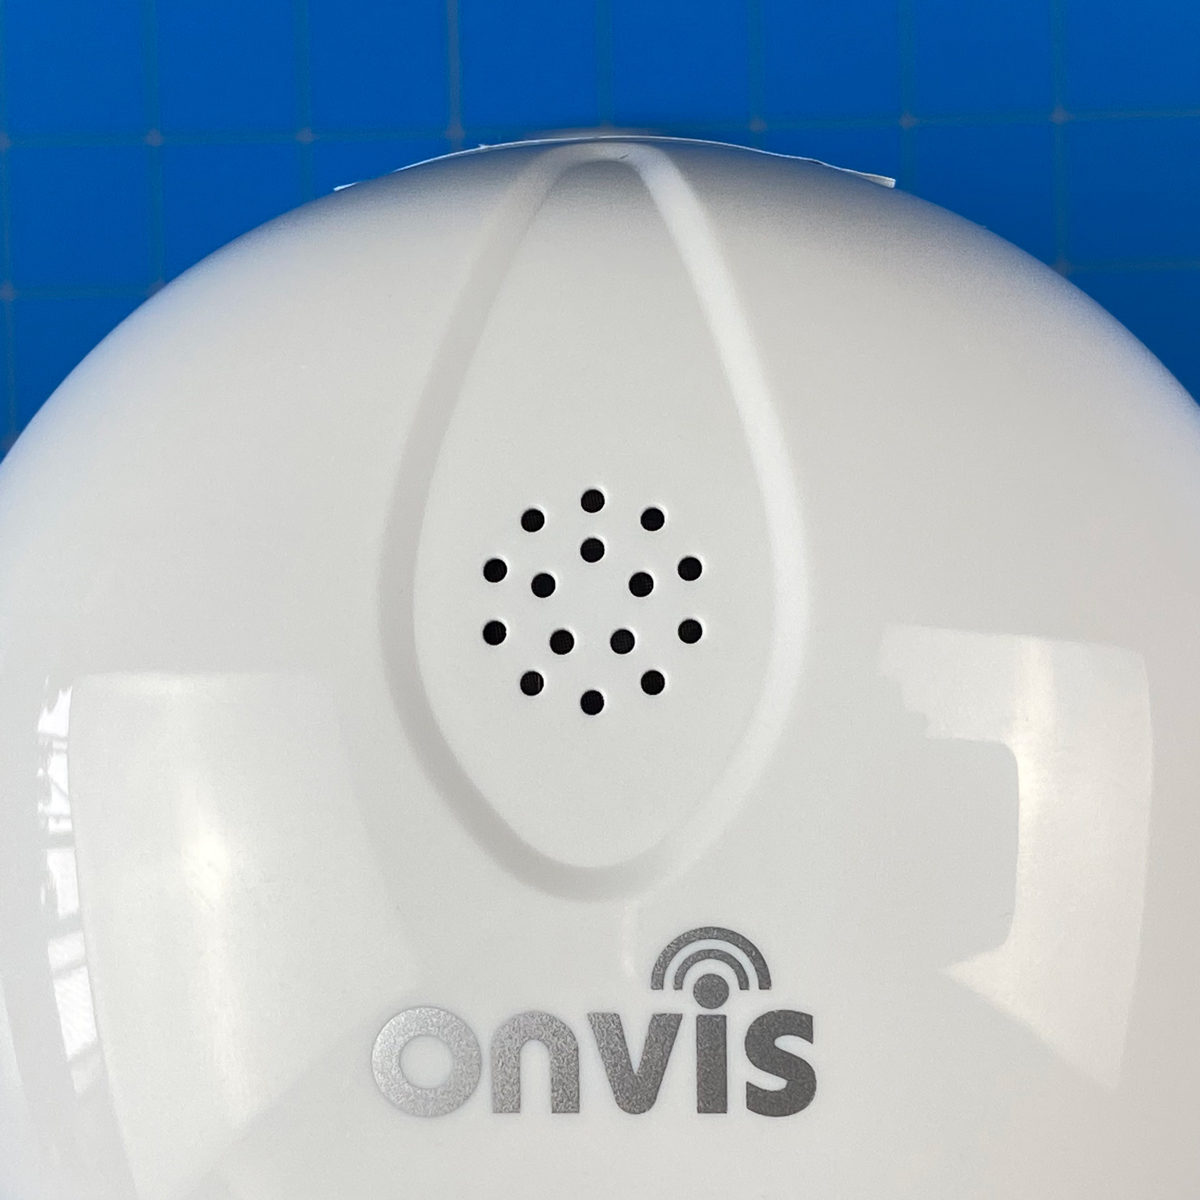
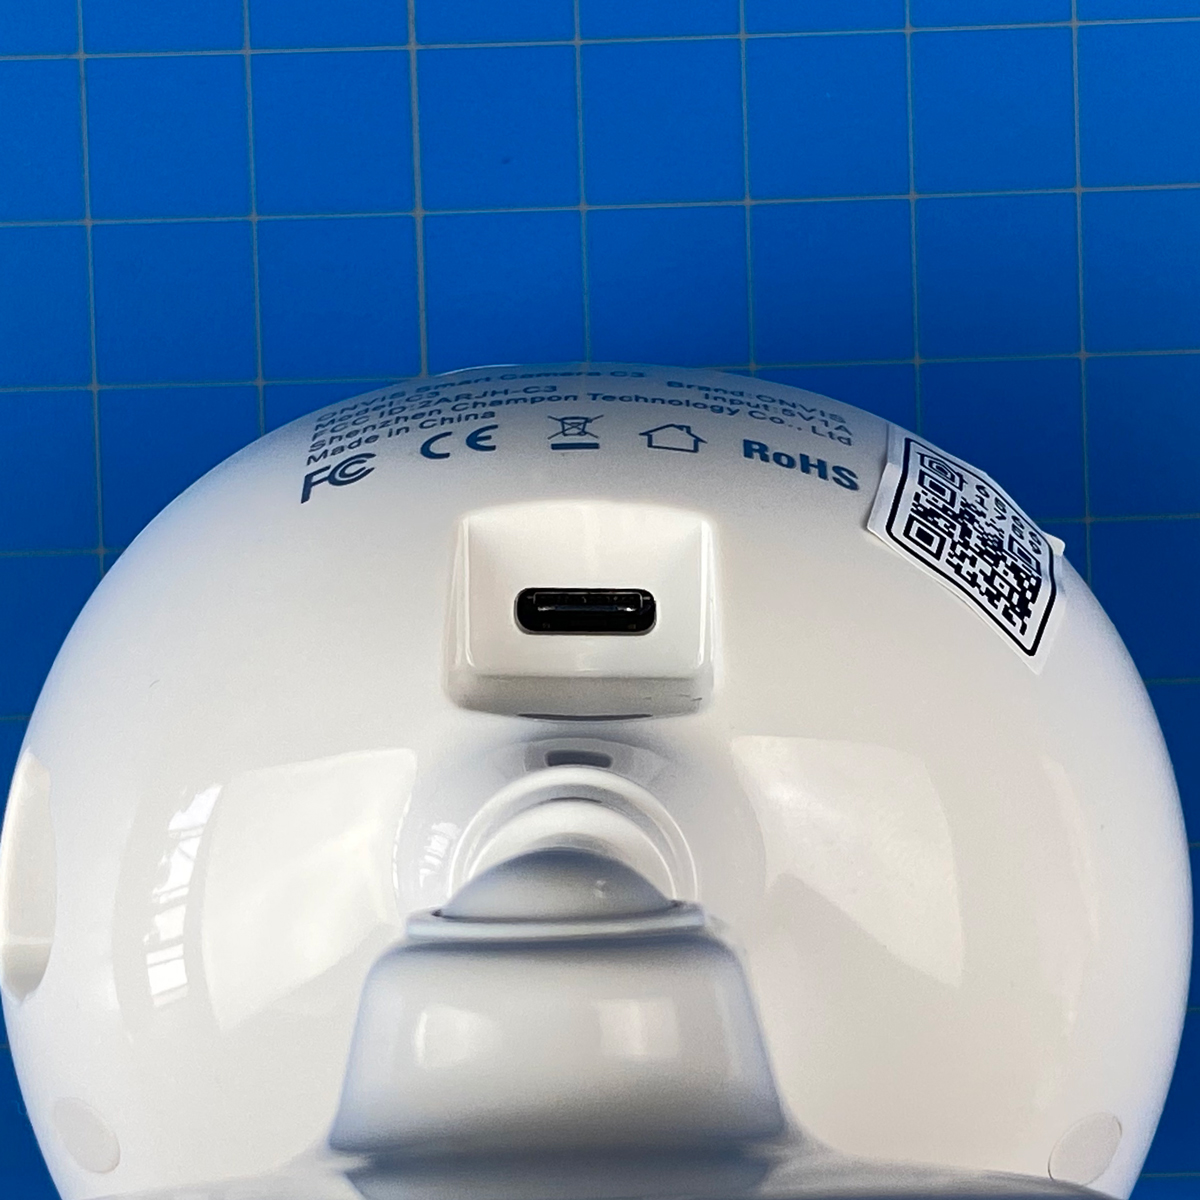
The rear of the camera has the downfacing USB-C port, and although it’s a minor plus, I don’t think a day goes by when I haven’t seen someone bemoan manufacturers sticking to Micro USB ports like their lives depended on it, so I for one, am glad to see this. One side of the camera has a pinhole for resetting the device, along with a Micro SD card slot for onboard local recording. The top of the camera has a speaker grille for the tw0-way audio functionality.
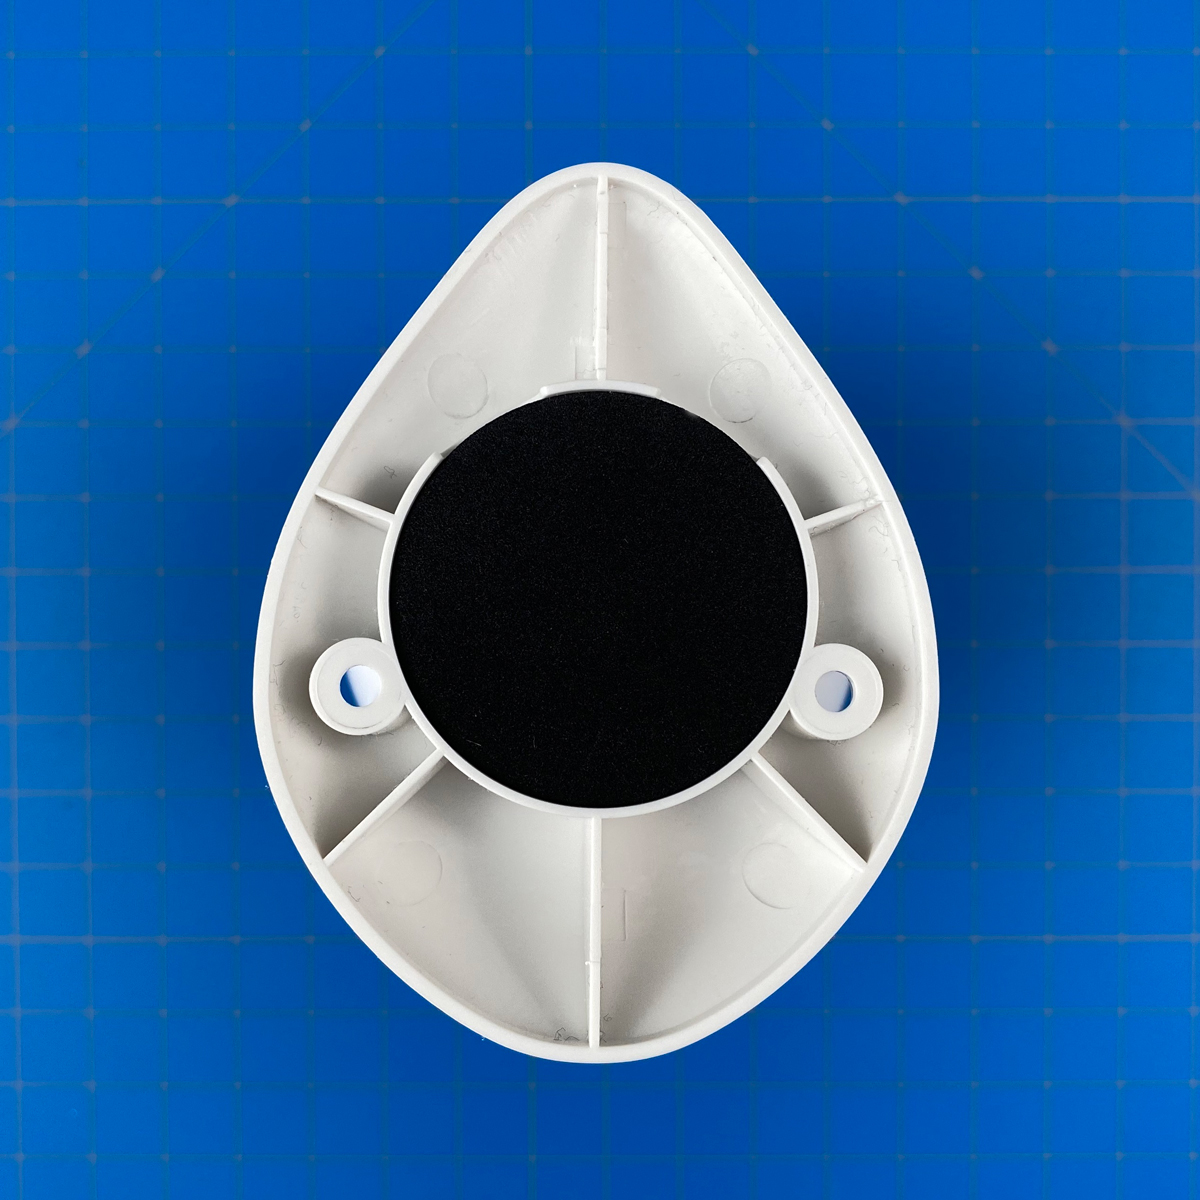
The camera is held up by a stem that rests into a balljoint at the top of the rather odd-looking base. This affords the C3 plenty of room for positioning, but by the same token, it’s not so easy to get it so that the camera is totally level. It just takes a bit of adjustment, so it’s not a big deal. As already mentioned, the camera can be wall-mounted using the provided screws, that fit into the two holes on the base of the stand. The underside of the stand has a circle of dense foam to give it a bit of weight, as well as make it less likely to slide around if placed on a shelf, for example. The stand itself does look and feel a bit like an afterthought, to be honest, and doesn’t feel particularly strong, but once it’s in place, I doubt there’s any need to move it.
THE C3 IN HOMEKIT
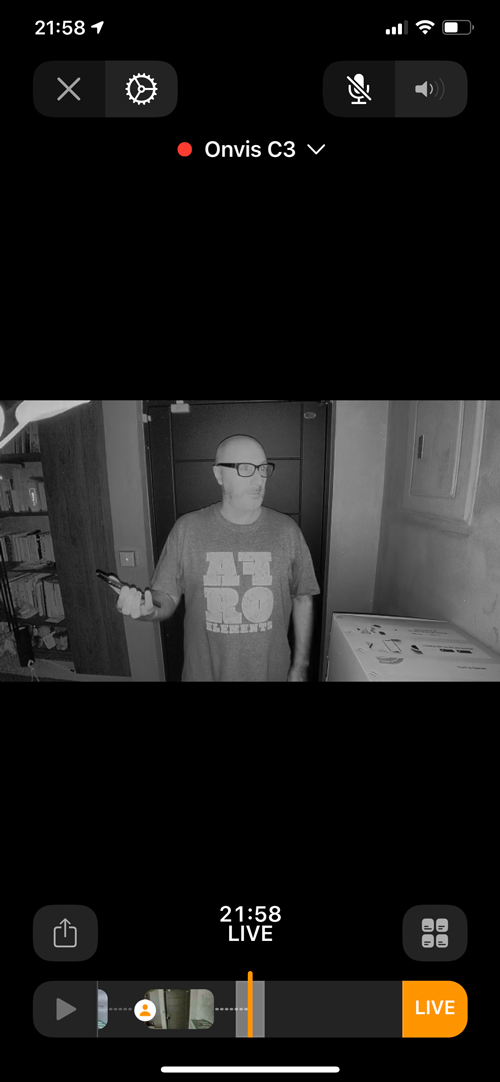
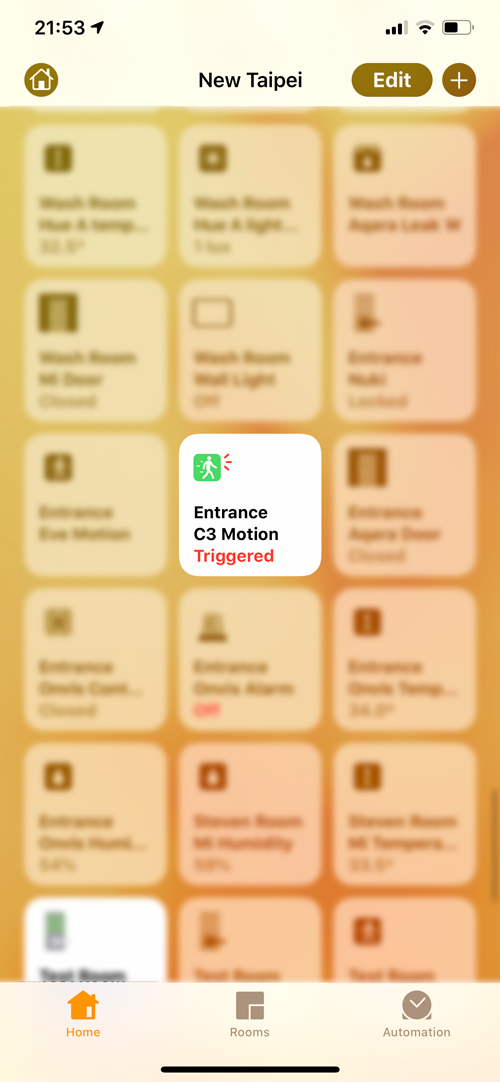
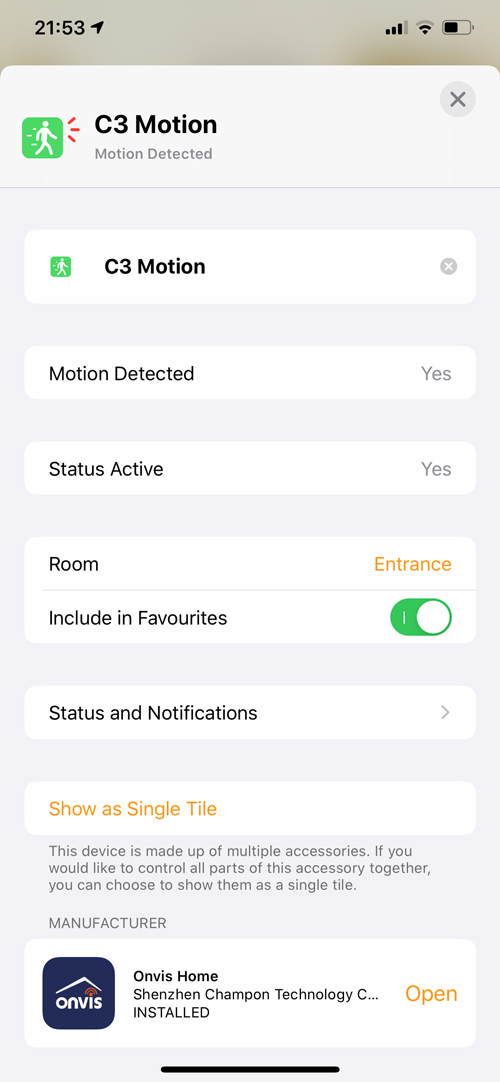
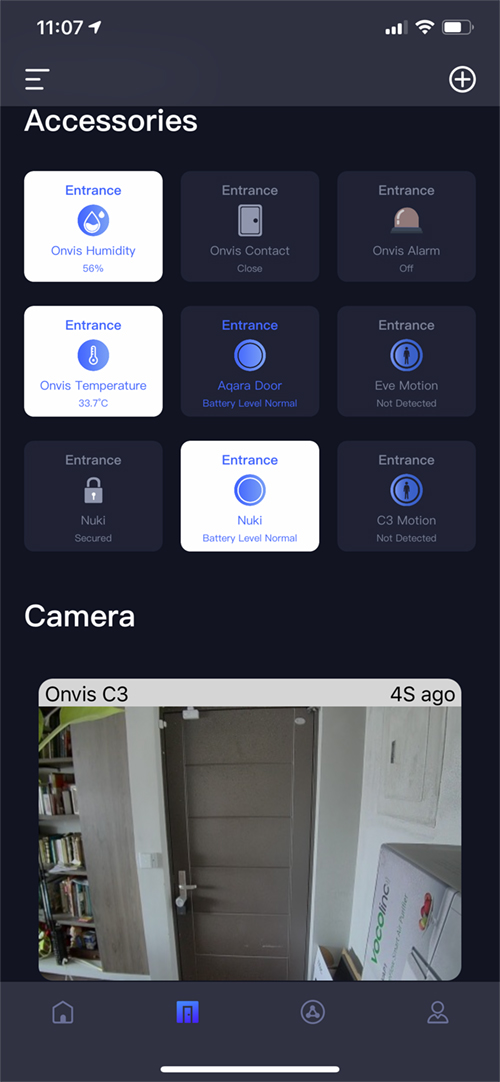
As you might expect, as this is just like other cameras that are HomeKit and HSV compatible device, it’s going to have most of the same features. In the live view in the Home app, you get the live stream, as well as microphone and speaker icons at the top, along with the settings icon, and the video capture timeline at the bottom, if the camera is set to ‘Stream & Allow Recording’. If this is set up, you also have the option to export recorded footage via the ‘share’ icon above the recording timeline. In iOS13, you also get quick access to any devices that are located in the same room as the camera itself. None of these is unique to the C3, but if you’re new to HomeKit or even HSV, then it’s good to know, all the same. The C3 also has a pixel-based motion sensor, which gets exposed as a separate device. Pretty much every camera has something like this, but in the case where you don’t happen to have a motion sensor, it’s a useful addition, although PIR (Passive Infrared) sensors are usually preferable. The great thing about having a motion sensor built into the camera is that not only will you get a notification when motion is detected, but said notification comes with a thumbnail image of the instance that set the motion off in the first place. Although motion detection zones are coming to iOS14, they aren’t available to iOS13 users at present, so one thing that is quite handy with the C3 at present is its ability to create motion zones within the Onvis Home app, via a grid that divides the image into squares, which you can turn on or off. We’ll show that later, but it’s good that this motion detection customisation is also applied to the motion sensor when in the Home app.
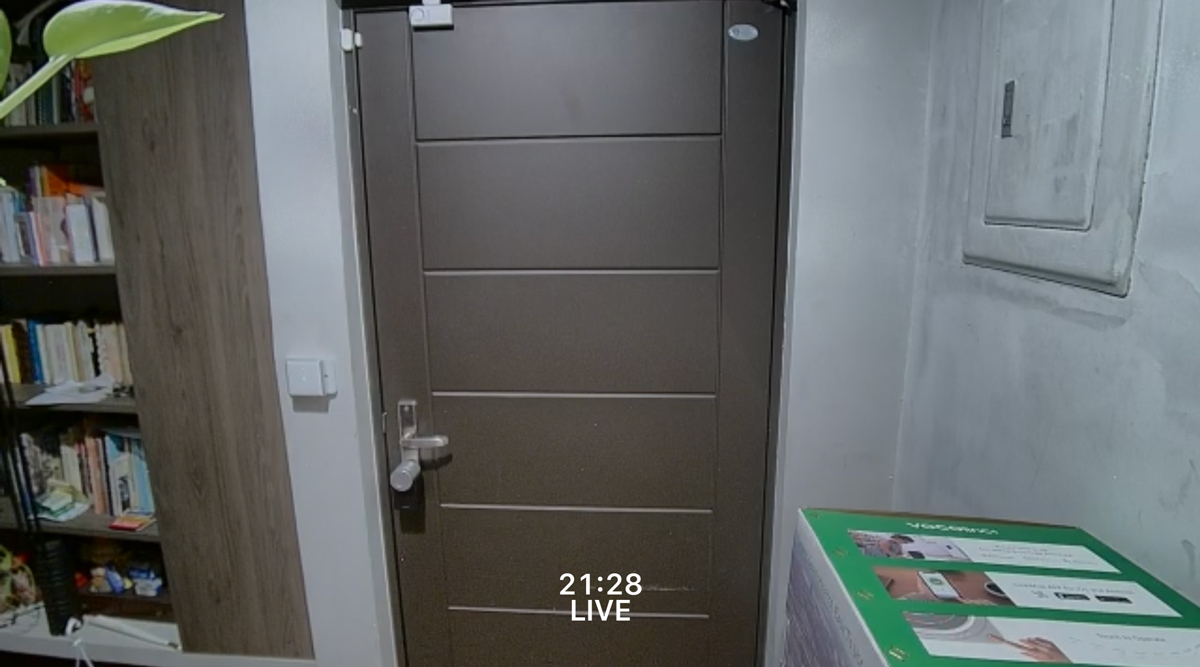
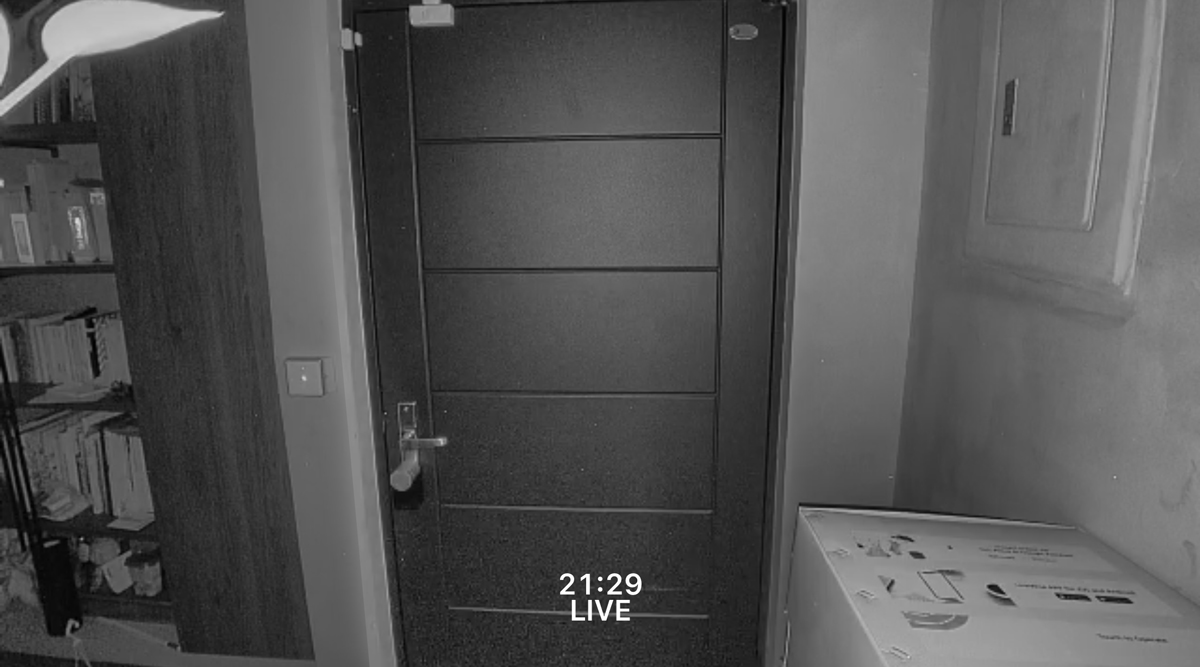
The camera itself pushes out three 1080p streams (two for live streaming and one for HSV, plus a fourth stream for SD card recordings) at 30 frames per second (fps), which goes above the minimum requirement of 24fps. Whilst this may not seem like a large leap, combined with the faster capabilities of the 5.0GHz WiFi, the live stream appears smoother, which is something I already noticed with my D-Link Omna, another camera that also connects to 5.0GHz WiFi. Anecdotal evidence seems to suggest that cameras on the 5.0GHz network launch quicker, although this is just my personal findings. I do wish more cameras had this option, as it’s quite easy for the 2.4GHz space to get clogged up with devices. That being said, whilst the image in daylight and decent artificial light is good, the night vision isn’t so great. It’s not a bad picture, per se, but if you look at the night-vision screengrab above, you can notice a bit of graininess towards the bottom of the door. I’ve mentioned this to Onvis, and they’ve stated that they’re working on a firmware update to address the issue, so hopefully, this will improve to the point where I can remove this ‘negative’ if and when I update this review. Bonus points for anyone who’s able to correctly identify four other HomeKit devices in this picture (five, if you include packaging…).
THE ONVIS HOME APP
I think it’s fair to say that many 3rd party apps for HomeKit devices just aren’t up to the task, whether that’s a confusing interface or simply a badly designed one. I have to say, whilst the Onvis Home app isn’t the worst one I’ve seen (that honour goes to the Etón app), it does lack a bit of polish, and only really serves to be able to view the SD card recordings, and functionalities related to this, as well as for firmware updates.
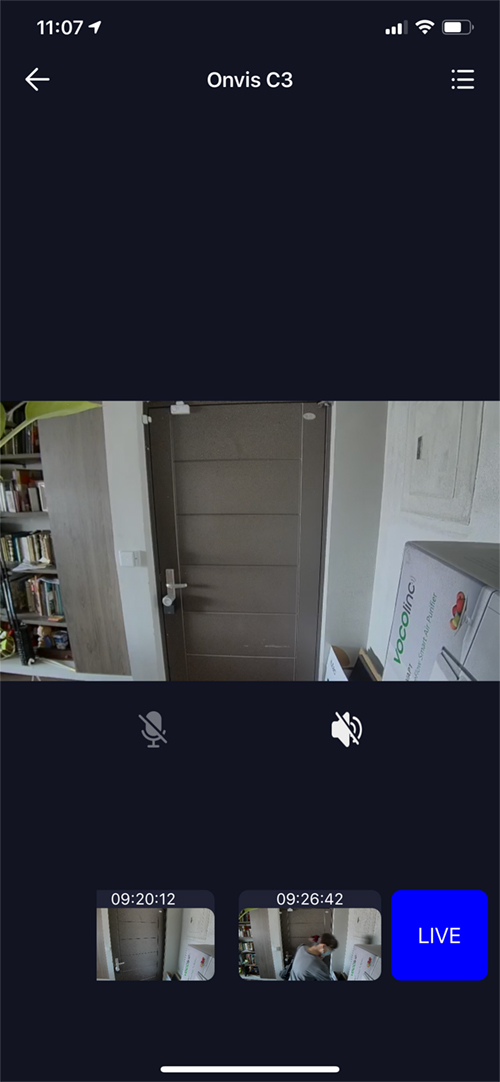
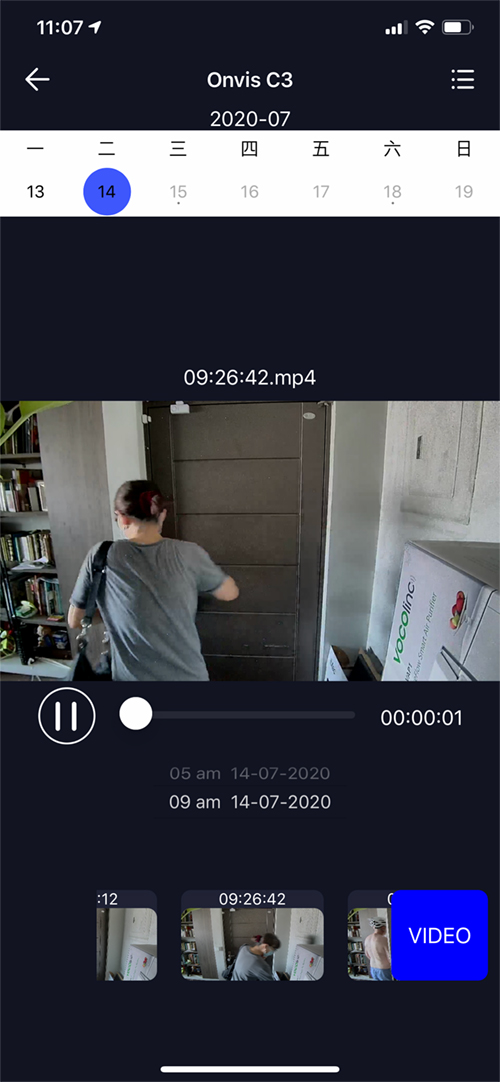
In the images above, you can see a snapshot of the feed at the bottom of the screen, which refreshes every ten seconds, just as with the Apple Home app. Upon clicking on the preview, you get to see the live feed. Below the feed are icons for two way audio, and muting the sound. At the bottom is a screen that shows previews of the most recently recorded events – events recorded to the SD card, not to HSV. The button says ‘LIVE’, which shows you’re seeing the live feed, but if you press on it, the button will change to show ‘VIDEO’. This will then proceed to play the most recent SD card recording in the large screen area, along with a timeline of recordings. These recordings are broken down into two distinct sections; the previews will only show the recordings made in a one hour slot, so the preview recordings you can see in the timeline in the third screenshot, are from 9-10am only. Above this section, you have the option to choose different time slots, so in the example, above we have 9am (actually 9-10am) and prior to that 5am (actually 5-6am). I’m using a TestFlight version of the Onvis app, and as such it’s slightly unfinished, which is evident from the dates section at the top of the screen which shows Chinese characters for the day of the week (三 representing both the number 3 and Wednesday, in Mandarin) instead of the English equivalent. This should all be fixed by the time the camera goes on sale in the West apparently.
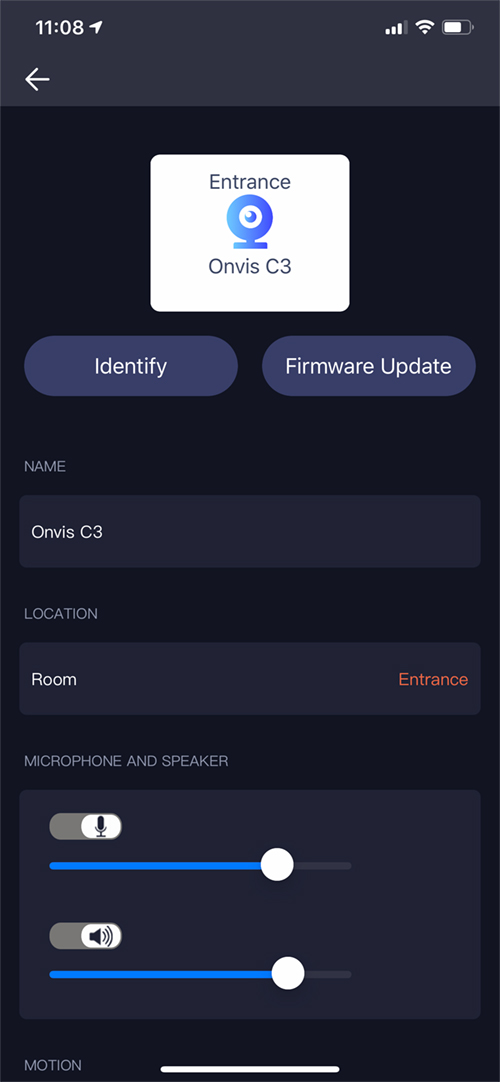
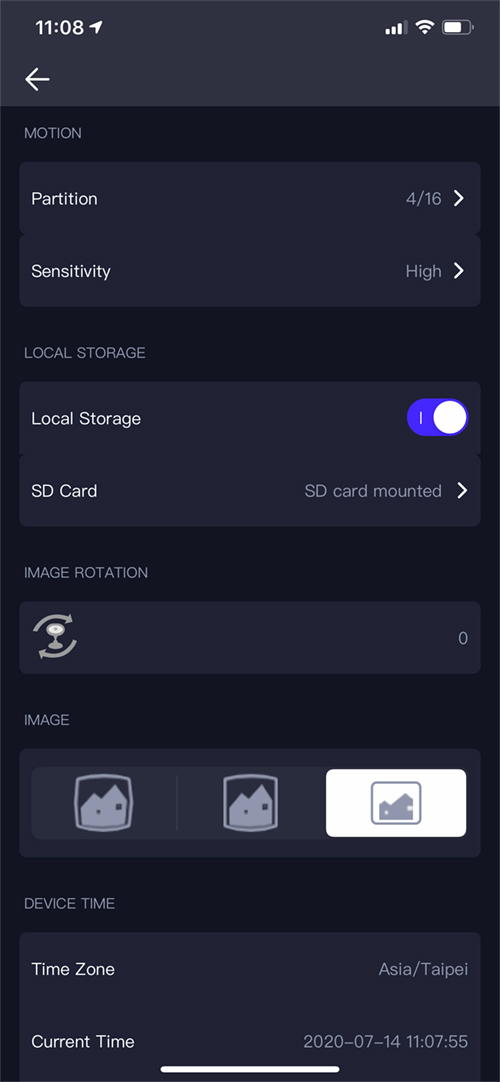
The main settings page for the C3 shows a prominent ‘firmware update’ button at the top. You then have access to the name and room settings for the C3, as well as being able to adjust the individual levels of both the microphone and the speaker. Further down, there are options for the motion sensor, which we’ll go into shortly, an option to rotate the camera view by 180º, in case you want to mount the camera to a ceiling upside down, and further options relating to local SD recordings, and the way in which the image is viewed.
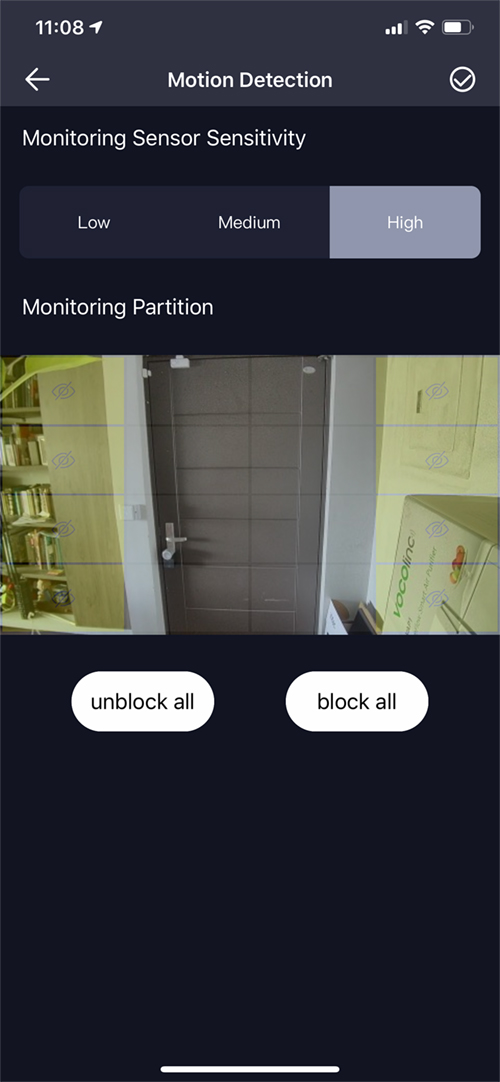

For motion detection, the Onvis Home app allows you to turn on or off certain areas of the camera’s view. This is done by dividing the image into 16 blocks, much like you get with the Aqara G2H, D-Link Omna and others. You also have the ability to set one of three sensitivity levels. Motion detection in the Home app is reflective of what is set in the Onvis app.
For local SD recording options, you have a few interesting options, one of which includes being able to choose whether or not audio is included in the recordings, although this is also available in the Home app as well, but only for HSV recordings. You can also choose a default recording length for your recordings, with the minimum being five seconds, up to a maximum of thirty seconds. In addition, you can even choose the resolution at which the recordings are made. You can choose between;
- 1920 x 1080 (full HD)
- 1280 x 720 (HD)
- 640 x 360
- 480 x 270
- 320 x 180
- 1280 x 960
- 1024 x 768
- 640 x 480 (SD)
- 480 x 360
- 320 x 240
I have to say, that even though I would tend to record to the SD card at full HD, it’s impressive that they’re able to offer so many different options. Such options are designed to maximise recording storage of course, and although I’ve only got a 32gb Micro SD card installed, the C3 is capable of accepting up to 128gb cards. The only current downside is that at present there’s no way of retrieving the locally recorded footage, unless you first remove the SD card, and then plug it into a computer or similar device capable of reading the video contents. I’ve mentioned this omission to Onvis, and they said a feature to download clips to your iPhone’s library is coming in the next planned update.
Going back to aspect ratio options for the camera, there’s a section that allows for the camera to be displayed in three different ways;


The first of the three options is what you might typically see on most cameras; All of the image is captured, but you get lens distortion as a result, with vertical lines bowing towards the edges of the image. The second option attempts to straighten out the bowing whilst bringing slightly more of the image into the frame, but by doing so, stretches the image vertically to fill the 16:9 screen ratio. The third and final image is the default, which fixes the lens distortion to some degree but also keeps the aspect ratio correct and not stretched in the vertical plane. This results in some of the image going off the edge, so you see less. This is the preferred version for me, and the loss of some image on either side is not something I’m concerned about.
PERFORMANCE AND COMPARISONS
I’m writing this in full awareness that not only has the HomeKit and HSV compatible camera market increased substantially in the last 6 months, not least with the arrival of the Eufy indoor 2K cameras, with the abundance of options within their own app, as well as ridiculously low price points, it makes life tricky for a camera that many have already judged to be an ‘also ran’ simply due to its looks. The specs for the C3 are reasonably impressive, so you would think it stands a fighting chance, but pricing seems to be everything in this day and age, so who knows whether the specs really make a difference. As I’ve already stated, I personally don’t think it’s the most attractive looking product, but I really don’t plan on gazing into the lens on a daily basis and have found that I don’t tend to think or notice any of my cameras very often, even if they’re placed in plain sight, so I can’t see this being an issue for me, but it may still be for others.
In terms of how it has performed since I was sent the camera, I’ve been consistently reporting back to Onvis, with any issues – even minor ones – and to their credit, they have issued software or firmware fixes where necessary, albeit belatedly at times. The live-streamed image is fairly comparable to other cameras in the home, which includes the D-Link Omna, Abode Iota, EufyCam 2C, and the Aqara G2H. I do have both of the Eufy 2K Indoor cameras, and a Logitech Circle View here, but have yet to test them to any large extent, so I’ll reserve judgement on those for now.
In terms of how reliable it has been, it has been incredibly fast to load up in the Home app, which I think I can partially put down to it being connected to the 5.0GHz network, although in the Onvis app this isn’t always the case. As already mentioned, I am using a beta version of the app, so things like this are expected, but in the Home app, I’ve yet to have an instance where it has become unresponsive. I’m happy that I can use an SD Card to record events, as I really don’t plan on upgrading to the 2TB iCloud plan at this time, so I’ll end up using the Logitech Circle view as the ‘designated driver’ for HSV, with all the other cameras using their local recording abilities to cover everything else. The app is a bit disappointing, but I was already aware that it wasn’t great, so all that needs fixing is a simple way to access the SD card recordings, as I don’t plan on using the Onvis Home app as my daily driver anytime soon.
When it comes to the price point, currently at just under US$80.00, it’s about half the price of the Logitech Circle View, but double the price of the Eufy 2K Indoor Cam, so we get back to price points over functions again, maybe. The Eufy does have 2K resolution, but then that is irrelevant in HomeKit, as only up to 1080p is supported. The Eufy and the Logitech also only support 2.4GHz, which might not be an issue to some, but certainly makes a difference to me. The forthcoming Eve Cam does also support 2.4 & 5.0GHz WiFi, but the price point still makes it almost double the price. The Eufy does have a much better app, and the camera also has a built-in alarm, which is not the case on both accounts with the C3. The Logitech View has abandoned the need for the Logitech app entirely, it seems.
If I’m not presenting a strong enough argument for the C3, that may simply be because there isn’t enough to sway you, to begin with. My own tentative tests with the Eufy indoor cams haven’t been amazing, to be honest, and it would seem that as of writing this article, some people are less happy about these amazingly priced cameras than they thought they would be, but the image quality is good, so Onvis need to step up to the plate in this regard, even though they’re not far behind. It’s a tough call, and I’ll leave that for you to decide, by weighing up the pros and cons for yourself. If you are interested, then you can get the camera at a limited discount price of only US$72 (regular price US$89.99) directly from Onvis own store (link below). What can be said for sure, is that there are plenty of camera choices in 2020!
Full disclosure: Onvis provided HomeKit News with the Onvis C3 Smart Indoor Camera for the purpose of this review. No other compensation was made or requested and has in no way influenced our opinion of this product.
Onvis C3 Indoor Smart Camera
Pros
- Can use 2.4 or 5.0GHz WiFi
- No need to sign up for an account
- all recordings 1080p @ 30fps
- Local recording option
- HSV compatible out of the box
Cons
- Not easy to access local recordings
- Issues with grainy image in low light
- Not the best looking camera